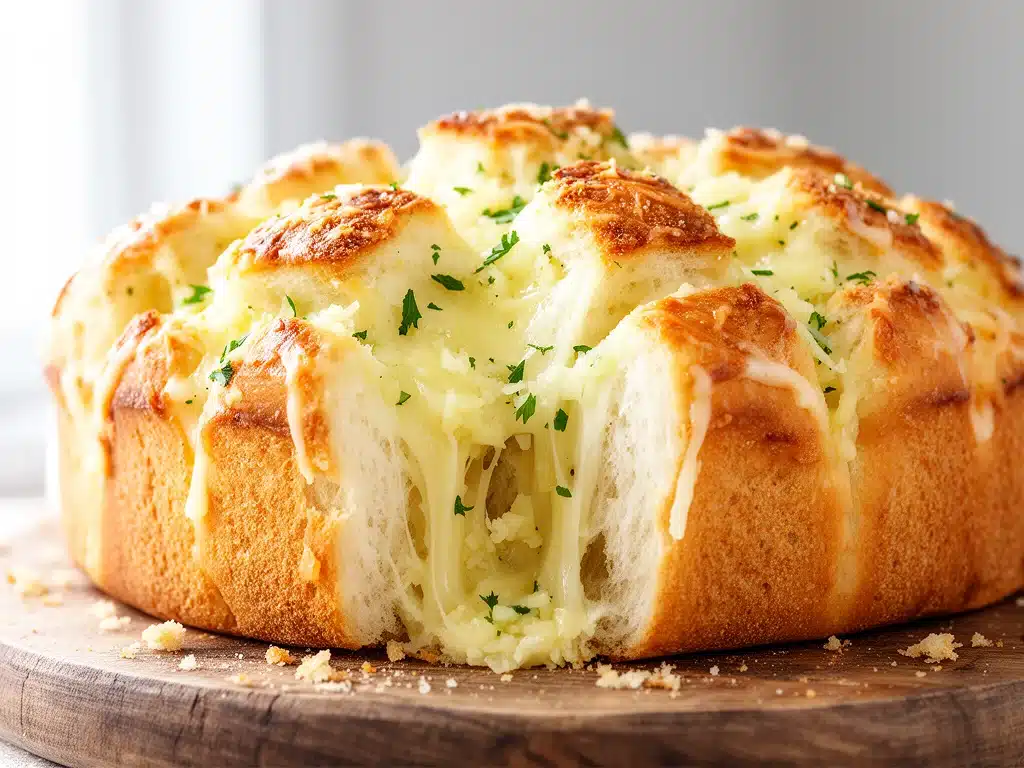
One rainy Saturday afternoon, I found myself craving something warm, comforting, and—honestly—totally shareable. I wanted a snack that could double as dinner, something that everyone could just pull apart and enjoy without forks or plates getting in the way. That’s how this Garlic Parmesan Pull-Apart Bread came to be my obsession. I wasn’t aiming for anything fancy, just simple ingredients I had on hand. But after my first bite, I knew I had stumbled onto a keeper.
I’ve made this bread at least a dozen times since that day, each time tweaking the garlic and cheese ratio (because you can never have too much garlic, right?). It’s become the go-to snack when friends drop by unexpectedly or when the family wants something to nibble while watching a movie. The best part? It’s ridiculously easy, uses pantry staples, and somehow feels indulgent without the fuss.
If you’ve ever been intimidated by fancy bread recipes, trust me—this one breaks all those rules. It’s about getting cozy, digging in, and making memories (plus, the smell wafting through your kitchen will have everyone begging for a taste).
Why You’ll Love This Recipe
This Garlic Parmesan Pull-Apart Bread has completely changed my snack game. Here’s why it’s in heavy rotation at my house:
- Simple Ingredients, Big Flavor — You don’t need specialty cheeses or hard-to-find herbs. Just garlic, Parmesan, butter, and a good bread loaf. I’ve made this with regular grocery store staples and always ended up with a wow-worthy snack.
- Fun and Shareable — The pull-apart format makes it perfect for casual gatherings or family nights. Everyone loves the interactive element, and it’s a great way to get picky eaters to try something new.
- Quick to Prep — It takes under 15 minutes to assemble, then about 25 minutes to bake. I’ve whipped this up while prepping other dinner components, like my crunchy ranch chicken wraps, making dinner feel effortless.
- Perfect for Leftovers — If there’s any bread left (rare!), it reheats beautifully in the oven or microwave. I often make extra just so I have a quick snack ready for the next day.
- Customizable — Love spice? Add red pepper flakes. Want herbs? Toss in some fresh parsley or rosemary. I’ve even mixed in bits of cooked bacon for a smoky twist.
This bread is my fallback when I want something that feels indulgent but doesn’t require hours in the kitchen. Honestly, it’s one of the easiest ways I’ve found to impress guests without breaking a sweat.
Ingredients You’ll Need
Here’s the best part: most of these ingredients are probably sitting in your kitchen right now.
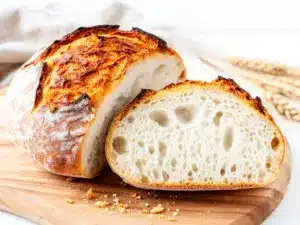
- Loaf of bread (1 large round sourdough or boule, about 12 inches) — I prefer sourdough for its chewy crust and tang, but any crusty bread works. Avoid super soft sandwich bread; it won’t hold up as well.
- Unsalted butter (½ cup / 113g, melted) — Use real butter here; it adds richness and helps the garlic and cheese stick. I’ve tried margarine, but it’s just not the same.
- Garlic (4-5 cloves, minced / about 1 tablespoon) — Fresh garlic is a must. I once tried jarred garlic and regretted it immediately—the flavor wasn’t nearly as vibrant.
- Parmesan cheese (1 cup / 100g, freshly grated) — Grate your own from a block. Pre-grated Parmesan has anti-caking agents that mess with the melt and texture.
- Fresh parsley (2 tablespoons, chopped) — Adds a pop of color and freshness. Optional but highly recommended.
- Salt (a pinch) — Enhances all the flavors.
- Black pepper (freshly ground, to taste) — Adds a subtle kick.
- Red pepper flakes (optional, ¼ teaspoon) — For a little heat, if you’re into that.
Pro tip: If you want an extra cheesy pull-apart, sprinkle shredded mozzarella between the bread cuts before baking. It turns this snack into a gooey masterpiece.
Equipment Needed
You really don’t need anything fancy to make this Garlic Parmesan Pull-Apart Bread. Here’s what I use:
- Baking sheet — I line mine with parchment paper for easy cleanup, but a silicone mat works just as well.
- Sharp knife — For slicing the bread into the pull-apart pattern. A serrated bread knife is best.
- Mixing bowl — To combine the melted butter, garlic, and seasonings.
- Pastry brush — Not mandatory, but it helps spread the butter mixture evenly.
- Grater — For fresh Parmesan. I use a microplane for fine shreds.
If you don’t have a pastry brush, just use a spoon to drizzle and spread the butter mixture. I’ve made this recipe dozens of times with whatever tools were on hand—no excuses.
How to Make It: Step-by-Step
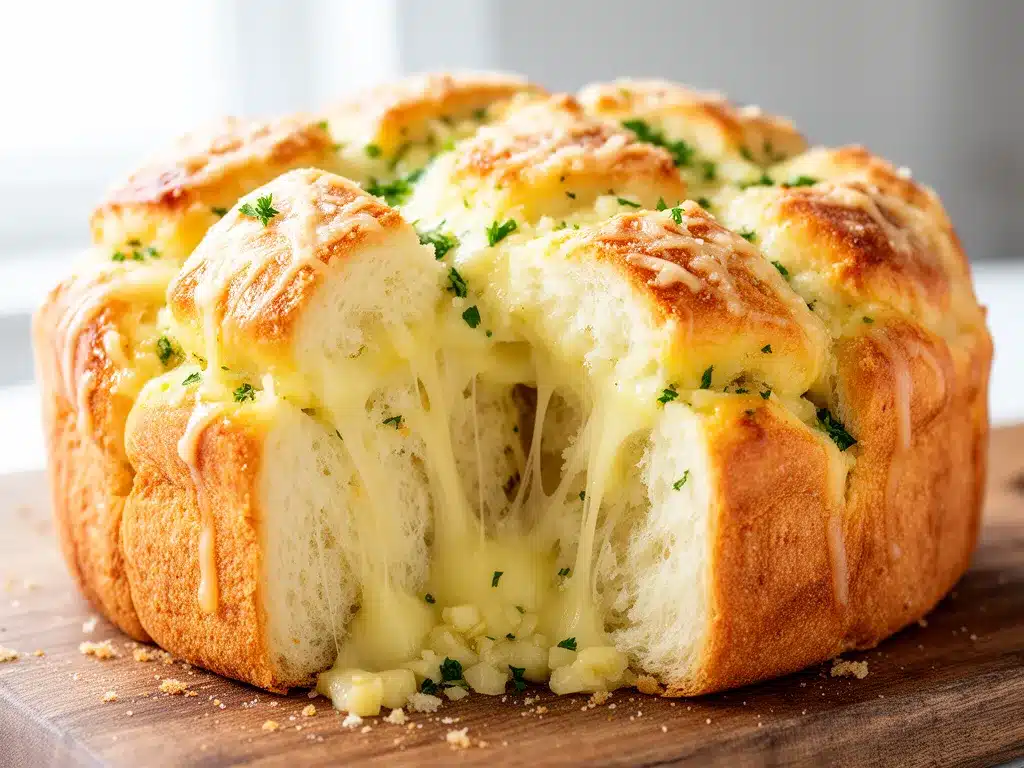
Alright, here’s how you make this irresistible Garlic Parmesan Pull-Apart Bread. I’m sharing every little trick so yours turns out perfect on the first try.
Step 1: Prep Your Bread
Place your loaf on a cutting board. Using a sharp serrated knife, carefully slice the bread vertically about 1 inch apart, but don’t cut all the way through—leave about ½ inch at the bottom. Rotate the loaf and slice horizontally the same way, creating a grid pattern of squares that are still connected at the bottom. This pull-apart technique lets the butter and cheese seep into every nook.
Step 2: Make the Garlic Butter
In a bowl, mix the melted butter with minced garlic, salt, pepper, and red pepper flakes if you’re using them. Stir in half of the chopped parsley and half of the Parmesan cheese. This combo is what makes the bread addictive.
Step 3: Stuff and Brush
Carefully spoon or brush the garlic butter mixture between the bread cuts, making sure it seeps deep inside. Don’t be shy—this is where the flavor hides. Then sprinkle the remaining Parmesan cheese over the top of the loaf for a golden, cheesy crust.
Step 4: Bake
Place the bread on a baking sheet and bake in a preheated 350°F (175°C) oven for about 25 minutes. The bread should be warm, the cheese melted and bubbling, and the top golden brown.
Step 5: Garnish and Serve
Remove from the oven and sprinkle with the remaining fresh parsley. Serve immediately while it’s warm and gooey. The best part? Everyone just pulls apart their own pieces—no plates, no forks, just pure snack joy.
Expert Tips & Tricks
- Don’t over-cut the bread: If you slice all the way through, the loaf will fall apart. Leaving the base intact keeps it sturdy but still easy to pull apart.
- Use room temperature butter: It mixes better with garlic and seasons evenly.
- Fresh Parmesan is key: It melts beautifully and adds a nutty flavor you just can’t get from pre-grated.
- Let it rest for 5 minutes after baking—this helps the cheese set slightly so it’s not too molten and messy.
- Customize your herbs: I sometimes swap parsley for rosemary or thyme depending on what I have. It’s always a hit.
- Make ahead: Assemble the bread, cover tightly, and refrigerate for up to 12 hours before baking. Just add a few extra minutes to the bake time if chilled.
Variations & Substitutions
Once you’ve nailed the classic, it’s fun to mix things up. Here are some of my favorite twists on this Garlic Parmesan Pull-Apart Bread:
- Bacon Lover’s: Add crispy bacon bits between the slices before baking. Instant crowd-pleaser.
- Cheesy Explosion: Mix mozzarella or cheddar cheese with Parmesan for extra gooeyness.
- Herbed Garlic: Add fresh rosemary, thyme, or basil to the butter mixture for a fragrant upgrade.
- Spicy Kick: Double the red pepper flakes or add a dash of cayenne for those who like heat.
- Veggie Boost: Stuff finely chopped sun-dried tomatoes or sautéed mushrooms inside. It’s surprisingly good!
- Gluten-Free Option: Use a gluten-free round bread loaf if you have one available. The method stays the same.
Serving & Storage
This pull-apart bread is perfect as a snack, appetizer, or side dish. I love serving it alongside simple meals like salad or soup, or as a fun finger food during game night.
It pairs wonderfully with fresh salads or mains like my thermos mac and cheese for a cozy night in.
Storing leftovers: Wrap tightly in foil and store at room temperature for up to 24 hours. For longer storage, refrigerate in an airtight container for up to 3 days. Reheat in a 350°F (175°C) oven for 10 minutes to restore crispness.
Freeze it: I don’t usually freeze this bread because the texture changes, but if you do, reheat gently and expect a softer crust.
Nutrition Information
| Per Serving (based on 8 servings) | Amount |
|---|---|
| Calories | 320 |
| Protein | 9g |
| Carbohydrates | 28g |
| Fat | 18g |
| Saturated Fat | 11g |
| Sodium | 400mg |
Not exactly health food, but this is ultimate comfort fare. The cheese and butter pack in the flavor and richness, while the bread provides satisfying carbs. You can lighten it up by using less butter or swapping in a whole wheat loaf, but honestly, sometimes you just gotta indulge.
Final Thoughts
So that’s my beloved Garlic Parmesan Pull-Apart Bread. I’ve probably told you too many stories by now, but when you make something this often, there’s a lot to say. This bread has saved so many snack times, casual gatherings, and even last-minute dinners.
It’s simple, it’s cheesy, it’s garlicky, and it’s fun to eat. What more could you want? Remember, cooking is about making recipes your own—so don’t hesitate to add your favorite herbs, cheeses, or even mix in bits of bacon or veggies to suit your family’s taste.
If you try it, drop a comment below and tell me how it turned out! If you run into any hiccups, I’m here to help troubleshoot. Happy baking, and may your kitchen smell as heavenly as mine does right now.
Frequently Asked Questions
Q: Can I use regular sandwich bread instead of a round loaf?
A: You can, but the texture won’t be the same. The crusty round loaf holds up better and creates those crispy edges that make this bread special. Sandwich bread tends to get mushy and fall apart when stuffed.
Q: How do I prevent the garlic from burning?
A: Since the garlic is mixed into melted butter and baked, it doesn’t usually burn. If you’re worried, mince the garlic finely and stir it well into the butter so it coats the bread gently. Avoid adding raw garlic on top of the loaf before baking.
Q: Can I make this vegan or dairy-free?
A: Absolutely! Use a plant-based butter substitute and a vegan Parmesan-style cheese (nutritional yeast mixed with ground nuts works). The flavor will be different but still delicious.
Q: Why isn’t my bread pulling apart easily?
A: Make sure you’re slicing deeply enough without cutting through the bottom. The bread should be scored so individual pieces can be pulled apart but still attached at the base. Also, warm bread pulls apart better, so serve it right out of the oven.
Q: Can I add other cheeses?
A: Yes! Mozzarella melts beautifully and makes the bread extra gooey. Cheddar adds a sharp bite. I like mixing Parmesan with mozzarella for the best of both worlds.
Q: How long does this bread stay fresh?
A: It’s best eaten the day it’s made, but leftovers keep well in the fridge for up to 3 days. Reheat gently to bring back the crisp crust and melty cheese.
Q: Can I prep this the night before?
A: Totally. Assemble the bread, cover tightly with plastic wrap, and refrigerate overnight. Then bake it fresh the next day, adding a few extra minutes to the baking time to account for the cold bread.
For more easy recipes that fit perfectly into busy weeknights, you might like my turkey and cheese pinwheels or these soft honey garlic pretzel bites. Both are simple, crowd-pleasing snacks that come together fast.
Pin This Recipe!
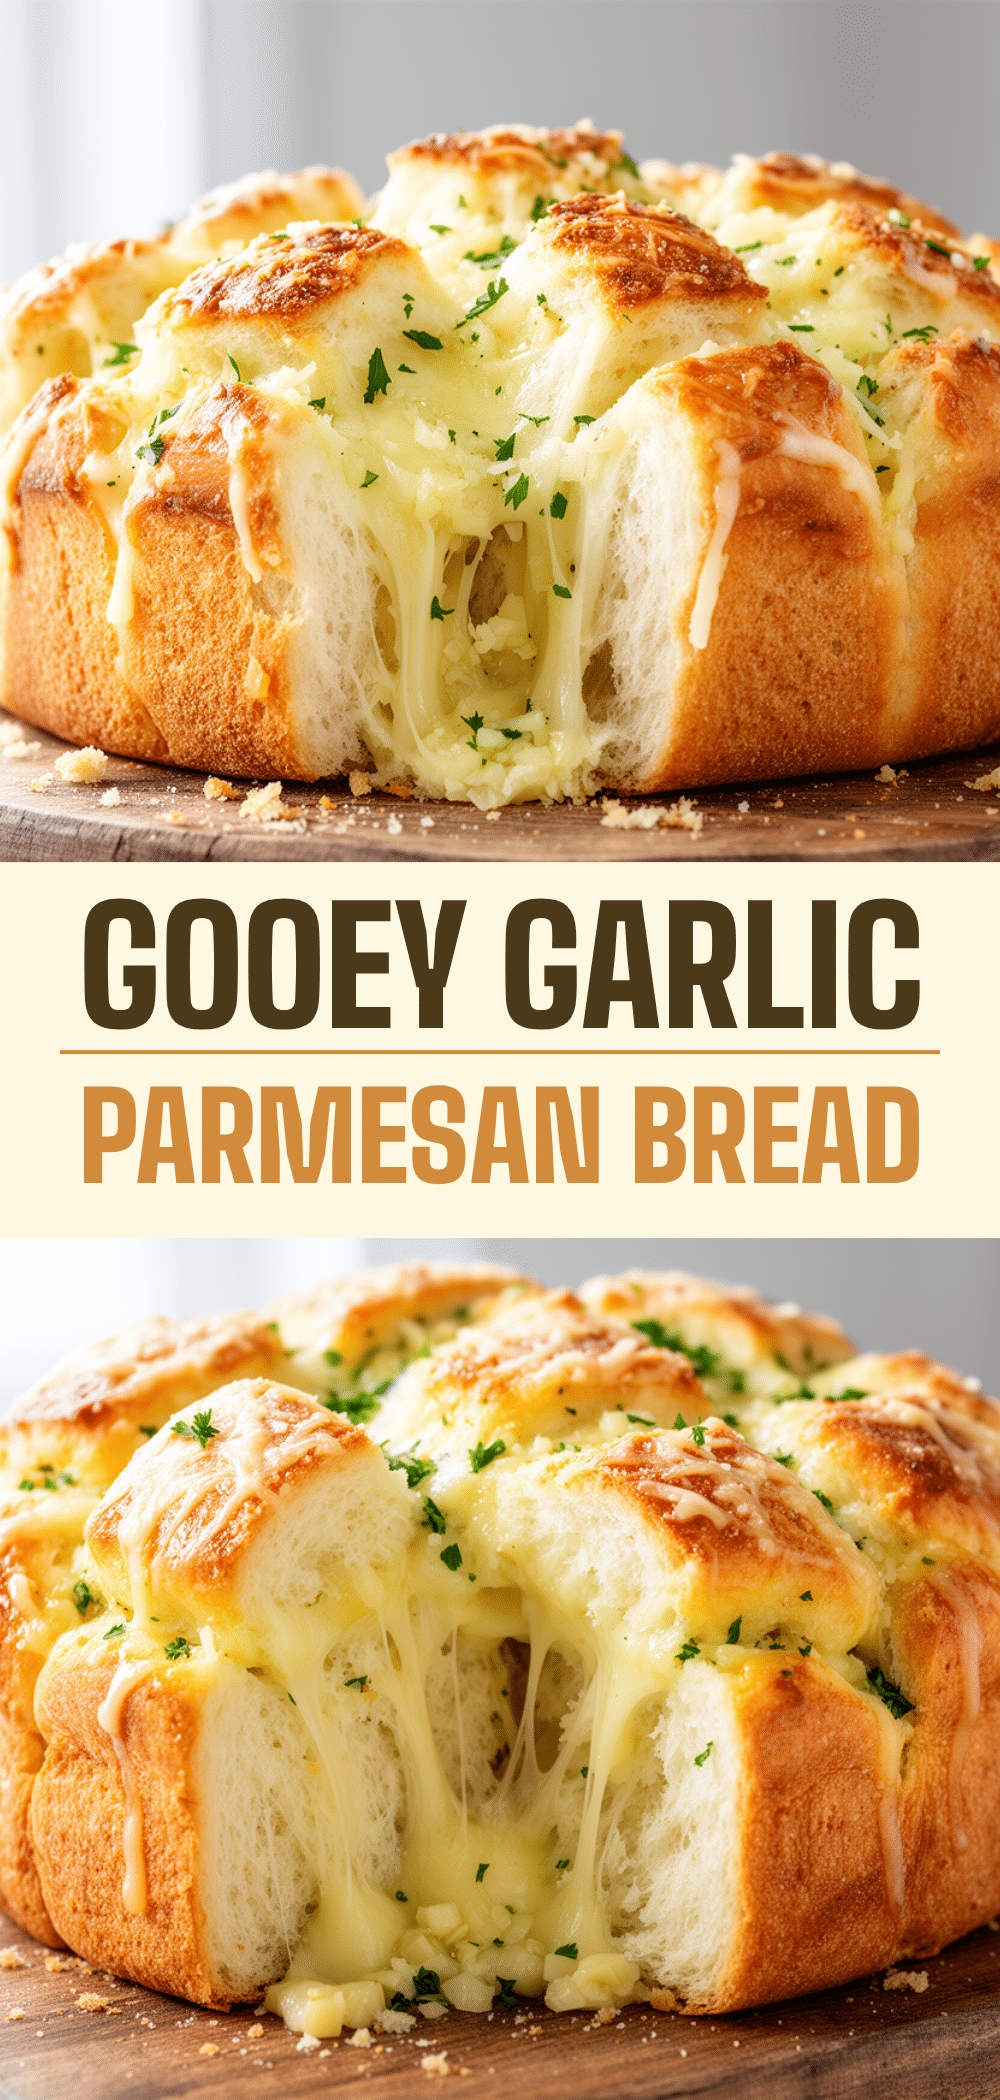
Garlic Parmesan Pull-Apart Bread
- Total Time: 40 minutes
- Yield: 8 servings 1x
Description
A warm, comforting, and shareable snack featuring crusty bread stuffed with garlic butter and Parmesan cheese, perfect for casual gatherings or family nights.
Ingredients
- 1 large round sourdough or boule loaf (about 12 inches)
- ½ cup (113g) unsalted butter, melted
- 4–5 cloves garlic, minced (about 1 tablespoon)
- 1 cup (100g) freshly grated Parmesan cheese
- 2 tablespoons fresh parsley, chopped (optional)
- Pinch of salt
- Freshly ground black pepper, to taste
- ¼ teaspoon red pepper flakes (optional)
Instructions
- Place the loaf on a cutting board. Using a sharp serrated knife, slice the bread vertically about 1 inch apart, leaving about ½ inch at the bottom uncut.
- Rotate the loaf and slice horizontally the same way, creating a grid pattern of squares still connected at the bottom.
- In a mixing bowl, combine melted butter, minced garlic, salt, pepper, and red pepper flakes if using. Stir in half of the chopped parsley and half of the Parmesan cheese.
- Carefully spoon or brush the garlic butter mixture between the bread cuts, ensuring it seeps deep inside.
- Sprinkle the remaining Parmesan cheese over the top of the loaf.
- Place the bread on a baking sheet and bake in a preheated 350°F (175°C) oven for about 25 minutes until warm, cheese melted and bubbling, and top golden brown.
- Remove from oven, sprinkle with remaining fresh parsley, and serve immediately while warm and gooey.
Notes
Do not cut all the way through the bread to keep it sturdy. Use room temperature butter for better mixing. Freshly grated Parmesan melts better than pre-grated. Let bread rest 5 minutes after baking to set cheese. Customize with herbs, bacon, or extra cheese as desired. Assemble ahead and refrigerate up to 12 hours before baking, adding a few extra minutes to bake time if chilled.
- Prep Time: 15 minutes
- Cook Time: 25 minutes
- Category: Snack
- Cuisine: American
Nutrition
- Serving Size: 1/8 of the loaf
- Calories: 320
- Sodium: 400
- Fat: 18
- Saturated Fat: 11
- Carbohydrates: 28
- Protein: 9
Keywords: garlic bread, pull-apart bread, Parmesan, snack, easy recipe, cheesy bread, party food