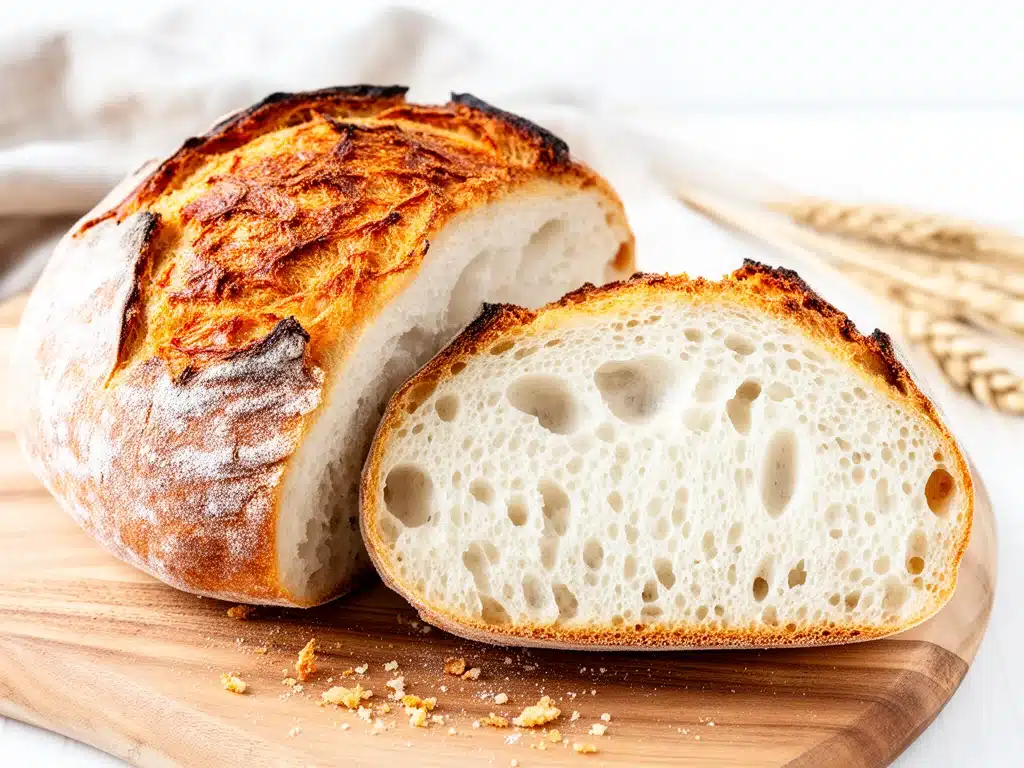
Two years ago, I was absolutely terrified of sourdough bread. The thought of cultivating a live starter, juggling precise timings, and mastering overnight fermentation felt like a science experiment I wasn’t qualified for. My first starter was a sad, sad blob that smelled more like vinegar than bread, and my loaf looked more like a brick than the perfect crusty beauty I’d dreamed of. But here’s the thing—I didn’t give up. I kept tweaking, simplifying, and learning. After about a dozen loaves (and some seriously burnt crusts), I finally cracked the code to a beginner-friendly homemade sourdough bread recipe that uses simple ingredients and zero fancy tools.
This isn’t some intimidating artisan bread with secret ingredients. It’s a straightforward, step-by-step guide that anyone can follow—no experience necessary. If you’ve ever wanted to try sourdough but felt overwhelmed, this is your starting point. I promise, once you make this loaf, you’ll be hooked. There’s nothing quite like the smell of freshly baked sourdough filling your kitchen, the crackle of that golden crust, and the soft, tangy crumb inside. Plus, it’s incredibly satisfying to make bread from scratch with just flour, water, salt, and your starter.
So, let me walk you through how I went from sourdough skeptic to obsessed baker, and how you can too.
Why You’ll Love This Beginner-Friendly Homemade Sourdough Bread Recipe
This recipe has completely changed how I approach baking bread at home. There are so many reasons I keep returning to this simple, reliable sourdough loaf, but here are the big ones:
- Simple ingredients — No need for special flours or additives. Just flour, water, salt, and your starter. You probably have everything in your pantry already.
- Beginner-friendly steps — I’ve broken down the process into easy-to-follow stages with plenty of tips so you won’t feel lost or overwhelmed.
- No fancy equipment required — You don’t need a bread machine, Dutch oven, or special bowls. A regular oven and a baking sheet work just fine.
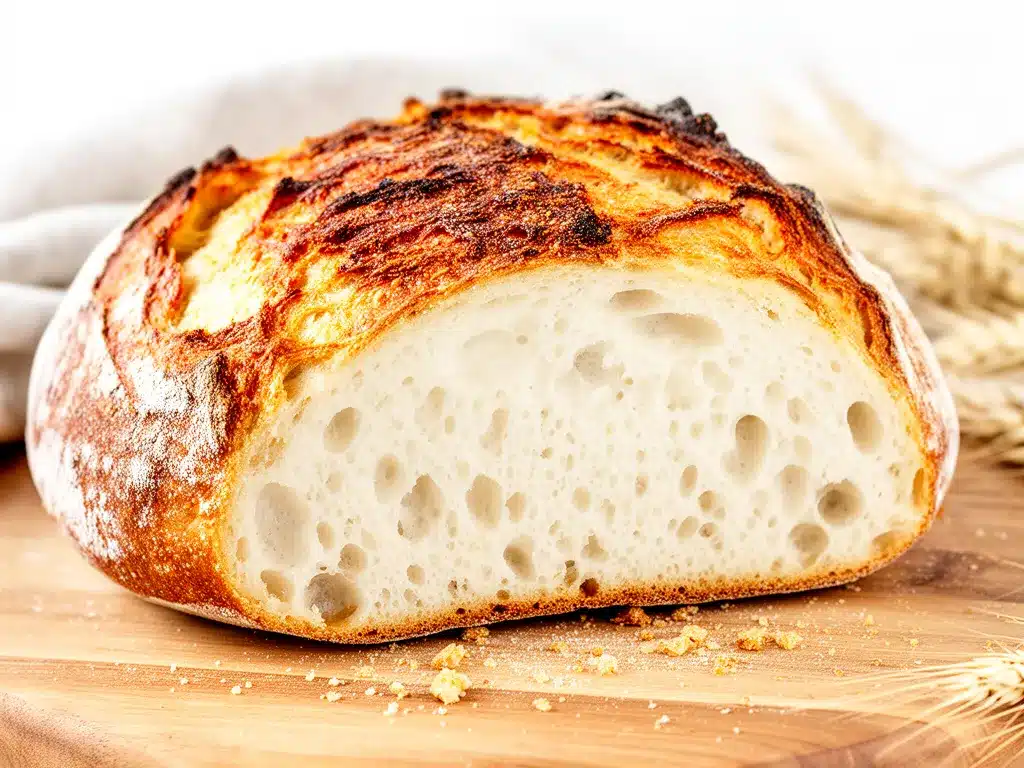
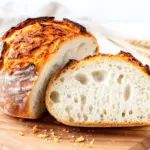
- Impressive results — The crust gets that beautiful golden crackle, and the crumb is soft with just the right tangy flavor. Friends and family will think you’re a pro (even if you’re not!).
- Flexible timing — You can adjust the fermentation times to fit your schedule. Want to bake over the weekend or during the week? It works either way.
Honestly, this recipe has saved me from store-bought bread countless times. When I’m juggling a busy week (sometimes alongside making quick meals like thermos mac and cheese), having a dependable sourdough loaf on hand feels like a small but mighty victory. Plus, nothing beats the feeling of slicing into your own homemade bread for sandwiches or toast.
Ingredients You’ll Need
Here’s the best part: you probably have most of these already, and I’m picky about a few that really affect the final loaf.
- Active sourdough starter (about ½ cup / 120g) — This is your natural yeast. If you don’t have one yet, I’ll share tips on how to start or where to get one.
- All-purpose flour (3 cups / 360g) — I use unbleached all-purpose flour. It strikes the perfect balance for a soft crumb and sturdy crust. You can experiment with bread flour for a chewier texture.
- Water (1 ¼ cups / 300ml, lukewarm) — Use filtered or tap water that’s not too hot (about 75°F/24°C). This helps activate the starter without killing it.
- Salt (2 teaspoons / 10g) — Essential for flavor and controlling fermentation. I use fine sea salt, but kosher salt works too.
Optional but helpful:
- Rice flour or extra all-purpose flour — For dusting your work surface and preventing sticking.
- A baking sheet or shallow pan — For baking your loaf if you don’t have a Dutch oven.
Quick note: If you don’t have an active sourdough starter yet, you can start one at home with just flour and water over 5-7 days (it’s easier than it sounds). Or, you can often find starters from friendly local bakers or online communities.
Equipment Needed
You don’t need fancy equipment for this. Here’s what I actually use:
- Mixing bowl — Any medium to large bowl works. I prefer glass or stainless steel for easy cleanup.
- Kitchen scale — Optional but highly recommended for accurate measurements. Baking is all about precision.
- Wooden spoon or spatula — To mix your dough.
- Clean kitchen towel or plastic wrap — For covering the dough during fermentation.
- Baking sheet or cast iron skillet — For baking the bread. If you have a Dutch oven, even better, but it’s not required.
- Sharp knife or bread lame — For scoring the dough before baking to help it rise evenly.
If you’re like me and don’t always have a bread lame, a serrated knife works perfectly fine. And I often bake on a regular baking sheet lined with parchment paper—no need to splurge on special pans when you’re just starting out.
How to Make It: Step-by-Step
Alright, let’s make this! I’m walking you through exactly how I do it, including the little tricks I’ve picked up along the way.
Step 1: Feed Your Starter (if needed) (10 minutes)
If your starter has been sitting in the fridge, feed it about 4-6 hours before you want to start mixing dough. Stir it well, discard half, and add equal parts flour and water by weight (usually ½ cup each). Let it get bubbly and active.
Step 2: Mix the Dough (10 minutes)
In your mixing bowl, combine ½ cup active sourdough starter with 1 ¼ cups lukewarm water. Stir to loosen the starter. Add 3 cups flour and 2 teaspoons salt. Mix with a wooden spoon until it forms a shaggy dough—don’t worry if it looks rough and sticky. Cover with a towel and let rest for 30 minutes (this is called autolyse and helps develop gluten).
Step 3: Knead and Bulk Ferment (4-5 hours)
After the rest, you’ll do a series of “stretch and folds” every 30 minutes for the first 2 hours to develop structure. Here’s how:
- Wet your hand to prevent sticking.
- Grab one side of the dough, stretch it up, and fold it over the rest.
- Rotate the bowl and repeat 3 more times (for all sides).
After the last fold, cover the dough and let it sit undisturbed for the remaining time until it has roughly doubled in size and feels airy (about 2-3 more hours). This slow fermentation builds flavor.
Step 4: Shape the Dough (10 minutes)
Generously flour your work surface with rice or all-purpose flour. Gently turn the dough onto it. Fold the edges into the center to form a rough ball. Then, using both hands, cup the dough and rotate it while pulling it toward you to create surface tension. Place it seam-side down on a floured towel or proofing basket if you have one.
Step 5: Proof the Dough (1-2 hours or overnight)
Cover the dough with a towel and let it rise until puffy and nearly doubled. You can proof at room temperature for 1-2 hours or place it in the fridge overnight for a slower fermentation (which develops more flavor).
Step 6: Preheat and Score (30 minutes)
About 30 minutes before baking, preheat your oven to 450°F (230°C). If using a Dutch oven, place it inside to heat. When ready, gently flip the dough onto parchment paper. Using a sharp knife or bread lame, make a few shallow slashes on top (this helps the bread expand without cracking).
Step 7: Bake the Bread (40-45 minutes)
Place the dough (with parchment) into your preheated Dutch oven or onto a baking sheet. If using a Dutch oven, cover with the lid for the first 20 minutes, then remove the lid to let the crust brown and crisp for the remaining 20-25 minutes. If using a baking sheet, put a small pan of water on the bottom rack to create steam (this helps the crust develop).
The bread is done when it’s deep golden brown and sounds hollow when tapped on the bottom.
Step 8: Cool Completely (1 hour)
Let your loaf cool on a wire rack for at least an hour before slicing. It’s tempting to cut in early, but the crumb needs time to set properly. Trust me, this step is worth the wait.
Expert Tips & Tricks
- Use a kitchen scale — Measuring flour and water by weight is much more accurate than cups. It makes a huge difference in bread baking.
- Patience is key — Sourdough takes time. Rushing fermentation or proofing leads to dense bread. Take advantage of slow overnight proofing if you can.
- Keep your starter happy — Feed it regularly and keep it at room temperature when baking. A bubbly starter means better rise.
- Don’t skip scoring — This controls how your bread expands in the oven and prevents ugly cracks.
- Create steam in your oven — It’s what gives sourdough that signature crust. Using a Dutch oven traps steam naturally; if not, a pan of hot water works.
- Experiment with flour blends — Adding a bit of whole wheat or rye flour to your dough can boost flavor and texture.
Quick note: If your dough feels too sticky to handle, sprinkle just a little flour at a time—too much can dry it out.
Variations & Substitutions
Once you’ve nailed the basic loaf, it’s fun to mix things up. Here are some tweaks I’ve tried:
- Whole Wheat Sourdough — Substitute 1 cup of all-purpose flour with whole wheat flour for a nuttier flavor.
- Herb-Infused — Add fresh rosemary or thyme to the dough during mixing for an aromatic twist.
- Seeded Loaf — Fold in ¼ cup of mixed seeds (sunflower, flax, sesame) right before shaping.
- Gluten-Free Starter — If you’re adventurous, you can cultivate a gluten-free starter and experiment with gluten-free flours, though it’s trickier.
- Quick Sourdough Flatbread — Skip the long fermentation and bake thinner, quicker breads for sandwiches or wraps.
These variations keep sourdough interesting and let you tailor it to your taste. If you love easy meals with simple ingredients, you might also appreciate my crunchy ranch chicken wraps—perfect for busy days when you want homemade flavor without hassle.
Serving & Storage
I usually slice this sourdough fresh and serve it with butter, jam, or as the base for sandwiches. It pairs beautifully with soups and salads, and makes the best toast for breakfast. When I’m making lunches for my kids, I rely on homemade bread like this to elevate simple sandwiches, alongside quick sides inspired by my turkey and cheese pinwheels.
Storage: Store your sourdough in a paper bag or wrapped loosely in a kitchen towel at room temperature for up to 3 days. Avoid plastic bags as they trap moisture and soften the crust.
Reheating: To refresh the crust, pop slices in a toaster or warm the whole loaf in a 350°F (175°C) oven for 10 minutes.
Freezing: Slice and freeze in an airtight bag. Toast slices straight from the freezer—no need to thaw.
Nutrition Information
| Nutrient | Per Serving (1 slice) |
|---|---|
| Calories | 150 |
| Protein | 5g |
| Carbohydrates | 30g |
| Fiber | 1.5g |
| Fat | 0.5g |
| Sodium | 200mg |
Not a nutritionist, but sourdough bread provides decent protein and fiber compared to regular white bread, thanks to the fermentation process. It’s naturally dairy-free and vegan (unless you add butter or toppings). Just watch your salt intake if you’re sensitive.
Final Thoughts
So that’s my beginner-friendly homemade sourdough bread recipe with simple ingredients. I’ve probably talked your ear off by now, but when you bake this loaf, you’ll understand why I have so much to say! It’s a game changer in the kitchen, turning a few pantry staples into something magical.
This bread has saved me on busy days, elevated my sandwiches, and made me feel proud of my baking skills. You don’t need fancy tools or complicated techniques—just patience, a little practice, and a willingness to get your hands a bit floury.
Make it your own. Add herbs, seeds, or whole grains. Share it with friends or keep it all to yourself (I won’t judge). And if you want to keep your weeknight dinners simple but satisfying, check out my take on baked apple cinnamon oatmeal cups for a cozy breakfast alongside your fresh bread.
If you try this recipe, please drop a comment and let me know how it goes! I love hearing your stories, troubleshooting with you, and sharing baking wins (or fails). Happy baking, and I hope your kitchen smells half as amazing as mine does right now.
Frequently Asked Questions
Q: How do I make a sourdough starter if I don’t have one?
A: Start with equal parts flour and water (½ cup each) mixed in a jar. Leave it at room temperature and feed daily by discarding half and adding fresh flour and water. After 5-7 days, it should bubble and smell tangy. There are plenty of starter guides online, and it’s easier than it sounds. Or ask a local baker for a bit of their starter.
Q: Can I use all bread flour instead of all-purpose?
A: Yes! Bread flour has more protein, which gives the dough more chew and a higher rise. I like all-purpose for a softer crumb, but bread flour works just as well if that’s what you have.
Q: Why didn’t my bread rise properly?
A: The most common reasons are an inactive starter, cold fermentation environment, or not enough fermentation time. Make sure your starter is bubbly and active before mixing. Keep the dough in a warm spot (around 75°F/24°C) and be patient with rising times.
Q: Can I bake sourdough without a Dutch oven?
A: Absolutely. Use a baking sheet lined with parchment and place a shallow pan of hot water on the oven’s bottom rack to create steam. This helps develop a nice crust. It won’t be exactly like a Dutch oven loaf but still delicious.
Q: How do I know when the bread is done baking?
A: It should be deep golden brown and sound hollow when tapped on the bottom. You can also use a thermometer—the internal temperature should be about 205°F (96°C).
Q: Can I speed up the fermentation process?
A: You can warm the dough slightly to speed things up, but be careful not to overheat or it will lose flavor. Alternatively, you can use commercial yeast for a quicker loaf, but it won’t have the same sourdough tang.
Q: How do I store leftover sourdough bread?
A: Store at room temperature in a paper bag or loosely wrapped in a towel for up to 3 days. For longer storage, slice and freeze. Toast slices straight from the freezer when ready to eat.
Pin This Recipe!
Beginner-Friendly Homemade Sourdough Bread Recipe
- Total Time: 6-8 hours (including fermentation and proofing time)
- Yield: 1 loaf (about 12 slices) 1x
Description
A simple, step-by-step sourdough bread recipe perfect for beginners using basic ingredients and no fancy equipment. Enjoy a crusty golden loaf with a soft, tangy crumb.
Ingredients
- ½ cup (120g) active sourdough starter
- 3 cups (360g) unbleached all-purpose flour
- 1 ¼ cups (300ml) lukewarm water (about 75°F/24°C)
- 2 teaspoons (10g) fine sea salt or kosher salt
- Optional: rice flour or extra all-purpose flour for dusting
Instructions
- Feed your starter about 4-6 hours before mixing dough if it has been refrigerated. Stir well, discard half, and add equal parts flour and water by weight (usually ½ cup each). Let it get bubbly and active.
- In a mixing bowl, combine ½ cup active sourdough starter with 1 ¼ cups lukewarm water. Stir to loosen the starter.
- Add 3 cups flour and 2 teaspoons salt. Mix with a wooden spoon until a shaggy dough forms. Cover with a towel and let rest for 30 minutes (autolyse).
- Perform a series of stretch and folds every 30 minutes for the first 2 hours: wet your hand, grab one side of the dough, stretch it up, fold it over the rest, rotate the bowl and repeat 3 more times.
- After the last fold, cover and let the dough sit undisturbed for 2-3 more hours until roughly doubled and airy.
- Flour your work surface generously. Turn the dough onto it and fold edges into the center to form a rough ball. Cup the dough and rotate it while pulling it toward you to create surface tension. Place seam-side down on a floured towel or proofing basket.
- Cover the dough and proof for 1-2 hours at room temperature until puffy and nearly doubled, or refrigerate overnight for slower fermentation.
- About 30 minutes before baking, preheat oven to 450°F (230°C). If using a Dutch oven, place it inside to heat.
- Flip the dough gently onto parchment paper. Score the top with a sharp knife or bread lame to allow expansion.
- Place dough with parchment into the preheated Dutch oven or onto a baking sheet. If using Dutch oven, cover for first 20 minutes, then remove lid and bake 20-25 more minutes until crust is golden and crisp. If using baking sheet, place a pan of hot water on the bottom rack to create steam.
- Bread is done when deep golden brown and sounds hollow when tapped on the bottom.
- Cool the loaf completely on a wire rack for at least 1 hour before slicing.
Notes
[‘Use a kitchen scale for accurate measurements.’, ‘Patience is key; allow proper fermentation and proofing for best results.’, ‘Keep starter active and bubbly for good rise.’, ‘Score the dough before baking to control expansion.’, ‘Create steam in the oven using a Dutch oven or a pan of hot water to develop crust.’, ‘If dough is too sticky, sprinkle flour gradually to avoid drying it out.’, ‘Variations include adding whole wheat flour, herbs, or seeds.’, ‘Store bread in a paper bag or loosely wrapped in a towel at room temperature for up to 3 days.’, ‘Refresh crust by toasting slices or warming whole loaf in a 350°F oven for 10 minutes.’, ‘Freeze sliced bread in airtight bags; toast directly from freezer.’]
- Prep Time: 50 minutes
- Cook Time: 40-45 minutes
- Category: Bread
- Cuisine: American
Nutrition
- Serving Size: 1 slice
- Calories: 150
- Sodium: 200
- Fat: 0.5
- Carbohydrates: 30
- Fiber: 1.5
- Protein: 5
Keywords: sourdough bread, homemade bread, beginner sourdough, easy bread recipe, no Dutch oven bread, natural yeast bread