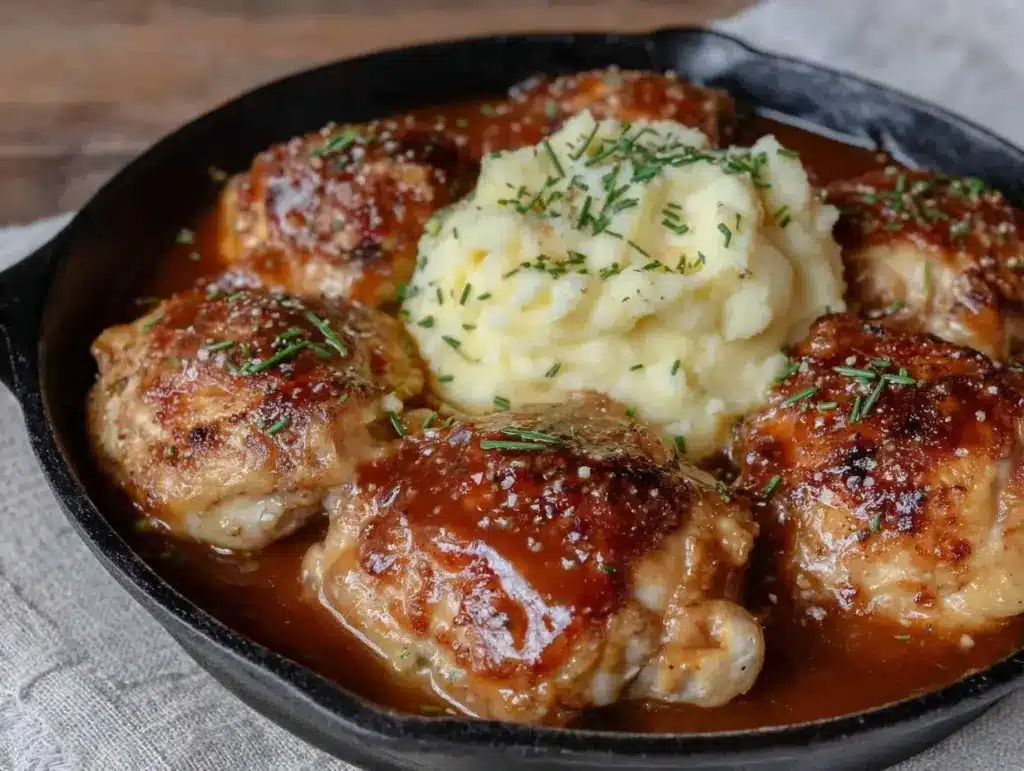
I’ve always been the friend who shows up to parties with a store-bought dessert. Don’t judge me—it’s honest. But for my own gatherings, I draw a hard line at the main course. If I’m hosting, I want the food to feel like a warm hug, something that smells incredible the second people walk through the door and looks so inviting they forget to check their phones. That’s exactly why this skillet chicken and gravy recipe has become my absolute go-to for weekend dinner parties and cozy family nights.
Here’s the thing about hosting: you want to impress, but you also want to actually enjoy the evening with your guests. You don’t want to be stuck in the kitchen scrubbing pans while everyone else is in the living room. This dish solves that problem. It’s rustic, it’s deeply savory, and it tastes like it took hours of slow-simmering (even though it takes less than an hour). The skin gets perfectly crisp, the meat stays juicy, and that gravy? It’s liquid gold. It’s the kind of meal that makes people ask, “How did you make this?” right before they ask for seconds.
I first perfected this technique after a disastrous attempt at a formal roast chicken that ended up dry and boring. I was frustrated, so I threw chicken thighs and drumsticks into a hot skillet with some onions and a splash of white wine, intending to just salvage dinner. The result was so good that my husband refused to let me cook anything else for a week. Since then, I’ve tweaked it, tested it, and made it at least twenty times. I’ve learned exactly how to get that golden-brown crust without burning the garlic, and how to thicken the gravy so it coats the back of a spoon without being gloopy. This is hands-down the best method for a weeknight dinner party recipe that feels fancy but doesn’t stress you out.
Why You’ll Love This Skillet Chicken and Gravy
There are about ten reasons I keep coming back to this skillet chicken and gravy recipe, but here are the big ones that make it a total game-changer for your hosting game.
One-Pan Wonder — Seriously, if you can brown chicken and chop an onion, you can make this. The beauty of cooking everything in one large skillet is that cleanup is a breeze. I can chat with my guests while the chicken rests, knowing I won’t have a mountain of dishes waiting for me. It’s the ultimate low-stress dinner party recipe.
Restaurant-Quality Crust — I’ve tried pan-roasting in the oven, but nothing beats the Maillard reaction that happens in a hot skillet. The skin gets shatteringly crisp, and the meat sears in its own juices. It looks as good as anything you’d get at a bistro, but it’s made in your own kitchen with simple ingredients.
Gravy That Actually Works — So many people are scared of making gravy because they worry about lumps or it being too thick. This method uses the fond (those brown bits stuck to the bottom of the pan) as the flavor base, so the gravy is packed with deep, savory richness. It’s not just sauce; it’s the soul of the dish. I’ve served this to picky eaters and food snobs alike, and everyone asks for the recipe.
Makes Amazing Leftovers — Actually, it tastes even better the next day. The chicken absorbs more of that rich gravy, and the flavors meld together. I deliberately make extra for lunch throughout the week. It reheats beautifully in the skillet, just add a splash of broth to loosen it up.
Budget-Smart — Chicken thighs and drumsticks are much cheaper than breasts, and they’re harder to overcook. This recipe feeds 4-6 people for a very reasonable price. That’s less than one meal at a nice restaurant, but it feels way more luxurious.
This is my go-to when I need dinner to just work. No complicated techniques, no weird ingredients, just reliable, delicious food that makes everyone happy and leaves your kitchen smelling like heaven.
Ingredients You’ll Need
Here’s the best part: you probably have most of this already. I’m particular about a few things here, and I’ll tell you exactly why they matter for getting that perfect texture and flavor.
Chicken Pieces (3-4 pounds / 1.5kg) — I use a mix of thighs and drumsticks. Bone-in, skin-on is non-negotiable here. The bones add flavor to the gravy, and the skin crisps up beautifully. Boneless skinless breasts will dry out and won’t give you that crispy texture. I buy them from the local butcher if I can, but any good supermarket brand works fine.
Chicken Broth (2 cups / 480ml) — Use low-sodium so you can control the saltiness yourself. If you’re looking for a lighter option, you can try a creamy mango lassi on the side for a refreshing contrast, though that’s a bit of a flavor departure! For the gravy, stick to good quality broth. I like Swanson or Kitchen Basics.
Heavy Cream (½ cup / 120ml) — This is what gives the gravy its velvety richness. Don’t skip it, and don’t use half-and-half if you want that luxurious mouthfeel. It’s a treat dish, so indulge a little.
Yellow Onion (1 large, sliced / about 250g) — Sweet onions work too, but yellow gives better depth. Slice them into half-moons. They’ll caramelize slightly in the pan and add a natural sweetness to balance the savory gravy.
Garlic (4-5 cloves, minced / about 2 tablespoons) — Yes, five cloves. Don’t skimp. Fresh only—no jarred garlic in this recipe. It needs to be fragrant and sharp to cut through the richness of the cream.
All-Purpose Flour (2-3 tablespoons) — This is for dredging the chicken and thickening the gravy. It helps create that crispy crust and gives the sauce body. I keep a bag of King Arthur Flour on hand because it measures consistently.
Butter (2 tablespoons) — For finishing the gravy. It adds a glossy shine and a rich, buttery finish. Unsalted is best so you can control the salt level.
Vegetable Oil (2 tablespoons) — To sear the chicken. Olive oil can burn at the high heat needed for crisping skin, so stick with a neutral oil with a high smoke point.
Worcestershire Sauce (1 teaspoon) — This is my secret weapon. It adds a deep umami boost that makes the gravy taste more complex and “meaty.” It’s subtle, but you’ll miss it if it’s not there.
Dry White Wine (½ cup / 120ml) — Optional but recommended. It deglazes the pan and adds acidity to balance the fat. If you don’t drink wine, you can use extra broth with a splash of vinegar.
Fresh Thyme (3-4 sprigs) — Or 1 teaspoon dried thyme. Fresh is better. It pairs perfectly with chicken and adds an earthy aroma.
Salt and Black Pepper — To taste. I use Kosher salt for seasoning the chicken before searing.
Equipment Needed
You don’t need fancy equipment for this. Here’s what I actually use.
Large Cast Iron Skillet or Dutch Oven — I use a 12-inch cast iron skillet. It holds heat incredibly well, which is crucial for getting that golden crust. If you don’t have cast iron, a heavy-bottomed stainless steel skillet or a Dutch oven works too. The key is that it needs to be big enough to hold all the chicken pieces in a single layer without overcrowding.
Sharp Chef’s Knife — For slicing onions and mincing garlic. A dull knife is dangerous and makes mincing garlic a nightmare.
Wooden Spoon — For stirring the gravy. It won’t scratch your pan like metal might, and it’s great for scraping up those brown bits from the bottom.
Measuring Cups and Spoons — Standard stuff. Dollar store versions work fine for this.
Tongs — For flipping the chicken. It’s much safer and easier than using a fork, which can pierce the skin and let the juices escape.
Whisk — For smoothing out the gravy. It ensures there are no lumps of flour in your sauce.
Cutting Board — Any size works. I use a large plastic one for easier cleanup.
Cheese Grater — Not strictly necessary for this recipe, but handy if you want to add some Parmesan on top for extra umami. I usually skip it, but it’s a nice touch.
How to Make It: Step-by-Step

Alright, let’s make this! I’m walking you through exactly how I do it, including the little tricks I’ve picked up over the years.
Step 1: Prep and Season the Chicken (5 minutes)
Pat the chicken pieces completely dry with paper towels. This is the most important step for getting crispy skin. Moisture is the enemy of crispiness. Season generously with salt and pepper on all sides, then lightly dredge them in flour, shaking off any excess. The flour helps create a crust and thickens the gravy later.
Step 2: Sear the Chicken (10-12 minutes)
Heat the vegetable oil in your large skillet over medium-high heat. Once the oil shimmers, add the chicken pieces skin-side down. Don’t move them! Let them sear for 5-6 minutes until the skin is deep golden brown and releases easily from the pan. Flip and cook the other side for 3-4 minutes. Remove the chicken to a plate. Don’t worry if it’s not fully cooked through yet; we’ll finish it in the gravy.
Step 3: Sauté the Aromatics (3 minutes)
Reduce the heat to medium. Add the sliced onions to the same skillet. Cook for 3-4 minutes, scraping up those brown bits (fond) from the bottom with your wooden spoon. Those bits are pure flavor. Add the minced garlic and thyme sprigs, cooking for just 1 minute until fragrant. Be careful not to burn the garlic.
Step 4: Deglaze and Build the Gravy (5 minutes)
Pour in the white wine (or extra broth) to deglaze the pan. Let it simmer for 2 minutes to cook off the alcohol. Add the chicken broth and Worcestershire sauce. Bring to a gentle simmer.
Step 5: Simmer the Chicken (15-20 minutes)
Return the chicken pieces to the skillet, nestling them into the onions and gravy. The liquid should come about halfway up the chicken. Reduce heat to medium-low, cover loosely, and let it simmer for 15-20 minutes, or until the chicken reaches an internal temperature of 165°F (74°C). Flip the chicken halfway through to ensure even cooking.
Step 6: Finish the Gravy (3 minutes)
Remove the chicken to a serving platter and tent with foil. Increase the heat to medium-high and let the gravy bubble vigorously for 2-3 minutes to reduce slightly. Whisk in the heavy cream and butter. Simmer for another minute until the gravy thickens enough to coat the back of a spoon. Taste and adjust salt and pepper.
Step 7: Serve
Pour the rich, golden gravy over the chicken. Serve immediately with buttery mashed potatoes. The contrast between the crispy skin, tender meat, and creamy potatoes is unbeatable.
Total Time: About 45-50 minutes (15 minutes active, 35 minutes mostly hands-off)
Expert Tips & Tricks
Here’s everything I’ve learned from making this dozens of times. These tips will save you from my mistakes.
Don’t Crowd the Pan
If your skillet is small, sear the chicken in batches. Overcrowding lowers the pan temperature and steams the chicken instead of searing it. You want that Maillard reaction, not boiled chicken. I learned this the hard way with a pan that was just too small.
Scrape the Fond
Those brown bits stuck to the bottom of the pan are liquid gold. Don’t let them burn! Scrape them up when you add the onions. They are the base of your gravy’s flavor. If they do start to burn, just add a splash of water immediately to stop the cooking and scrape.
Pat the Chicken Dry
I can’t stress this enough. Wet skin = soggy skin. Use paper towels and be thorough. If the chicken is too wet, the flour won’t stick, and the skin won’t crisp. This step takes 30 seconds but makes all the difference.
Use Bone-In, Skin-On
It’s worth the extra effort. The bones add flavor to the gravy, and the skin protects the meat from drying out. Plus, nobody likes dry chicken breast. Thighs are more forgiving and juicier.
Finish with Butter
Swirling in a tablespoon of cold butter at the end gives the gravy a glossy, restaurant-quality shine. It also adds a rich, velvety texture that cream alone can’t achieve.
Common Mistakes (and how to avoid them):
Mistake: Gravy is too thin
Fix: Let it simmer longer. The starch from the flour and the reduction of the broth will thicken it. If it’s still too thin, mix 1 teaspoon of cornstarch with 1 tablespoon of cold water and whisk it in.
Mistake: Chicken is dry
Fix: You overcooked it. Use a meat thermometer. Remove the chicken when it hits 165°F. It will continue to cook slightly as it rests.
Pro Tricks I’ve Learned:
For Extra Depth
Add a splash of soy sauce or fish sauce instead of Worcestershire. It adds umami without making it taste Asian. I do this when I want a deeper, darker gravy.
For Better Texture
Let the chicken rest for 5 minutes before serving. This allows the juices to redistribute, keeping the meat moist.
Variations & Substitutions
Once you’ve nailed the basic version, here’s how you can mix it up. I’ve tried all of these.
Herb-Crusted Version
Add 1 tablespoon of dried rosemary or sage to the flour dredge. It adds a lovely aromatic note that pairs well with the thyme.
Mushroom Lover’s
Sauté 8oz sliced mushrooms with the onions. Cook until golden brown. Adds earthiness and makes it feel fancier. I love the combination of chicken and mushrooms.
Lighter Version
Use chicken breast instead of thighs (but be careful not to overcook). Swap heavy cream for half-and-half. It’s thinner but still good. I make this when I’m trying to be “healthy,” though I usually end up eating the full version anyway.
Dietary Modifications:
Gluten-Free
Use gluten-free flour for dredging and ensure your broth and Worcestershire sauce are GF. Everything else is naturally gluten-free.
Dairy-Free
Replace heavy cream with full-fat coconut cream and butter with olive oil. It’s different but still tasty. My lactose-intolerant friend requests this version occasionally.
Other Proteins:
Pork Chops
You can use thick-cut pork chops instead of chicken. They take a bit longer to cook, so simmer for 20-25 minutes. I also love making pulled chicken sliders for parties, but this skillet version is great for a sit-down meal.
Duck Legs
If you’re feeling fancy, duck legs work beautifully with this method. Just trim the excess fat first.
Serving & Storage
How to Serve:
I usually serve this straight from the skillet at the dinner table—it looks rustic and stays warm. But here are other ways I’ve enjoyed it:
Side Dishes:
- Buttery mashed potatoes (obviously)
- Crispy roasted green beans
- A simple arugula salad with lemon vinaigrette
- Creamy polenta (great for soaking up gravy)
Wine Pairing:
Not a wine expert, but my wine-snob friend says a Pinot Noir or a Chardonnay works great with this. The acidity cuts through the richness.
Storage Instructions:
Refrigerator:
Store in an airtight container for up to 4 days. The sauce will thicken in the fridge—totally normal.
Reheating:
Best method: Add to a skillet with a splash of broth or milk over low heat. Stir until heated through and creamy again. Microwave method: Heat in 30-second intervals, stirring between. Add a splash of milk if it’s too thick. Never works: Trying to reheat in the pot you cooked it in. It always burns on the bottom. Ask me how I know.
Freezing:
Honestly, this doesn’t freeze well because of the dairy. The sauce separates when thawed. Make it fresh or store in the fridge for up to 4 days.
Nutrition Information
I’m not a nutritionist, but here’s the breakdown if you’re tracking.
Per Serving (based on 6 servings):
| Nutrient | Amount |
|---|---|
| Calories | 480 |
| Protein | 35g |
| Carbs | 12g |
| Fiber | 1g |
| Fat | 32g |
| Saturated Fat | 12g |
| Cholesterol | 140mg |
| Sodium | 650mg |
What’s Good:
- High protein from the chicken
- Rich in flavor without being overly heavy on carbs
What to Know:
- Higher in calories and fat from the cream and skin
- Contains dairy and gluten
Look, this is comfort food. It’s not a diet recipe. But it’s way better than takeout, costs less, and I know exactly what’s in it. When I want to make it lighter, I use the half-and-half version and skip the bread. But usually? I just eat a reasonable portion and enjoy it.
Final Thoughts
So that’s my go-to skillet chicken and gravy! I’ve probably talked your ear off at this point, but when you make a recipe this often, you have a lot to say about it. This has saved weeknight dinners more times than I can count. It’s my answer to “what’s for dinner” when I’m tired, don’t want takeout, and still want something that tastes really good. My kids are happy, my husband’s happy, and I’m happy because I’m not stressed about cooking.
Make it yours! Try different herbs, swap in your favorite vegetables, adjust the garlic (though more is always better in my opinion). The best recipes are the ones you adapt to your family’s tastes.
If you make this, drop a comment and let me know what you think! I love hearing how recipes turn out in your kitchen. And if something doesn’t work, tell me that too—I’m here to help troubleshoot.
Happy cooking! And I hope your kitchen smells half as good as mine does right now.
Frequently Asked Questions
Q: Can I use chicken breasts instead of thighs?
A: You can, but they will cook much faster and are easier to dry out. If you use breasts, sear them for 3-4 minutes per side, then simmer in the gravy for only 10-12 minutes. Check the temperature frequently; remove them at 165°F. Thighs are more forgiving and juicier, so I recommend them for beginners.
Q: Why did my gravy get lumpy?
A: Usually means you added the flour or cream too quickly without whisking. When you add the cream, whisk constantly. If you made a roux with the flour and butter, make sure it’s smooth before adding liquid. If it’s already lumpy, strain it through a fine-mesh sieve or use an immersion blender to smooth it out.
Q: Can I make this ahead for a dinner party?
A: Sort of. You can sear the chicken and make the gravy base up to 2 days ahead and store in the fridge. Reheat the gravy gently, add the cream, and simmer. Cook the chicken fresh right before serving (takes 15 minutes). It won’t be quite as good as fresh, but it’s close and saves you stress during the party. I do this all the time.
Q: Can I use white wine vinegar instead of wine?
A: Yes, but use less. Wine adds sweetness and complexity, while vinegar is just acidic. If you use vinegar, start with 1 tablespoon and taste. You might want to add a pinch of sugar to balance it. I prefer wine for the flavor, but vinegar works in a pinch.
Q: How do I reheat leftovers without it getting dry?
A: Add a splash of milk or broth to a skillet, add your leftover chicken and gravy, and heat gently over low heat, stirring frequently. The extra liquid brings back the creamy texture. Microwave sort of works but tends to dry it out. If you do microwave, definitely add a splash of liquid first and heat in short bursts, stirring between.
Q: Can I double this recipe?
A: Absolutely! Double everything and use your biggest pot or skillet. The cooking times stay the same. I do this when I’m meal-prepping or feeding a crowd. Just make sure your skillet is big enough for the sauce—you might need to use two pans or a very large skillet. Don’t overcrowd the pan when searing.
Pin This Recipe!


Skillet Chicken and Gravy: Easy Weeknight Dinner Party Recipe
- Total Time: 50 minutes
- Yield: 4-6 servings 1x
Description
A rustic, one-pan skillet chicken and gravy recipe that delivers restaurant-quality crispy skin and rich, savory sauce. Perfect for stress-free dinner parties and cozy family nights, this dish is deeply flavorful and easy to make.
Ingredients
- 3–4 pounds chicken thighs and drumsticks (bone-in, skin-on)
- 2 cups low-sodium chicken broth
- ½ cup heavy cream
- 1 large yellow onion, sliced into half-moons
- 4–5 cloves garlic, minced
- 2–3 tablespoons all-purpose flour
- 2 tablespoons unsalted butter
- 2 tablespoons vegetable oil
- 1 teaspoon Worcestershire sauce
- ½ cup dry white wine (optional)
- 3–4 sprigs fresh thyme (or 1 teaspoon dried thyme)
- Kosher salt and black pepper, to taste
Instructions
- Pat chicken pieces completely dry with paper towels and season generously with salt and pepper. Lightly dredge in flour, shaking off excess.
- Heat vegetable oil in a large cast iron skillet or Dutch oven over medium-high heat. Sear chicken skin-side down for 5-6 minutes until golden brown, then flip and cook for 3-4 minutes. Remove chicken to a plate.
- Reduce heat to medium. Add sliced onions to the skillet and cook for 3-4 minutes, scraping up brown bits (fond) from the bottom. Add garlic and thyme, cooking for 1 minute until fragrant.
- Pour in white wine (or extra broth) to deglaze the pan and simmer for 2 minutes. Add chicken broth and Worcestershire sauce, bringing to a gentle simmer.
- Return chicken to the skillet, nestling into the onions. Liquid should come halfway up the chicken. Cover loosely and simmer for 15-20 minutes until internal temperature reaches 165°F, flipping halfway through.
- Remove chicken to a platter and tent with foil. Increase heat to medium-high and let gravy bubble for 2-3 minutes to reduce. Whisk in heavy cream and butter, simmering for 1 minute until thickened. Adjust seasoning.
- Pour gravy over chicken and serve immediately with mashed potatoes.
Notes
Do not crowd the pan; sear in batches if necessary to ensure crispy skin. Scrape the fond (brown bits) from the bottom of the pan for maximum flavor. Pat chicken dry thoroughly before seasoning to ensure crispiness. For a lighter version, use chicken breast and half-and-half. For gluten-free, use GF flour. For dairy-free, use coconut cream and olive oil. This recipe does not freeze well due to the dairy content.
- Prep Time: 15 minutes
- Cook Time: 35 minutes
- Category: Main Course
- Cuisine: American
Nutrition
- Serving Size: 1 piece of chicken w
- Calories: 480
- Sodium: 650
- Fat: 32
- Saturated Fat: 12
- Carbohydrates: 12
- Fiber: 1
- Protein: 35
Keywords: skillet chicken, chicken and gravy, weeknight dinner, dinner party recipe, one-pan meal, crispy chicken, easy dinner, comfort food