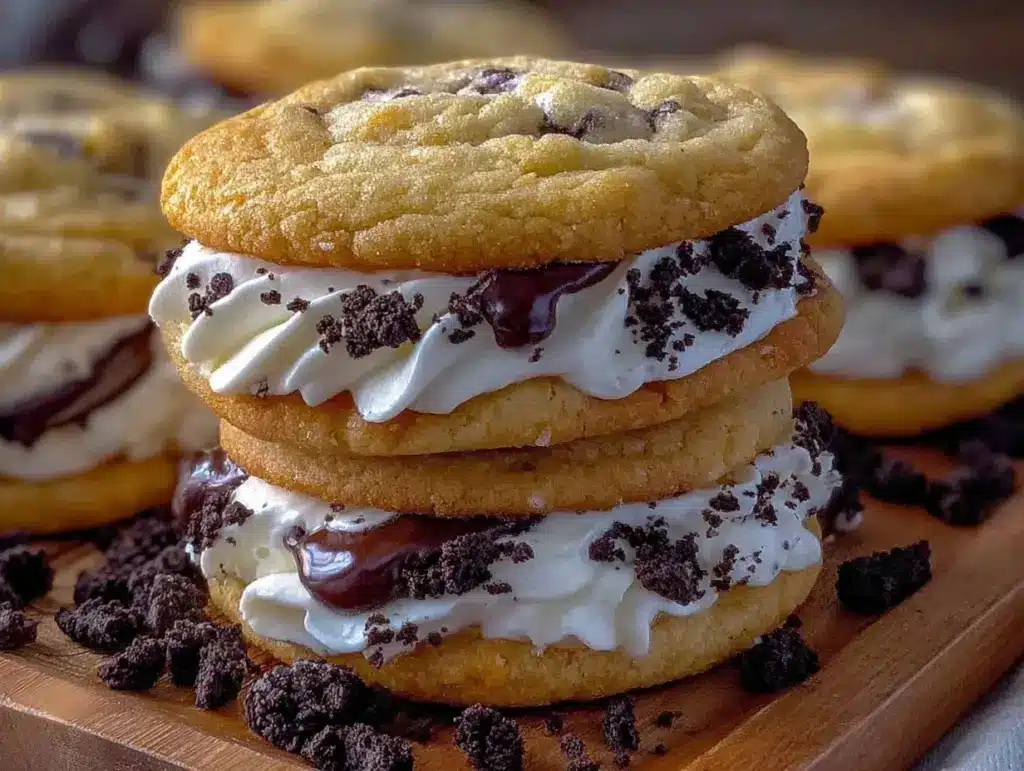
I have a confession to make. Last Saturday, I made a batch of these soft Oreo stuffed cookies, and I hid them in the back of the pantry behind the coffee. I told myself I was being smart—saving the best for a special moment. But when my neighbor stopped by for a quick chat, I offered them a plate. Within ten minutes, three neighbors had shown up, drawn by the smell of warm sugar and chocolate. We stood on the porch eating cookies that were still warm, talking about nothing in particular, and I realized something important.
These aren’t just cookies. They’re social lubricants. They are the culinary equivalent of a warm hug. The moment you break one open, that thick, cool Oreo center oozes out, mixing with the soft, cake-like cookie dough. It’s messy. It’s indulgent. It’s exactly what you need when life feels a little too complicated.
I’ve tested this recipe at least a dozen times. I’ve tried different brands of Oreos (obviously), different types of chocolate chips, and even different baking times. Some batches were too crisp; others were too doughy in the middle. But this version? This is the gold standard. It’s the one I make for my kids’ birthday parties, the one I bring to book clubs, and the one I bake on rainy Sundays when I just need something sweet to look at. If you’ve ever wanted to make a dessert that looks impressive but is actually ridiculously easy, you need to add this soft Oreo stuffed cookie recipe to your immediate to-do list.
Why You’ll Love This Recipe
There are about ten reasons I keep making these cookies, but let’s be real—you’re here because you want cookies that taste like the best part of a dessert plate. Here’s why this recipe has earned a permanent spot in my rotation:
The Gooey Center Factor — Seriously, the surprise of biting into a whole Oreo inside a soft cookie is unbeatable. It’s like a treasure hunt every time. I’ve seen grown adults get genuinely excited when they see the cookie break open. It’s pure joy.
Stupid Simple Assembly — You don’t need to be a pastry chef for this. I’ve walked my teenage daughter through the entire process while she did her homework. The hardest part is probably unwrapping the Oreos, and even that’s not that bad. It’s basically just rolling dough around a disk and dropping it on a tray.
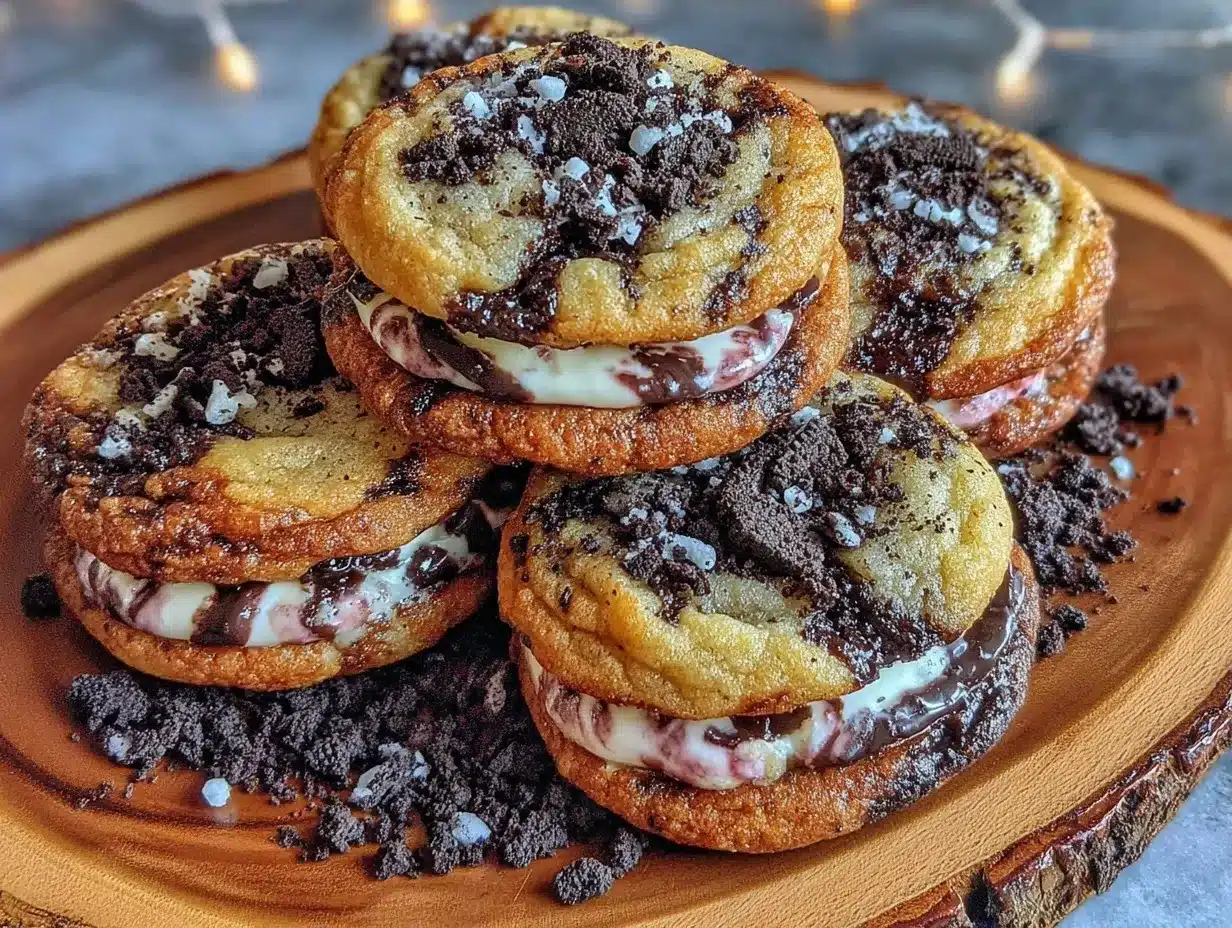
Perfect Texture — I spent years making cookies that were either too cakey or too crunchy. These hit that sweet spot: crisp edges that give way to a chewy, cake-like interior. The crushed cookie crumbs on top add a nice textural contrast that makes every bite interesting.
Crowd-Pleaser Status — I’ve served these to picky eaters, chocolate lovers, and people who claim they “don’t really like sweets.” Everyone comes back for seconds. It’s the kind of cookie that disappears fast, so don’t make them if you’re not ready to share. (Though, honestly, if you’re making them for just yourself, I won’t judge.)
Makes Amazing Leftovers — These actually stay soft for days if stored correctly. I usually make a double batch, and by day three, they’re still moist and delicious. I even like to microwave one for 10 seconds to make the center extra melty.
Budget-Friendly Indulgence — Oreos are cheap. Flour, sugar, butter, and chocolate chips are pantry staples. You can make a batch of these for under $10, which is way cheaper than buying a box of fancy bakery cookies. It’s a treat that doesn’t break the bank.
This is my go-to when I need to impress without stress. No complicated techniques, no weird ingredients, just reliable, delicious food that makes everyone happy. And if you need a drink to go with it, try my homemade vanilla sweet cream cold brew—the cold coffee cuts through the sweetness perfectly.
Ingredients You’ll Need
Here’s the best part: you probably have most of this already in your kitchen. The beauty of this recipe is how simple the ingredient list is, but the combination creates something truly special. I’m particular about three things here, and I’ll tell you exactly why.
Butter (1 cup / 226g, softened) — I use unsalted butter so I can control the salt. You want it softened to room temperature. If you microwave it, you’ll get greasy cookies. Let it sit out for an hour. Softened means it should indent when you press it, not melt when you touch it.
Sugar (1 cup / 200g granulated, 1 cup / 200g brown sugar) — The brown sugar is non-negotiable. It adds moisture and that chewy texture. White sugar gives you the crisp edges. I use a mix. Don’t skip the brown sugar, or they’ll be dry. Dark brown sugar is even better if you want a deeper molasses flavor.
Eggs (2 large, room temperature) — Room temp eggs incorporate better into the butter. Cold eggs can cause the butter to seize up. I take mine out of the fridge 30 minutes before I start. If I forget, I put them in a bowl of warm water for five minutes.
Vanilla Extract (2 teaspoons) — Use real vanilla, not imitation. It makes a huge difference in the flavor profile. I keep a bottle of Nielsen-Massey in my pantry because it’s potent and pure.
All-Purpose Flour (2 ½ cups / 315g) — Spoon and level, don’t scoop. Scooping packs the flour in and leads to dry cookies. I use Gold Medal flour, but any standard AP flour works.
Baking Soda (1 teaspoon) — This helps the cookies spread and brown. Make sure it’s fresh. If your baking soda is older than six months, it might not work as well. Test it by dropping a little in vinegar—if it fizzes, you’re good.
Salt (½ teaspoon) — Essential for balancing the sweetness. I use fine sea salt.
Oreo Cookies (24 cookies, whole) — The star of the show. I use regular Oreos, but double-stuff works too if you want an even bigger center. Just make sure they fit inside your dough balls.
Chocolate Chips (1 cup / 170g, semi-sweet or milk chocolate) — I use Ghirardelli semi-sweet. They melt beautifully. You can also use white chocolate chips if you prefer, but semi-sweet adds a nice contrast to the sweet cream filling.
Crushed Oreos (½ cup, for topping) — This is what gives them that bakery look. I crush them in a ziplock bag with a rolling pin. It’s therapeutic and fun.
Optional: Sea Salt Flakes — A sprinkle on top right after baking adds a gourmet touch and enhances the chocolate flavor.
I’m particular about the Oreos. Don’t use store-brand unless you have to. The cream filling in name-brand Oreos is thicker and holds up better inside the cookie. Also, buy the cookies fresh. Old Oreos get stale and don’t melt as nicely.
Equipment Needed
You don’t need fancy equipment for this. Here’s what I actually use:
Mixing Bowls — One large bowl for the wet ingredients, one medium for the dry. I use stainless steel because they’re durable and easy to clean. Glass works too.
Electric Mixer — A hand mixer or stand mixer is best. Creaming the butter and sugar by hand is possible, but it takes effort and arm strength. I use my KitchenAid because it’s consistent. If you don’t have one, a strong whisk and elbow grease will work.
Baking Sheets — I use two half-sheet pans. Light-colored aluminum sheets are best because they promote even baking. Dark pans can burn the bottoms. If you only have one pan, you’ll need to bake in batches.
Parchment Paper — Line your baking sheets with parchment. It prevents sticking and makes cleanup a breeze. I never bake directly on the metal anymore. It’s a game-changer.
Cooling Rack — Essential for cooling the cookies evenly. If you leave them on the hot pan, they’ll continue to cook and might get too crisp.
Ziplock Bags — For crushing the Oreos. Put them in the bag, seal it, and smash them with a rolling pin or meat mallet. It’s easier than using a food processor.
Ice Cream Scoop — This is my secret weapon. It ensures all your cookies are the same size, which means they bake evenly. I use a 2-tablespoon scoop for the dough.
Measuring Cups and Spoons — Standard stuff. Dollar store versions work fine, but make sure they’re accurate. I have a set of stainless steel spoons that have lasted me ten years.
Pastry Brush — Optional, but nice for brushing off excess flour if needed. Or just use your fingers.
Don’t have a stand mixer? No problem. Just be patient when creaming the butter and sugar. It should take about 3-4 minutes by hand to get it light and fluffy.
How to Make It: Step-by-Step
Alright, let’s make this! I’m walking you through exactly how I do it, including the little tricks I’ve picked up over the years.
Step 1: Prep Your Oven and Pans (5 minutes)
Preheat your oven to 350°F (175°C). Line two large baking sheets with parchment paper. This is crucial. If you skip the parchment, your cookies will stick, and you’ll be scraping them off like a detective. I also make sure my oven is fully preheated. An oven that’s not hot enough will spread the cookies too much.
Step 2: Cream the Butter and Sugars (3-4 minutes)
In a large bowl, beat the softened butter, granulated sugar, and brown sugar together until light and fluffy. This step takes time. I use my electric mixer on medium-high speed for about 3 minutes. The mixture should look pale and airy. If you rush this, your cookies will be dense. Take the time to get it right. It’s the foundation of the texture.
Step 3: Add Eggs and Vanilla (2 minutes)
Add the eggs one at a time, beating well after each addition. Scrape down the sides of the bowl with a spatula to make sure everything is incorporated. Add the vanilla extract. The mixture should be smooth and creamy. If it looks curdled, don’t worry—just keep mixing. It will come together.
Step 4: Mix in Dry Ingredients (2 minutes)
In a separate bowl, whisk together the flour, baking soda, and salt. Gradually add the dry ingredients to the wet ingredients, mixing on low speed. Stop as soon as the flour disappears. Overmixing develops gluten, which makes cookies tough. I mix until just combined. It might look a little dry, but that’s okay.
Step 5: Fold in Chocolate Chips (1 minute)
Stir in the chocolate chips by hand with a spatula. This gives you better control and ensures they’re evenly distributed without overmixing the dough. The dough will be thick and sticky. This is normal. If it’s too sticky to handle, chill it in the fridge for 15 minutes.
Step 6: Assemble the Cookies (10-15 minutes)
Take a portion of dough (about 2 tablespoons) and flatten it into a disc in your palm. Place one whole Oreo in the center. Carefully wrap the dough around the Oreo, sealing the edges completely. Roll it into a smooth ball. Make sure there are no cracks or gaps, or the Oreo will leak out during baking. Repeat with the remaining dough and Oreos.
Pro Tip: If the dough is too warm, it will be hard to seal. Keep the dough chilled. I often put the bowl back in the fridge while I’m assembling.
Step 7: Roll in Crushed Oreos (2 minutes)
Place the crushed Oreo crumbs in a shallow bowl. Gently roll each dough ball in the crumbs, coating it completely. This gives them that beautiful, textured look. Press the crumbs in slightly so they stick. If you’re feeling fancy, sprinkle a tiny bit of sea salt on top now.
Step 8: Bake (10-12 minutes)
Place the cookies on the prepared baking sheets, leaving about 2 inches between them. They will spread. Bake for 10-12 minutes. You want the edges to be set and slightly golden, but the centers should still look soft and puffy. They will continue to cook on the hot pan after you take them out.
Visual Cue: The cookies should look like they’re just starting to crack on top. If they look fully baked in the oven, they’ll be dry when they cool.
Step 9: Cool and Serve (15 minutes)
Let the cookies cool on the baking sheet for 5 minutes. Then transfer them to a wire rack to cool completely. This is the hardest part—waiting. But if you move them too soon, they’ll break. Once cooled, they’re ready to eat. Store in an airtight container.
Total Time: About 45 minutes (15 minutes prep, 10-12 minutes bake, 15 minutes cool)
Expert Tips & Tricks
Here’s everything I’ve learned from making these dozens of times. These tips will save you from my mistakes.
Keep the Dough Cold
Warm dough is the enemy of stuffed cookies. If the dough gets too soft, it won’t hold the Oreo. I usually chill the dough for 30 minutes before assembling. If your kitchen is warm, keep the bowl in the fridge while you work.
Seal Tight
Make sure you seal the dough around the Oreo completely. Any air pockets will expand in the oven and cause the cookie to burst. I press the edges firmly together and roll it gently to smooth out any seams.
Don’t Overbake
These cookies are meant to be soft and chewy. Take them out when they look slightly underdone. They will firm up as they cool. If you bake them until they look fully set, they’ll be crisp and dry.
Use a Cookie Scoop
Consistency is key. Using a cookie scoop ensures all cookies are the same size, which means they bake evenly. I use a 2-tablespoon scoop for the dough and a 1-tablespoon scoop for the crushed crumbs.
Double Stuff for Extra Creaminess
If you want an even creamier center, use double-stuff Oreos. The extra cream adds to the gooey factor. Just make sure the dough is thick enough to contain it.
Chill Before Baking
After assembling, I put the baking sheet in the fridge for 10 minutes before baking. This helps the cookies hold their shape and prevents excessive spreading.
Common Mistakes (and how to avoid them):
Mistake: Cookies spread too much
Fix: Your butter was too warm, or your oven wasn’t preheated enough. Make sure your butter is softened, not melted. Preheat your oven for a full 15 minutes.
Mistake: Oreos leaked out
Fix: The dough wasn’t sealed properly. Press the edges firmly and check for cracks before baking.
Mistake: Cookies are too dry
Fix: You overbaked them. Take them out when the edges are just set. They will continue to cook on the pan.
Pro Tricks I’ve Learned:
For Extra Richness
Add a tablespoon of cocoa powder to the dough. It turns the cookie into a chocolate cookie, which pairs beautifully with the Oreo center.
For Better Texture
Chill the assembled cookies for 15 minutes before baking. This helps them keep their round shape.
For Party Prep
You can assemble these ahead of time and freeze them. Bake directly from frozen, adding 1-2 minutes to the baking time.
Variations & Substitutions
Once you’ve nailed the basic version, here’s how you can mix it up. I’ve tried all of these.
Chocolate Chip Oreo Cookies
Add ½ cup of mini chocolate chips to the dough. It adds extra chocolatey goodness. This is my favorite variation.
Peanut Butter Stuffed
Use peanut butter Oreos instead of regular ones. The salty-sweet combo is amazing. I also add a swirl of peanut butter into the dough.
Mint Oreo Cookies
Use mint Oreos. The mint flavor is subtle but refreshing. Great for holidays.
Double Chocolate
Replace ¼ cup of flour with cocoa powder. Use chocolate Oreos if you can find them. For a deep chocolate experience, pair these with a dark chocolate espresso tart for a serious chocolate lover’s feast.
Vanilla Bean
Add 1 teaspoon of vanilla bean paste to the dough. It adds tiny specks of vanilla and a more intense flavor.
Dietary Modifications:
Gluten-Free
Use a 1:1 gluten-free flour blend. Everything else is naturally gluten-free. I’ve used Bob’s Red Mill blend, and it works well.
Dairy-Free
Replace butter with dairy-free butter alternative. Use dairy-free Oreos (like Trader Joe’s or store brand). The texture might be slightly different, but it’s still delicious.
Vegan
Replace butter with vegan butter. Use vegan Oreos (check the label, some are accidentally vegan). Replace eggs with flax eggs (1 tablespoon ground flax + 3 tablespoons water per egg). The cookies will be denser, but still tasty.
Other Add-ins:
White chocolate chips
Butterscotch chips
Crushed pretzels (for salty-sweet)
Chopped nuts (walnuts or pecans)
Serving & Storage
How to Serve:
I usually serve these warm, right out of the oven. They’re best enjoyed with a cold glass of milk. But here are other ways I’ve enjoyed them:
Side Dishes:
– A scoop of vanilla ice cream
– Whipped cream
– A drizzle of caramel sauce
– A glass of frozen strawberry lemonade slushie for a summer party vibe
Toppings Bar:
When I have guests, I put out: extra crushed Oreos, sea salt flakes, caramel drizzle, and white chocolate chips. Everyone customizes their cookie.
Storage Instructions:
Refrigerator:
Store in an airtight container for up to 5 days. They stay soft for days. If they start to dry out, add a slice of bread to the container. The bread will release moisture and keep the cookies soft.
Freezing:
These freeze beautifully. You can freeze the baked cookies for up to 3 months. Or freeze the assembled dough balls. To bake from frozen, add 2-3 minutes to the baking time. Thaw at room temperature if baking baked cookies.
Reheating:
Microwave for 10-15 seconds to warm them up. The center will be melty and gooey. This is my favorite way to eat leftovers.
Pro tip: If you’re making these for a party, assemble them the night before and bake them the morning of. They’ll be fresh and warm when your guests arrive.
Nutrition Information
I’m not a nutritionist, but here’s the breakdown if you’re tracking. Keep in mind, these are indulgent cookies, so enjoy them in moderation.
Per Cookie (based on 24 cookies):
– Calories: 280
– Protein: 3g
– Carbs: 38g
– Fiber: 1g
– Sugar: 24g
– Fat: 14g
– Saturated Fat: 8g
– Cholesterol: 35mg
– Sodium: 180mg
What’s Good:
– Satisfies a sweet tooth
– Easy to share
– Fun to make with kids
What to Know:
– High in sugar and calories
– Contains gluten and dairy
– Not suitable for low-sugar diets
My Take:
Look, these are cookies. They’re supposed to be sweet and rich. They’re not a health food. But they’re made with real ingredients, and they’re better than anything you’ll buy at a store. When I make them, I allow myself two cookies. Usually, I only need one because they’re so rich and satisfying.
Final Thoughts
So that’s my go-to soft Oreo stuffed cookie recipe! I’ve probably talked your ear off at this point, but when you make a recipe this often, you have a lot to say about it. These cookies have saved my social life more times than I can count. They’re my answer to “I need to bring something to the party” or “I want to treat myself to something special.” My kids are happy, my friends are happy, and I’m happy because I’m not stressed about making something complicated.
Make it yours! Try different variations, swap in your favorite chocolate chips, or add a sprinkle of sea salt. The best recipes are the ones you adapt to your tastes. If you make these, drop a comment and let me know what you think! I love hearing how recipes turn out in your kitchen. And if something doesn’t work, tell me that too—I’m here to help troubleshoot.
Happy baking! And I hope your kitchen smells half as good as mine does right now.
Frequently Asked Questions
Q: Can I use homemade Oreos instead of store-bought?
A: You can, but it’s a lot of work. Homemade Oreos might not have the same cream consistency, so they might not melt as nicely. I recommend sticking with store-bought for consistency. If you do use homemade, make sure the cream is thick enough to hold the shape.
Q: Why did my cookies spread too much?
A: This usually happens if the butter was too warm or the oven wasn’t preheated enough. Make sure your butter is softened, not melted. Also, preheat your oven for a full 15 minutes. If the dough is too warm, chill it before baking.
Q: Can I make these ahead of time?
A: Yes! You can assemble the cookies and freeze them on a baking sheet. Once frozen, transfer them to a ziplock bag. Bake directly from frozen, adding 1-2 minutes to the baking time. You can also bake them and freeze the baked cookies for up to 3 months.
Q: Why did my Oreos leak out?
A: The dough wasn’t sealed properly. Make sure you press the edges firmly together and check for cracks. If the dough is too warm, it will be harder to seal. Chill the dough before assembling.
Q: Can I use double-stuff Oreos?
A: Absolutely! Double-stuff Oreos will give you an even creamier center. Just make sure the dough is thick enough to contain the extra cream. You might need to use a slightly larger portion of dough.
Q: How do I store these cookies?
A: Store in an airtight container at room temperature for up to 5 days. If they start to dry out, add a slice of bread to the container. You can also freeze them for up to 3 months.
Q: Can I double the recipe?
A: Yes! Double everything and use two baking sheets. The cooking times stay the same. I do this when I’m feeding a crowd. Just make sure your oven has enough space for both sheets.
Pin This Recipe!


Soft Oreo Stuffed Cookies: Best Indulgent Dessert Recipe
- Total Time: 45 minutes
- Yield: 24 cookies 1x
Description
Soft, chewy cookies stuffed with a whole Oreo cookie, featuring crisp edges and a gooey center. These easy-to-make treats are perfect for parties, holidays, or satisfying a sweet craving.
Ingredients
- 1 cup (226g) unsalted butter, softened to room temperature
- 1 cup (200g) granulated sugar
- 1 cup (200g) brown sugar
- 2 large eggs, room temperature
- 2 teaspoons vanilla extract
- 2 ½ cups (315g) all-purpose flour
- 1 teaspoon baking soda
- ½ teaspoon fine sea salt
- 24 whole Oreo cookies
- 1 cup (170g) semi-sweet or milk chocolate chips
- ½ cup crushed Oreos (for topping)
- Optional: Sea salt flakes for garnish
Instructions
- Preheat oven to 350°F (175°C). Line two large baking sheets with parchment paper.
- In a large bowl, beat the softened butter, granulated sugar, and brown sugar together until light and fluffy (about 3 minutes).
- Add eggs one at a time, beating well after each addition. Scrape down the sides of the bowl. Add vanilla extract and mix until smooth.
- In a separate bowl, whisk together the flour, baking soda, and salt.
- Gradually add the dry ingredients to the wet ingredients, mixing on low speed until just combined. Do not overmix.
- Stir in the chocolate chips by hand with a spatula.
- Take a portion of dough (about 2 tablespoons) and flatten it into a disc. Place one whole Oreo in the center. Wrap the dough around the Oreo, sealing edges completely, and roll into a smooth ball.
- Roll each dough ball in the crushed Oreo crumbs to coat completely. Optionally sprinkle with sea salt flakes.
- Place cookies on prepared baking sheets, leaving 2 inches between them. Bake for 10-12 minutes until edges are set and slightly golden but centers look soft.
- Let cookies cool on the baking sheet for 5 minutes, then transfer to a wire rack to cool completely.
Notes
Keep the dough cold to prevent spreading and ensure the Oreo stays sealed inside. Do not overbake; the cookies will continue to cook on the hot pan. For best results, use name-brand Oreos with thick cream filling. Store in an airtight container for up to 5 days.
- Prep Time: 15 minutes
- Cook Time: 10-12 minutes
- Category: Dessert
- Cuisine: American
Nutrition
- Serving Size: 1 cookie
- Calories: 280
- Sugar: 24
- Sodium: 180
- Fat: 14
- Saturated Fat: 8
- Carbohydrates: 38
- Fiber: 1
- Protein: 3
Keywords: Oreo cookies, stuffed cookies, soft cookies, chocolate chip cookies, dessert recipe, easy baking, party treats