Last September, just as the chaos of back-to-school season hit full throttle, I found myself scrambling every evening to pack lunches and plan quick dinners. My youngest was suddenly done with peanut butter sandwiches, and I was desperate for something that was both kid-approved and fast to make. Enter the turkey and cheese pinwheel—a simple, no-fuss lunchbox hero that saved my sanity more times than I can count. I’ve tweaked this recipe through countless busy weeknights, and it never disappoints. It’s the perfect balance of savory turkey, melty cheese, and soft tortilla wrapped in a neat little package that’s easy to eat on the go.
What makes this back-to-school turkey and cheese pinwheel lunchbox idea stand out? It’s quick, customizable, and uses ingredients you probably already have. Plus, it’s a breeze to throw together even when you’re juggling homework, extracurriculars, and the endless “what’s for dinner?” questions. I’ve tested this turkey and cheese pinwheel recipe more than 15 times this school year, and it’s become my secret weapon for stress-free lunches and a quick after-school snack. Ready to add this to your weeknight routine?
Why You’ll Love This Recipe
This back-to-school turkey and cheese pinwheel recipe has completely changed how I approach lunchpacking and quick dinners.
- Super Fast to Make — From start to finish, these pinwheels take less than 15 minutes. I’ve whipped them up while simultaneously helping with math homework.
- Kid-Approved Every Time — My picky eater not only loves the classic turkey and cheese combo but asks for these instead of the usual sandwiches. That’s a win in my book.
- Customizable — Whether you want to swap turkey for ham, add veggies, or make it gluten-free, this recipe adapts effortlessly.
- Perfect for Busy Weeknights — When dinner feels like a marathon, these pinwheels double as a quick snack or light meal that everyone can grab and go.
- Lunchbox Friendly — They stay fresh, don’t get soggy, and fit perfectly in any lunch container or snack bag.
This recipe has become my go-to when I’m juggling a million things and just need something reliable that kids will actually eat without a fuss. Plus, it keeps the lunchbox exciting without me having to reinvent the wheel every day.
Ingredients You’ll Need
Here’s the best part: you probably have most of these ingredients already, and they’re pantry and fridge staples in my kitchen.
- Flour tortillas (8-inch, 4 tortillas) — Soft, pliable tortillas work best to roll tightly without cracking. I usually grab the whole wheat kind for a little extra fiber.
- Sliced deli turkey (8 ounces / about 225g) — I prefer oven-roasted turkey breast for flavor and tenderness. If you like, you can swap for ham or roast beef.
- Cheddar cheese (4 slices / about 4 ounces / 115g) — Sharp cheddar melts beautifully and adds a nice tang. You could also use Swiss or mozzarella depending on your preference.
- Mayonnaise (2 tablespoons) — Adds moisture and a creamy texture. Greek yogurt is a good substitute if you want it lighter.
- Dijon mustard (1 teaspoon) — Just a touch for a subtle kick. Feel free to leave it out if your kids aren’t fans.
- Fresh spinach leaves (1 cup / about 30g) — Optional but adds freshness and a little punch of green. I sneak these in all the time.
- Salt and pepper — A pinch to season the mayo mixture.
- Optional add-ins: thinly sliced bell peppers, shredded carrots, or cucumber ribbons for crunch.
Quick note: If you’re making these for a gluten-free lunchbox, swap the tortillas for gluten-free wraps. I’ve tried gluten-free tortillas and they hold up well without falling apart.
Equipment Needed
You don’t need fancy gadgets here—just everyday tools you probably already own.
- Cutting board and sharp knife — For slicing any veggies and trimming cheese if needed.
- Small bowl — To mix the mayo, mustard, salt, and pepper.
- Spreader or butter knife — For evenly spreading the mayo mixture on tortillas.
- Plastic wrap or parchment paper — To wrap the pinwheels tightly before slicing.
- Sharp serrated knife — This helps cut the pinwheels cleanly without squishing them.
Honestly, I sometimes skip the plastic wrap if we’re eating these right away, but it really helps keep them neat in the lunchbox or fridge.
How to Make It: Step-by-Step

Alright, let’s make this! I’m walking you through exactly how I do it, including the little tricks I’ve picked up.
Step 1: Mix the Spread (2 minutes)
In a small bowl, combine the mayonnaise, Dijon mustard, a pinch of salt, and pepper. Stir until smooth. This little mix adds creaminess and a subtle zing that keeps the pinwheels from tasting dry.
Step 2: Prep the Tortillas (1 minute)
Lay out one flour tortilla flat on your cutting board. Spread about 1 tablespoon of the mayo mixture evenly across the entire surface, all the way to the edges. Don’t be shy here; this keeps every bite flavorful.
Step 3: Layer the Fillings (2 minutes)
Place two slices of turkey evenly over the mayo. Then lay one slice of cheddar cheese on top of the turkey. If you’re adding veggies like spinach leaves or bell pepper strips, scatter them over the cheese.
Step 4: Roll It Up (1 minute)
Starting from one edge, roll the tortilla tightly into a log shape. The tighter the roll, the better it holds together once sliced. Wrap the rolled tortilla snugly in plastic wrap or parchment paper. Repeat with the remaining tortillas.
Step 5: Chill and Slice (5 minutes)
Pop the wrapped rolls into the fridge for at least 10 minutes if you have time—that makes slicing easier and helps everything set. When ready, unwrap and use a sharp serrated knife to cut each roll into 1-inch pinwheels. For a 8-inch tortilla, you’ll get about 8 pinwheels each.
Step 6: Pack or Serve
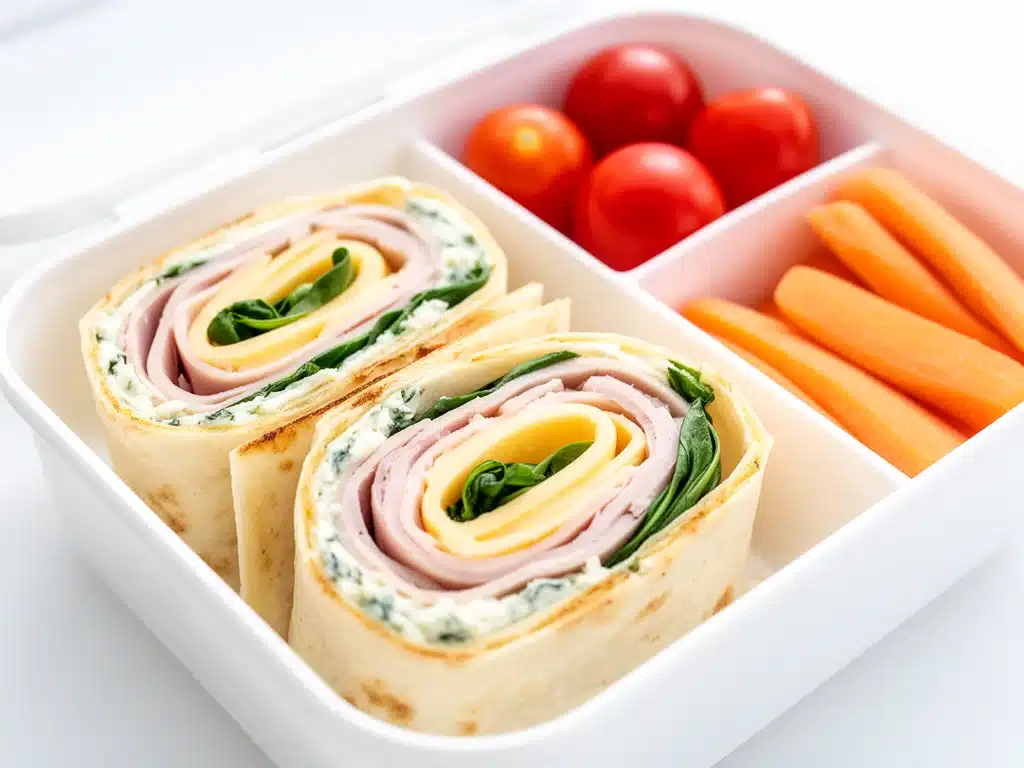
Arrange the pinwheels in your lunchbox or on a plate. They’re perfect finger food for little hands or a quick snack after school. I love pairing them with fresh fruit or crunchy veggie sticks for a balanced meal.
Expert Tips & Tricks
- Keep the roll tight: If you roll too loosely, the pinwheels fall apart. I often press firmly as I roll to avoid this.
- Chill before slicing: I learned this the hard way after trying to cut room temperature rolls. The slices get messy and the filling squeezes out. A quick chill makes all the difference.
- Customize your spread: Swap mayo for cream cheese, pesto, or hummus for different flavors. My kids love the cream cheese and chive combo.
- Try different cheeses: Pepper jack adds a little spice, while mozzarella keeps it mellow.
- Make ahead for busy mornings: Prepare pinwheels the night before and store them in the fridge. Just pack them straight into lunchboxes in the morning.
Quick note: If you’re curious about more easy lunch ideas that travel well, I’ve had great success with crispy garlic chicken recipes that double as tasty cold leftovers too.
Variations & Substitutions
Once you’ve nailed the classic turkey and cheese pinwheels, here’s how you can mix it up:
- Ham and Swiss: Swap turkey for honey ham and cheddar for Swiss cheese. Add a smear of honey mustard for sweetness.
- Veggie Pinwheels: Skip the meat and load up on sliced cucumbers, shredded carrots, avocado, and spinach with a cream cheese spread.
- Spicy Kick: Add thin slices of pickled jalapeños or a sprinkle of chili flakes to the mayo mixture for a little heat.
- Gluten-Free: Use gluten-free tortillas to keep things safe and tasty.
- Protein Boost: Add a hard-boiled egg, sliced thin, inside the roll for extra protein.
For a fun twist on weeknight dinners, you could even warm these pinwheels briefly in a skillet for a melty, toasty treat—my family loves that version on chilly nights.
Serving & Storage
How to Serve: These pinwheels are versatile. I often pack them with carrot sticks, apple slices, and a small container of ranch or hummus for dipping. They’re also great served with a simple green salad or soup for a light dinner.
Storage Instructions:
- Refrigerator: Store the wrapped, uncut rolls in the fridge for up to 3 days. Once sliced, keep pinwheels in an airtight container for 1-2 days.
- Reheating: These are best enjoyed cold or at room temperature, but if you like them warm, a quick 20-second zap in the microwave works.
- Freezing: I don’t recommend freezing pinwheels; the tortillas get soggy and the texture suffers.
Meal prep tip: Make a batch on Sunday night for the whole week. It saves so much time during those hectic weekday mornings.
Nutrition Information
I’m not a nutritionist, but here’s a rough breakdown per serving (assuming 4 servings):
| Calories | 320 |
|---|---|
| Protein | 18g |
| Carbohydrates | 28g |
| Fiber | 2g |
| Fat | 14g |
| Saturated Fat | 6g |
| Sodium | 620mg |
What’s good here? Turkey and cheese provide a solid protein boost, and the spinach adds a touch of vitamins and minerals. The fat mostly comes from the cheese and mayo, so if you want it lighter, swap mayo for Greek yogurt and use reduced-fat cheese.
Honestly, this is a balanced, kid-friendly lunch that’s way better than processed snacks or fast food. Plus, you control the ingredients, so you know exactly what’s going into your kid’s lunchbox.
Final Thoughts
So that’s my easy, back-to-school turkey and cheese pinwheel recipe—the lunchbox lifesaver for busy weeknights and hectic mornings. I know I’ve probably talked your ear off, but when a recipe makes your life this much easier, there’s a lot to say.
This has been my answer to those frantic afternoons when I need a quick, crowd-pleasing lunch or snack that everyone actually eats without complaint. My kids love them, my husband sneaks a few for himself, and I love how little time it takes. Plus, they’re endlessly adaptable to whatever you have in the fridge.
Make it yours! Play with different cheeses, add your favorite veggies, or swap the turkey for something new. The best recipes are the ones you tweak to fit your family’s tastes.
If you give this a try, drop a comment below and tell me how it goes! And if you hit any snags, I’m here to help you troubleshoot. Happy lunch packing—and here’s to less stress and more delicious meals in your busy week.
Frequently Asked Questions
Q: Can I use a different kind of wrap instead of flour tortillas?
A: Absolutely! Whole wheat, spinach, or sun-dried tomato wraps add great flavor. Just make sure whatever you use is flexible enough to roll tightly without cracking. Gluten-free wraps also work well if you need that option.
Q: How long do pinwheels stay fresh in the fridge?
A: Wrapped tightly, the uncut rolled pinwheels last up to 3 days refrigerated. Once sliced, they’re best eaten within 1-2 days for optimal freshness and texture.
Q: Can I make these vegan or dairy-free?
A: Yes! Use dairy-free cheese slices and swap mayo for vegan mayo or hummus. Replace turkey with roasted veggies or plant-based deli slices. The rolling and slicing method stays the same.
Q: Do pinwheels freeze well?
A: I don’t recommend freezing these. The tortillas tend to get soggy, and the texture of the cheese and mayo changes once thawed. Better to make fresh or store in the fridge.
Q: Can I add other proteins to the pinwheels?
A: Definitely! Thinly sliced chicken breast, ham, or even cooked bacon crumbles work great. Just make sure the meat is sliced thin so the rolls stay neat.
Q: How do I keep the pinwheels from drying out in the lunchbox?
A: Wrapping them tightly in plastic wrap and packing them in an airtight container does the trick. Adding a small container with a little dip (like ranch or hummus) helps keep things moist too.
Q: What’s the best way to slice the pinwheels cleanly?
A: Use a sharp serrated knife and slice gently with a sawing motion. Cutting while the rolls are chilled makes it easier and prevents squishing.
Pin This Recipe!


Back-to-School Turkey and Cheese Pinwheel Recipe
- Total Time: 15 minutes
- Yield: 4 servings 1x
Description
A quick, kid-approved, and customizable turkey and cheese pinwheel recipe perfect for busy weeknights and lunchboxes. These pinwheels are easy to make, portable, and delicious.
Ingredients
- 4 flour tortillas (8-inch, whole wheat preferred)
- 8 ounces sliced deli turkey (oven-roasted turkey breast preferred)
- 4 slices cheddar cheese (about 4 ounces)
- 2 tablespoons mayonnaise
- 1 teaspoon Dijon mustard
- 1 cup fresh spinach leaves (about 30g, optional)
- Salt and pepper, to taste
- Optional add-ins: thinly sliced bell peppers, shredded carrots, cucumber ribbons
Instructions
- In a small bowl, combine mayonnaise, Dijon mustard, salt, and pepper. Stir until smooth.
- Lay one flour tortilla flat and spread about 1 tablespoon of the mayo mixture evenly across the entire surface.
- Place two slices of turkey evenly over the mayo, then lay one slice of cheddar cheese on top. Add optional veggies like spinach or bell pepper strips if desired.
- Roll the tortilla tightly into a log shape starting from one edge. Wrap the rolled tortilla snugly in plastic wrap or parchment paper. Repeat with remaining tortillas.
- Chill the wrapped rolls in the fridge for at least 10 minutes to make slicing easier.
- Unwrap and use a sharp serrated knife to cut each roll into 1-inch pinwheels (about 8 pinwheels per tortilla).
- Arrange pinwheels in a lunchbox or on a plate and serve.
Notes
Keep the roll tight to prevent pinwheels from falling apart. Chill before slicing for cleaner cuts. Customize the spread with cream cheese, pesto, or hummus. Prepare ahead and store in the fridge for up to 3 days. Avoid freezing to prevent soggy tortillas.
- Prep Time: 8 minutes
- Cook Time: 0 minutes
- Category: Lunch, Snack
- Cuisine: American
Nutrition
- Serving Size: About 8 pinwheels pe
- Calories: 320
- Sodium: 620
- Fat: 14
- Saturated Fat: 6
- Carbohydrates: 28
- Fiber: 2
- Protein: 18
Keywords: turkey pinwheels, cheese pinwheels, lunchbox ideas, quick snacks, kid-friendly recipes, easy lunch, back-to-school recipes


