Let’s be honest for a second. I used to think Halloween baking was just an excuse to buy a bag of orange food coloring and pretend it was a culinary event. I’d whip up some generic cookies, call it a day, and watch my kids politely chew on them while eyeing the actual candy bowl in the corner. That was until last year.
Last October, my seven-year-old looked at me with those wide, hopeful eyes and said, “Mom, can you make the spooky ghosts again?” It hit me like a ton of bricks. They didn’t want the store-bought stuff. They wanted *my* version. And they wanted it to be scary-cute, not just “yucky.”
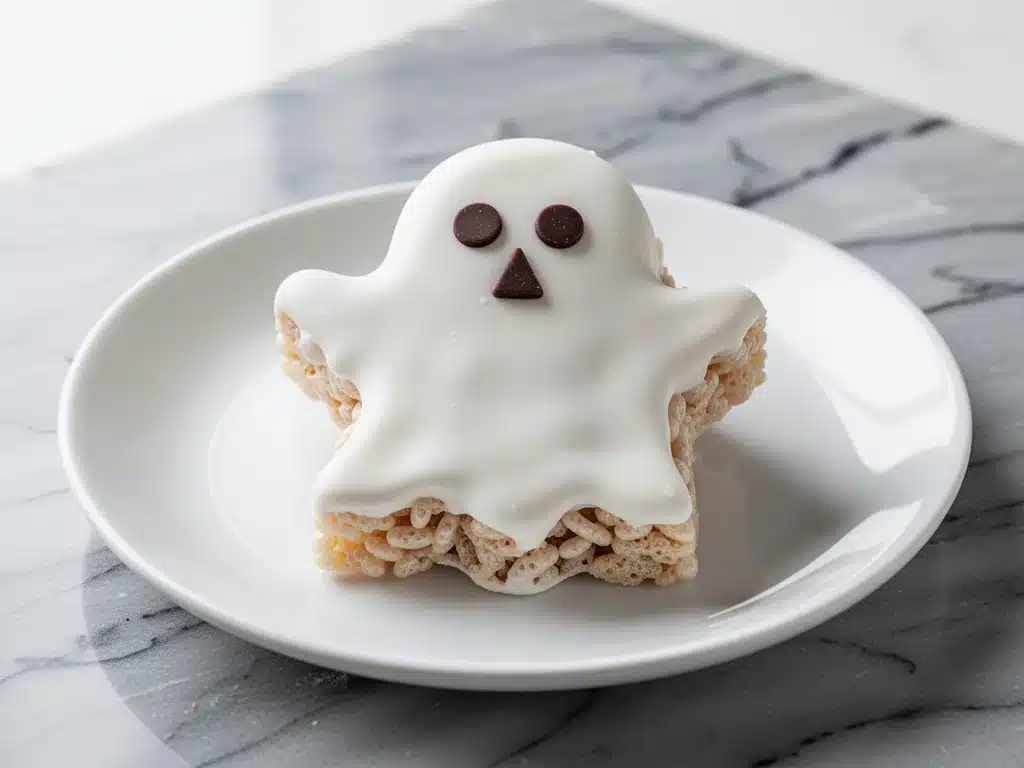
So I got to work. I wanted something that felt elevated—like something you’d see in a high-end bakery window—but was stupid simple enough to make with a seven-year-old helper. The result? Halloween Marshmallow Ghost Rice Krispie Treats with Brown Butter. These aren’t your average gray, sticky squares. They’re golden, nutty, impossibly chewy, and shaped into adorable little ghosts that actually look like they belong in a haunted house.
I’ve tested this recipe about a dozen times now. I’ve tried different butters, different marshmallow brands, and even messed up the shaping process more times than I care to admit (RIP to a few lopsided, sad-looking spirits). But this version? It’s the one. The brown butter adds this deep, toasty flavor that completely changes the game, making it taste less like a snack and more like a dessert. It’s better than any takeout dessert I’ve ever ordered, and it costs less than $10 to make.
If you’re looking for a Halloween activity that doesn’t involve a fire hazard or a trip to the emergency room, this is it. Plus, the smell of brown butter filling your house is honestly better than any candle you could buy. Let me walk you through exactly how to make these spooky treats without losing your mind.
Why You’ll Love These Ghost Rice Krispie Treats
There are a million reasons to make these, but I’ll stick to the ones that actually matter to your daily life.
- It’s the Flavor Upgrade You Didn’t Know You Needed — Regular Rice Krispie treats taste like sugar and air. These taste like toasted nuts and caramel. The brown butter step is non-negotiable. It adds this complex, rich depth that makes people ask, “Wait, what is *in* these?” Spoiler: Just butter, marshmallows, and cereal.
- Zero Stress Shaping — I used to struggle with getting the treats to hold their shape. The trick? Wetting your hands and working quickly while they’re warm. Once you get the hang of it, you can make a ghost in under 30 seconds. My kids can do it. You can definitely do it.
- Make-Ahead Friendly — These actually taste better the next day. The flavors meld together, and they hold their shape perfectly in the fridge. I make them on Sunday for Halloween night, and they stay fresh and chewy all week long.
- Kid-Approved Chaos — This is the perfect project for little hands. No baking required, no sharp knives (mostly), and lots of marshmallow stretching. It’s less stressful than making churro cheesecake bars, which is saying something.
- Looks Fancy, Costs Pennies — You can buy these at a fancy bakery for $5 a piece. Here? You’re making a batch for under $4. It’s the ultimate budget hack that still looks impressive on your dessert table.
Real talk? These have replaced my go-to Halloween cookies. They’re easier, tastier, and honestly, the kids prefer them because they’re chewy and fun to eat. If you’re tired of dry gingerbread men or overly spicy pumpkin cookies, give these a shot. You won’t be disappointed.
Ingredients You’ll Need
Here’s the best part: you probably have most of this already. This isn’t a recipe that requires a trip to three different specialty stores. It’s pantry staples with one special technique (the brown butter).
For the Base
Unsalted Butter (6 tablespoons / 85g) — This is where the magic happens. I use high-quality unsalted butter because you want to control the salt level. Salted butter can make the final taste weirdly bitter once you brown it. I like to use Kerrygold or Plugra if I can find them, but any good European-style butter works.
Mini Marshmallows (10 oz / 280g) — Yes, mini marshmallows. Please, I beg you, do not use jumbo marshmallows. Mini marshmallows melt evenly and quickly. Jumbo ones leave you with crunchy centers and burnt edges. This is a common mistake I made in my first few tries. Save yourself the frustration.
Rice Krispies Cereal (6 cups / 210g) — Standard box of Kellogg’s Rice Krispies. Do not substitute with puffed rice or puffed wheat unless you want a completely different texture. You need that crisp, airy crunch to contrast with the chewy marshmallow. If you’re looking for a gluten-free option, look for certified GF rice cereal, but the texture will be slightly different.
For the Decor (Optional but Recommended)
White Chocolate Chips (½ cup / 85g) — For the ghost faces. You can use white chocolate melts or regular chips. Regular chips work fine, but melts are easier to temper. I usually just melt them in the microwave in 15-second bursts.
Black Food Gel or Gel Pen — For the eyes and mouth. Liquid food coloring can make the chocolate too thin, so a gel pen or thick gel is better for precision. I love using a black gel pen for the eyes because it’s precise and doesn’t run.
Orange Food Coloring (Optional) — If you want to make pumpkin ghosts, you can tint the marshmallow mixture slightly orange before shaping. I usually skip this because the white ghosts are classic, but it’s a fun option for variety.
Tools You’ll Need
Large Saucepan — I use a 3-quart saucepan. It needs to be big enough to hold the marshmallows and butter without overflowing when you add the cereal. A non-stick pan is helpful here because brown butter can stick if you’re not careful.
Wooden Spoon or Silicone Spatula — For stirring the butter and folding in the cereal. Silicone is better because it won’t scratch your pan and it handles the heat well.
Parchment Paper — Line your workspace. Marshmallow is sticky. Like, “stuck-to-your-clothes-for-days” sticky. Parchment paper saves your counter and makes cleanup a breeze.
Spritz Bottle with Water — This is my secret weapon. Fill a small spray bottle with water. Spray your hands lightly before shaping the ghosts. It prevents the marshmallow from sticking to your skin. Trust me on this one.
How to Make It: Step-by-Step
Alright, let’s make these spooky ghosts! I’m walking you through exactly how I do it, including the little tricks I’ve picked up over the years.
Step 1: Brown the Butter (5 minutes)
First, let’s tackle the brown butter. This is the step that takes this from “kids’ snack” to “adult dessert.” Cut your butter into cubes and melt it in a light-colored saucepan over medium heat. The light pan is crucial because you need to see the color change.
Stir constantly. The butter will foam up, then settle down. Soon, you’ll see little brown bits forming at the bottom and the butter will smell nutty, like toasted hazelnuts. This usually takes 3-5 minutes. Don’t walk away! It goes from perfect to burnt in seconds. Once it smells amazing and looks like amber-colored tea, take it off the heat immediately.
Step 2: Melt the Marshmallows (2 minutes)
Add the mini marshmallows to the hot brown butter. Stir gently. The heat from the butter will melt the marshmallows. If they’re not melting fast enough, put the pan back on the lowest heat for 30 seconds at a time. Do not overheat! You want smooth, glossy marshmallow, not a burnt mess.
Once smooth, remove from heat. If you’re adding orange food coloring, do it now. Stir it in until evenly distributed.
Step 3: Fold in the Cereal (2 minutes)
Pour in the Rice Krispies. Use your spatula to fold them in. You want every piece coated. This happens fast, so work quickly before the mixture starts to set. If it gets too stiff to stir, put it back on low heat for 10 seconds. But be careful not to melt the cereal!
Step 4: Shape the Ghosts (10 minutes)
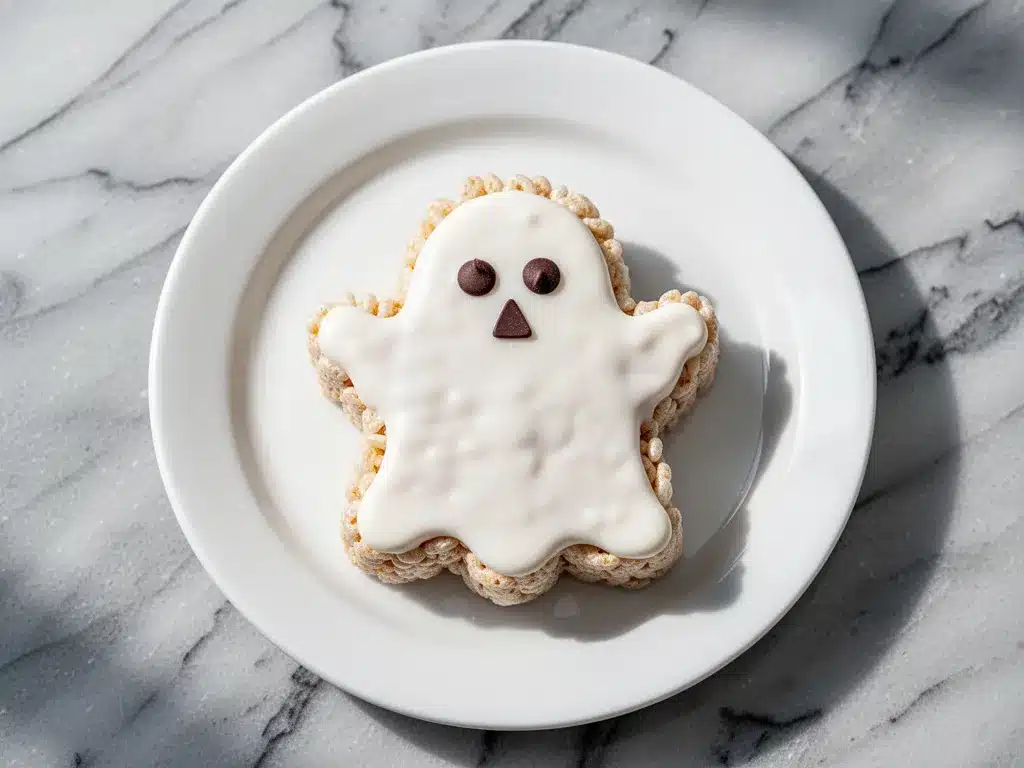
This is the fun part. Spray your hands with water. Take a golf-ball-sized piece of the mixture. Roll it into a ball, then gently press one side to flatten it slightly. Use your fingers to pull the bottom into a jagged, wavy shape—like the bottom of a sheet or a ghost’s dress.
Don’t worry about making them perfect. The charm is in the imperfection. Place them on a parchment-lined tray. If they start to stick to your hands, spray again. Work quickly while the mixture is warm and pliable. If it cools down and gets too hard, you can warm it up again in the microwave for 10 seconds.
Step 5: Add the Faces (5 minutes)
Melt the white chocolate chips in the microwave in 15-second intervals, stirring in between. Once smooth, put it in a small piping bag or a ziplock bag with the corner snipped off.
Pipe two dots for eyes and a small “w” or smile for the mouth. If you’re using a black gel pen, you can draw the face directly on the white chocolate. Let them set for 10-15 minutes at room temperature. They’ll harden up quickly.
Expert Tips & Tricks
Here’s everything I’ve learned from making these dozens of times. These tips will save you from my mistakes.
Don’t Skip the Brown Butter
I know it’s an extra step, but it’s worth it. The nutty flavor pairs so well with the sweet marshmallow. It’s like the difference between regular cake and a fancy bakery cake. If you’re in a rush, you can use regular melted butter, but you’re missing out on the best part.
Keep Your Hands Wet
Marshmallow is sticky. Like, really sticky. Keep a spray bottle of water nearby and mist your hands every few ghosts. It makes shaping so much easier. You don’t want to end up with marshmallow all over your kitchen counter.
Work Quickly
The mixture starts to set as it cools. Once you add the cereal, try to shape the ghosts within 10-15 minutes. If it gets too hard to shape, warm it up gently in the microwave. But don’t overheat it, or it’ll become tough.
Use Mini Marshmallows
I can’t stress this enough. Jumbo marshmallows take forever to melt and often leave chunks. Mini marshmallows melt evenly and quickly. It’s a small detail that makes a huge difference in the final texture.
White Chocolate vs. Candy Melts
White chocolate chips are easier to find and taste better, but they can seize up if you add too much moisture. Candy melts are more stable and easier to work with, but they taste a bit waxy. I prefer white chocolate for the flavor, but if you’re struggling, try candy melts.
Variations & Substitutions
Once you’ve nailed the basic version, here’s how you can mix it up. I’ve tried all of these.
Orange Ghosts
Add a few drops of orange food coloring to the marshmallow mixture before adding the cereal. It’s a fun twist on the classic white ghost. My kids love these because they look like little pumpkins.
Chocolate Ghosts
Stir in ¼ cup of cocoa powder to the brown butter before adding the marshmallows. It makes a chocolate version that’s perfect for older kids or adults who want something less sweet.
Pumpkin Spice
Add ½ teaspoon of pumpkin pie spice to the brown butter. It gives a subtle autumn flavor that’s perfect for Halloween. This pairs really well with the white chocolate faces.
Gluten-Free
Use certified gluten-free rice cereal. Everything else is naturally gluten-free, so this is an easy swap. The texture might be slightly different, but it still tastes great.
Vegan Version
Use vegan butter and vegan marshmallows (like Dandies). The technique is the same, but vegan marshmallows can be trickier to melt. You might need to add a splash of plant milk to help them smooth out.
Serving & Storage
How to Serve:
I usually serve these on a platter lined with black parchment paper for a spooky effect. They look great next to a bowl of candy or on a dessert table with other treats like fudgy sea salt caramel brownies. They’re also great for lunchboxes or after-school snacks.
Storage:
Store in an airtight container at room temperature for up to 5 days. They stay fresh and chewy. If you live in a hot house, keep them in the fridge, but let them come to room temperature before serving for the best texture.
Freezing:
You can freeze these for up to 2 months. Place them in a single layer on a baking sheet, freeze until solid, then transfer to a freezer bag. Thaw at room temperature before serving. They thaw surprisingly well!
Nutrition Information
I’m not a nutritionist, but here’s the breakdown if you’re tracking. This is a treat, so enjoy it in moderation!
Per Serving (based on 12 ghosts):
| Nutrient | Amount |
|---|---|
| Calories | 220 |
| Protein | 2g |
| Carbs | 35g |
| Fiber | 0g |
| Sugar | 28g |
| Fat | 9g |
| Sodium | 120mg |
What’s Good:
It’s a quick energy boost, perfect for Halloween night. The brown butter adds some healthy fats, though it’s still high in sugar.
What to Know:
High in sugar and carbs. Not suitable for diabetics without consulting a doctor. The recipe can be modified to be gluten-free or vegan, but the nutritional profile will change slightly.
Final Thoughts
So that’s my go-to Halloween Marshmallow Ghost Rice Krispie Treats with Brown Butter! I’ve probably talked your ear off at this point, but when you make a recipe this often, you have a lot to say about it.
This has saved Halloween nights more times than I can count. It’s my answer to “what’s for dessert” when I’m tired, don’t want to bake a complicated cake, and still want something that looks impressive. My kids are happy, my husband’s happy, and I’m happy because I’m not stressed about cooking.
Make it yours! Try different food colorings, add sprinkles, or mix in some chopped nuts for crunch. The best recipes are the ones you adapt to your family’s tastes.
If you make this, drop a comment and let me know what you think! I love hearing how recipes turn out in your kitchen. And if something doesn’t work, tell me that too—I’m here to help troubleshoot.
Happy cooking! And I hope your kitchen smells half as good as mine does right now.
Frequently Asked Questions
Can I use regular marshmallows instead of mini?
You can, but it’s not recommended. Jumbo marshmallows take much longer to melt and often leave crunchy centers. Mini marshmallows melt evenly and quickly, giving you a smoother, more consistent texture. If you must use jumbo, chop them up first and melt them slowly over low heat.
Why did my brown butter burn?
Brown butter goes from perfect to burnt very quickly. Make sure you use a light-colored pan so you can see the color change. Stir constantly and keep the heat at medium. Once it smells nutty and turns amber, take it off the heat immediately. The residual heat will continue to cook it, so don’t wait for it to look perfectly brown in the pan.
Can I make these ahead of time?
Yes! These actually taste better the next day. Make them up to 2 days ahead and store in an airtight container at room temperature. If you’re making them for a party, I recommend shaping them the day before and adding the faces on the day of to prevent the chocolate from smudging.
How do I keep the marshmallow from sticking to my hands?
Wet your hands with water before shaping. A spray bottle works best because it gives you a light, even mist. You don’t want your hands soaking wet, just damp. If they start to stick, spray again. This is the secret to clean, smooth ghosts.
Can I freeze the finished ghosts?
Absolutely. Place them on a baking sheet and freeze until solid, then transfer to a freezer bag. They’ll keep for up to 2 months. Thaw at room temperature before serving. The texture might be slightly softer after thawing, but they still taste great.
What if I don’t have white chocolate?
You can use white chocolate melts, which are easier to work with but taste a bit waxy. Or, you can use a black gel pen to draw the face directly on the marshmallow ghost. It’s less elegant but still cute and effective.
Can I add nuts to the mixture?
Yes! Chopped pecans or walnuts add a nice crunch and complement the brown butter flavor. Add them along with the Rice Krispies. Just make sure they’re finely chopped so they don’t interfere with shaping the ghosts.
Pin This Recipe!
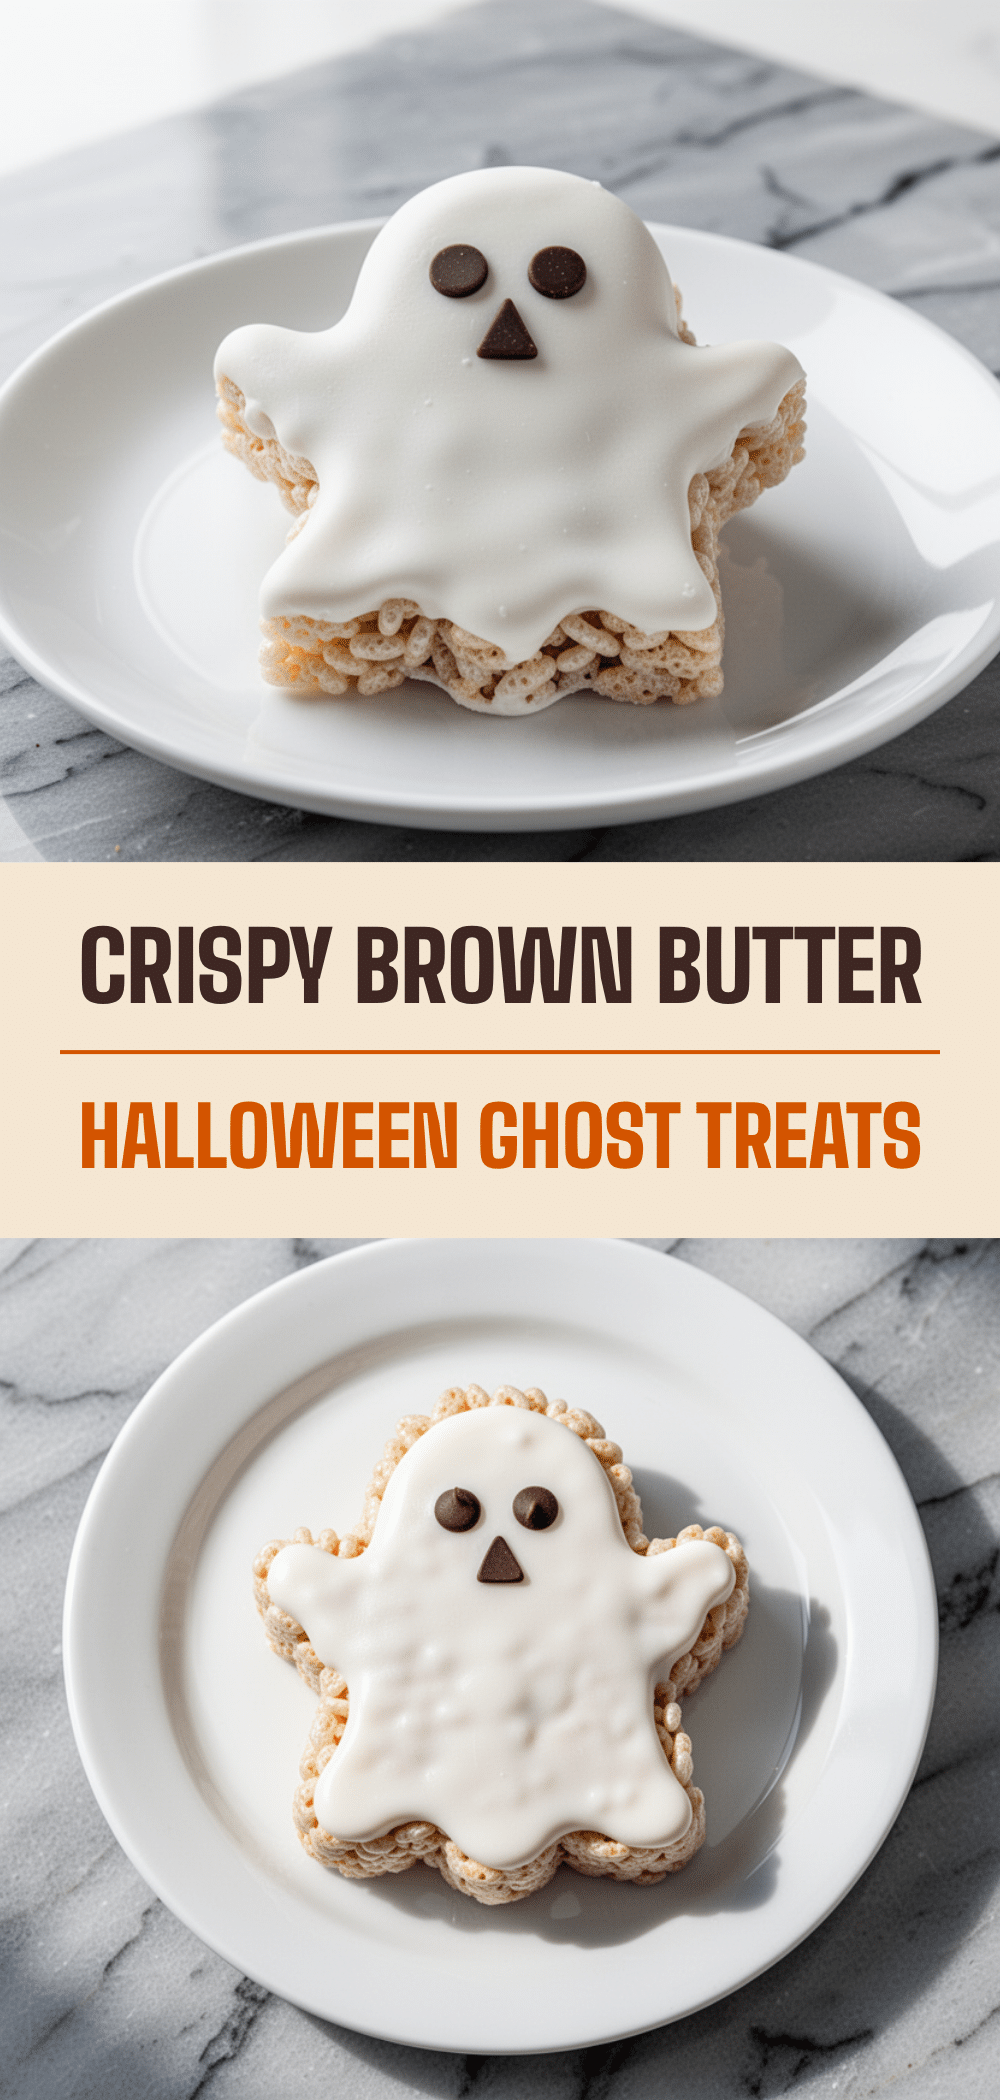
Halloween Marshmallow Ghost Rice Krispie Treats with Brown Butter
- Total Time: 25 minutes
- Yield: 12 servings 1x
Description
Elevated Rice Krispie treats made with nutty brown butter and shaped into adorable, spooky ghosts. These chewy, golden treats are easy to make with kids and taste like a high-end bakery dessert.
Ingredients
- 6 tablespoons (85g) unsalted butter
- 10 oz (280g) mini marshmallows
- 6 cups (210g) Rice Krispies cereal
- ½ cup (85g) white chocolate chips
- Black food gel or gel pen
- Orange food coloring (optional)
Instructions
- Brown the butter: Melt butter in a light-colored saucepan over medium heat, stirring constantly until it foams, settles, and smells nutty (amber color). This takes 3-5 minutes. Remove from heat immediately.
- Melt the marshmallows: Add mini marshmallows to the hot brown butter. Stir gently until melted and smooth. If needed, return to lowest heat for 30 seconds at a time. Do not overheat.
- Fold in the cereal: Pour in Rice Krispies and fold until every piece is coated. Work quickly before the mixture sets.
- Shape the ghosts: Spray hands with water. Take a golf-ball-sized piece, roll into a ball, flatten one side, and pull the bottom into a jagged, wavy shape. Place on parchment paper.
- Add the faces: Melt white chocolate chips in 15-second intervals. Pipe two dots for eyes and a small ‘w’ or smile for the mouth. Alternatively, draw faces with a black gel pen. Let set for 10-15 minutes.
Notes
Use mini marshmallows for even melting; jumbo marshmallows leave crunchy centers. Keep hands wet to prevent sticking. Brown butter adds a nutty, caramel-like depth. These treats taste better the next day as flavors meld. Can be made gluten-free by using certified GF rice cereal or vegan by using vegan butter and marshmallows.
- Prep Time: 15 minutes
- Cook Time: 10 minutes
- Category: Dessert
- Cuisine: American
Nutrition
- Serving Size: 1 ghost
- Calories: 220
- Sugar: 28
- Sodium: 120
- Fat: 9
- Saturated Fat: 5
- Carbohydrates: 35
- Protein: 2
Keywords: Halloween treats, Rice Krispie treats, brown butter, marshmallow ghosts, kid-friendly dessert, easy Halloween recipe, no-bake dessert


