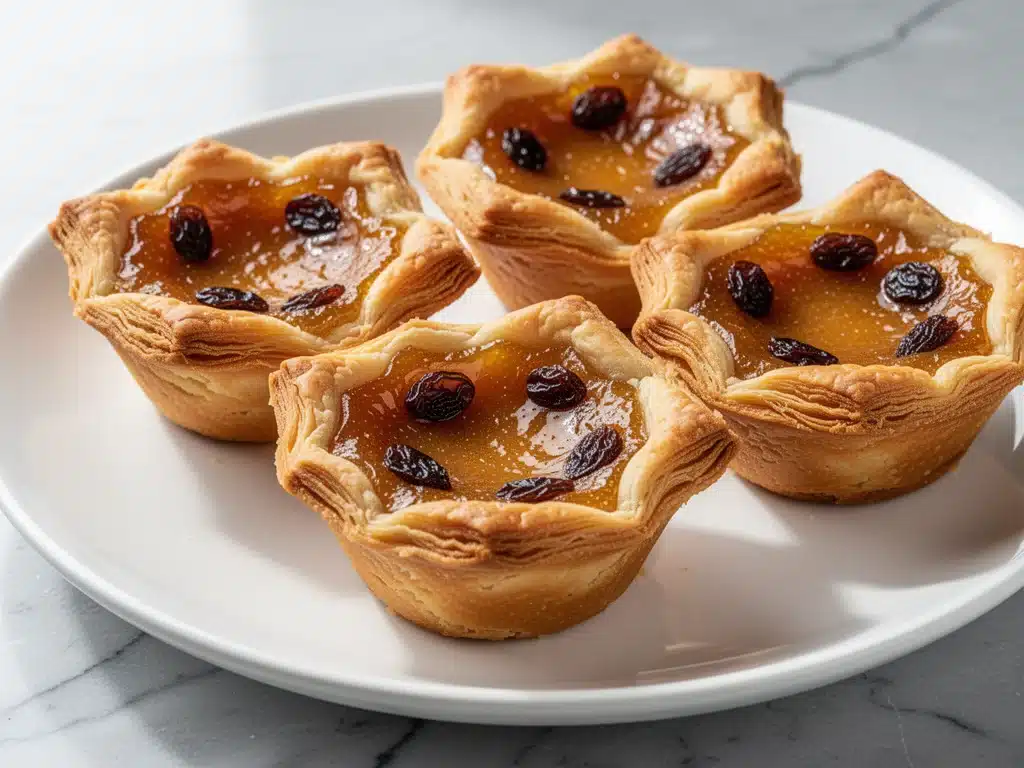
I still remember the first time I tried a butter tart that actually had soul. I was visiting my aunt in rural Ontario, somewhere outside of Toronto, during a crisp October afternoon. The windows were fogged up from the cold, and the kitchen smelled like burnt sugar and vanilla—a scent that instantly transported me back to childhood. She pulled a tin from the oven, and those little golden discs wobbled in the most satisfying way. I took a bite, and it was this perfect, gooey contradiction: crispy edges, a soft caramel center, and a crust that shattered under my fork but wasn’t greasy at all.
Most butter tarts I’ve made at home over the years have been a letdown. They’re either too runny, like a mess waiting to spill onto the counter, or too firm, like eating a hard candy shell. Some are so sweet they make your teeth ache for hours. I wanted to fix that. I wanted to create a recipe that captures that specific Canadian Thanksgiving magic without requiring a degree in pastry arts or a PhD in chemistry.
That’s why I developed this recipe for Canadian Thanksgiving Butter Tarts. It’s not just about the filling; it’s about the balance. The key to making butter tarts that impress every time lies in two things: a genuinely flaky pastry crust (not that soggy, shortbread-style base you often see) and a filling that sets perfectly every single time. I’ve tested this version more than a dozen times, tweaking the ratios of brown sugar to butter and finding the exact chilling time needed to keep the pastry tender. These tarts are the star of my holiday table. They’re simple, deeply comforting, and they disappear faster than the turkey ever does.
If you’re looking for a dessert that feels nostalgic and homemade but tastes like it came from a high-end bakery, you’re in the right place. These aren’t just cookies with a hole in the middle; they’re little pockets of caramelized heaven. Let’s get baking.
Why You’ll Love This Recipe
There are about a dozen reasons I keep coming back to this butter tart recipe, but let’s be honest—you’re here because you want something that works, tastes incredible, and doesn’t require a trip to the store for exotic ingredients. Here’s the real deal on why these tarts are worth your time.
Actually Flaky Pastry
Let’s address the elephant in the room. Most “easy” butter tart recipes use a sweet, cookie-like crust that’s basically a shortbread base. It’s fine, but it’s boring. This recipe uses a classic all-butter pie dough. It’s flaky, buttery, and provides that necessary structural contrast to the gooey center. I’ve made this dough for my bakery-style blueberry muffins friends in the past, and the technique is similar—keep it cold, handle it gently. The result is a crust that actually feels like a pie.
Perfect Set, Every Time
The biggest fear with butter tarts is a runny center. I used to struggle with this until I learned the importance of the “wobble test.” These tarts come out with a center that is set but still has that luxurious, custard-like jiggle. It’s not liquid, and it’s not a brick. It’s the sweet spot. I’ve nailed this timing so you don’t have to guess.
Minimal Ingredients, Maximum Flavor
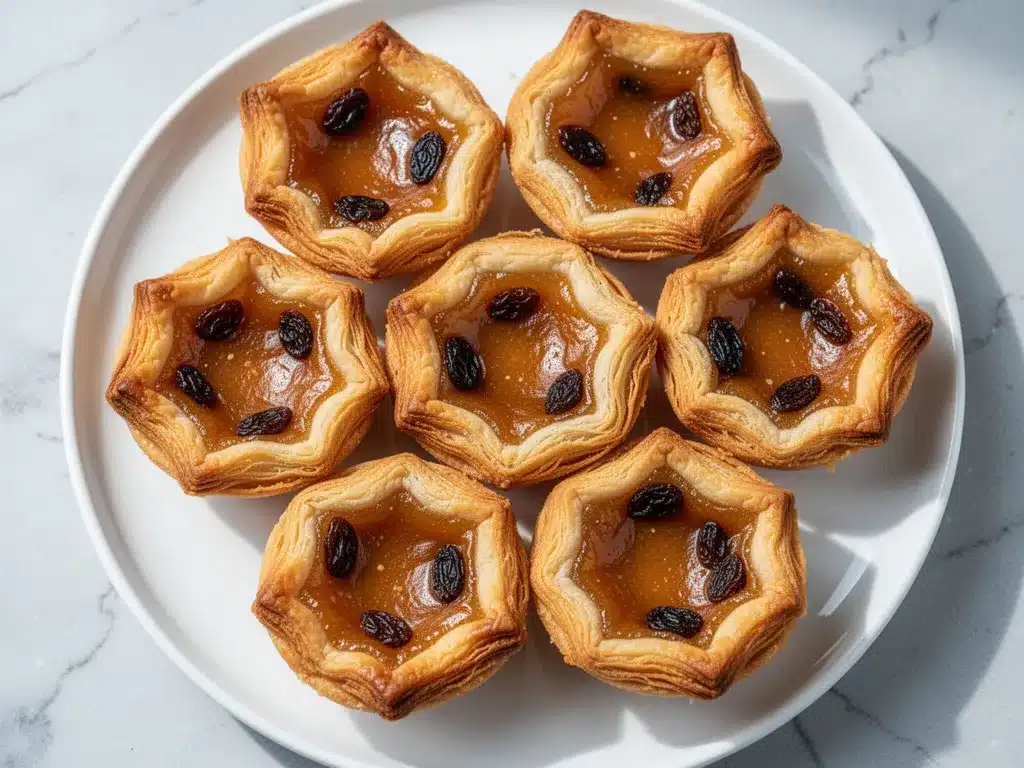
You probably have everything you need in your pantry right now. Butter, sugar, eggs, vanilla, and a touch of corn syrup (or maple syrup if you want to go fully Canadian). No weird stabilizers, no xanthan gum, no complicated techniques. It’s honest, simple baking. If you can boil water and mix a bowl, you can make these. I’ve walked my teenage niece through the whole process over a video call, and she got perfect results.
Make-Ahead Friendly
Thanksgiving is chaotic. You don’t need another dessert that needs to be baked 20 minutes before guests arrive. These tarts are best made a day ahead. They actually taste better after chilling overnight, as the flavors meld and the texture firms up just enough to slice cleanly. They keep well in the fridge for up to a week, making them the ultimate stress-buster for holiday hosting.
Ingredients You’ll Need
Here’s the best part: this ingredient list is short, simple, and mostly things you already own. I’m particular about three items here, and I’ll tell you exactly why.
For the Flaky Pastry Crust
All-purpose flour (1 ½ cups / 190g) — This is your base. Don’t try to substitute with whole wheat here; you want that tender, flaky texture. Measure it correctly—spoon and level, don’t scoop and pack, or your dough will be tough.
Unsalted butter (½ cup / 113g, cold) — This is non-negotiable. Cold butter creates steam pockets in the oven, which makes the layers flaky. Cube it and keep it in the fridge until the second you need it. I use high-quality European-style butter when I’m feeling fancy, but standard grocery store brand works fine.
Cold water (3-4 tablespoons) — Just enough to bring the dough together. If you add too much, the gluten develops and the crust gets tough. Add it one tablespoon at a time.
Salt (½ teaspoon) — Enhances the flavor and balances the sweetness. Don’t skip it.
For the Gooey Filling
Unsalted butter (½ cup / 113g, melted) — Yes, more butter. This is a butter tart, after all. Melt it completely. It adds richness and helps the filling set properly.
Packed brown sugar (1 cup / 200g) — This gives the classic molasses flavor. Dark brown sugar is better for a deeper, more caramel-like taste. Light brown sugar works, but it’s less complex.
Granulated white sugar (½ cup / 100g) — This provides the crispiness. Without it, the tarts would be too soft and chewy. The mix of sugars is what creates that texture contrast.
Heavy cream (½ cup / 120ml) — Adds richness and helps emulsify the filling. Milk works in a pinch, but the tarts won’t be as rich. Half-and-half is a good middle ground.
Light corn syrup (½ cup / 170g) — This is the traditional Canadian secret. It prevents the sugar from crystallizing, keeping the center smooth and glossy. If you can’t find it, use golden syrup or even maple syrup, but know that maple syrup will change the flavor profile significantly (which might be good, but it’s different).
Eggs (2 large) — Room temperature eggs mix better into the filling. They act as the binder that holds everything together.
Vanilla extract (1 teaspoon) — Pure vanilla, please. Artificial vanilla tastes chemical and clashes with the caramel notes. I keep a bottle of Nielsen-Massey in my pantry specifically for baking.
Whiskey or Bourbon (Optional) (1 tablespoon) — This is my secret weapon. A splash of whiskey adds a warm, adult depth that cuts through the sweetness. If you’re making these for kids, skip it, but trust me, it’s worth it for the adults.
For the Optional Topping
Craisins or Raisins — Traditionalists argue about this. Some say no fruit, some say you need it. I love the tartness of dried cranberries (craisins) to cut the sweetness. If you’re a purist, skip them. If you’re like me, toss in a handful.
Equipment Needed
You don’t need fancy gadgets for this. Here’s what I actually use.
Food Processor — I use this for the dough because it’s fast and keeps the butter cold. You can use a pastry cutter or your hands, but it takes longer and warms the butter. Speed is key with pie dough.
9-inch Pie Dish — I use a ceramic pie dish. Glass works too. You’ll make one full tart, but you can also use a muffin tin for mini butter tarts, which are great for parties.
Muffin Tin — If you want to make 12 mini tarts, a standard 12-cup muffin tin is perfect. They bake faster, so keep an eye on them.
Rolling Pin — Any standard rolling pin works. I prefer wood because it doesn’t stick.
Pastry Brush — Useful for brushing the crust with egg wash if you want a shiny finish, though not strictly necessary.
How to Make It: Step-by-Step
Alright, let’s make this! I’m walking you through exactly how I do it, including the little tricks I’ve picked up over the years.
Step 1: Make the Dough
In your food processor, pulse the flour and salt until combined. Add the cold, cubed butter. Pulse about 10-15 times until the mixture looks like coarse crumbs with some pea-sized pieces of butter remaining. Those little butter chunks are what create the flaky layers. If you over-process it, you’ll lose the flakes.
Drizzle in the cold water, one tablespoon at a time, pulsing after each addition. Stop when the dough just starts to come together when you pinch it. It should look shaggy, not like a ball. Over-working the dough makes it tough.
Turn the dough out onto a piece of plastic wrap. Gather it into a disc (or two smaller discs if you’re making mini tarts). Wrap tightly and chill in the fridge for at least 1 hour. This relaxes the gluten and re-chills the butter. Don’t skip this step.
Step 2: Prepare the Filling
While the dough chills, make the filling. In a large bowl, whisk together the melted butter, brown sugar, white sugar, and corn syrup until smooth. The mixture should look glossy.
Add the heavy cream, eggs, vanilla, and whiskey (if using). Whisk vigorously until the filling is well combined and slightly thickened. It should look like a smooth, caramel-colored liquid. Taste it—it should be sweet but balanced. If it’s too sweet, add a tiny pinch more salt.
Step 3: Roll and Fit the Pastry
Preheat your oven to 350°F (175°C). On a lightly floured surface, roll out your chilled dough to about 1/8-inch thickness. Lift it gently and fit it into your pie dish (or line your muffin cups if making minis). Trim the edges. If you’re making minis, you can use a round cutter to fit the cups neatly.
If you’re making the full tart, you can crimp the edges with your fingers or a fork. If you’re making minis, just press the dough into the cups. Chill the lined dish/cups in the fridge for another 15 minutes. This helps prevent shrinkage in the oven.
Step 4: Add Fruit (Optional)
If you’re using craisins or raisins, sprinkle them evenly into the pastry shell now. I usually use about ½ cup for a full tart. Press them gently into the dough so they stay in place.
Step 5: Pour and Bake
Pour the filling into the crust. It should come almost to the top, but leave about ¼ inch of space so it doesn’t bubble over. The filling will expand slightly.
Bake for 35-45 minutes for a full tart, or 15-20 minutes for minis. Here’s the crucial part: you’re looking for a set edge with a still-jiggly center. The center should wobble like Jell-O, not slosh like liquid. If it’s firm, you’ve overbaked it. If it’s liquid, it needs more time.
Remove from the oven and let them cool in the pan on a wire rack. They will continue to set as they cool. This is the hardest part—waiting for them to cool. But if you cut into them hot, the filling will be runny.
Step 6: Cool and Serve
Let the tarts cool completely, at least 2 hours. For best results, chill them in the fridge overnight. This firms up the filling and makes slicing clean. Serve at room temperature or slightly chilled. They taste amazing with a cup of coffee or tea.
Expert Tips & Tricks
Here’s everything I’ve learned from making these dozens of times. These tips will save you from my mistakes.
Keep Everything Cold
This is the golden rule of pastry. If your butter melts before it hits the oven, you lose your flakiness. If your kitchen is hot, put your flour and butter in the fridge for 30 minutes before starting. If the dough feels warm while you’re rolling it, pop it back in the fridge for 10 minutes. Patience pays off.
Don’t Overbake
I’ve burned this batch twice before getting it right. The center should still jiggle when you take it out. It will set as it cools. If you wait until it’s firm in the oven, it will become rubbery once cooled. Trust the wobble.
Use a Pie Weight (If Blind Baking)
Some people blind bake the crust first. I usually don’t bother with butter tarts because the filling is liquid enough to keep the dough down. But if you’re worried about the bottom getting soggy, you can line the crust with parchment and fill it with pie weights or dried beans for 15 minutes before adding the filling. It’s an extra step, but it guarantees a crisp bottom.
The Corn Syrup Question
Can you skip the corn syrup? Yes, but the texture changes. Without it, the sugar can crystallize, leading to a grainy filling. If you’re avoiding corn syrup, use golden syrup (Lyle’s) or even honey. Just know that honey has a stronger flavor. I stick with corn syrup for that classic, smooth texture.
Storage is Key
These tarts are best stored in an airtight container in the fridge. They last up to 5 days. If you leave them out, the filling can get too soft, especially in a warm kitchen. I always keep mine in the fridge and let them come to room temp for 15 minutes before serving.
Variations & Substitutions
Once you’ve nailed the basic version, here’s how you can mix it up. I’ve tried all of these.
Maple Butter Tarts
Swap the corn syrup and white sugar for pure maple syrup and brown sugar. This gives a distinct Canadian maple flavor. Use 1 cup of maple syrup instead of the corn syrup and sugar mix. It’s less sweet and more earthy.
Pecan Butter Tarts
Add 1 cup of chopped pecans to the filling. They add crunch and richness. I love this version for holiday gatherings because it feels a bit more upscale.
Chocolate Butter Tarts
Melt ½ cup of chocolate chips and swirl them into the filling before baking. Or, sprinkle chocolate chips on top of the filling before baking. It’s indulgent and pairs well with the buttery crust.
Gluten-Free Option
Use a 1:1 gluten-free flour blend for the crust. The filling is naturally gluten-free. The texture might be slightly denser, but it still works well. I’ve used Bob’s Red Mill blend with good results.
Dairy-Free Option
Use vegan butter and coconut cream instead of dairy butter and heavy cream. The flavor will be slightly different, but the texture holds up. I’ve made this for a lactose-intolerant friend, and she loved them.
Serving & Storage
These tarts are versatile and easy to serve. I usually arrange them on a platter with a dusting of powdered sugar for a festive look. They pair beautifully with homemade vanilla sweet cream cold foam iced coffee or a strong cup of black tea.
How to Serve
Serve at room temperature. Cold tarts have a firmer texture, which some people prefer. I like them slightly chilled but not fridge-cold. They look stunning alongside a slice of Mediterranean orange olive oil cake if you want to offer a lighter, citrusy alternative to the rich butter tarts.
Storage Instructions
Refrigerator: Store in an airtight container for up to 5 days. They will keep their texture well.
Freezing: These freeze surprisingly well! Bake them, cool them completely, and wrap them tightly in plastic wrap and foil. They freeze for up to 3 months. Thaw in the fridge overnight. The texture remains good, though the crust might soften slightly.
Reheating: You don’t need to reheat them, but if you want a warm tart, microwave for 10-15 seconds. Don’t overdo it, or the filling will become runny.
Nutrition Information
I’m not a nutritionist, but here’s the breakdown if you’re tracking. These are rich, sweet tarts, so portion control is key.
Per Tart (based on 8 servings):
- Calories: 320
- Protein: 4g
- Carbs: 45g
- Fiber: 1g
- Sugar: 32g
- Fat: 16g
- Saturated Fat: 9g
- Cholesterol: 55mg
- Sodium: 180mg
These are decadent treats. I enjoy one or two with my coffee, and that’s plenty. If you’re watching sugar, consider making mini tarts to control portions. They’re also a great way to use up leftover pie dough from other recipes.
Final Thoughts
So that’s my go-to Canadian Thanksgiving butter tart recipe! I’ve probably talked your ear off at this point, but when you make a recipe this often, you have a lot to say about it. These tarts have saved my holiday dessert game more times than I can count. They’re my answer to “what’s for dessert” when I’m tired, don’t want takeout, and still want something that tastes really good. My family is happy, my guests are impressed, and I’m happy because I’m not stressed about cooking.
Make it yours! Try different add-ins, swap in your favorite nuts, or adjust the sweetness to your taste. The best recipes are the ones you adapt to your family’s tastes. If you make these, drop a comment and let me know what you think! I love hearing how recipes turn out in your kitchen. And if something doesn’t work, tell me that too—I’m here to help troubleshoot.
Happy baking! I hope your kitchen smells half as good as mine does right now.
Frequently Asked Questions
Can I use maple syrup instead of corn syrup?
You can, but the texture will be different. Corn syrup prevents crystallization, keeping the filling smooth. Maple syrup can make the filling a bit more chewy or crystalline if not balanced correctly. If you use maple syrup, I recommend using dark maple syrup for a stronger flavor. You’ll need to adjust the sugar content slightly, so start with ¾ cup maple syrup and reduce the brown sugar to ¾ cup.
Why did my butter tart filling crack?
Cracking usually means the filling was overbaked. The eggs overcoagulated, causing the surface to split. Next time, take the tarts out when the edges are set but the center still jiggles. They will continue to cook slightly from residual heat.
Can I make these ahead of time?
Absolutely. These tarts are actually better the next day. Make them 24 hours before serving, store them in the fridge, and let them come to room temperature before serving. They keep well in the fridge for up to 5 days.
Why is my crust soggy?
A soggy bottom often happens if the filling is too wet or if the crust wasn’t pre-baked. If you’re making a full tart, you can blind bake the crust for 10 minutes before adding the filling. For mini tarts, ensure the dough is thin enough so it cooks through, and don’t overfill the cups.
Can I freeze the dough?
Yes! Wrap the dough disc tightly in plastic wrap and freeze for up to 3 months. Thaw it in the fridge overnight before rolling and baking. This is great for meal prep.
What’s the best way to store leftover tarts?
Store them in an airtight container in the fridge. They will keep their texture well for up to 5 days. If you leave them out, the filling can get too soft, especially in a warm kitchen.
Pin This Recipe!
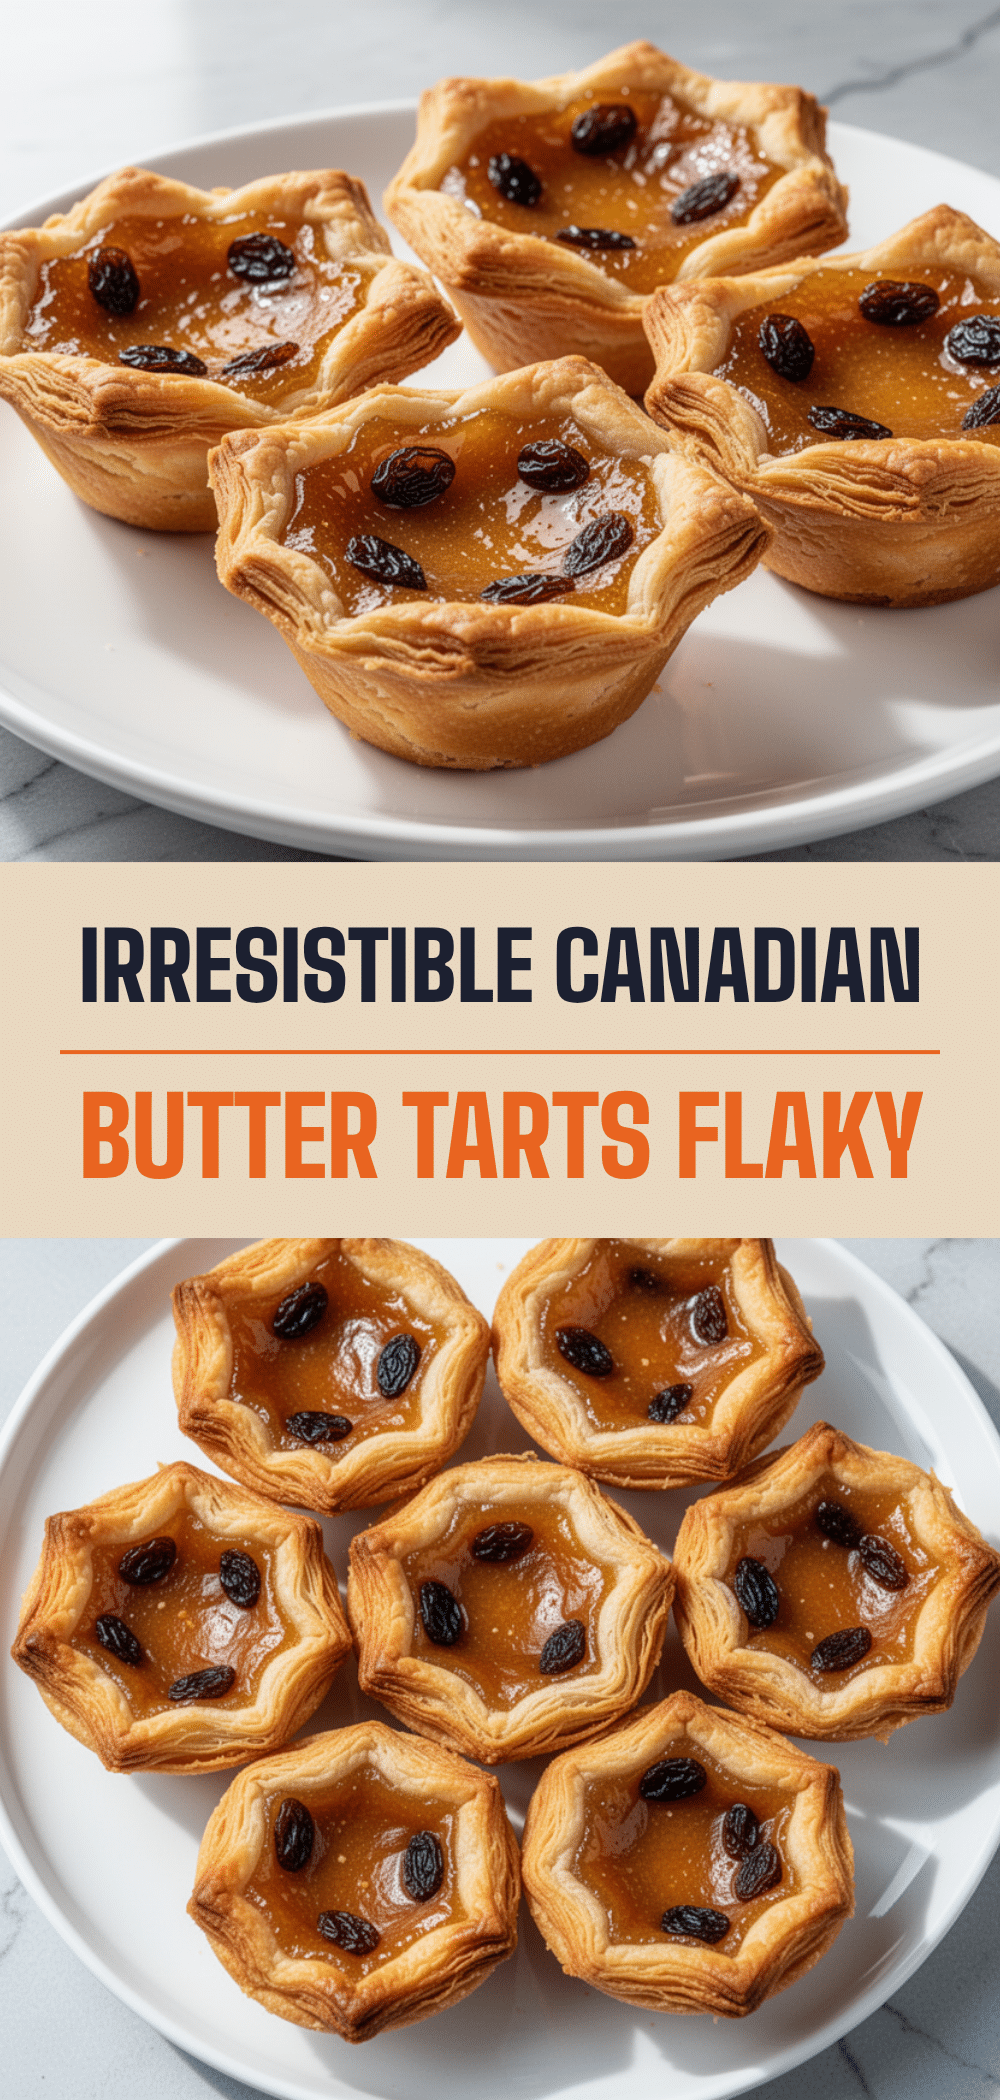
Canadian Thanksgiving Butter Tarts: Easy Flaky Pastry Recipe
- Total Time: 1 hour 15 minutes (plus chilling time)
- Yield: 8 servings 1x
Description
A nostalgic Canadian dessert featuring a genuinely flaky all-butter pastry crust and a perfectly set, gooey caramel filling. This recipe balances sweetness with rich flavors, ensuring a tender texture without being overly runny or firm.
Ingredients
- 1 ½ cups all-purpose flour
- ½ teaspoon salt
- ½ cup unsalted butter, cold and cubed
- 3–4 tablespoons cold water
- ½ cup unsalted butter, melted
- 1 cup packed brown sugar
- ½ cup granulated white sugar
- ½ cup heavy cream
- ½ cup light corn syrup
- 2 large eggs, room temperature
- 1 teaspoon vanilla extract
- 1 tablespoon whiskey or bourbon (optional)
- ½ cup Craisins or raisins (optional)
Instructions
- In a food processor, pulse flour and salt. Add cold cubed butter and pulse 10-15 times until mixture resembles coarse crumbs with pea-sized butter pieces.
- Drizzle in cold water one tablespoon at a time, pulsing after each addition, until dough just starts to come together. Do not over-process.
- Turn dough onto plastic wrap, form into a disc, wrap tightly, and chill in the fridge for at least 1 hour.
- Preheat oven to 350°F (175°C).
- In a large bowl, whisk melted butter, brown sugar, white sugar, and corn syrup until smooth and glossy.
- Add heavy cream, eggs, vanilla, and whiskey (if using). Whisk vigorously until well combined and slightly thickened.
- Roll chilled dough to 1/8-inch thickness on a floured surface. Fit into a 9-inch pie dish or line muffin cups. Trim edges.
- Chill lined dish/cups in the fridge for another 15 minutes to prevent shrinkage.
- Sprinkle Craisins or raisins into the crust if using.
- Pour filling into the crust, leaving ¼ inch of space at the top.
- Bake for 35-45 minutes for a full tart, or 15-20 minutes for mini tarts. The edges should be set while the center still jiggles like Jell-O.
- Cool in the pan on a wire rack for at least 2 hours, or chill overnight in the fridge before serving.
Notes
Keep all ingredients cold to ensure a flaky crust. Do not overbake; the center should jiggle when removed from the oven as it will set while cooling. These tarts are best made a day ahead and stored in the refrigerator. For a gluten-free option, use a 1:1 gluten-free flour blend. For dairy-free, use vegan butter and coconut cream.
- Prep Time: 30 minutes
- Cook Time: 35-45 minutes
- Category: Dessert
- Cuisine: Canadian
Nutrition
- Serving Size: 1 tart
- Calories: 320
- Sugar: 32
- Sodium: 180
- Fat: 16
- Saturated Fat: 9
- Carbohydrates: 45
- Fiber: 1
- Protein: 4
Keywords: Canadian Thanksgiving, butter tarts, flaky pastry, caramel filling, holiday dessert, easy baking, homemade tarts


