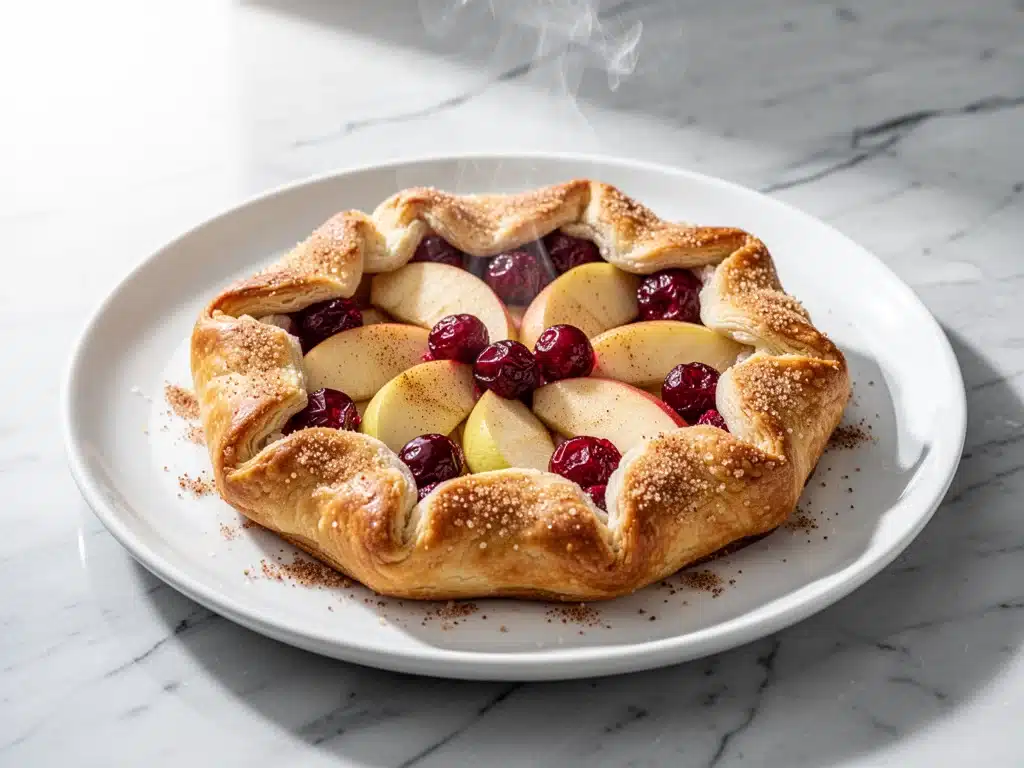
Last November, I was staring at a half-eaten box of store-bought pie crusts, feeling absolutely defeated. It was the day before Thanksgiving, and I had decided—somewhat ambitiously—that I wanted to make a dessert that looked like I’d spent three days in a French bakery, but actually took less time than it does to order takeout. I tried to make a perfect, symmetrical pie. It cracked. The filling leaked out. It looked less like “elegant holiday dessert” and more like “my kitchen had a small earthquake.”
I was about to give up and just serve ice cream when I remembered my grandmother’s galettes. “If it’s lopsided, it’s rustic,” she’d say. “If it’s rustic, it’s fancy.” So I scraped that sad pie into the compost bin and started over. I dumped the apples and cranberries onto a circle of dough, folded the edges haphazardly, and sprinkled it with cinnamon sugar. When it came out of the oven, golden and bubbling with ruby-red juice, my family didn’t even notice it wasn’t a perfect circle. They just asked for the recipe.
That was the moment I fell in love with the fall cranberry apple galette. It’s the ultimate guilt-free flex. It looks stunning on a holiday table, smells like autumn warmth, and is forgiving enough for anyone who claims they “can’t bake.” The cinnamon sugar crust adds a crunchy, sweet contrast to the tart, juicy filling that keeps you coming back for seconds (and thirds, I won’t judge). This isn’t just a dessert; it’s a confidence builder. Once you make this, you’ll never look at a pie crust the same way again.
Why You’ll Love This Recipe
There are about a dozen reasons I keep making this galette on repeat, but here are the big ones that will win you over before you even preheat the oven.
Stupid Simple Technique — Seriously, if you can fold dough and sprinkle sugar, you can master this. I’ve walked my teenage niece through making this over a video call. She made a lopsided mess, and it was the best thing on the table. The beauty of a galette is that imperfection is the point. It’s rustic, it’s charming, and it’s impossible to mess up.
Seasonal Flavor Explosion — There’s something magical about the combination of tart cranberries and sweet, tender apples. The cranberries cut through the richness of the butter crust, while the cinnamon sugar ties everything together with that classic fall aroma. It tastes like a cozy cabin in the woods, but in dessert form.
Lightning Fast Prep — Compared to a traditional pie that requires blind baking, crimping edges, and calculating baking times down to the minute, this galette is a breeze. From start to finish, you’re looking at about 45 minutes. That’s faster than waiting for a delivery driver. I make this on weeknights when I need a treat but don’t want to spend hours in the kitchen.
Make-Ahead Friendly — This is actually my secret weapon for holiday hosting. You can assemble the galette the night before, cover it, and refrigerate it. Then, you just pop it in the oven while you’re setting the table. It reheats beautifully the next day, too—actually, I think it tastes even better on day two as the flavors meld together.
Visually Stunning — Don’t let the “easy” part fool you. This looks like something from a high-end patisserie. The glossy, caramelized edges and the vibrant red cranberries peeking through the golden crust are perfect for Pinterest and Instagram. Your guests will think you bought it from a fancy bakery, but you’ll have the satisfaction of knowing you made it.
This is my go-to when I need a dessert that feels special but doesn’t require a culinary degree. No complicated techniques, no weird ingredients, just reliable, delicious food that makes everyone happy. And if you’re looking for other easy desserts that don’t stress you out, check out my homemade churro cheesecake bars or these fudgy sea salt caramel brownies for more crowd-pleasing treats.
Ingredients You’ll Need
Here’s the best part: you probably have most of this already in your pantry or fridge. This isn’t a recipe that requires a trip to three different specialty stores. I’m particular about a few things here, and I’ll tell you exactly why.
For the Crust
Unsalted butter (1/2 cup / 113g, cold and cubed) — This is non-negotiable. Cold butter creates steam pockets in the dough, which gives you those flaky layers. If your butter is soft, the crust will be tough. I keep a stick in the fridge until the last minute. Salted butter works, but you’ll need to reduce the added salt in the recipe.
All-purpose flour (1 1/4 cups / 150g) — Standard stuff. Don’t go trying to substitute with almond flour unless you want a completely different texture. This gives the structure we need.
Granulated sugar (1 tablespoon) — Just a touch in the dough to help with browning. It’s subtle, but it makes a difference in the color.
Salt (1/2 teaspoon) — Essential for flavor balance. Without it, the crust will taste flat.
Ice water (3-4 tablespoons) — This is the trickiest part. The water must be ice cold. If it’s warm, it melts the butter. I keep a glass of water with ice cubes in it and use a spoon to scoop out the cold water only. This ensures the dough stays tender.
For the Filling
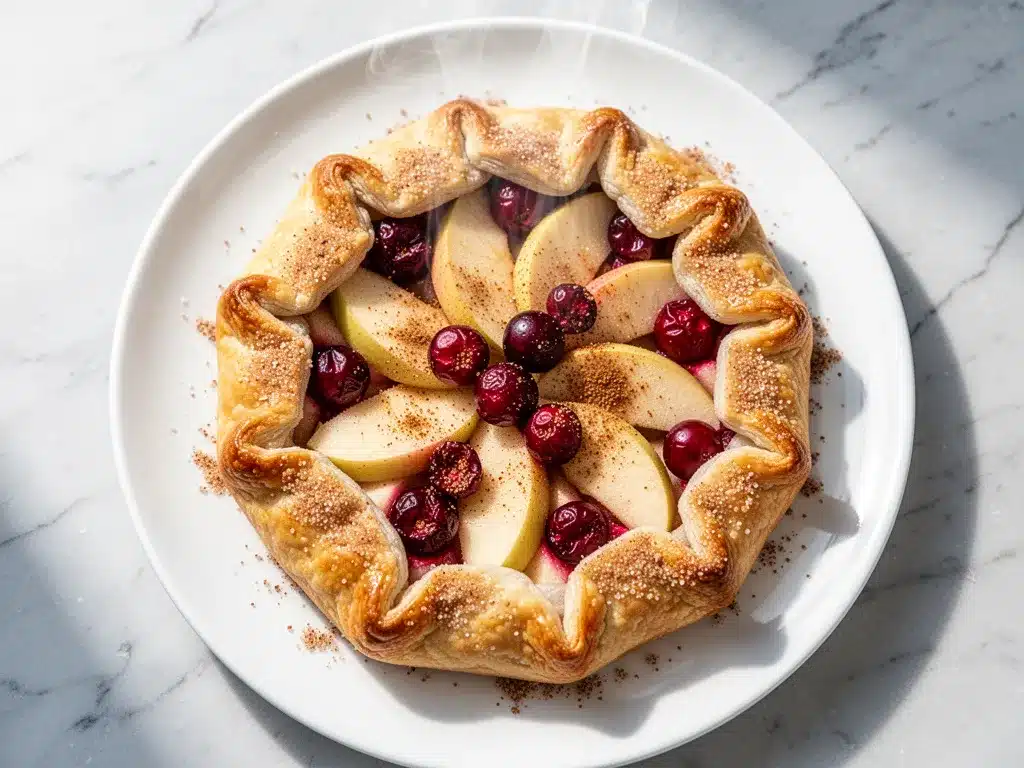
Apples (3 medium, about 1.5 lbs / 680g) — I use a mix of Granny Smith and Honeycrisp. Granny Smiths hold their shape and provide tartness, while Honeycrisps add sweetness and a soft texture. Avoid Red Delicious—they turn to mush and lack flavor. Peel them, but leave the skin on Granny Smiths for a nice color pop.
Fresh cranberries (1 cup / 120g) — Fresh is best because they burst beautifully in the oven. Dried cranberries work in a pinch, but they won’t give you that juicy, tart punch. If you use dried, soak them in warm water for 10 minutes first to plump them up.
Granulated sugar (1/3 cup / 65g) — Apples and cranberries are tart, so you need enough sugar to balance it out. Adjust based on how sweet your apples are.
Ground cinnamon (1 teaspoon) — The star of the show. Use fresh cinnamon if you can—old cinnamon loses its punch. It pairs perfectly with the apples.
Ground ginger (1/4 teaspoon) — Optional, but I highly recommend it. It adds a warm, spicy depth that makes the dessert feel more complex and “holiday-like.”
Cornstarch (1 tablespoon) — This thickens the juices released by the fruit. Without it, you’ll have a soupy galette. Cornstarch creates a glossy, jam-like consistency.
Lemon juice (1 teaspoon) — Just a squeeze to brighten the flavors and prevent the apples from browning before they go in the oven.
For the Cinnamon Sugar Crust
Coarse sugar or sanding sugar (2 tablespoons) — This is what gives you that crunchy, sparkly top. Regular granulated sugar works, but coarse sugar adds that professional bakery crunch and shine. I love the visual appeal of it.
Ground cinnamon (1/2 teaspoon) — Mixed with the sugar for that classic cinnamon roll aroma.
Heavy cream (1 tablespoon) — Brushed on the crust before baking. This helps the sugar stick and promotes browning. Milk works, but cream gives a richer color.
Equipment Needed
You don’t need fancy equipment for this. Here’s what I actually use.
Large mixing bowl — For combining the dough. I use a glass bowl because I can see everything clearly.
Pastry cutter or fork — To cut the butter into the flour. A pastry cutter is faster, but a fork works fine if you’re patient. I use a fork because I’m lazy, but I’ve heard pastry blenders make it quicker.
Rolling pin — Any standard rolling pin works. I prefer a wooden one because it doesn’t stick.
Baking sheet — A large, rimmed baking sheet. Line it with parchment paper for easy cleanup. I’ve learned the hard way that galette juice can burn onto the pan if you don’t use parchment.
Parchment paper — Essential. It prevents sticking and makes transferring the galette to the oven much easier. I roll the dough out on the parchment, then slide the whole thing onto the baking sheet.
Sharp knife — For slicing the apples. A serrated knife works well for apples with tough skins.
Measuring cups and spoons — Standard stuff. Dollar store versions work fine, but make sure they’re accurate.
How to Make It: Step-by-Step
Alright, let’s make this! I’m walking you through exactly how I do it, including the little tricks I’ve picked up over the years.
Step 1: Make the Dough (10 minutes)
In a large bowl, whisk together the flour, sugar, and salt. Add the cold, cubed butter. Use a pastry cutter or fork to cut the butter into the flour until the mixture looks like coarse crumbs with some pea-sized pieces of butter remaining. Those pea-sized pieces are key—they create flakiness. Don’t overmix! If the butter is fully incorporated, your crust will be tough.
Add the ice water, one tablespoon at a time, gently stirring with a fork until the dough just starts to come together. It should look shaggy and not fully formed. If it’s too dry, add another tablespoon of water. If it’s too sticky, add a sprinkle of flour.
Turn the dough out onto a lightly floured surface and gently press it into a disc. Wrap it in plastic wrap and refrigerate for at least 30 minutes. This relaxes the gluten and re-chills the butter, which is crucial for a tender crust.
Step 2: Prepare the Filling (5 minutes)
While the dough chills, peel and slice the apples. I cut them into thin wedges, about 1/4-inch thick. Too thick, and they won’t cook through. Too thin, and they turn to mush. Toss the apple slices with the fresh cranberries, granulated sugar, cinnamon, ginger, cornstarch, and lemon juice in a large bowl. Mix well until everything is evenly coated. The cornstarch will turn cloudy, which is normal.
Step 3: Roll and Assemble (10 minutes)
Preheat your oven to 400°F (200°C). Line a baking sheet with parchment paper.
Take the chilled dough disc out of the fridge. On a lightly floured surface, roll it out into a large circle, about 12 inches in diameter and 1/8-inch thick. Don’t worry about it being perfect. If it tears, just patch it with a bit of dough.
Transfer the rolled dough to the parchment-lined baking sheet. Spoon the apple and cranberry mixture into the center, leaving a 2-inch border around the edges. Pile it in the middle—it should form a mound. Don’t spread it all the way to the edge!
Fold the edges of the dough over the filling, pleating as you go. You don’t need to seal it completely. Leave some gaps so the steam can escape and the fruit can bubble out. This creates that rustic, beautiful look. Brush the folded edges with heavy cream, then sprinkle generously with the cinnamon-sugar mixture.
Step 4: Bake (35-40 minutes)
Place the galette in the preheated oven. Bake for 35-40 minutes, or until the crust is deep golden brown and the filling is bubbling vigorously. The bubbles should be thick and jammy, not watery. If the edges start browning too quickly, cover them with a strip of foil.
Let the galette cool on the baking sheet for at least 15 minutes before slicing. This allows the filling to set slightly, so it doesn’t run out when you cut it.
Step 5: Serve
Slice it into wedges and serve warm. It’s amazing on its own, but I always add a scoop of vanilla ice cream or a dollop of whipped cream. The contrast of the warm, tart fruit and the cold, creamy topping is irresistible.
Total Time: About 1 hour (15 minutes active, 45 minutes baking)
Expert Tips & Tricks
Here’s everything I’ve learned from making this dozens of times. These tips will save you from my mistakes.
Keep Everything Cold
This is the #1 tip for pie crusts. If your butter gets warm, the crust will be tough. If your hands are warm, the dough will stick. I even chill my bowl and rolling pin if it’s a hot day. Cold butter = flaky crust. It’s physics.
Don’t Skimp on the Cornstarch
I’ve tried making this without cornstarch once, and it was a disaster. The juices pooled on the bottom of the crust, making it soggy. The cornstarch thickens the fruit juices as they heat up, creating a glossy, jam-like filling that stays in the galette. Don’t skip it.
Use Fresh Cranberries
Fresh cranberries burst in the oven, releasing their tart juice which balances the sweet apples. Dried cranberries are chewy and don’t provide that same texture or flavor contrast. If you can’t find fresh cranberries, frozen ones work, but thaw and drain them first so they don’t make the filling watery.
Let It Cool
I know it’s tempting to slice it immediately, but resist the urge. The filling is extremely hot and liquid when it comes out of the oven. If you cut it right away, it will spill out. Letting it cool for 15-20 minutes allows the cornstarch to set, giving you clean slices.
Customize Your Sugar
For that bakery sparkle, use coarse sugar or sanding sugar. It doesn’t dissolve completely, so you get those crunchy, sweet bits on top. Regular granulated sugar works, but it won’t give you the same visual appeal or crunch.
Variations & Substitutions
Once you’ve nailed the basic version, here’s how you can mix it up. I’ve tried all of these, and they’re all winners.
Pear and Cranberry
Swap the apples for pears. Pears are softer and sweeter, so you might want to reduce the sugar slightly. This is a more delicate, floral version that’s perfect for spring or early fall.
Maple Pecan
Add 1/2 cup chopped pecans to the filling. Toast them first for extra flavor. Drizzle with maple syrup instead of some of the sugar. This adds a nutty, rich depth that pairs beautifully with the cranberries.
Orange Zest
Add the zest of one orange to the filling. The citrus notes brighten up the heavy spices and make the dessert feel lighter and more refreshing.
Gluten-Free
Use a 1:1 gluten-free flour blend for the crust. Make sure it contains xanthan gum, or add 1/2 teaspoon. The texture will be slightly different—more shortbread-like—but still delicious.
Vegan
Use vegan butter (like Miyoko’s or Earth Balance) for the crust. Replace the heavy cream with coconut cream or oat milk. Use agave nectar or maple syrup instead of sugar if you prefer. The filling is naturally vegan.
Berry Boost
Add 1 cup of blueberries or blackberries to the apple-cranberry mix. This creates a mixed-berry galette that’s even more colorful and flavorful. Just make sure to increase the cornstarch by 1/2 teaspoon.
Serving & Storage
How to Serve:
I usually serve this straight from the baking sheet at the dinner table—it looks rustic and stays warm. But here are other ways I’ve enjoyed it:
Side Dishes:
It’s a dessert, so it doesn’t really need sides. But if you’re serving it as part of a larger spread, it pairs well with a simple green salad or roasted vegetables. It’s also fantastic with a cup of homemade vanilla sweet cream cold foam iced coffee for a cozy afternoon treat.
Toppings Bar:
When I have guests, I put out: vanilla ice cream, whipped cream, crushed pecans, and a drizzle of caramel sauce. Everyone customizes their bowl.
Wine Pairing:
Not a wine expert, but my wine-snob friend says a late-harvest Riesling or a Port works great with this. The sweetness of the wine complements the cinnamon sugar.
Storage Instructions:
Refrigerator: Store in an airtight container for up to 3 days. The crust will soften slightly, but it’s still good.
Reheating: Best method: Reheat in a 350°F oven for 10-15 minutes to crisp up the crust. Microwave works, but it makes the crust soggy. If you do microwave, do it in short bursts and serve immediately.
Freezing: You can freeze the baked galette for up to 2 months. Wrap it tightly in plastic and then foil. Thaw at room temperature and reheat in the oven. You can also freeze the unbaked, assembled galette on the baking sheet, then wrap it and freeze. Bake from frozen, adding 5-10 minutes to the baking time.
Nutrition Information
I’m not a nutritionist, but here’s the breakdown if you’re tracking. This is a rich dessert, so moderation is key.
Per Serving (based on 8 servings):
- Calories: 320
- Protein: 3g
- Carbs: 45g
- Fiber: 3g
- Sugar: 22g
- Fat: 14g
- Saturated Fat: 8g
- Cholesterol: 30mg
- Sodium: 180mg
What’s Good:
- Fiber from the apples and cranberries
- Antioxidants from the cranberries
- Relatively low in sodium
What to Know:
- Higher in calories from the butter and sugar
- Contains gluten and dairy
- High in sugar (but it’s a dessert!)
My Take:
Look, this is comfort food with butter and sugar. It’s not a diet recipe. But it’s way better than store-bought pastries, costs less, and I know exactly what’s in it. When I want to make it lighter, I use less sugar in the filling and serve a smaller slice. But usually? I just enjoy it as a special treat.
Final Thoughts
So that’s my go-to fall cranberry apple galette! I’ve probably talked your ear off at this point, but when you make a recipe this often, you have a lot to say about it.
This has saved holiday dinners more times than I can count. It’s my answer to “what’s for dessert” when I’m tired, don’t want takeout, and still want something that tastes really good. My kids are happy, my husband’s happy, and I’m happy because I’m not stressed about cooking.
Make it yours! Try different apples, swap in your favorite nuts, or adjust the spices to your liking. The best recipes are the ones you adapt to your family’s tastes.
If you make this, drop a comment and let me know what you think! I love hearing how recipes turn out in your kitchen. And if something doesn’t work, tell me that too—I’m here to help troubleshoot.
Happy baking! And I hope your kitchen smells half as good as mine does right now.
Frequently Asked Questions
Can I use store-bought pie crust?
Absolutely! If you’re short on time, a store-bought refrigerated pie crust works perfectly. Just roll it out slightly larger than the package suggests to account for shrinkage. It won’t be quite as flaky as homemade, but it’s still delicious and saves a lot of time.
Why did my galette leak juice?
Usually means you didn’t use enough cornstarch, or you piled the filling too high in the center. Make sure to use the full tablespoon of cornstarch, and leave a generous border around the edges. If it leaks a little, it’s fine—it just caramelizes on the baking sheet. Just wipe the pan clean before putting it in the oven.
Can I make this ahead for a dinner party?
Yes! You can assemble the galette the night before, cover it tightly, and refrigerate. Bake it the next day. You might need to add 5 minutes to the baking time since it’s starting from cold. This is my favorite way to handle holiday hosting.
Why did my crust get soggy?
This usually happens if the filling is too wet or if the galette isn’t baked long enough. Make sure to use cornstarch to thicken the juices, and bake until the crust is deep golden brown. If you’re worried about a soggy bottom, place the baking sheet on the lowest rack of the oven to ensure the bottom cooks thoroughly.
Can I use frozen cranberries?
You can, but thaw and drain them first. Frozen cranberries release a lot of water, which can make the filling watery. Pat them dry with a paper towel before adding them to the mixture. Fresh cranberries are preferred for their texture and burst of flavor.
How do I reheat leftovers without it getting dry?
Reheat in a 350°F oven for 10-15 minutes. This restores the crispness of the crust. Avoid the microwave if you can—it makes the crust soft and chewy. If you must use the microwave, heat in short bursts and serve immediately.
Can I double this recipe?
Yes, but you’ll need two baking sheets. Double the dough and filling, and make two galettes. They’ll bake at the same rate. Just make sure they have enough space on the baking sheet for the dough to fold over.
What kind of apples are best for galette?
I recommend a mix of firm, tart apples like Granny Smith and sweeter, firm apples like Honeycrisp or Fuji. Avoid soft apples like McIntosh or Red Delicious, as they turn to mush and don’t hold their shape well during baking.
Pin This Recipe!
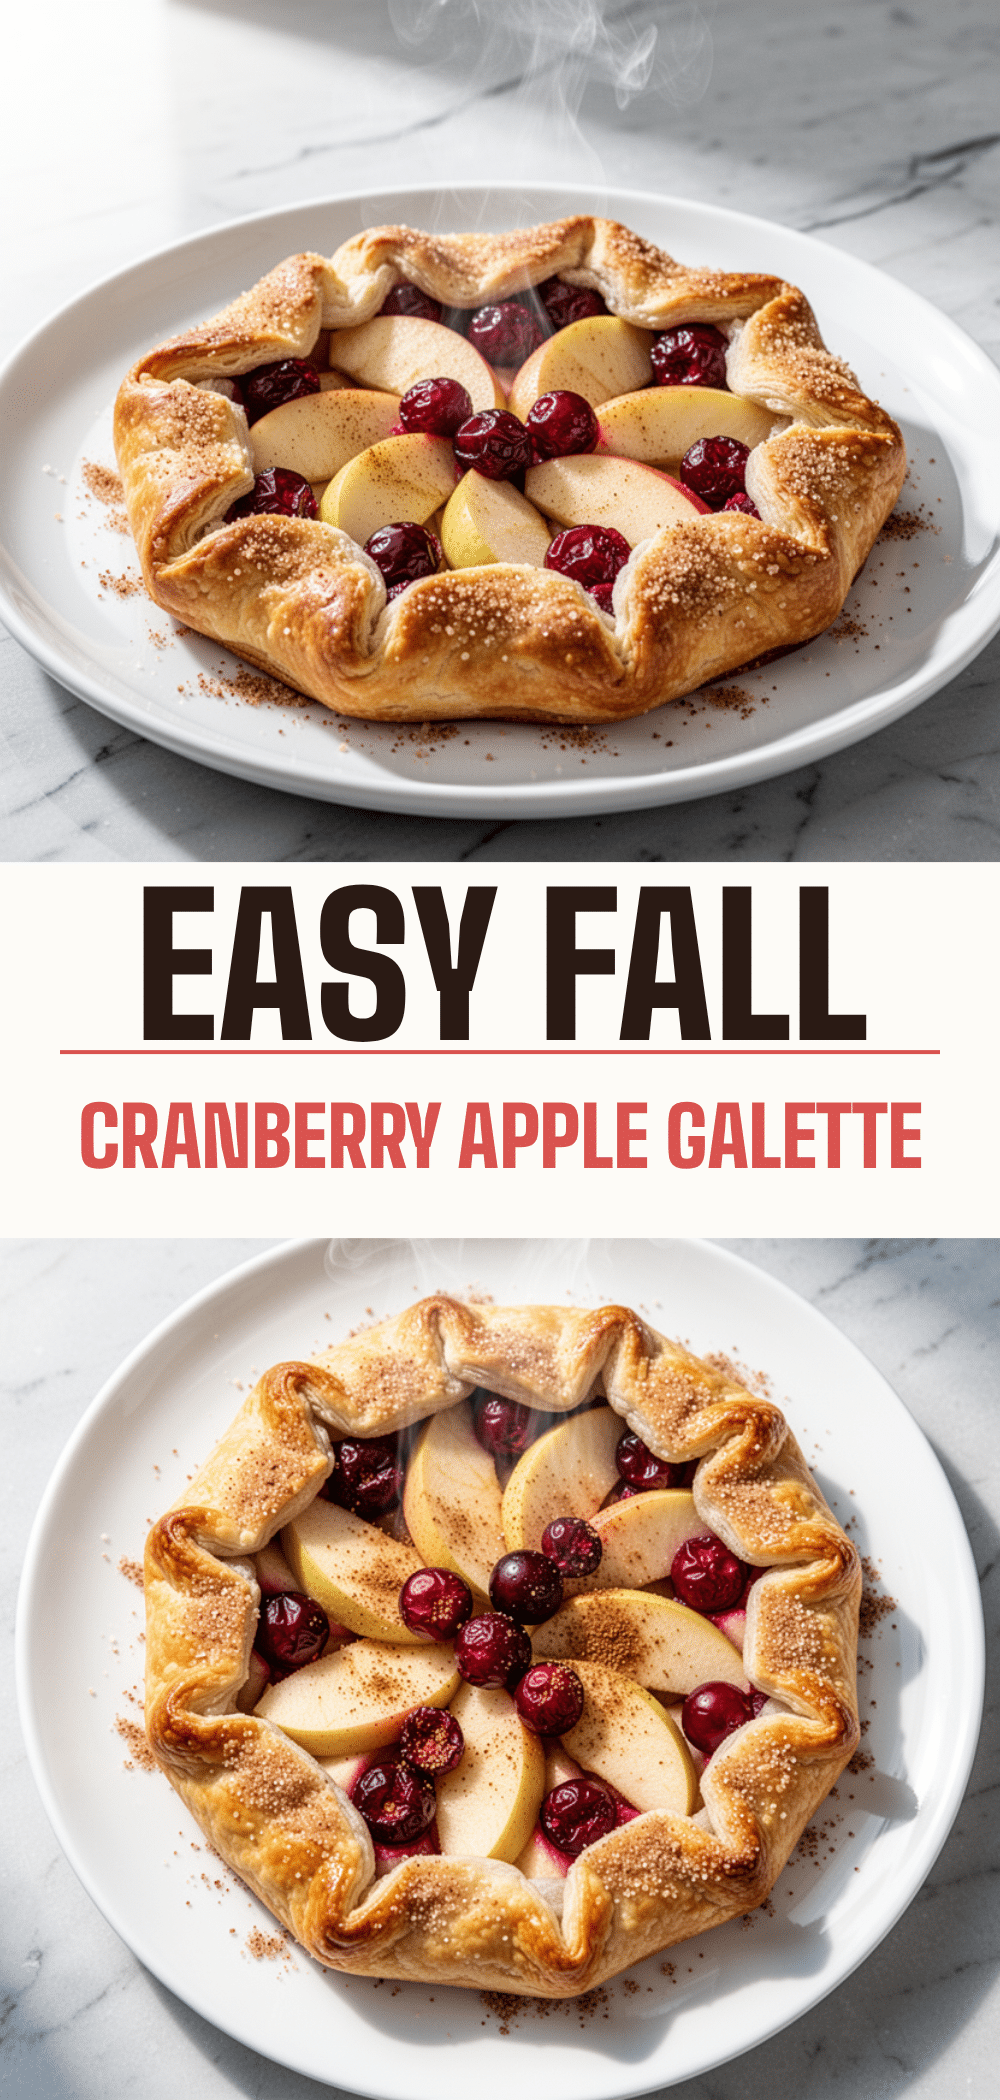

Fall Cranberry Apple Galette: Easy Holiday Dessert
- Total Time: 1 hour
- Yield: 8 servings 1x
Description
A rustic, forgiving, and stunning fall dessert featuring tart cranberries and sweet apples in a flaky butter crust, topped with crunchy cinnamon sugar.
Ingredients
- 1/2 cup unsalted butter, cold and cubed
- 1 1/4 cups all-purpose flour
- 1 tablespoon granulated sugar
- 1/2 teaspoon salt
- 3–4 tablespoons ice water
- 3 medium apples (mix of Granny Smith and Honeycrisp), peeled and sliced
- 1 cup fresh cranberries
- 1/3 cup granulated sugar
- 1 teaspoon ground cinnamon
- 1/4 teaspoon ground ginger
- 1 tablespoon cornstarch
- 1 teaspoon lemon juice
- 2 tablespoons coarse sugar or sanding sugar
- 1/2 teaspoon ground cinnamon
- 1 tablespoon heavy cream
Instructions
- In a large bowl, whisk together flour, 1 tablespoon sugar, and salt. Cut in cold cubed butter until mixture resembles coarse crumbs with pea-sized butter pieces.
- Add ice water one tablespoon at a time, stirring gently until dough just comes together. Form into a disc, wrap in plastic, and refrigerate for at least 30 minutes.
- Preheat oven to 400°F (200°C) and line a baking sheet with parchment paper.
- While dough chills, toss sliced apples and fresh cranberries with 1/3 cup sugar, cinnamon, ginger, cornstarch, and lemon juice.
- Roll chilled dough into a 12-inch circle on a floured surface and transfer to the parchment-lined baking sheet.
- Spoon fruit filling into the center, leaving a 2-inch border. Fold edges over the filling, pleating as you go.
- Brush folded edges with heavy cream and sprinkle generously with the mixture of coarse sugar and cinnamon.
- Bake for 35-40 minutes until crust is deep golden brown and filling is bubbling. Cover edges with foil if browning too quickly.
- Cool on the baking sheet for at least 15 minutes before slicing to allow filling to set.
Notes
Keep all ingredients cold for a flaky crust. Do not skip the cornstarch as it thickens the fruit juices. Let the galette cool completely before slicing to prevent the filling from running. Can be made ahead and refrigerated overnight before baking.
- Prep Time: 15 minutes
- Cook Time: 35-40 minutes
- Category: Dessert
- Cuisine: American
Nutrition
- Serving Size: 1 slice
- Calories: 320
- Sugar: 22
- Sodium: 180
- Fat: 14
- Saturated Fat: 8
- Carbohydrates: 45
- Fiber: 3
- Protein: 3
Keywords: fall dessert, cranberry apple galette, holiday baking, easy pie, rustic dessert, autumn recipes


