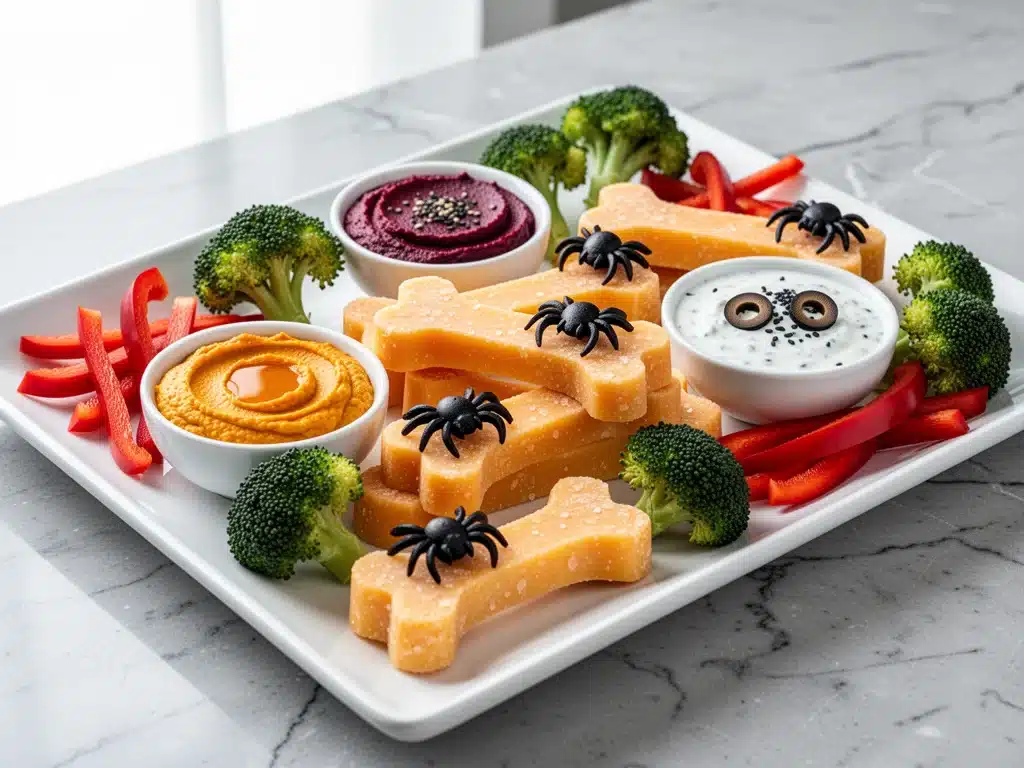
I still remember the Halloween of 2019. I was hosting my first “real” adult Halloween party, and I had spent three weeks planning costumes, decorations, and a playlist that sounded like it was curated by a goth DJ. But when the clock struck 7 PM and my first guest walked in, I realized I had forgotten the most important part: the food. I stared at my empty coffee table, panic rising in my chest, while the smell of pumpkin spice candles seemed to mock me. I scrambled to the store, bought a bag of chips and a block of cheese, and tried to arrange them in a way that looked intentional rather than desperate. It did not.
That year, the cheese bones were an afterthought. They were just cubes of cheddar I’d hastily cut with a butter knife. But this year? This year, I’m not just serving snacks. I’m serving an experience. I’ve spent the last month testing every cheese shape, every dip, and every spooky garnish to create a Halloween snack board that doesn’t just look good in photos—it actually tastes incredible and keeps your guests from raiding the pantry at 9 PM.
This isn’t about buying pre-packaged, sad-looking party platters. This is about taking simple ingredients and turning them into a centerpiece that screams “I tried, but in a cool, effortless way.” The star? Those adorable cheese bones. They’re surprisingly easy to make, they look like they came from a high-end charcuterie shop, and they disappear faster than my decorations in the wind. Whether you’re hosting a trick-or-treat drop-off, a costume party for kids, or a spooky gathering with friends, this Halloween snack board with cheese bones is the answer to your hosting prayers.
Why You’ll Love This Halloween Snack Board
Let’s be honest: hosting Halloween can be stressful. You want the vibe to be fun and festive, but you also don’t want to spend your entire evening in the kitchen while your guests are standing around eating nothing but pretzels. This board solves that problem. Here’s why this setup has become my go-to for every spooky season gathering:
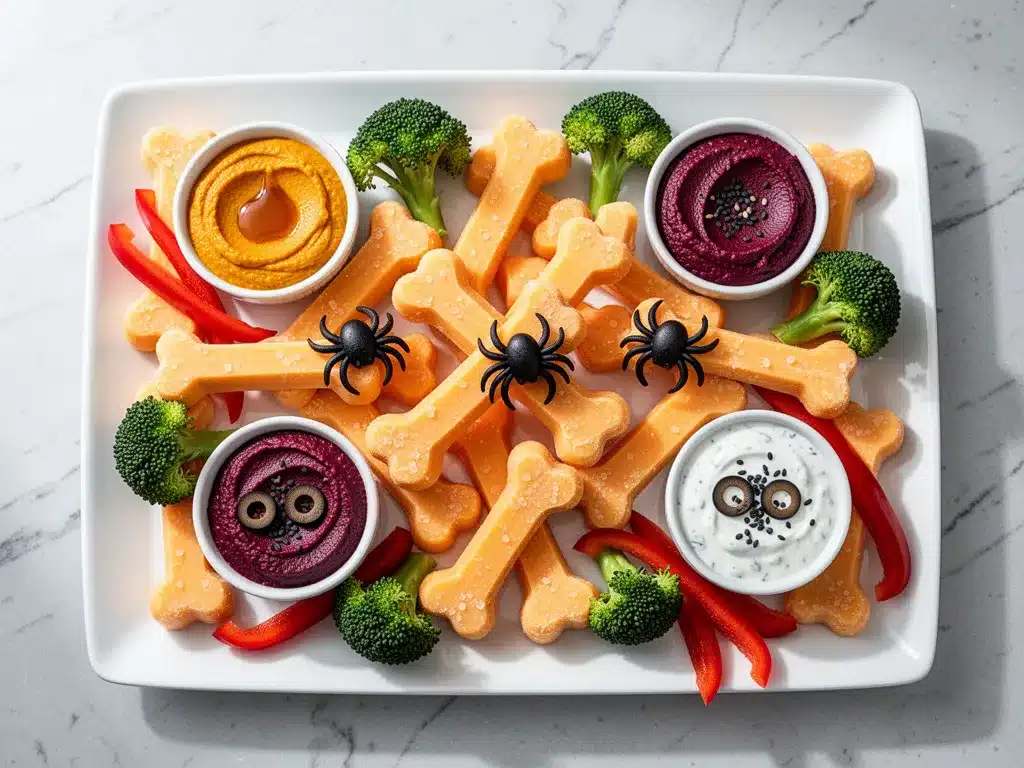
It’s a Visual Star — Seriously, this board takes the cake. Or, well, the bone. The contrast of the white cheddar “bones” against the dark slate board, surrounded by orange and purple accents, is pure Instagram gold. I’ve had guests ask me for the recipe before they’ve even taken a bite. It looks complicated, but it’s actually very intuitive.
Zero Cooking Required — This is a no-cook snack board. I’m not turning on the oven. I’m not standing over a stove. I’m just cutting cheese and arranging fruit. If you can use a knife (or a cookie cutter), you can make this. This is perfect for busy weeknights or when you’re hosting a last-minute gathering.
Customizable for Any Crowd — Have gluten-free friends? Just skip the crackers. Have kids who are picky eaters? The cheese bones are usually a hit because they’re fun and familiar. I’ve made this for vegetarian groups, keto dieters, and huge families. It scales up easily.
Make-Ahead Friendly — You can prepare 80% of this board the day before. The cheese can be cut, the fruit can be washed, and the dips can be made. On the day of the party, you just assemble it. This means you’re not stressed when the doorbell rings.
It’s Actually Delicious — Don’t let the “cute” factor fool you. This isn’t just about looks. I’ve paired sharp cheddar with sweet apple slices, creamy brie with spicy honey, and salty nuts with dried cranberries. The flavor combinations are balanced and satisfying, not just sweet or just salty.
This board has saved me from that 2019 panic attack more times than I can count. It’s my answer to “what’s for Halloween snacks?” when I want to impress without exhausting myself.
Ingredients You’ll Need
Here’s the best part: you probably have most of this already in your kitchen. The beauty of a snack board is that it’s incredibly flexible. However, for the cheese bones to really pop, I’m particular about a few key items. I’ll break down exactly what you need and why.
For the Cheese Bones (The Star of the Show)
Sharp White Cheddar Cheese (1 pound / 450g) — This is non-negotiable. You need a firm, dry cheese that holds its shape. Sharp cheddar has the best flavor profile to balance the sweet snacks. Avoid soft cheeses like brie for the bones—they won’t hold the shape. I recommend buying a block and grating it yourself, or buying pre-sharpened cheddar blocks. Pre-grated cheese has anti-caking agents that can make it gritty, so skip it.
Cream Cheese (4 ounces / 115g) — This acts as the binder. It holds the cheddar together so you can shape the bones. Room temperature is crucial here. Cold cream cheese won’t mix smoothly.
Garlic Powder (½ teaspoon) — Just a hint. You don’t want it to taste like garlic bread, but it adds a savory depth that makes the cheese more interesting.
Dried Parsley Flakes (1 teaspoon) — For that “bone-like” texture and color variation. It’s optional, but I love the rustic look it gives the cheese.
For the Board Accents
Apple Slices (2 medium apples, sliced) — Honeycrisp or Fuji work best because they’re crisp and sweet. They provide a fresh crunch to balance the rich cheese. Toss them in a little lemon juice to prevent browning.
Grapes (1 cup, red or green) — Grapes are easy to eat and add a burst of sweetness. I leave them on the vine for a more natural, rustic look.
Pretzel Bites or Crackers (2 cups) — Pretzel bites are my top choice for Halloween because they’re crunchy and salty. Whole wheat crackers work too if you want a lighter option. I always keep homemade pretzel bites in mind, but store-bought works perfectly fine for this board.
Dried Cranberries (½ cup) — The deep red color adds a pop of Halloween purple/red vibe. They’re chewy and tart, which cuts through the fat of the cheese.
Walnuts or Pecans (½ cup, chopped) — Nuts add texture and a sophisticated touch. Toast them lightly for extra flavor.
Black Olives (¼ cup, sliced) — These are great for adding a “spooky” element. They look like little eyes or bats when arranged creatively.
For the Dips
Honey (½ cup) — Drizzle it over the cheese and brie. The sweetness contrasts beautifully with the sharp cheddar.
Peanut Butter (½ cup) — A classic dip for apples and celery. If you have nut allergies, sunflower seed butter is a great swap.
Cream Cheese (2 ounces / 55g) — For the dip. Whisk it with a little honey and vanilla for a sweet dip, or with garlic and herbs for a savory one.
Apple Butter or Pumpkin Butter (½ cup) — This is the secret weapon. It’s sweet, spiced, and perfect for Halloween. I love how it pairs with the sharp cheddar.
For Decoration
Mini Pumpkins (2-3 small ones) — Use these as bowls for dips or just as decor.
Edible Flowers or Rosemary Sprigs — For a touch of green and elegance. Rosemary looks like little pine trees and adds a nice aroma.
Black Food Coloring (optional) — If you want to dye some pretzels or olives black for extra spookiness.
Equipment Needed
You don’t need fancy equipment for this. Here’s what I actually use:
Sharp Chef’s Knife — Essential for slicing apples and cutting cheese. A dull knife is dangerous and makes a mess. Learn from my experience: buy a good knife.
Bone-Shaped Cookie Cutter — This is the tool that makes the cheese bones possible. You can buy them online or at kitchen stores. If you can’t find one, you can shape the cheese by hand, but it won’t look as neat. I use a 2-inch cutter for perfect-sized bones.
Mixing Bowl — For mixing the cheese mixture. A medium-sized bowl works best.
Fork or Hand Mixer — To mix the cream cheese and cheddar until smooth. A fork works if you’re strong, but a mixer is easier.
Serving Board or Platter — A large wooden board, slate, or even a clean baking sheet. I prefer a dark slate board because it makes the colors pop.
Small Bowls — For holding dips. Mini pumpkin bowls are cute, but small ceramic bowls work too.
Parchment Paper — To line the board if you’re serving on a non-stick surface, or to wrap leftover cheese.
How to Make It: Step-by-Step
Alright, let’s make this! I’m walking you through exactly how I do it, including the little tricks I’ve picked up. This process is straightforward, but attention to detail makes all the difference.
Step 1: Prepare the Cheese Mixture (10 minutes)
In a medium mixing bowl, combine the softened cream cheese, sharp cheddar, garlic powder, and dried parsley. Mix until well combined. The mixture should be thick and moldable. If it’s too dry, add a little more cream cheese. If it’s too wet, add more cheddar. You want a consistency like playdough—firm enough to hold shape but soft enough to press into the cutter.
Step 2: Shape the Cheese Bones (15 minutes)
Take small portions of the cheese mixture (about 1 tablespoon each) and roll them into balls. Press each ball into the bone-shaped cookie cutter. Gently push the cheese into the corners of the cutter to ensure it’s fully formed. Tap the cutter gently on the counter to release the bone. Place the bones on a parchment-lined baking sheet. Repeat until all the cheese is used. You should get about 15-20 bones, depending on the size of your cutter.
Step 3: Chill the Bones (30 minutes)
Place the baking sheet in the refrigerator for at least 30 minutes. This step is crucial. It firms up the cheese, making it easier to handle and preventing the bones from falling apart on the board. I usually do this while I’m prepping the other snacks.
Step 4: Prep the Fruits and Vegetables (10 minutes)
While the cheese chills, slice the apples into thin wedges. Toss them with a little lemon juice to prevent browning. Wash and dry the grapes. Slice the black olives. Chop the nuts. Arrange these items in small bowls or directly on the board.
Step 5: Assemble the Board (15 minutes)
Take the chilled cheese bones out of the fridge. Start arranging them on the board. Place the bones in a scattered pattern, leaving space for the other items. Add the apple slices, grapes, pretzels, cranberries, and nuts. Fill in any gaps with olives or additional cheese. Drizzle honey over the cheese and brie. Add small bowls of dips (peanut butter, apple butter) around the board. Garnish with rosemary sprigs or edible flowers.
Step 6: Final Touches (5 minutes)
Step back and admire your work. Adjust any items that look out of place. Add a few extra pretzels or olives if needed. Make sure the dips are easily accessible. Your Halloween snack board is ready to serve!
Expert Tips & Tricks
Here’s everything I’ve learned from making this dozens of times. These tips will save you from my mistakes.
Keep the Cheese Cold — The colder the cheese mixture, the easier it is to shape. If the cheese gets too warm while you’re working, pop it back in the fridge for 10 minutes. Warm cheese is sticky and hard to handle.
Use a Sharp Cutter — If your bone cutter is dull, the edges of the cheese will be ragged. Make sure your cutter is clean and sharp for clean edges.
Balance Flavors — Don’t just pile on the cheese. Balance it with sweet (apples, honey), salty (pretzels, olives), and tart (cranberries, grapes). This keeps the board interesting and prevents flavor fatigue.
Color Contrast — Halloween is all about colors. Use orange (cheese, carrots), black (olives, pretzels), white (cheese, apples), and purple (grapes, cranberries). The more color contrast, the more visually appealing the board.
Prep Ahead — You can make the cheese mixture and shape the bones up to 24 hours in advance. Store them in an airtight container in the fridge. This saves time on the day of the party.
Don’t Overcrowd — Leave some empty space on the board. It looks more elegant and makes it easier for guests to grab items without knocking everything over.
Use Fresh Herbs — Fresh rosemary or thyme adds a nice aroma and visual appeal. Tuck them in between the cheese and fruit.
Label the Dips — If you have guests with allergies, label the dips. It’s a thoughtful touch that shows you care.
Variations & Substitutions
Once you’ve nailed the basic version, here’s how you can mix it up. I’ve tried all of these.
Gluten-Free Option — Swap pretzel bites for gluten-free crackers or rice cakes. Check all labels to ensure they’re certified gluten-free.
Dairy-Free Option — Use dairy-free cheese alternatives for the bones. There are many vegan cheddar brands that work well. Swap honey for maple syrup or agave. Use dairy-free cream cheese for the dips.
Vegetarian Option — The base recipe is already vegetarian. To make it more filling, add roasted vegetables like sweet potatoes or butternut squash cubes.
Keto Option — Skip the crackers and pretzels. Add more nuts, olives, and celery sticks. Use full-fat cheese and cream cheese. This is a great low-carb snack board.
Kid-Friendly Version — Use mini cookie cutters for fun shapes. Add fruit skewers with grapes and cheese cubes. Use sweet dips like yogurt or fruit puree.
Spicy Version — Add jalapeño slices or spicy mustard to the board. Use pepper jack cheese for the bones. Add hot honey for a sweet-heat kick.
Seasonal Twist — In autumn, add apple butter or pumpkin butter. In winter, add cranberry sauce. In spring, add strawberry jam. Change the dips to match the season.
Serving & Storage
How to Serve:
I usually serve this board at room temperature. Cold cheese can be hard and less flavorful. Take the board out of the fridge 30 minutes before serving. Place it on a stable surface where guests can easily reach it. Pair it with creamy frozen piña coladas for a tropical twist, or serve with high-protein peanut butter banana oat smoothies for a healthier beverage option.
Storage:
Store leftover cheese bones in an airtight container in the fridge for up to 3 days. They may soften slightly, but they’ll still be delicious. Store fruits and veggies in separate containers to prevent moisture transfer. Dips should be stored in airtight containers for up to 5 days.
Reheating:
This board is best served at room temperature. Do not reheat the cheese bones, as they will lose their shape. If the cheese is too cold, let it sit out for 15 minutes before serving.
Nutrition Information
I’m not a nutritionist, but here’s the breakdown if you’re tracking. Per serving (based on 8 servings):
| Nutrient | Amount |
|---|---|
| Calories | 250 |
| Protein | 8g |
| Carbs | 15g |
| Fiber | 2g |
| Sugar | 10g |
| Fat | 18g |
| Saturated Fat | 10g |
| Cholesterol | 45mg |
| Sodium | 300mg |
What’s Good:
Good source of protein from cheese and nuts. Contains healthy fats from nuts and olive oil (if used). Provides vitamins from fruits and vegetables.
What to Know:
Higher in calories and saturated fat due to cheese and cream. Contains dairy and gluten (unless substituted). Moderate sodium.
My Take:
Look, this is a snack board. It’s meant to be enjoyed in moderation. It’s not a diet meal. But it’s a great way to share food with friends and family. When I want to make it lighter, I use less cheese and more veggies. But usually? I just enjoy it and move on.
Final Thoughts
So that’s my go-to Halloween snack board with cheese bones! I’ve probably talked your ear off at this point, but when you make a recipe this often, you have a lot to say about it.
This board has saved me from hosting disasters more times than I can count. It’s my answer to “what’s for Halloween?” when I want to impress without exhausting myself. My guests are happy, my friends are happy, and I’m happy because I’m not stressed about cooking.
Make it yours! Try different cheese shapes, swap in your favorite fruits, adjust the dips. The best recipes are the ones you adapt to your party’s vibe.
If you make this, drop a comment and let me know what you think! I love hearing how recipes turn out in your kitchen. And if something doesn’t work, tell me that too—I’m here to help troubleshoot.
Happy hosting! And I hope your Halloween party is as spooky and delicious as this board.
Frequently Asked Questions
Can I make the cheese bones ahead of time?
Yes! You can shape the cheese bones up to 24 hours in advance. Store them in an airtight container in the fridge. They’ll firm up further and be easier to handle. Just take them out 30 minutes before serving to let them come to room temperature.
What kind of cheese is best for cheese bones?
Sharp white cheddar is the best choice because it’s firm and flavorful. You can also use pepper jack for a spicy twist, or gouda for a smokier flavor. Avoid soft cheeses like brie or cream cheese alone, as they won’t hold the shape.
Can I use a different shape for the cheese?
Absolutely! If you don’t have a bone-shaped cutter, you can use any cookie cutter. Ghosts, pumpkins, bats, or even stars work great. The key is to use a firm cheese that holds its shape.
How do I prevent the cheese from browning?
Cheddar doesn’t brown like apples, but it can dry out. Keep the cheese bones covered in plastic wrap or in an airtight container when not serving. This prevents them from drying out and losing flavor.
Can I make this board gluten-free?
Yes! Simply swap the pretzel bites for gluten-free crackers or rice cakes. Check all labels to ensure they’re certified gluten-free. The cheese and fruits are naturally gluten-free.
How long does the snack board last?
The cheese bones can last up to 3 days in the fridge. The fruits and veggies should be eaten within 1-2 days for best freshness. Dips can last up to 5 days. Assemble the board just before serving for the best presentation.
Can I freeze the cheese bones?
Freezing is not recommended. The texture of the cheese will change, and it may become crumbly when thawed. It’s best to make them fresh or store them in the fridge for up to 3 days.
Pin This Recipe!
Halloween Snack Board: 10 Easy Cheese Bones for Spooky Parties
- Total Time: 35 minutes
- Yield: 8 servings 1x
Description
Create a visually stunning and delicious Halloween snack board featuring homemade cheese bones, fresh fruits, nuts, and dips. This no-cook recipe is perfect for parties, requires minimal prep, and offers customizable options for various dietary needs.
Ingredients
- 1 pound (450g) sharp white cheddar cheese
- 4 ounces (115g) cream cheese, softened
- 1/2 teaspoon garlic powder
- 1 teaspoon dried parsley flakes
- 2 medium apples (Honeycrisp or Fuji), sliced
- 1 cup red or green grapes
- 2 cups pretzel bites or crackers
- 1/2 cup dried cranberries
- 1/2 cup walnuts or pecans, chopped
- 1/4 cup black olives, sliced
- 1/2 cup honey
- 1/2 cup peanut butter
- 2 ounces (55g) cream cheese (for dips)
- 1/2 cup apple butter or pumpkin butter
- 2–3 mini pumpkins (for decor/bowls)
- Edible flowers or rosemary sprigs
- Black food coloring (optional)
Instructions
- In a medium mixing bowl, combine the softened cream cheese, sharp cheddar, garlic powder, and dried parsley. Mix until well combined and the consistency resembles playdough.
- Take small portions of the cheese mixture (about 1 tablespoon each) and roll them into balls.
- Press each ball into a bone-shaped cookie cutter, ensuring it fills the corners. Tap the cutter gently to release the bone.
- Place the shaped cheese bones on a parchment-lined baking sheet.
- Refrigerate the baking sheet for at least 30 minutes to firm up the cheese.
- While the cheese chills, slice apples and toss with lemon juice to prevent browning. Wash grapes, slice olives, and chop nuts.
- Arrange the chilled cheese bones on a serving board in a scattered pattern.
- Add apple slices, grapes, pretzel bites, cranberries, and nuts to the board.
- Drizzle honey over the cheese and arrange small bowls of dips (peanut butter, apple butter) around the board.
- Garnish with rosemary sprigs or edible flowers and serve at room temperature.
Notes
Keep the cheese mixture cold while shaping to prevent sticking. The cheese bones can be made up to 24 hours in advance and stored in an airtight container in the fridge. Serve at room temperature for best flavor. For gluten-free options, swap pretzels for gluten-free crackers. For dairy-free, use vegan cheese alternatives and maple syrup instead of honey.
- Prep Time: 35 minutes
- Cook Time: 0 minutes
- Category: Appetizer
- Cuisine: American
Nutrition
- Serving Size: Approximately 1/8 of
- Calories: 250
- Sugar: 10
- Sodium: 300
- Fat: 18
- Saturated Fat: 10
- Carbohydrates: 15
- Fiber: 2
- Protein: 8
Keywords: Halloween snack board, cheese bones, no-cook appetizer, party snacks, cheese board, spooky food, easy entertaining, vegetarian snacks


