I used to think I was too old to learn new tricks. That’s what I told myself anyway, especially when it came to baking. I had my routines, my favorite recipes, and a healthy skepticism about anything that claimed to be “easy.” Then, last summer, I spent a week in Key West with my sister. We were walking around Duval Street, sweating through our clothes, eating fried conch, and generally trying to soak up every last drop of sunshine. I wasn’t thinking about baking. I wasn’t thinking about oven temperatures or crust ratios.
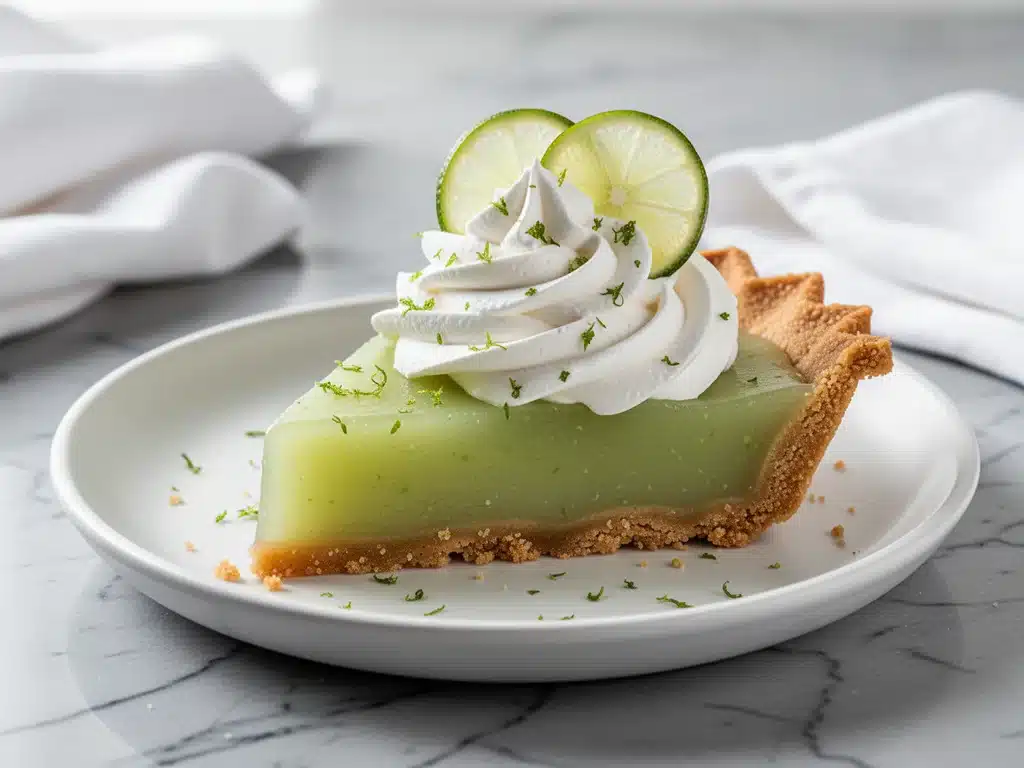
But then, we stumbled into a tiny, no-name shop with a flickering neon sign. It didn’t have tables, just a counter and a display case that looked like it had been there since 1952. I ordered a slice of pie. Just a slice. One bite in, and I stopped walking. The crust was buttery and crisp, shattering slightly when the fork hit it. The filling was tart enough to make my jaw ache, sweet enough to balance it, and creamy in a way that felt impossible for a dessert to be. It tasted like summer in a bowl. It tasted like a vacation I didn’t want to end.
I came home determined to recreate it. I bought three different kinds of limes. I ruined two boxes of graham crackers. I tried using lemon juice because I was too lazy to find key limes at first (big mistake). It took me about eight attempts before I finally nailed it. And now? This Classic Key Lime Pie with Buttery Graham Cracker Crust is the only pie I make for summer gatherings. It’s the dessert that gets the loudest applause, the one people ask for the recipe for, and the one I make when I want to feel like I’m back on that porch in Key West, watching the sun dip below the horizon.
If you’ve been intimidated by the idea of making pie from scratch, or if you’ve tried key lime pie before and found it too sweet or too runny, this is the version for you. It’s simple, it’s tangy, and it’s ridiculously impressive. Let’s get baking.
Why You’ll Love This Key Lime Pie
There are about a dozen reasons I keep making this pie, but let’s be real—you probably just want to know why it’s better than the ones from the grocery store or that dense, heavy version your aunt makes. Here’s the truth.
It’s Actually Tangy — Most store-bought key lime pie is basically sweetened condensed milk with a hint of yellow food coloring. This recipe uses fresh key lime juice (or a good mix of key and Persian limes), so it has that sharp, bright kick that wakes up your palate. It’s not cloying. It’s refreshing.
The Crust is a Game-Changer — I’ve seen too many recipes skip the butter in the crust. Don’t do that. This Classic Key Lime Pie with Buttery Graham Cracker Crust uses melted butter pressed firmly into the pan, creating a cookie-like base that holds up against the wet filling without getting soggy. It’s crunchy, buttery, and essential.
No Bake (Mostly) — Yes, there’s a brief bake time for the crust and the filling, but it’s low and slow. You’re not standing over the stove stirring custard for an hour. You’re mixing, pouring, and waiting. It’s perfect for humid days when you don’t want your kitchen to feel like a sauna.
It Holds Up in the Fridge — Unlike mousse or cream pies that weep and separate after a day, this pie gets better as it chills. The flavors meld, the texture firms up, and it stays stable. I can make it two days ahead, which is a lifesaver when I’m hosting dinner.
Ingredients You Already Have — Seriously. Sweetened condensed milk, eggs, limes, graham crackers, butter. If you have a pantry and a fridge, you’re 90% there. This isn’t a recipe that requires a special trip to a specialty store.
This pie has saved me more than once. It’s my go-to when I need to bring a dessert to a potluck and want to look like I put in effort, even though I didn’t. It’s elegant, it’s classic, and it just works.
Ingredients You’ll Need
Here’s the best part: you probably have most of this already. The beauty of key lime pie is its simplicity. You don’t need fancy gadgets or obscure ingredients. Just quality basics.
For the Buttery Graham Cracker Crust
Graham cracker crumbs (1 ½ cups / 150g) — I buy pre-crushed crumbs to save time, but if you’re feeling fancy, crush whole sheets in a food processor. Make sure they’re fine, not chunky. Chunky crusts are annoying to eat.
Unsalted butter (6 tablespoons / 85g, melted) — This is the “buttery” part of the crust. Don’t skimp. Use real butter, not margarine. It adds flavor and helps the crust bind. Salted butter works too, just omit the salt in the recipe.
Granulated sugar (2 tablespoons / 25g) — Just a little sweetness to balance the tartness of the limes. You can use brown sugar for a deeper molasses flavor, but white sugar keeps it classic.
Pinch of salt — Enhances the flavor of the butter and graham crackers. Don’t skip it.
For the Filling
Fresh key lime juice (½ cup / 120ml) — This is the star. If you can’t find key limes, a mix of ¼ cup key lime juice and ¼ cup Persian lime juice works. Avoid bottled lime juice if you can help it. It tastes metallic and flat. Fresh is non-negotiable for this Classic Key Lime Pie.
Sweetened condensed milk (1 can / 14 oz / 397g) — Do not substitute with evaporated milk. Condensed milk is thick, sweet, and creamy. It’s the structure of the filling. Keep it in the fridge until you use it.
Egg yolks (3 large) — I use only yolks for a richer, creamier texture. The whites can make the filling a bit rubbery. If you have leftover whites, save them for fluffy egg and cheese breakfast sandwiches or meringue!
Fresh lime zest (2 teaspoons) — The zest contains the essential oils that give lime its perfume. Zest before you juice. Use a microplane for the finest zest.
Vanilla extract (1 teaspoon) — Just a splash to round out the flavors. Use pure vanilla, not imitation.
Cream of tartar (½ teaspoon) — Optional, but it helps stabilize the egg yolks and prevents curdling. I always use it.
Equipment Needed
You don’t need fancy equipment for this. Here’s what I actually use.
9-inch Pie Dish — Glass or ceramic works best. I use a glass dish because I can see the bottom browning. Metal pans work too, but watch the crust closely.
Food Processor or Ziploc Bag — For crushing graham crackers. A food processor is faster. A rolling pin and a sturdy bag is fine if you want to avoid cleaning a machine.
Mixing Bowls — Two medium bowls. One for the crust, one for the filling.
Whisk — A good old-fashioned whisk is perfect for blending the eggs and lime juice smoothly.
Zester or Microplane — For getting that fine lime zest. A knife works, but it’s tedious.
Juicer — A handheld citrus juicer makes quick work of the limes. You’ll need about 12-15 limes.
Electric Mixer (Optional) — I don’t use one for the filling, but if you want a lighter texture, you can whip the yolks briefly. Most of the time, I just whisk by hand.
How to Make It: Step-by-Step
Alright, let’s make this! I’m walking you through exactly how I do it, including the little tricks I’ve picked up over the years.
Step 1: Prep Your Oven and Pan (5 minutes)
Preheat your oven to 350°F (175°C). Grease your 9-inch pie dish lightly with butter or cooking spray. This helps the crust stick and makes unmolding easier if you’re feeling brave.
Step 2: Make the Crust (5 minutes)
In a medium bowl, mix the graham cracker crumbs, melted butter, sugar, and salt. Stir until it looks like wet sand. Press this mixture firmly into the bottom and up the sides of your pie dish. Use the bottom of a measuring cup to pack it down tight. You want it even and compact. Bake for 8-10 minutes until it smells toasty. Let it cool completely. While it cools, you can start the filling.
Step 3: Prep the Limes (10 minutes)
Roll your limes on the counter with your palm before cutting them. This breaks the internal membranes and makes juicing easier. Cut them in half and juice them. You need ½ cup of fresh juice. If you’re using Persian limes, you might need more. Taste the juice—it should be sharp. If it’s too sour, you can add a teaspoon more sugar to the filling, but usually, the condensed milk balances it perfectly.
Step 4: Mix the Filling (5 minutes)
In a large bowl, whisk the egg yolks and cream of tartar until smooth. Add the sweetened condensed milk and whisk until combined. Stir in the fresh lime juice and lime zest. Add the vanilla extract. The mixture will look curdled at first—that’s normal. The acid in the lime juice reacts with the milk, but it will smooth out as it bakes.
Step 5: Bake (15-20 minutes)
Pour the filling into the cooled crust. Bake at 350°F (175°C) for 15-20 minutes. The pie is done when the edges are set but the center still jiggles slightly like Jell-O. It will firm up as it cools. Do not overbake, or you’ll get cracks and a rubbery texture.
Step 6: Cool and Chill (Critical Step)
Let the pie cool on a wire rack for 30 minutes. Then, refrigerate for at least 4 hours, preferably overnight. This chilling time is non-negotiable. It allows the filling to set properly and the flavors to meld. If you cut into it warm, it’ll be a soup. Be patient.
Step 7: Serve
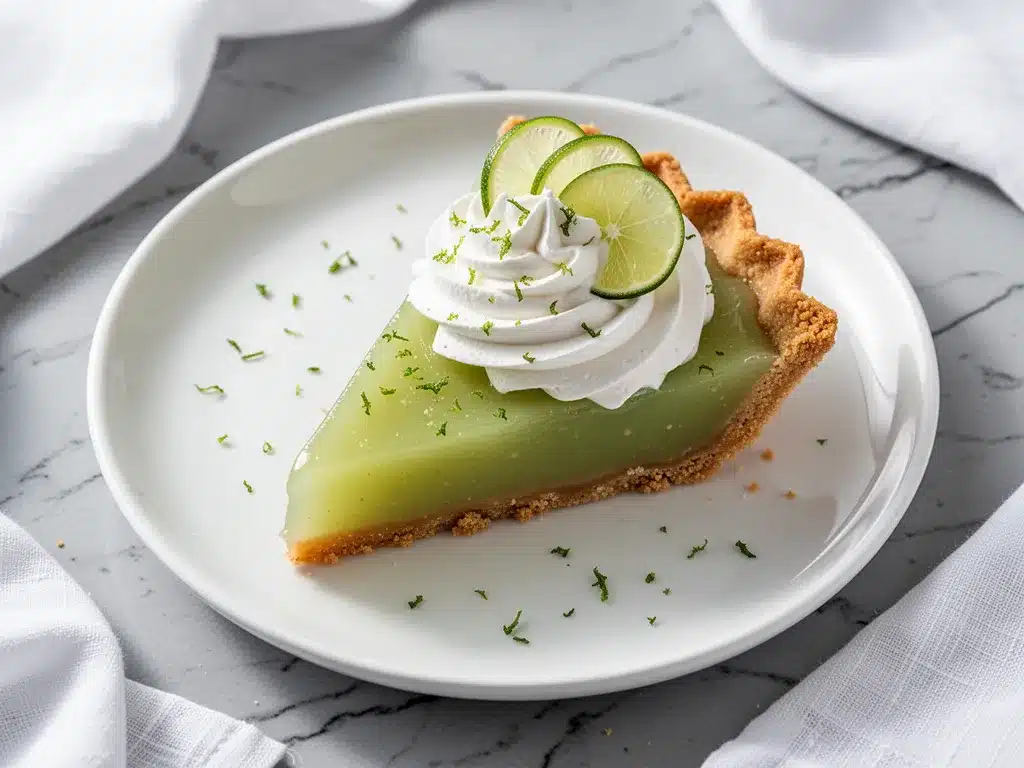
Top with whipped cream and a lime wheel. Slice with a sharp knife dipped in hot water for clean cuts. Enjoy!
Expert Tips & Tricks
Here’s everything I’ve learned from making this dozens of times. These tips will save you from my mistakes.
Don’t Skip the Zest — The juice provides the tartness, but the zest provides the aroma. Without zest, it just tastes like sweet lime milk. Get that green part only, not the white pith, which is bitter.
Room Temperature Ingredients — Take your eggs and condensed milk out of the fridge 30 minutes before baking. Cold ingredients can cause the filling to curdle or bake unevenly.
The Jiggle Test — This is how you know it’s done. The center should move like a wave, not splash like water. If it’s firm, you’ve overbaked it.
Whipped Cream Perfection — Whip heavy cream with a little powdered sugar and vanilla until soft peaks form. Don’t over-whip, or it’ll turn into butter. I add a squeeze of lime juice to the whipped cream for extra zing.
Common Mistake: Cracks in the Pie — Cracks happen when the pie cools too quickly or is overbaked. To prevent this, turn off the oven after baking and leave the door cracked open for an hour. This gradual cooling helps prevent cracks.
Common Mistake: Soggy Bottom — This rarely happens with graham cracker crusts, but if you’re worried, brush the cooled crust with a thin layer of melted chocolate before adding the filling. It creates a moisture barrier.
Variations & Substitutions
Once you’ve nailed the basic version, here’s how you can mix it up. I’ve tried all of these.
Key Lime Cheesecake — Add 8 oz of cream cheese (softened) to the filling mixture. Blend until smooth. It adds richness and stability. This is my favorite variation for holiday parties.
Coconut Key Lime Pie — Add ½ cup of toasted coconut flakes to the crust. Or fold ¼ cup of coconut cream into the filling. It adds a tropical vibe that pairs perfectly with the lime.
Gluten-Free — Use gluten-free graham crackers or almond flour for the crust. Make sure your sweetened condensed milk is certified gluten-free (most are, but check labels).
Dairy-Free — This is harder because of the condensed milk and eggs. You can use coconut condensed milk (made from coconut cream and sugar) and flax eggs, but the texture will be different. I haven’t perfected a fully dairy-free version that tastes just like the original, but the coconut version is still delicious.
Lemon Key Lime Pie — If key limes are too expensive or hard to find, use a 50/50 mix of key lime and Persian lime juice. Or add a tablespoon of lemon juice for extra brightness. It’s not traditional, but it works.
Serving & Storage
How to Serve: — I usually serve this straight from the fridge. It’s best cold. Top with homemade whipped cream, a sprinkle of crushed graham crackers, or a thin slice of lime. It looks elegant and tastes even better.
Side Dishes: — This pie is rich, so it pairs well with light sides if you’re serving a full meal. I like it with Mediterranean chickpea salad or a simple green salad with vinaigrette. The acidity cuts through the richness of the pie.
Storage: — Store in the refrigerator, covered with plastic wrap or in an airtight container, for up to 5 days. It actually tastes better on day 2 or 3 as the flavors deepen.
Freezing: — You can freeze this pie, but the texture of the filling may change slightly upon thawing. It might become a bit grainy. If you must freeze, wrap it tightly in plastic and foil. Thaw in the fridge overnight. I prefer to make it fresh, but freezing works in a pinch.
Reheating: — Do not reheat this pie. It’s meant to be eaten cold. If you want it slightly softer, let it sit on the counter for 15 minutes before serving.
Nutrition Information
I’m not a nutritionist, but here’s the breakdown if you’re tracking. This is a rich dessert, so portion control is key.
Per Slice (based on 8 servings):
| Nutrient | Amount |
|---|---|
| Calories | 380 |
| Total Fat | 18g |
| Saturated Fat | 10g |
| Cholesterol | 120mg |
| Sodium | 220mg |
| Total Carbs | 52g |
| Dietary Fiber | 1g |
| Sugars | 48g |
| Protein | 6g |
What’s Good: — It provides some calcium from the dairy and a bit of vitamin C from the limes. The graham cracker crust adds a little fiber.
What to Know: — It’s high in sugar due to the condensed milk. If you’re watching your sugar intake, consider making smaller slices or using a sugar-free condensed milk alternative (though the texture will differ).
My Take: — Look, this is dessert. It’s meant to be indulgent. It’s not a health food. But it’s made from real ingredients, and it’s far better than anything from a box. When I make this, I enjoy it mindfully. One or two slices are plenty. Pair it with a cup of coffee or tea to balance the sweetness.
Final Thoughts
So that’s my go-to Classic Key Lime Pie with Buttery Graham Cracker Crust! I’ve probably talked your ear off at this point, but when you make a recipe this often, you have a lot to say about it.
This pie has saved me more than once. It’s my answer to “what’s for dessert” when I want to impress without stressing. My family loves it, my friends ask for it, and I love making it. It’s a reminder that sometimes the simplest recipes are the most rewarding.
Make it yours! Try different toppings, adjust the lime juice to your taste, or add a twist of coconut. The best recipes are the ones you adapt to your family’s tastes.
If you make this, drop a comment and let me know what you think! I love hearing how recipes turn out in your kitchen. And if something doesn’t work, tell me that too—I’m here to help troubleshoot.
Happy baking! And I hope your kitchen smells half as good as mine does right now.
Frequently Asked Questions
Q: Can I use bottled lime juice?
A: You can, but fresh tastes so much better in this recipe. Bottled juice often has preservatives that give it a metallic or flat flavor. If you must use it, choose one with no preservatives and mix it with fresh zest to compensate. But honestly, buying a dozen limes takes like 10 minutes. It’s worth it.
Q: Why did my pie fillings curdle?
A: The acid in the lime juice reacts with the dairy, causing it to curdle slightly. This is normal and actually desirable for the texture. If it looks like cottage cheese before baking, don’t panic. It will smooth out in the oven. If it curdles after baking, you might have overbaked it or the eggs weren’t fully incorporated.
Q: Can I make this ahead for a party?
A: Absolutely! This pie is even better the next day. Make it 24-48 hours before your party. Store it in the fridge covered. It holds up well and the flavors have time to meld. Just add the whipped cream right before serving.
Q: How do I get clean slices?
A: Dip your knife in hot water and wipe it dry before each cut. The heat helps the knife glide through the cold, firm filling without tearing the crust. This is a pro tip that makes a huge difference in presentation.
Q: Can I use Persian limes instead of key limes?
A: Yes, but the flavor will be different. Persian limes are larger and less aromatic than key limes. For the closest flavor to traditional key lime pie, use a mix of 50% key lime juice and 50% Persian lime juice. If you can’t find key limes, just use Persian limes and add extra zest for aroma.
Q: Can I freeze this pie?
A: You can, but the texture may change. The filling might become slightly grainy or soft after thawing. If you freeze it, wrap it tightly in plastic and foil. Thaw in the fridge overnight. I prefer to make it fresh, but freezing works in a pinch.
Pin This Recipe!
Classic Key Lime Pie with Buttery Graham Cracker Crust
- Total Time: 55 minutes
- Yield: 8 servings 1x
Description
A tangy, creamy, and buttery homemade key lime pie with a crisp graham cracker crust. This no-fuss dessert is perfect for summer gatherings and can be made ahead of time.
Ingredients
- 1 ½ cups graham cracker crumbs
- 6 tablespoons unsalted butter, melted
- 2 tablespoons granulated sugar
- Pinch of salt
- ½ cup fresh key lime juice (or mix of key and Persian limes)
- 1 can (14 oz) sweetened condensed milk
- 3 large egg yolks
- 2 teaspoons fresh lime zest
- 1 teaspoon vanilla extract
- ½ teaspoon cream of tartar
Instructions
- Preheat oven to 350°F (175°C) and lightly grease a 9-inch pie dish.
- In a medium bowl, mix graham cracker crumbs, melted butter, sugar, and salt until it resembles wet sand.
- Press the mixture firmly into the bottom and up the sides of the pie dish. Bake for 8-10 minutes until toasted, then let cool completely.
- Roll limes on the counter to soften, then cut and juice them to yield ½ cup of fresh juice.
- In a large bowl, whisk egg yolks and cream of tartar until smooth.
- Add sweetened condensed milk and whisk until combined.
- Stir in fresh lime juice, lime zest, and vanilla extract. The mixture may look curdled initially.
- Pour filling into the cooled crust.
- Bake at 350°F (175°C) for 15-20 minutes until edges are set but the center jiggles slightly.
- Cool on a wire rack for 30 minutes, then refrigerate for at least 4 hours or overnight until fully set.
- Serve topped with whipped cream and lime slices.
Notes
Use fresh lime juice for the best flavor; bottled juice can taste metallic. Ensure ingredients are at room temperature to prevent curdling. The pie must be chilled for at least 4 hours to set properly. For clean slices, dip a sharp knife in hot water before cutting. Do not overbake to avoid cracks.
- Prep Time: 30 minutes
- Cook Time: 25 minutes
- Category: Dessert
- Cuisine: American
Nutrition
- Serving Size: 1 slice
- Calories: 380
- Sugar: 48
- Sodium: 220
- Fat: 18
- Saturated Fat: 10
- Carbohydrates: 52
- Fiber: 1
- Protein: 6
Keywords: key lime pie, graham cracker crust, homemade dessert, summer pie, tangy lime dessert, no bake pie, classic key lime pie


