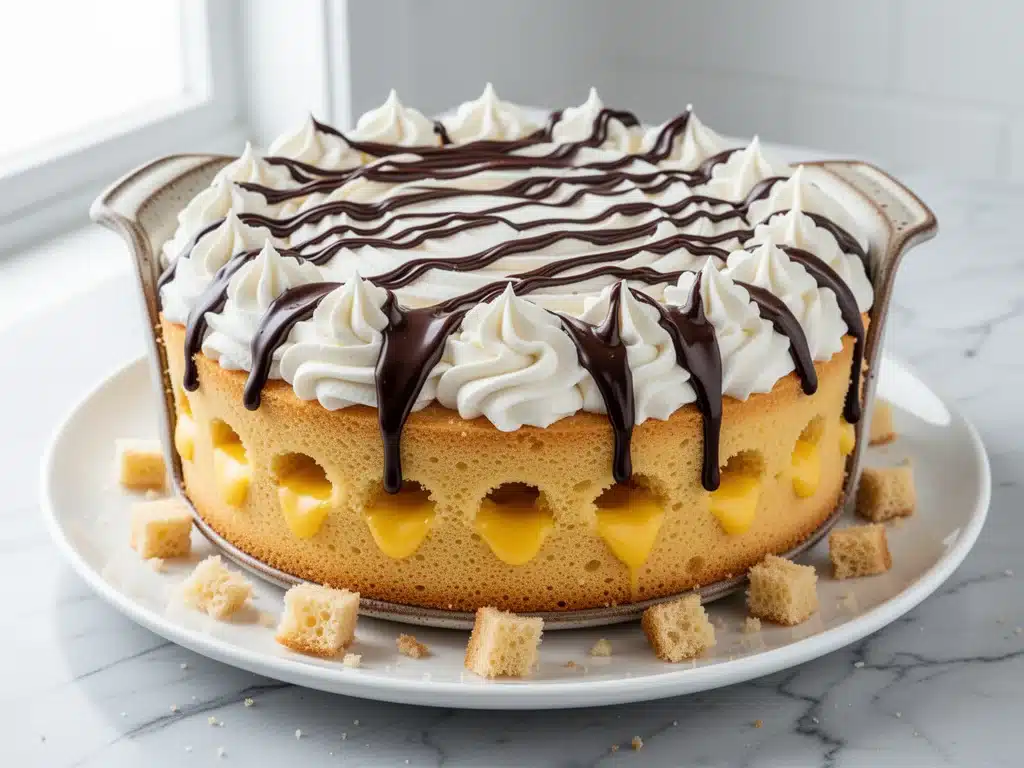
Last year, I attempted to be the “cool mom” for my son’s birthday party. You know the type: making everything from scratch, looking effortless, serving something that screams “I put thought into this.” I decided to make a Boston Cream Pie. Well, technically a Boston Cream Cake. Because pies are for autumn, and birthdays happen in the spring. I was confident. I had watched three YouTube tutorials. I felt like I had it down.
Then came the filling. Boston Cream filling is essentially a thick pastry cream, right? How hard could it be? I whisked the eggs, heated the milk, added the cornstarch, and waited. I waited for it to thicken. It thickened. I pulled it off the heat, poured it into the cake layers, and chilled them. Or so I thought. I left them out for two hours because the party started at 4 PM and I was busy with other things. Two hours. That’s all it took.
When I finally went to frost the cake, the filling had collapsed into a soupy mess. It wept moisture into the sponge. The bottom layer was soggy. The sides were sliding. It looked less like a bakery masterpiece and more like a dessert that had given up on life. My son looked at it, looked at me, and said, “Mom, is it supposed to be wet?” I wanted to die. I scraped it into the trash and ordered a sheet cake from the grocery store. It was chocolate. It was fine. But it stung.
That failure haunted me. I knew the flavor combination was perfect—the vanilla sponge, the silky custard, the rich chocolate ganache. I just needed a vessel that could handle the moisture without falling apart. That’s when I remembered poke cakes. You know, those cakes where you poke holes in them and pour stuff inside? It’s the ultimate cheat code for busy weeknights. It’s forgiving. It’s moist. It’s impossible to mess up.
So, I took that ruined birthday cake and reinvented it. I swapped the delicate sponge for a sturdy yellow cake mix base (yes, I use a mix, hear me out), poked holes all over it, and poured a thickened vanilla pudding into the voids. Then I topped it with a ganache that actually set. The result? The Homemade Boston Cream Poke Cake with Chocolate Ganache. It tastes like it took all day, but it takes about 45 minutes of active time. It’s the perfect dessert for when you need to impress but don’t have the energy to fuss. And honestly? It’s better than the original. The pudding stays put. The cake stays moist. No weeping. No sliding. Just pure, creamy, chocolatey victory.
Why You’ll Love This Boston Cream Poke Cake Recipe
After that birthday disaster, I made this poke cake version at least ten times in two months. It has completely replaced my need for complicated baking projects on weeknights. Here’s why this recipe is now a permanent fixture in my rotation:
It’s a Weeknight Savior — Seriously, if you can boil water and poke holes with a fork, you can make this. I’ve made this on Tuesdays when I got home from work at 7 PM, exhausted, and still had the energy to throw it together. It requires zero advanced baking skills.
Maximum Moisture, Minimum Effort — Poke cakes are basically magic for dry cakes. By pouring the pudding directly into the sponge, you’re ensuring every bite is moist. You don’t need to brush syrup or soak it. The cake does the work for you. It’s the opposite of that dry, crumbly box cake I used to hate.
Pantry-Friendly Ingredients — You probably have most of this already. A box of yellow cake mix, instant pudding mix, milk, chocolate chips, and heavy cream. These aren’t exotic ingredients. You don’t need to make a special trip to the store. It’s perfect for that “I need dessert now” moment.
Make-Ahead Friendly — This is my secret weapon for busy weekends. I can make this on Saturday morning, let it chill in the fridge all day, and it’s ready for Sunday dinner. In fact, it tastes better the next day because the pudding has fully absorbed and the ganache has set completely. It’s basically meal prep for dessert.
Restaurant-Quality Look — Don’t let the simplicity fool you. This looks like something from a fancy patisserie. The glossy chocolate ganache dripping down the sides? That’s pure Instagram gold. But unlike my birthday cake attempt, this one actually holds its shape. It’s sturdy enough to slice cleanly and beautiful enough to serve on a platter.
This is my go-to when I need a dessert that just works. No tempering chocolate, no piping bags, no delicate layers. Just reliable, delicious food that makes everyone happy. It’s the antidote to baking stress.
Ingredients You’ll Need for the Best Poke Cake
Here’s the best part: you probably have most of this already in your pantry. I’m particular about three ingredients here—the pudding mix, the chocolate, and the cream—and I’ll tell you exactly why.
Yellow Cake Mix (1 box, 15.25 oz / 432g) — I stick to the classic yellow cake mix for that authentic Boston Cream flavor. Golden Vanilla or Lemonade Cake mixes also work, but yellow is the traditional choice. I don’t feel bad using a mix here; it provides the sturdy structure we need for poking. If you prefer from-scratch, you can use a reliable one-bowl cake recipe as a base, but keep in mind it might be more delicate.
Instant Vanilla Pudding Mix (2 boxes, 3.4 oz each / 96g total) — This is the heart of the poke cake. Do not use “cook and serve” pudding. It must be the instant kind. The instant pudding thickens quickly and stays stable in the fridge, which is crucial so your cake doesn’t get soggy. I like Jell-O or French’s brands. They have a consistent texture.
Whole Milk (3 cups / 720ml) — You’ll need this for both the cake batter and the pudding. Use whole milk for the best richness. Skim milk will make the pudding taste watery and the cake dry. Don’t substitute with almond milk unless you want a weird aftertaste; dairy is key here for that classic custard flavor.
Vegetable Oil or Melted Butter (½ cup / 120ml) — The cake mix instructions usually call for oil, which keeps the cake moist. I sometimes swap half the oil for melted butter for extra flavor, but oil is foolproof for keeping it tender. If you’re using olive oil in other cakes, you might be tempted here, but stick to neutral oil for this one.
Eggs (3 large) — These bind the cake and add structure. Room temperature eggs mix better into the batter, ensuring a smooth cake without lumps. If you’re in a rush, just run them under warm water for a minute.
Heavy Cream (1 cup / 240ml) — For the ganache. You need heavy cream with at least 36% fat. Light cream or half-and-half won’t thicken properly into a ganache; it’ll stay runny. This is non-negotiable if you want that glossy, drippy effect.
Semi-Sweet Chocolate Chips (1 cup / 170g) — I use Ghirardelli or Hershey’s semi-sweet. Dark chocolate chips work too if you prefer less sweetness. Avoid chocolate bars that aren’t meant for melting, as they might have additives that prevent smooth melting. Fresh chips melt more evenly than older ones sitting in the back of the pantry.
Salt (1 pinch) — A tiny pinch in the ganache enhances the chocolate flavor. It’s a pro tip that makes the chocolate taste more intense, not salty.
Optional: Vanilla Extract (1 teaspoon) — I add a splash to the pudding mixture to boost the vanilla flavor. It’s subtle, but it helps bridge the gap between the cake and the custard.
Equipment Needed
You don’t need fancy equipment for this. Here’s what I actually use. Most of this is stuff you already have in your kitchen drawer.
9×13 Inch Baking Pan — I use a metal pan, preferably dark-colored, as it conducts heat well. Glass pans work too, but you might need to reduce the baking time by 5 minutes. Just keep an eye on it. The pan needs to be standard size so the cake layer is thick enough to hold the pudding.
Electric Mixer or Whisk — For the cake batter. A hand mixer is fastest, but a whisk works if you’re doing it by hand. You need to mix the batter until it’s smooth, so a mixer saves your arm. I’ve done it by hand once; don’t recommend it.
Fork or Wooden Spoon Handle — To poke the holes. I use the handle of a wooden spoon because it’s thick enough to make good holes without going all the way through the bottom. A fork works too, but makes smaller holes that don’t hold as much pudding.
Spatula — For spreading the pudding. A rubber spatula is best because it gets into the corners of the pan and scrapes the bowl clean. You want every bit of that pudding in the cake.
Small Saucepan — For the ganache. You can use a microwave-safe bowl, but a saucepan gives you more control over the heat. I prefer the saucepan because I can watch the cream simmer without boiling over.
Whisk — Essential for the ganache. You need to whisk the chocolate and cream together until it’s completely smooth. Any lumps will ruin the glossy finish. A small balloon whisk works best.
Measuring Cups and Spoons — Standard stuff. Dollar store versions work fine for dry ingredients. For the milk and cream, liquid measuring cups are helpful.
Refrigerator Space — Obviously, you need room for the cake to chill. This isn’t equipment, but it’s crucial. If your fridge is packed, this cake will take longer to set. I usually make it the day before I need it.
How to Make It: Step-by-Step
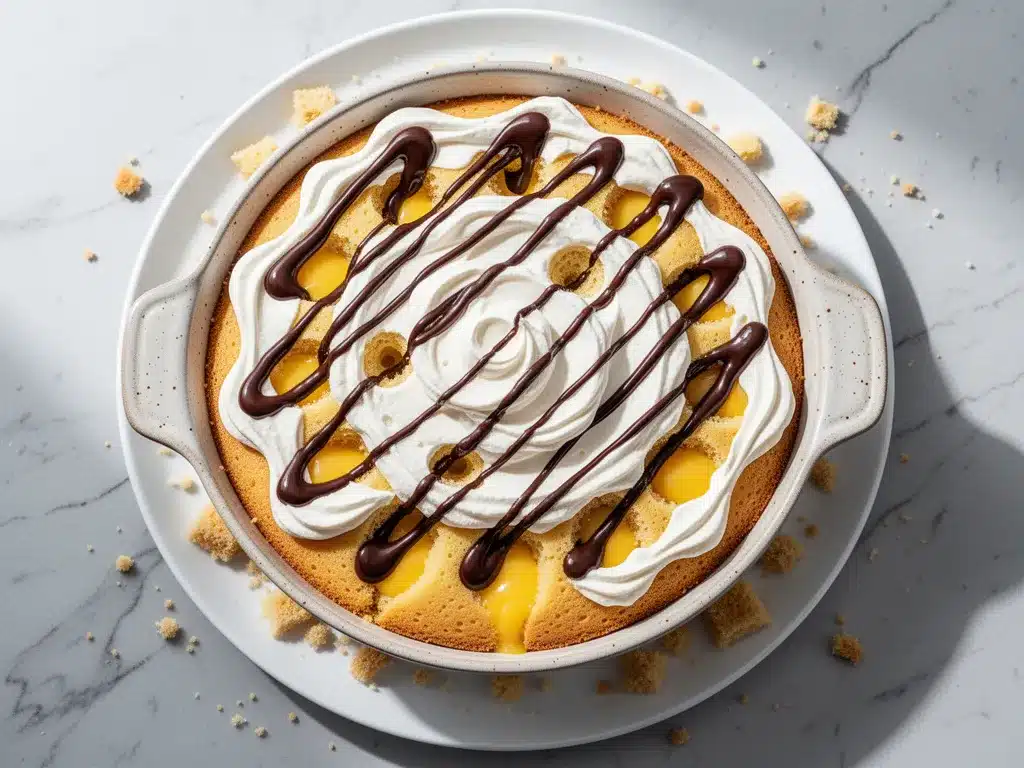
Alright, let’s make this! I’m walking you through exactly how I do it, including the little tricks I’ve picked up. This process is straightforward, but timing matters.
Step 1: Prep Your Pan and Oven (5 minutes)
Preheat your oven to 350°F (175°C). Grease your 9×13 inch baking pan with non-stick spray or butter. I like to line the bottom with parchment paper just to be safe—easy cleanup later. While the oven heats, get your cake mix, pudding mix, milk, eggs, and oil ready. Having everything measured out makes the mixing process smooth.
Step 2: Make the Cake Batter (10 minutes)
In a large bowl, combine the yellow cake mix, eggs, milk, and vegetable oil (or melted butter). Mix on medium speed for about 2 minutes, or whisk vigorously by hand until smooth. The batter should be thick but pourable. Pour it into your prepared pan and spread it evenly. I use a spatula to smooth the top, making sure the corners are filled. Bake for 20-25 minutes, or until a toothpick inserted in the center comes out clean. The cake should be golden brown and spring back when touched.
Step 3: Poke the Holes (5 minutes)
This is the critical step. While the cake is still hot, take your wooden spoon handle or fork and poke holes all over the surface. I go in about 1 inch apart, covering the entire cake. Push down until you hit the bottom of the pan, but don’t tear the cake. The holes need to be deep enough to hold the pudding. If you wait until the cake is cool, it’s harder to poke, and the holes might close up. Hot cake = easy poking.
Step 4: Make and Pour the Pudding (10 minutes)
While the cake is baking and cooling slightly, whisk the two boxes of instant vanilla pudding with 3 cups of cold whole milk in a large bowl. Whisk for 2 minutes until it thickens. It should be quite thick, like a soft-serve ice cream consistency. Once the cake is baked and you’ve poked the holes, pour the pudding evenly over the top. Use a spatula to gently spread it into the holes. You might need to tilt the pan to help the pudding flow into the gaps. Don’t worry if it looks messy; it will settle.
Step 5: Chill the Cake (1 hour minimum)
Place the cake in the refrigerator for at least 1 hour, but preferably 2-4 hours. This allows the pudding to set and the cake to absorb the moisture. If you rush this step, the pudding will be runny and the ganache won’t stick. I usually make this the night before, so it’s fully set by morning. The cake will look like a single, cohesive layer by the end of this time.
Step 6: Make the Chocolate Ganache (10 minutes)
In a small saucepan, heat the heavy cream over medium heat until it just starts to simmer (small bubbles around the edges). Do not let it boil over. Pour the hot cream over the semi-sweet chocolate chips in a heatproof bowl. Let it sit for 2 minutes without stirring. This melts the chocolate gently. Then, whisk slowly from the center outward until the mixture is smooth, glossy, and uniform. Add a pinch of salt if using. Let the ganache cool for 5-10 minutes until it’s slightly thickened but still pourable. If it gets too thick, microwave for 10 seconds.
Step 7: Pour and Serve (5 minutes)
Pour the ganache over the chilled cake. It will drip down the sides, which is exactly what you want. Use a spatula to guide the ganache to the edges. Let the cake sit at room temperature for 15 minutes to let the ganache set slightly, then slice and serve. Enjoy!
Expert Tips & Tricks
Here’s everything I’ve learned from making this dozens of times. These tips will save you from my mistakes.
Keep the Cake Hot When Poking
I cannot stress this enough. If you wait for the cake to cool completely, the pores close up, and your holes won’t hold the pudding. Poke it while it’s warm from the oven. It’s safer than you think, and the difference in absorption is massive.
Don’t Skimp on the Pudding Thickness
If your pudding is too thin, it will sink to the bottom and make the cake soggy. Make sure you whisk the instant pudding mix with cold milk until it’s thick. If it’s still runny after 2 minutes, add a little more pudding mix. It should be spoonable, not drinkable.
Chill Long Enough
I know you want to eat it now. Resist. If you pour the ganache on before the pudding is set, the ganache will slide off and mix with the pudding, creating a muddy mess. An hour is the minimum, but 2-4 hours is ideal. The cake needs time to become a solid unit.
Control the Ganache Temperature
If the ganache is too hot, it will run off the cake instantly and pool at the bottom. If it’s too cold, it will be lumpy and hard to spread. Let it cool for 5-10 minutes after mixing. It should coat the back of a spoon but still pour easily. This is the sweet spot.
Use a Parchment Paper Lift
If you’re serving this at a party, line your pan with parchment paper with overhanging edges. You can lift the entire cake out of the pan and place it on a serving platter. It makes slicing and serving much cleaner, and you avoid the “stuck cake” struggle.
Common Mistakes (and how to avoid them):
– Mistake: Pudding is watery. Fix: Use cold milk and whisk thoroughly. Ensure you’re using instant pudding, not cook-and-serve.
– Mistake: Ganache is grainy. Fix: The cream wasn’t hot enough, or you didn’t let it sit before whisking. Heat the cream properly and be patient.
– Mistake: Cake is dry. Fix: You overbaked it. Check it at 20 minutes. Poke cakes are moist, but an overbaked base will be dry.
Variations & Substitutions
Once you’ve nailed the basic version, here’s how you can mix it up. I’ve tried all of these.
Chocolate Poke Cake
Swap the yellow cake mix for chocolate cake mix. Use chocolate pudding mix instead of vanilla. It’s a double-chocolate bomb. My kids prefer this version—it tastes like a dessert bar from the cafeteria.
Coffee Flavor
Add 1 tablespoon of instant espresso powder to the cake batter. It enhances the chocolate flavor without making it taste like coffee. Great for adult parties.
Carrot Cake Poke Cake
Use carrot cake mix and cream cheese pudding. Top with cream cheese frosting instead of ganache. It’s a fun twist that works surprisingly well.
Gluten-Free
Use a gluten-free yellow cake mix and ensure your pudding and chocolate chips are certified gluten-free. Most instant puddings are naturally gluten-free, but check the label. The texture might be slightly denser, but it still works.
Dairy-Free
Use dairy-free milk (like oat or soy) for the pudding and cake. Use dairy-free chocolate chips and coconut cream for the ganache. It’s different, but still rich and creamy. My lactose-intolerant friend loves this version.
Lighter Version
Use low-fat milk for the pudding (though it might be slightly less thick) and reduce the heavy cream in the ganache by half, mixing with a little milk. It’s not as rich, but still tasty.
Serving & Storage
How to Serve:
I usually serve this straight from the pan, but for a dinner party, I lift it out with the parchment paper and place it on a nice platter. Slice with a sharp knife. For clean cuts, wipe the knife between slices. It’s best served chilled, as the pudding and ganache are firmer and easier to slice.
Side Dishes:
This is rich, so it pairs well with light sides if you’re serving it as part of a meal. A simple green salad or some fresh berries cut through the sweetness. But honestly? It’s usually the main event for dessert.
Storage Instructions:
Store leftovers in an airtight container in the refrigerator for up to 4 days. The cake will stay moist, and the ganache will harden slightly in the fridge. This is actually preferred, as it makes slicing easier.
Reheating:
You don’t need to reheat this. In fact, reheating might make the ganache melt into a puddle. Serve it cold or at room temperature. If you must reheat, just let it sit out for 15 minutes to soften slightly.
Freezing:
This doesn’t freeze well. The pudding texture changes when thawed, becoming grainy. It’s best made fresh or stored in the fridge. If you have leftovers, eat them within 4 days.
Nutrition Information
I’m not a nutritionist, but here’s the breakdown if you’re tracking. This is a rich dessert, so portion control is key.
Per Serving (based on 12 servings):
| Nutrient | Amount |
|---|---|
| Calories | 380 |
| Protein | 5g |
| Carbs | 45g |
| Fiber | 1g |
| Sugar | 32g |
| Fat | 20g |
| Saturated Fat | 12g |
| Cholesterol | 45mg |
| Sodium | 280mg |
What’s Good:
It’s a treat, so don’t expect it to be healthy. But it provides some energy from the carbs and fat. The pudding adds a bit of calcium.
What to Know:
High in sugar and saturated fat. Use low-sugar chocolate chips if you’re watching sugar intake. The sodium is moderate.
My Take:
Look, this is Boston Cream Poke Cake. It’s cake, pudding, and chocolate ganache. It’s not a diet recipe. But it’s way better than store-bought, costs less, and I know exactly what’s in it. When I want to make it lighter, I use the half-and-half version and load up on vegetables. But usually? I just eat a reasonable portion and enjoy it.
Final Thoughts
So that’s my Homemade Boston Cream Poke Cake with Chocolate Ganache! I’ve probably talked your ear off at this point, but when you make a recipe this often, you have a lot to say about it.
This has saved weeknight desserts more times than I can count. It’s my answer to “what’s for dessert” when I’m tired, don’t want to order takeout, and still want something that tastes really good. My kids are happy, my husband’s happy, and I’m happy because I’m not stressed about baking.
Make it yours! Try different pudding flavors, swap in your favorite chocolate, adjust the ganache thickness. The best recipes are the ones you adapt to your family’s tastes.
If you make this, drop a comment and let me know what you think! I love hearing how recipes turn out in your kitchen. And if something doesn’t work, tell me that too—I’m here to help troubleshoot.
Happy cooking! And I hope your kitchen smells half as good as mine does right now.
Frequently Asked Questions
Q: Can I use cool whip instead of pudding?
A: You can, but it’s not traditional. Cool whip is lighter and airier, so it won’t provide that dense, custard-like texture. If you use it, fold it into the cake after poking, but it won’t set as firmly. I prefer the pudding for that authentic Boston Cream taste.
Q: Why did my ganache turn out grainy?
A: Usually means the cream wasn’t hot enough to melt the chocolate fully, or you stirred too vigorously too soon. Let the cream simmer properly, pour it over the chips, wait 2 minutes, then whisk gently from the center out. If it’s already grainy, you can try warming it slightly over low heat while whisking.
Q: Can I make this ahead for a dinner party?
A: Absolutely! This is actually better made ahead. Make it 1-2 days before. The flavors meld, and the ganache sets nicely. Just keep it in the fridge until you’re ready to serve.
Q: Why did my pudding sink to the bottom?
A: The pudding was too thin, or you didn’t poke the holes deep enough. Make sure your pudding is thick and your holes go all the way to the bottom. Also, chill the cake long enough to let the pudding set.
Q: Can I use a different type of cake?
A: Yes! Vanilla, yellow, or even lemon cake work well. Just ensure the cake is sturdy enough to hold the moisture. Avoid very delicate cakes like angel food.
Q: How do I store leftovers?
A: Cover tightly with plastic wrap or store in an airtight container in the fridge. It will last up to 4 days. Do not freeze.
Q: Can I double this recipe?
A: Yes, but you’ll need a larger pan (like a 9×13 and a smaller one, or a large sheet pan). Adjust baking time accordingly. The poking and pudding steps remain the same.
Pin This Recipe!

Boston Cream Poke Cake: 5-Step Easy Homemade Dessert
- Total Time: 45 minutes
- Yield: 12 servings 1x
Description
A forgiving and moist poke cake that combines a sturdy yellow cake base with thickened vanilla pudding and a rich chocolate ganache, offering the classic Boston Cream flavor without the structural issues of traditional layer cakes.
Ingredients
- 1 box (15.25 oz / 432g) yellow cake mix
- 2 boxes (3.4 oz each / 96g total) instant vanilla pudding mix
- 3 cups (720ml) whole milk
- ½ cup (120ml) vegetable oil or melted butter
- 3 large eggs
- 1 cup (240ml) heavy cream
- 1 cup (170g) semi-sweet chocolate chips
- 1 pinch salt
- 1 teaspoon vanilla extract (optional)
Instructions
- Preheat oven to 350°F (175°C). Grease a 9×13 inch baking pan and line with parchment paper if desired.
- In a large bowl, combine cake mix, eggs, milk, and oil/butter. Mix on medium speed for 2 minutes until smooth. Pour into prepared pan and bake for 20-25 minutes until a toothpick comes out clean.
- While the cake is still hot, poke holes all over the surface about 1 inch apart using a wooden spoon handle or fork, pushing down to the bottom of the pan.
- In a separate bowl, whisk instant pudding mix with 3 cups of cold whole milk for 2 minutes until thick. Pour evenly over the hot cake and spread into holes.
- Refrigerate the cake for at least 1 hour, preferably 2-4 hours, until the pudding is set.
- Heat heavy cream in a small saucepan until it just starts to simmer. Pour over chocolate chips in a heatproof bowl and let sit for 2 minutes. Whisk until smooth and glossy. Let cool for 5-10 minutes.
- Pour the ganache over the chilled cake, allowing it to drip down the sides. Let sit at room temperature for 15 minutes before slicing and serving.
Notes
Keep the cake hot when poking holes to ensure proper absorption. Ensure pudding is thick before pouring to prevent sogginess. Chill cake for at least 1 hour before adding ganache. Do not freeze as pudding texture may become grainy.
- Prep Time: 15 minutes
- Cook Time: 25 minutes
- Category: Dessert
- Cuisine: American
Nutrition
- Serving Size: 1 slice
- Calories: 380
- Sugar: 32
- Sodium: 280
- Fat: 20
- Saturated Fat: 12
- Carbohydrates: 45
- Fiber: 1
- Protein: 5
Keywords: Boston Cream Poke Cake, easy dessert, weeknight baking, chocolate ganache, vanilla pudding cake, homemade poke cake


