I have a confession to make. Last Friday night, I was supposed to be prepping for a big weekend dinner party. You know the type—roasts, complicated sauces, things that require actual planning. Instead, I found myself standing in my kitchen at 11 PM, staring at a bag of dark chocolate chips and a half-empty jar of espresso powder, deciding to make dessert first.
It wasn’t a random act of chaos. It was desperation. I needed something to satisfy a craving that felt like it was clawing its way out of my chest. I didn’t want cake. I didn’t want ice cream. I wanted something dense, rich, and caffeinated. I wanted the kind of cookie that makes you pause mid-bite and question your life choices because it’s just that good.
So, I threw together a batch of dark chocolate espresso brownie cookies with crackly tops. I didn’t have a recipe. I just had instincts and a lot of butter. The first batch was a disaster—flat, greasy, and underbaked in the middle. The second batch was better, but the tops stayed matte and matte is boring when you’re dealing with chocolate. It wasn’t until the third attempt, when I realized I’d forgotten to let the dough rest in the fridge, that everything clicked.
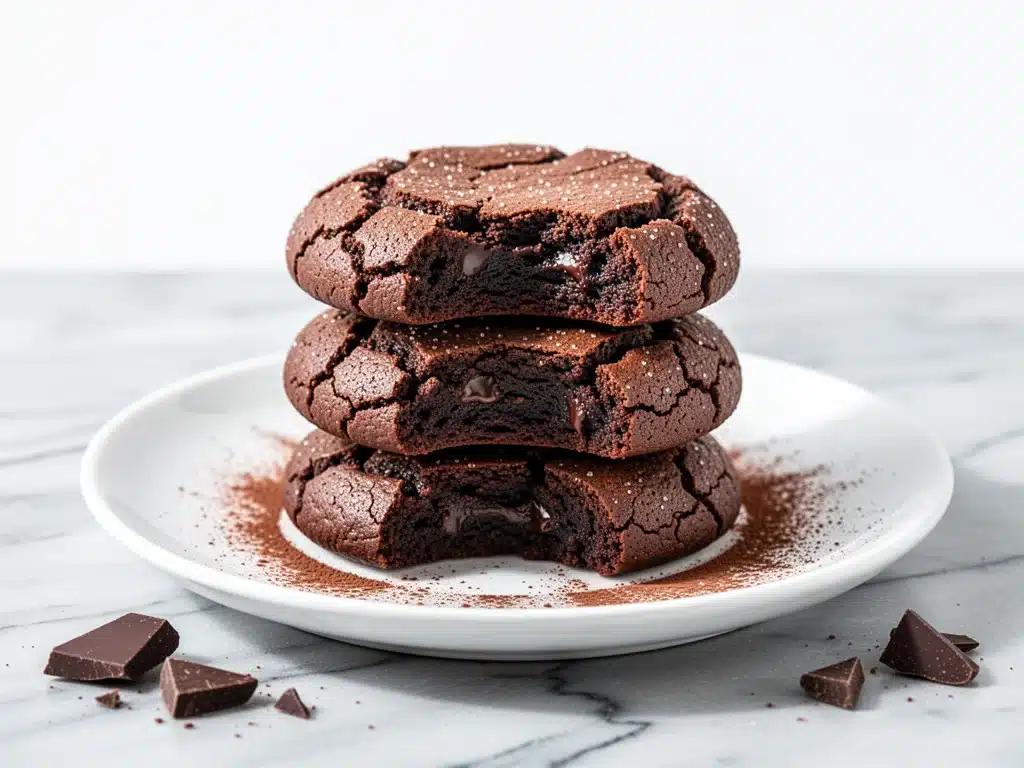
Those cookies didn’t just bake; they transformed. They spread just enough to become chewy, stayed firm enough to hold their shape, and developed that signature, paper-thin crackly crust that shatters when you bite into the fudgy center. I ate one straight out of the oven. Then another. Then I had to hide the rest from my family because they would have devoured them before dinner.
This is the recipe I’ve refined over dozens of batches. It’s not just a cookie; it’s a mood. It’s for those nights when you need a pick-me-up that tastes like a brownie but behaves like a cookie. If you love the combo of bitter espresso and sweet chocolate, you’re going to obsess over these dark chocolate espresso brownie cookies with crackly tops. It’s the best easy recipe I’ve found for balancing intensity with texture.
Why You’ll Love This Recipe
There are a lot of chocolate cookies out there. There are also a lot of espresso cookies. But this dark chocolate espresso brownie cookie recipe hits a specific sweet spot that most bakers miss. It’s not just about flavor; it’s about the experience of eating it.
Here’s why this is now a permanent fixture in my baking rotation:
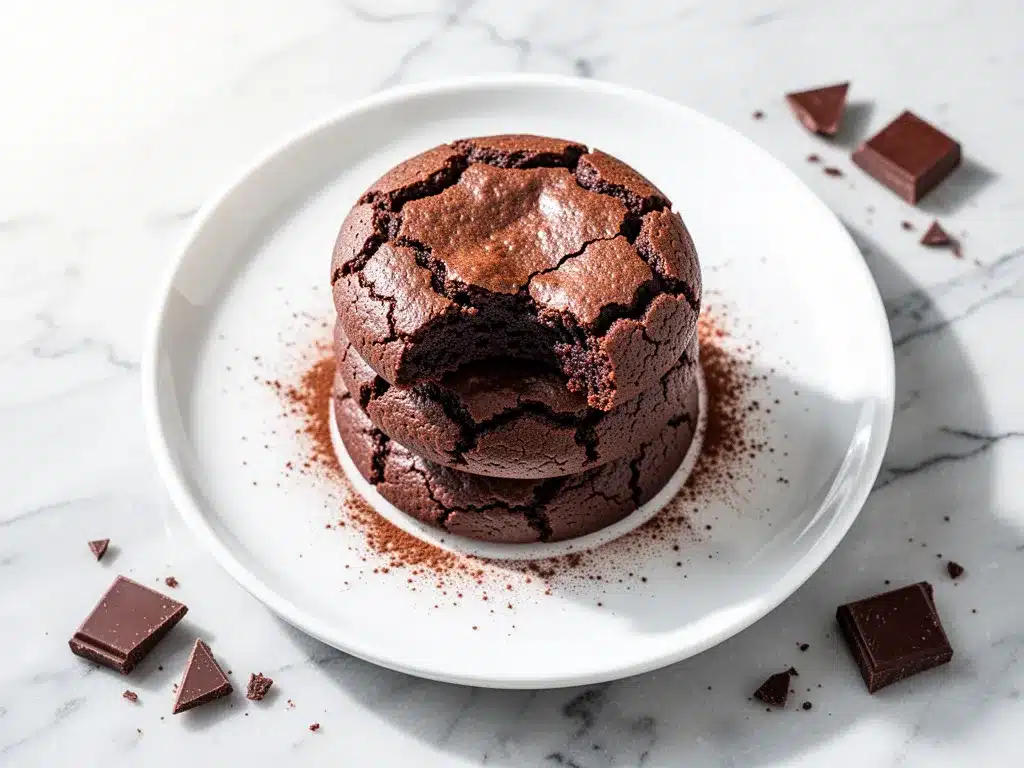
That Crackly Top — Seriously, the texture is everything. I’ve tried so many methods to get that thin, crinkly crust, and this one delivers every time. It’s delicate, almost like a sugar glass, but it melts instantly. It’s the difference between a good cookie and a bakery-worthy one. I’ve made these for my book club, and three different people asked if I bought them from a fancy local shop.
Coffee-Lover’s Paradise — If you’re a fan of my copycat iced brown sugar oatmilk espresso, you already know I’m a caffeine junkie. This cookie takes that love and packs it into a dense, fudgy bite. The espresso doesn’t make them taste like coffee; it makes the chocolate taste more like chocolate. It’s a flavor enhancer, not a flavor override.
Chewy, Not Cakey — I hate dry, crumbly cookies. I want that brownie-like density. This recipe uses a higher ratio of brown sugar to white sugar and a touch of cornstarch to keep the center soft and chewy while the edges crisp up slightly. It’s the perfect contrast. One bite and you’re hooked.
Quick and Forgiving — You don’t need a mixer for this. You can make this by hand in about 15 minutes. The dough comes together fast, and since it needs to chill, you can prep it ahead of time. It’s perfect for busy weeknights when you want a treat but don’t have hours to spare.
Great for Gifting — These travel well. The sturdy texture means they don’t crumble in a tin. I’ve wrapped them in cellophane and tied them with ribbon for neighbors, and they always get compliments. It’s an easy win for anyone looking to impress without trying too hard.
This is my go-to when I need to lift my spirits or impress guests with minimal effort. It’s rich, it’s intense, and it’s reliably delicious every single time.
Ingredients You’ll Need
Here’s the best part: you probably have most of this already. This isn’t a recipe that requires a trip to three different specialty stores. It’s pantry staples with a few key upgrades for maximum flavor.
Unsalted Butter (1 cup / 226g) — You need the good stuff here. I use European-style butter like Kerrygold or Plugra because of the higher fat content, which gives a richer flavor. Melt it completely. Don’t brown it for this one; you want pure buttery richness.
Dark Chocolate (8 ounces / 225g) — This is non-negotiable. I use 70% cocoa bars. Chop them yourself. Pre-chipped chocolate has stabilizers that change how it melts. Chopping it by hand gives you those beautiful, irregular pools of chocolate in every bite. I like a mix of small chunks and larger shards.
Bittersweet Chocolate Chips (1 cup / 170g) — I add these for consistency. The chopped bar gives the flavor, the chips give the structural integrity. Use high-quality chips, not the cheap baking chips. If you’re feeling fancy, use fudgy sea salt caramel brownies style chunks, but chips work great for the classic look.
Brown Sugar (1 ½ cups / 300g) — Pack it down firmly. This is the main source of moisture and chew. Dark brown sugar is better because of the molasses content, which pairs perfectly with the espresso.
Granulated Sugar (½ cup / 100g) — This is the secret to the crackly top. The granulated sugar doesn’t dissolve completely in the dough; it crystallizes on the surface as it bakes, creating that signature crust. Don’t skip this.
Eggs (2 large, plus 1 yolk) — I add an extra yolk for richness and chew. The yolks add fat, which keeps the center soft. Room temperature eggs incorporate better, but melted butter is cool, so just mix it quickly.
Espresso Powder (1 tablespoon) — Instant espresso powder, not instant coffee granules. The powder dissolves completely and intensifies the chocolate flavor. If you can’t find it, you can use strong brewed coffee, but it will change the texture slightly. I never substitute; the powder is key.
All-Purpose Flour (1 ½ cups / 190g) — Don’t overmeasure. Spoon it into the cup and level it off. Too much flour makes them cakey. Too little makes them spread into puddles. Aim for the sweet spot.
Cornstarch (1 teaspoon) — This is the texture trick. It tenderizes the cookie, ensuring that chewy, brownie-like center rather than a crisp, cracker-like texture.
Baking Soda (½ teaspoon) — Helps with browning and spread.
Salt (½ teaspoon) — Enhances all the flavors. Don’t skip it.
Vanilla Extract (2 teaspoons) — Pure vanilla. The imitation stuff will taste harsh against the dark chocolate.
Optional: Sea Salt Flakes — For sprinkling on top after baking. A little crunch and a little salt cut through the sweetness perfectly.
Equipment Needed
You don’t need fancy gadgets for this. Here’s what I actually use:
Large Mixing Bowl — I prefer a wide bowl so I can mix by hand easily. A 4-quart bowl is perfect.
Whisk — For beating the butter and sugars together until smooth. A silicone whisk is nice because it scrapes the sides.
Spatula — A sturdy rubber spatula is essential for folding in the chocolate chunks and flour. You need to scrape the bottom of the bowl.
Baking Sheets — I use two half-sheet pans. Light-colored aluminum pans are best for even browning. Dark pans can burn the bottoms.
Parchment Paper — Line your sheets. Cleanup is easier, and the cookies slide off effortlessly. No greasing needed.
Cooling Rack — Essential for stopping the cooking process. If you leave them on the hot pan, they’ll overcook.
Knife or Bench Scraper — For chopping your chocolate bar. A serrated knife works well for harder chocolates.
Measuring Cups and Spoons — Accuracy matters, especially with the flour and cornstarch.
Refrigerator — You’ll need space for the dough to chill. This is crucial for the texture.
How to Make It: Step-by-Step
Alright, let’s make these bad boys. I’m walking you through exactly how I do it, including the little tricks I’ve picked up over the years.
Step 1: Melt the Butter (5 minutes)
Melt your butter in a microwave-safe bowl or saucepan. You want it fully liquid but not hot. If it’s boiling, let it cool for a few minutes. We don’t want to cook the eggs when we add them. Set it aside.
Step 2: Mix Sugars and Butter (2 minutes)
In your large mixing bowl, combine the melted butter, brown sugar, and granulated sugar. Whisk vigorously for about 2 minutes. You want the mixture to look glossy and smooth. This step incorporates air and starts the sugar dissolution process, which is key for that crackly top. If you rush this, your tops won’t crack as nicely.
Step 3: Add Eggs and Vanilla (1 minute)
Add the whole eggs and the extra yolk. Add the vanilla extract. Whisk again until fully combined. The mixture should look uniform. Scrape down the sides of the bowl to make sure you get everything.
Step 4: Incorporate Dry Ingredients (2 minutes)
Add the espresso powder, flour, cornstarch, baking soda, and salt. Fold these in gently with your spatula. Do not overmix. Once you see no more streaks of flour, stop. Overmixing develops gluten, which leads to tough cookies. You want tender, chewy cookies.
Step 5: Fold in Chocolate (2 minutes)
Now for the fun part. Add your chopped dark chocolate and chocolate chips. Fold them in until evenly distributed. You want chunks in every bite. Reserve a few small pieces to press onto the tops of the cookies before baking for extra visual appeal.
Step 6: Chill the Dough (At least 1 hour, up to 3 days)
This is the most important step. Cover the bowl with plastic wrap and refrigerate. Chilling solidifies the fat, which prevents the cookies from spreading too thin. It also allows the flavors to meld. The espresso powder hydrates, and the chocolate firms up. If you skip this, you’ll get greasy, flat cookies. I often make the dough the night before and bake it in the morning.
Step 7: Scoop and Bake (12-14 minutes)
Preheat your oven to 350°F (175°C). Line two baking sheets with parchment paper. Scoop the dough into balls, about 2 tablespoons each. Roll them into smooth balls. Place them on the baking sheet, spacing them about 2 inches apart. They will spread.
Bake for 12-14 minutes. You want the edges to be set and slightly golden, but the centers should still look soft and puffy. They will firm up as they cool. Do not overbake. If they look dry in the oven, they will be dry on the plate. The crackly top should be visible.
Step 8: Cool and Serve (10 minutes)
Let the cookies cool on the baking sheet for 5 minutes. This sets the structure. Then transfer to a wire rack to cool completely. Sprinkle with flaky sea salt if you’re feeling fancy. Wait until they’re cool enough to handle, then dig in. The crackle will be audible.
Expert Tips & Tricks
Here’s everything I’ve learned from making this dozens of times. These tips will save you from my mistakes.
Don’t Skip the Chill
I know you want to eat them now. Don’t. The dough needs time in the fridge. If you’re impatient, freeze the dough balls for 20 minutes. But an hour minimum is non-negotiable for the best texture.
Use Good Chocolate
I cannot stress this enough. Cheap chocolate chips taste waxy and overly sweet. Use a high-quality bar of 70% dark chocolate. Chop it into uneven pieces. The variety in size creates pockets of intense chocolate flavor.
Espresso Powder is Key
Do not use instant coffee granules. They don’t dissolve the same way and can leave gritty bits. Espresso powder is finely ground and dissolves instantly, infusing the dough with a deep, bitter note that enhances the chocolate.
Watch the Oven
Ovens vary. Start checking at 12 minutes. The edges should be firm, but the center should still jiggle slightly. They continue to cook on the hot pan after you take them out. If you wait until they look fully set in the oven, they will be dry.
Roll the Dough Balls Tight
When you scoop the dough, roll it between your palms to create a smooth surface. A smooth surface helps the crackly top form evenly. If the dough is rough, the cracks will be uneven.
Storage is Simple
Store cookies in an airtight container at room temperature for up to 5 days. They actually taste better on day 2 as the flavors meld further. If you want to freeze them, freeze the baked cookies in a single layer, then transfer to a container. Thaw at room temperature.
Variations & Substitutions
Once you’ve nailed the basic version, here’s how you can mix it up. I’ve tried all of these.
White Chocolate Chunk Version
Swap half the dark chocolate for white chocolate chunks. The contrast of bitter espresso and sweet white chocolate is incredible. It’s less intense but still very flavorful.
Nutty Twist
Add 1 cup of toasted walnuts or pecans. Toasting the nuts first brings out their oils and adds a nice crunch. It makes the cookies feel more like a dessert bar.
Orange Zest
Add the zest of one orange to the butter mixture. Orange and chocolate are a classic pairing. The citrus brightens up the heavy flavors.
Gluten-Free
Use a 1:1 gluten-free flour blend. Make sure it contains xanthan gum. If it doesn’t, add ½ teaspoon. The cornstarch helps with texture, so GF versions turn out surprisingly chewy.
Dairy-Free
Use a high-quality vegan butter stick. Note that vegan butter has more water, so the cookies may spread slightly more. Chill the dough longer to compensate. Use dairy-free chocolate chips.
Serving & Storage
How to Serve:
These are best served at room temperature. I like to serve them with a cold glass of milk or a hot cup of coffee. They pair beautifully with my homemade vanilla sweet cream cold foam iced coffee for a complete caffeine experience.
Side Dishes:
They don’t really need sides, but if you’re having a dessert plate, add some fresh berries to cut the richness. A dollop of whipped cream is also nice.
Storage Instructions:
Store in an airtight container at room temperature for up to 5 days. If your kitchen is humid, add a piece of bread to the container to keep them chewy. The bread will harden, but the cookies will stay soft.
Freezing:
You can freeze the dough balls. Scoop them, freeze on a tray, then transfer to a bag. Bake straight from frozen, adding 1-2 minutes to the bake time. This is great for having fresh cookies on demand.
Reheating:
If you want them warm, microwave for 10-15 seconds. They’ll be soft and gooey. Avoid the oven for reheating single cookies; it dries them out.
Nutrition Information
I’m not a nutritionist, but here’s the breakdown if you’re tracking. These are rich cookies, so portion control is key.
Per Cookie (makes approx. 24 cookies):
- Calories: 180
- Protein: 2g
- Carbs: 22g
- Fat: 10g
- Sugar: 15g
- Fiber: 1g
Look, this is a treat. It’s chocolate and espresso and butter. It’s not health food. But it’s better than store-bought cookies because you control the ingredients. Enjoy a couple and savor them.
Final Thoughts
So that’s my dark chocolate espresso brownie cookies with crackly tops. I’ve probably talked your ear off at this point, but when you make a recipe this often, you have a lot to say about it.
This has saved my dessert plans more times than I can count. It’s my answer to “I need something sweet and strong” when I’m tired or stressed. The combination of textures—the crackly top, the chewy center, the melty chocolate—is just perfect.
Make it yours! Try different chocolates, add nuts, or skip the salt. The best recipes are the ones you adapt to your tastes. If you make these, drop a comment and let me know what you think! I love hearing how recipes turn out in your kitchen.
Happy baking! And I hope your kitchen smells half as good as mine does right now.
Frequently Asked Questions
Can I use regular coffee instead of espresso powder?
You can, but the flavor won’t be as intense. Instant espresso powder is concentrated and dissolves completely. If you use instant coffee granules, make sure they are fine enough to dissolve, or you’ll get gritty bits in your cookies. I recommend sticking to espresso powder for the best result.
Why didn’t my cookies get a crackly top?
This usually happens if the dough wasn’t chilled long enough, or if you didn’t use enough granulated sugar. The granulated sugar is crucial for the crust. Also, make sure you’re rolling the dough balls smooth before baking. A rough surface prevents even cracking.
Can I double this recipe?
Yes, absolutely. Just make sure you have a large enough bowl to mix everything. You might need to chill the dough in two batches if your fridge is small. The baking time stays the same, but keep an eye on them since ovens vary.
How do I store leftover cookies?
Store them in an airtight container at room temperature for up to 5 days. If they start to get soft, you can crisp them up in a 300°F oven for 5 minutes. Don’t refrigerate them; it dries them out.
Can I make the dough ahead of time?
Yes! The dough can be refrigerated for up to 3 days or frozen for up to 3 months. If freezing, thaw in the fridge overnight before scooping and baking.
Pin This Recipe!
Dark Chocolate Espresso Brownie Cookies
- Total Time: 1 hour 27 minutes
- Yield: 24 cookies 1x
Description
Rich, fudgy cookies with a signature crackly top and intense chocolate-espresso flavor. These brownie-like cookies are chewy, dense, and easy to make by hand.
Ingredients
- 1 cup (226g) unsalted butter, melted
- 1 ½ cups (300g) dark brown sugar, packed
- ½ cup (100g) granulated sugar
- 2 large eggs, room temperature
- 1 large egg yolk
- 2 teaspoons vanilla extract
- 1 tablespoon instant espresso powder
- 1 ½ cups (190g) all-purpose flour
- 1 teaspoon cornstarch
- ½ teaspoon baking soda
- ½ teaspoon salt
- 8 ounces (225g) dark chocolate (70% cocoa), chopped
- 1 cup (170g) bittersweet chocolate chips
- Sea salt flakes, optional for topping
Instructions
- Melt the butter in a microwave-safe bowl or saucepan until fully liquid but not hot. Set aside to cool slightly.
- In a large mixing bowl, combine the melted butter, brown sugar, and granulated sugar. Whisk vigorously for about 2 minutes until the mixture is glossy and smooth.
- Add the whole eggs, extra egg yolk, and vanilla extract. Whisk until fully combined and uniform in color.
- Add the espresso powder, flour, cornstarch, baking soda, and salt. Fold these ingredients in gently with a spatula until no streaks of flour remain. Do not overmix.
- Fold in the chopped dark chocolate and chocolate chips until evenly distributed. Reserve a few small chocolate pieces for topping.
- Cover the bowl with plastic wrap and refrigerate the dough for at least 1 hour (up to 3 days). This step is crucial for texture.
- Preheat oven to 350°F (175°C). Line two baking sheets with parchment paper.
- Scoop dough into 2-tablespoon balls and roll into smooth spheres. Place on baking sheets, spacing them 2 inches apart.
- Bake for 12-14 minutes until edges are set and slightly golden, but centers still look soft. Do not overbake.
- Let cookies cool on the baking sheet for 5 minutes to set the structure, then transfer to a wire rack to cool completely.
- Sprinkle with sea salt flakes if desired before serving.
Notes
Chilling the dough is non-negotiable for the crackly top and chewy texture. Use high-quality dark chocolate and chop it yourself for better texture. Do not substitute espresso powder with instant coffee granules as they do not dissolve the same way. Cookies can be stored in an airtight container at room temperature for up to 5 days.
- Prep Time: 15 minutes
- Cook Time: 12-14 minutes
- Category: Dessert
- Cuisine: American
Nutrition
- Serving Size: 1 cookie
- Calories: 180
- Sugar: 15
- Sodium: 120
- Fat: 10
- Saturated Fat: 6
- Carbohydrates: 22
- Fiber: 1
- Protein: 2
Keywords: dark chocolate, espresso cookies, brownie cookies, crackly top, chewy cookies, easy dessert, coffee dessert


