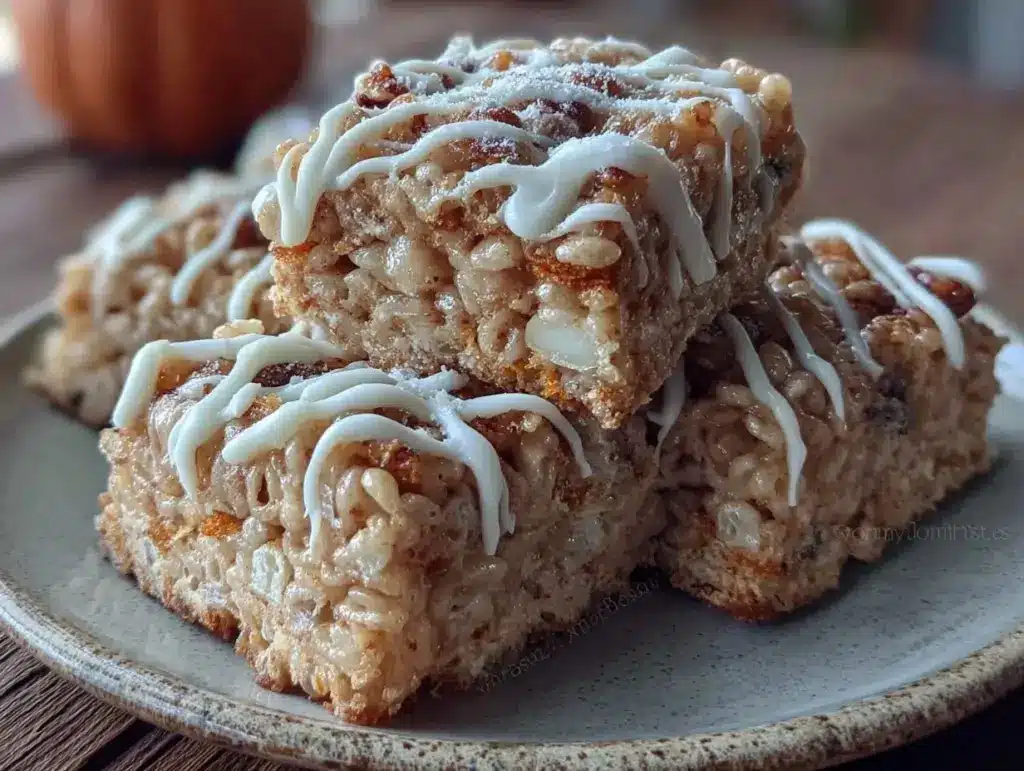
My grandmother’s house always smelled like cinnamon and toasted marshmallows in October. It wasn’t just pumpkin spice lattes or decorative gourds on the porch; it was the actual scent of autumn baking, lingering in the curtains and settling into the carpet. She didn’t use store-bought mixes or fancy gadgets. She stood at her chipped enamel sink, stirring a large pot on the stove, watching the butter melt and the marshmallows swell into a gooey, golden mass.
I remember standing on a step stool, waiting for that first sticky spoonful, while she hummed along to the radio. Those were the years before I understood the chemistry of cooking—before I knew why you couldn’t burn the butter or why you had to work fast once the marshmallows melted. I just knew that when Grandma made Rice Krispie Treats, it felt like a hug from the inside out. But this year, I wanted to add a layer of seasonal warmth that she would have loved. Not the artificial, chemical taste of cheap pumpkin pie spice, but the real, earthy depth of roasted squash and warm spices.
That’s how Pumpkin Spice Rice Krispie Treats with White Chocolate Drizzle were born. I started experimenting last fall, trying to bridge the gap between a classic childhood treat and the cozy flavors of fall baking. At first, they were a disaster. The marshmallows seized up. The treats were dense bricks. But after a few batches (and a fair amount of cleanup), I figured out the real way to do it. It’s about patience. It’s about using good butter and real pumpkin puree, not the canned pie filling stuff. It’s about drizzling white chocolate over the top like autumn leaves on a path.
This isn’t a quick hack for busy weeknights. This is a weekend project. It’s a treat for when you have an hour to spare and want to fill your kitchen with the smell of comfort. I’ve made these for every family gathering since, and they’ve become just as much a tradition as Grandma’s original recipe. If you’re looking for a dessert that tastes like nostalgia with a modern, spiced twist, this is it. Trust me, once you try the real way, you’ll never go back to the boxed mix.
Why You’ll Love This Recipe
There’s something magical about taking a simple, no-bake treat and elevating it with the flavors of the season. I’ve served these at every Halloween party and Thanksgiving gathering since I perfected the recipe, and they disappear faster than you can say “second helping.” Here’s why these pumpkin spice treats have earned a permanent spot in my rotation:
Real Flavor, No Artificial Taste — Most pumpkin treats rely on artificial flavoring that tastes like medicine. I use actual pumpkin puree and a blend of cinnamon, nutmeg, ginger, and cloves. The flavor is warm and spicy, not sweet and cloying. It tastes like the inside of a pumpkin pie, but in a chewy, marshmallowy form.
The White Chocolate Drizzle — This is the game-changer. The sweetness of the white chocolate cuts through the spice beautifully. It adds a creamy, rich contrast that makes the treat feel fancy. I drizzle it on while the treats are still slightly warm so it sets into little ridges. It’s the kind of detail that makes people ask for the recipe immediately.
No-Bake Convenience (With a Twist) — While this isn’t a “five-minute” recipe, it still requires no oven. You’re working on the stovetop, which means you don’t have to heat up the house. It’s perfect for crisp autumn days when you want to bake but don’t want to turn on the oven. Plus, it’s easier than making actual pumpkin bars, which can be tricky to get right.
Perfect for Gifting — I’ve wrapped these in cellophane bags with a ribbon and given them as hostess gifts. They look elegant, especially with the white chocolate drizzle and a dusting of powdered sugar. They’re sturdy enough to transport but delicate enough to feel special. I’ve also seen them as centerpieces at fall weddings.
Kid-Approved — My nieces and nephews love these. They’re sweet, chewy, and familiar, but the pumpkin spice adds a layer of complexity that adults appreciate. It’s a great way to introduce kids to real spices without making them feel like they’re eating “vegetables” in dessert form.
This recipe has saved me more than once when I need a dessert that looks impressive but doesn’t require hours of labor. It’s my go-to when I want to share a piece of my childhood with new friends or family. And honestly? The smell alone is worth the effort.
Ingredients You’ll Need
Before we start, let’s talk about what goes into these treats. I’m particular about a few ingredients here, and I’ll tell you exactly why. This isn’t just about throwing stuff in a pot; it’s about balance. The right ingredients make the difference between a soggy mess and a perfect, chewy treat.
For the Base
Unsalted Butter (6 tablespoons / 85g) — I use unsalted butter because I want to control the saltiness. Real butter makes a huge difference in flavor. Don’t use margarine; it just won’t melt the same way and will leave a waxy taste. I like to cut the butter into small cubes so it melts evenly.
Marshmallows (10 ounces / 280g) — That’s one standard bag. Use the regular white marshmallows. Don’t try to use mini marshmallows unless you want to burn your fingers. And please, don’t use the toasted marshmallows; they’re for s’mores, not for this. The key is to melt them slowly.
Pumpkin Puree (½ cup / 120g) — This is crucial. Use 100% pure pumpkin puree, not pumpkin pie filling. Pie filling has sugar and spices already added, which will throw off the balance. You can find pumpkin puree in the canned goods aisle, usually near the pie filling. If you’re feeling adventurous, you can roast your own pumpkin, but for this recipe, canned works perfectly fine if it’s pure.
Rice Krispies Cereal (6 cups / 240g) — That’s about three 10.5-ounce boxes. I use the original Rice Krispies. Other crispy rice cereals work, but they might be sweeter or have a different texture. I stick with the brand I’ve known since I was a kid because it has the perfect crunch-to-chew ratio.
Pumpkin Spice Blend (1 ½ teaspoons) — I make my own blend because it tastes so much better than the store-bought stuff. Mix 1 teaspoon cinnamon, ½ teaspoon ginger, ¼ teaspoon nutmeg, and a pinch of cloves. Adjust to taste. If you’re not a fan of cloves, skip them. The spice should be warm, not overpowering.
Salt (¼ teaspoon) — A pinch of salt is essential to balance the sweetness. Don’t skip it. It makes the flavors pop.
For the White Chocolate Drizzle
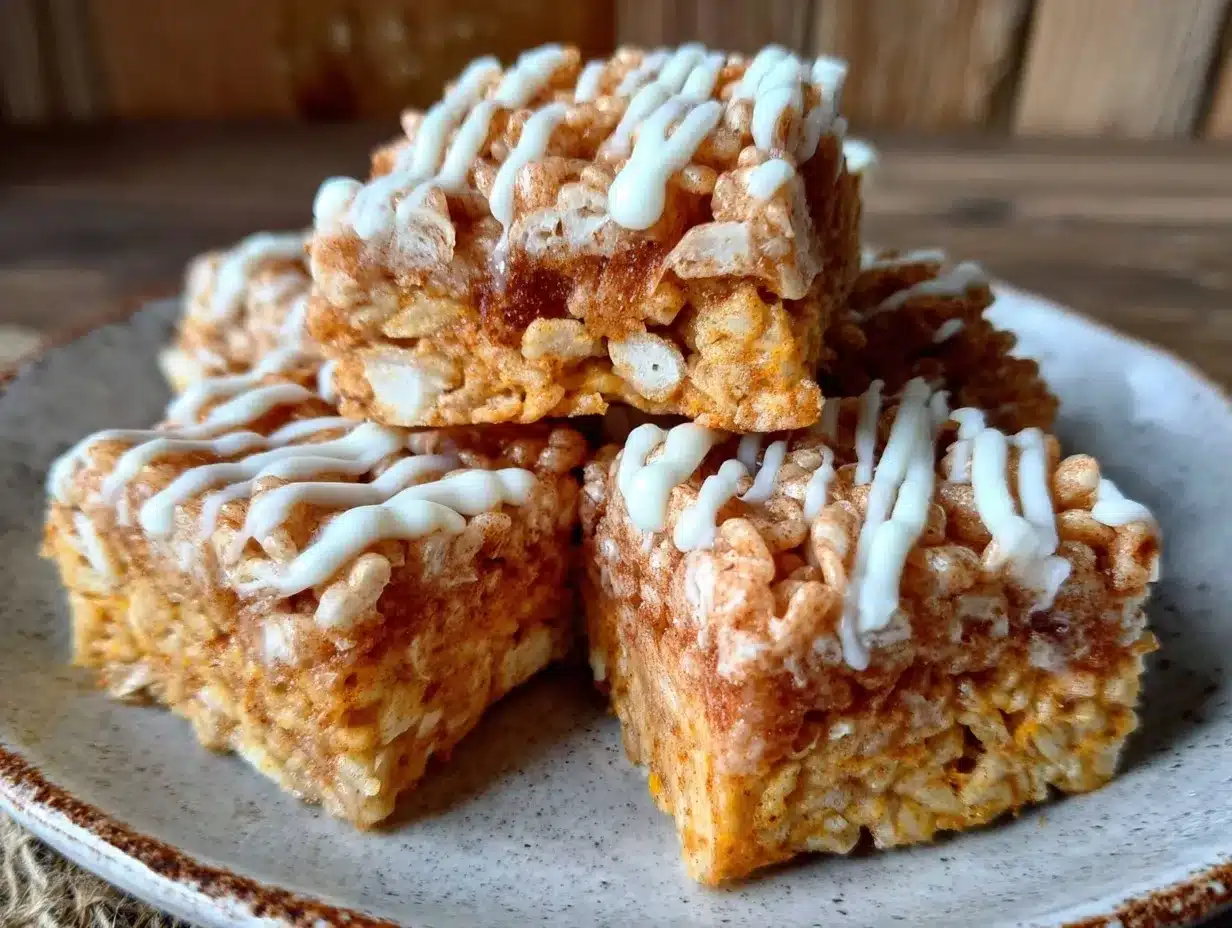
White Chocolate Chips (½ cup / 85g) — I use high-quality white chocolate chips. Ghirardelli or Godiva work well. Don’t use the cheap stuff; it will seize up and won’t drizzle smoothly. If you can’t find white chocolate chips, you can chop up a bar of white chocolate.
Heavy Cream (1 tablespoon) — This helps thin the white chocolate so it drizzles easily. If you don’t have heavy cream, you can use milk, but the consistency might be slightly different.
Vanilla Extract (½ teaspoon) — Just a little bit to enhance the flavor. It’s optional, but I always add it.
Optional Toppings
Powdered Sugar — For a dusting of “snow” on top. It looks beautiful and adds a touch of sweetness.
Crushed Gingersnap Cookies — For extra crunch and spice. I crumble them up and sprinkle them over the drizzle before it sets.
Pumpkin Seeds — Toasted pepitas add a nice nutty flavor and a pop of green color. It’s a nice touch for fall-themed gatherings.
Equipment Needed
You don’t need fancy equipment for this. Here’s what I actually use:
Large Saucepan — I use a 4-quart saucepan. It needs to be big enough to hold the marshmallows and butter without overflowing. My old stainless steel pan works perfectly. Avoid non-stick if you can; it’s harder to get the marshmallows to melt evenly without sticking.
Spatula — A heat-resistant silicone spatula is essential. You need something that can scrape the sides of the pan and fold the marshmallows gently. A wooden spoon works too, but a spatula is easier to clean.
9×13 Inch Baking Dish — Grease it well with butter or non-stick spray. I like to line it with parchment paper for easier removal, but it’s not strictly necessary. If you use parchment, leave some overhang on the sides so you can lift the treats out later.
Microwave-Safe Bowl — For melting the white chocolate. A glass bowl works best. If you don’t have a microwave, you can use a double boiler on the stovetop.
Zester or Microplane — If you want to add fresh nutmeg or ginger, a microplane is perfect. It gives you a fine, even sprinkle that looks professional.
Piping Bag or Ziploc Bag — For the drizzle. If you don’t have a piping bag, just cut a tiny corner off a Ziploc bag. It’s not as pretty, but it works.
How to Make It: Step-by-Step
Alright, let’s make this! I’m walking you through exactly how I do it, including the little tricks I’ve picked up over the years. This isn’t a race, but you do need to move with purpose once the marshmallows melt.
Step 1: Prep Your Pan (5 minutes)
Grease your 9×13 inch baking dish with butter or non-stick spray. If you’re using parchment paper, line the dish now. I like to grease the parchment paper too, just to be safe. This step is crucial because Rice Krispie Treats stick like crazy. I learned this the hard way with a pan that took me an hour to clean.
Step 2: Melt the Butter (2 minutes)
In your large saucepan, melt the butter over low heat. Stir occasionally until it’s completely liquid. Don’t let it brown or burn. Low and slow is the key here. Once it’s melted, add the pumpkin puree and stir until it’s smooth. This might take a minute. The mixture should look like a thick, orange paste.
Step 3: Add the Marshmallows (5-7 minutes)
Add the marshmallows to the pumpkin-butter mixture. Stir constantly over low heat. This is the most important part. You need to melt the marshmallows slowly so they don’t seize up. If you turn the heat up too high, they’ll become rubbery. Keep stirring until the marshmallows are almost completely melted. It will look lumpy at first, but keep going.
Step 4: Finish Melting and Mix (3 minutes)
Once the marshmallows are mostly melted, remove the pan from the heat. Add the pumpkin spice blend and salt. Stir until everything is well combined. The mixture should be smooth and glossy. If there are still a few lumps of marshmallow, that’s okay; they’ll melt as you fold in the cereal.
Step 5: Add the Cereal (2 minutes)
Pour in the Rice Krispies cereal. Use your spatula to fold the cereal into the marshmallow mixture. Be gentle but thorough. You want every piece of cereal coated. This will take some muscle. Don’t rush it. If you don’t coat the cereal evenly, you’ll get dry spots in the final treat.
Step 6: Press into Pan (5 minutes)
Transfer the mixture to your prepared baking dish. Grease your hands with a little butter or non-stick spray, then press the mixture into the pan. You want it to be as even as possible. Don’t press too hard, or the treats will be dense. Just enough to hold them together. I like to use a piece of parchment paper to press it down, which keeps my hands clean.
Step 7: Cool and Set (30 minutes)
Let the treats cool at room temperature for at least 30 minutes. Don’t rush this step. If you cut them too soon, they’ll be messy and sticky. Once they’re cool, you can cover them with plastic wrap and let them sit for an hour if you have time. This helps them set completely.
Step 8: Make the White Chocolate Drizzle (5 minutes)
In a microwave-safe bowl, combine the white chocolate chips and heavy cream. Microwave in 30-second intervals, stirring between each, until the chocolate is smooth and melted. Stir in the vanilla extract. If the mixture is too thick, add a few more drops of cream. If it’s too thin, add a few more chocolate chips.
Step 9: Drizzle and Decorate (5 minutes)
Once the treats are cool, drizzle the white chocolate over the top. Use a piping bag or a Ziploc bag with a cut corner. Drizzle in a zigzag pattern or in random lines. If you’re using crushed gingersnaps or pumpkin seeds, sprinkle them on now, before the chocolate sets.
Step 10: Cut and Serve
Once the chocolate has set (about 15 minutes), cut the treats into squares. I like to cut them into 24 squares, but you can make them any size. Serve immediately or store in an airtight container.
Expert Tips & Tricks
Here’s everything I’ve learned from making these dozens of times. These tips will save you from my mistakes.
Low Heat is Non-Negotiable
The biggest mistake people make is turning the heat up too high. Marshmallows burn easily. Keep the heat on low and be patient. If you’re in a hurry, you’ll end up with rubbery, burnt treats. Trust me, I’ve been there.
Use Real Pumpkin Puree
Do not use pumpkin pie filling. It has too much sugar and spice, and the texture will be wrong. Pure pumpkin puree is neutral and lets the spices shine. If you can’t find canned puree, you can make your own by roasting a sugar pumpkin and pureeing the flesh.
Don’t Overmix the Cereal
Once you add the cereal, mix it just enough to coat it. If you overmix, you’ll crush the cereal and make the treats dense. You want them to be light and airy.
White Chocolate Seizes Easily
White chocolate is delicate. If it gets too hot or if any water gets in it, it will seize up and become grainy. Melt it slowly and in short bursts. If it does seize, add a little more cream and stir vigorously. Sometimes you can save it.
Cool Completely Before Cutting
I know it’s tempting to cut them while they’re warm, but don’t. They’ll be sticky and messy. Let them cool completely for the cleanest cuts. If you’re in a hurry, you can put them in the fridge for 15 minutes, but room temperature is best.
Customize Your Drizzle
Don’t feel like you have to use white chocolate. Dark chocolate or milk chocolate works too. For a more traditional fall look, try a mix of white and orange-tinted white chocolate. Or, for a more sophisticated flavor, use caramel sauce.
Variations & Substitutions
Once you’ve nailed the basic version, here’s how you can mix it up. I’ve tried all of these.
Gluten-Free Version
Use gluten-free crispy rice cereal. Most major brands have a gluten-free option. The rest of the ingredients are naturally gluten-free, so this is an easy swap.
Dairy-Free Version
Use dairy-free butter and dairy-free marshmallows (like Dandies). For the white chocolate drizzle, use dairy-free white chocolate chips. It’s not as creamy, but it works.
Chocolate Chip Version
Add ½ cup of chocolate chips to the marshmallow mixture before adding the cereal. It adds a nice surprise in every bite.
Caramel Drizzle
Instead of white chocolate, use caramel sauce. It pairs beautifully with the pumpkin spice. You can buy store-bought caramel or make your own.
Mini Treats
Press the mixture into a mini muffin tin for bite-sized treats. These are perfect for parties and potlucks. You’ll get about 48 mini treats.
Serving & Storage
These treats are best served at room temperature. If you refrigerate them, they’ll get hard and lose their chewiness.
Storage
Store in an airtight container at room temperature for up to 5 days. If it’s hot and humid, store them in the fridge, but let them come to room temperature before serving. They don’t freeze well because the marshmallows can become hard.
Serving Suggestions
These are great with a cup of hot coffee or tea. I also like to serve them with a scoop of vanilla ice cream for a warm-and-cold contrast. They’re perfect for Halloween parties, Thanksgiving desserts, or just a cozy autumn afternoon.
Nutrition Information
I’m not a nutritionist, but here’s the breakdown if you’re tracking. Keep in mind that these are treats, so they’re high in sugar and calories.
Per Serving (based on 24 servings):
- Calories: 180
- Protein: 2g
- Carbs: 28g
- Fiber: 1g
- Sugar: 20g
- Fat: 7g
- Saturated Fat: 4g
- Cholesterol: 10mg
- Sodium: 80mg
These are a decadent treat, so enjoy them in moderation. They’re best shared with friends and family.
Final Thoughts
So that’s my go-to Pumpkin Spice Rice Krispie Treats with White Chocolate Drizzle! I’ve probably talked your ear off at this point, but when you make a recipe this often, you have a lot to say about it. These treats have become a staple in my home, just like Grandma’s original recipe. They’re a reminder that the best things in life are often simple, but made with love and care.
Make it yours! Try different toppings, swap in your favorite chocolate, or adjust the spice level. The best recipes are the ones you adapt to your family’s tastes. If you make this, drop a comment and let me know what you think! I love hearing how recipes turn out in your kitchen. And if something doesn’t work, tell me that too—I’m here to help troubleshoot.
Happy cooking! And I hope your kitchen smells half as good as mine does right now.
Frequently Asked Questions
Can I use pumpkin pie filling instead of puree?
I strongly advise against it. Pumpkin pie filling has added sugar and spices, which will throw off the balance of your treats. You’ll end up with treats that are too sweet and too spicy. Stick with 100% pure pumpkin puree for the best results.
Why did my marshmallows seize up?
This usually happens if the heat was too high or if any water got into the pan. Marshmallows are sensitive to moisture. Make sure your pan is completely dry before starting, and keep the heat on low. If they do seize, you can try adding a little more butter or cream to rescue them.
Can I make these ahead of time?
Yes! You can make these up to 5 days in advance. Store them in an airtight container at room temperature. If you’re making them for a party, I recommend making them a day ahead so they have time to set completely.
Can I use mini marshmallows?
You can, but it will take longer to melt them. I prefer using regular marshmallows because they melt more evenly. If you use mini marshmallows, be patient and keep the heat low.
How do I cut the treats cleanly?
Use a sharp knife and wipe it clean between cuts. You can also dip the knife in hot water and dry it off before each cut. This helps prevent sticking. If the treats are still sticky, put them in the fridge for 10 minutes to firm up.
Can I freeze these treats?
It’s not recommended. The marshmallows can become hard and lose their chewiness when frozen. They’re best enjoyed fresh or stored at room temperature.
What if I don’t have white chocolate?
You can skip the drizzle or use a different type of chocolate. Milk chocolate or dark chocolate would work well, though the flavor profile will be different. You can also use caramel sauce or a simple powdered sugar dusting.
Pin This Recipe!
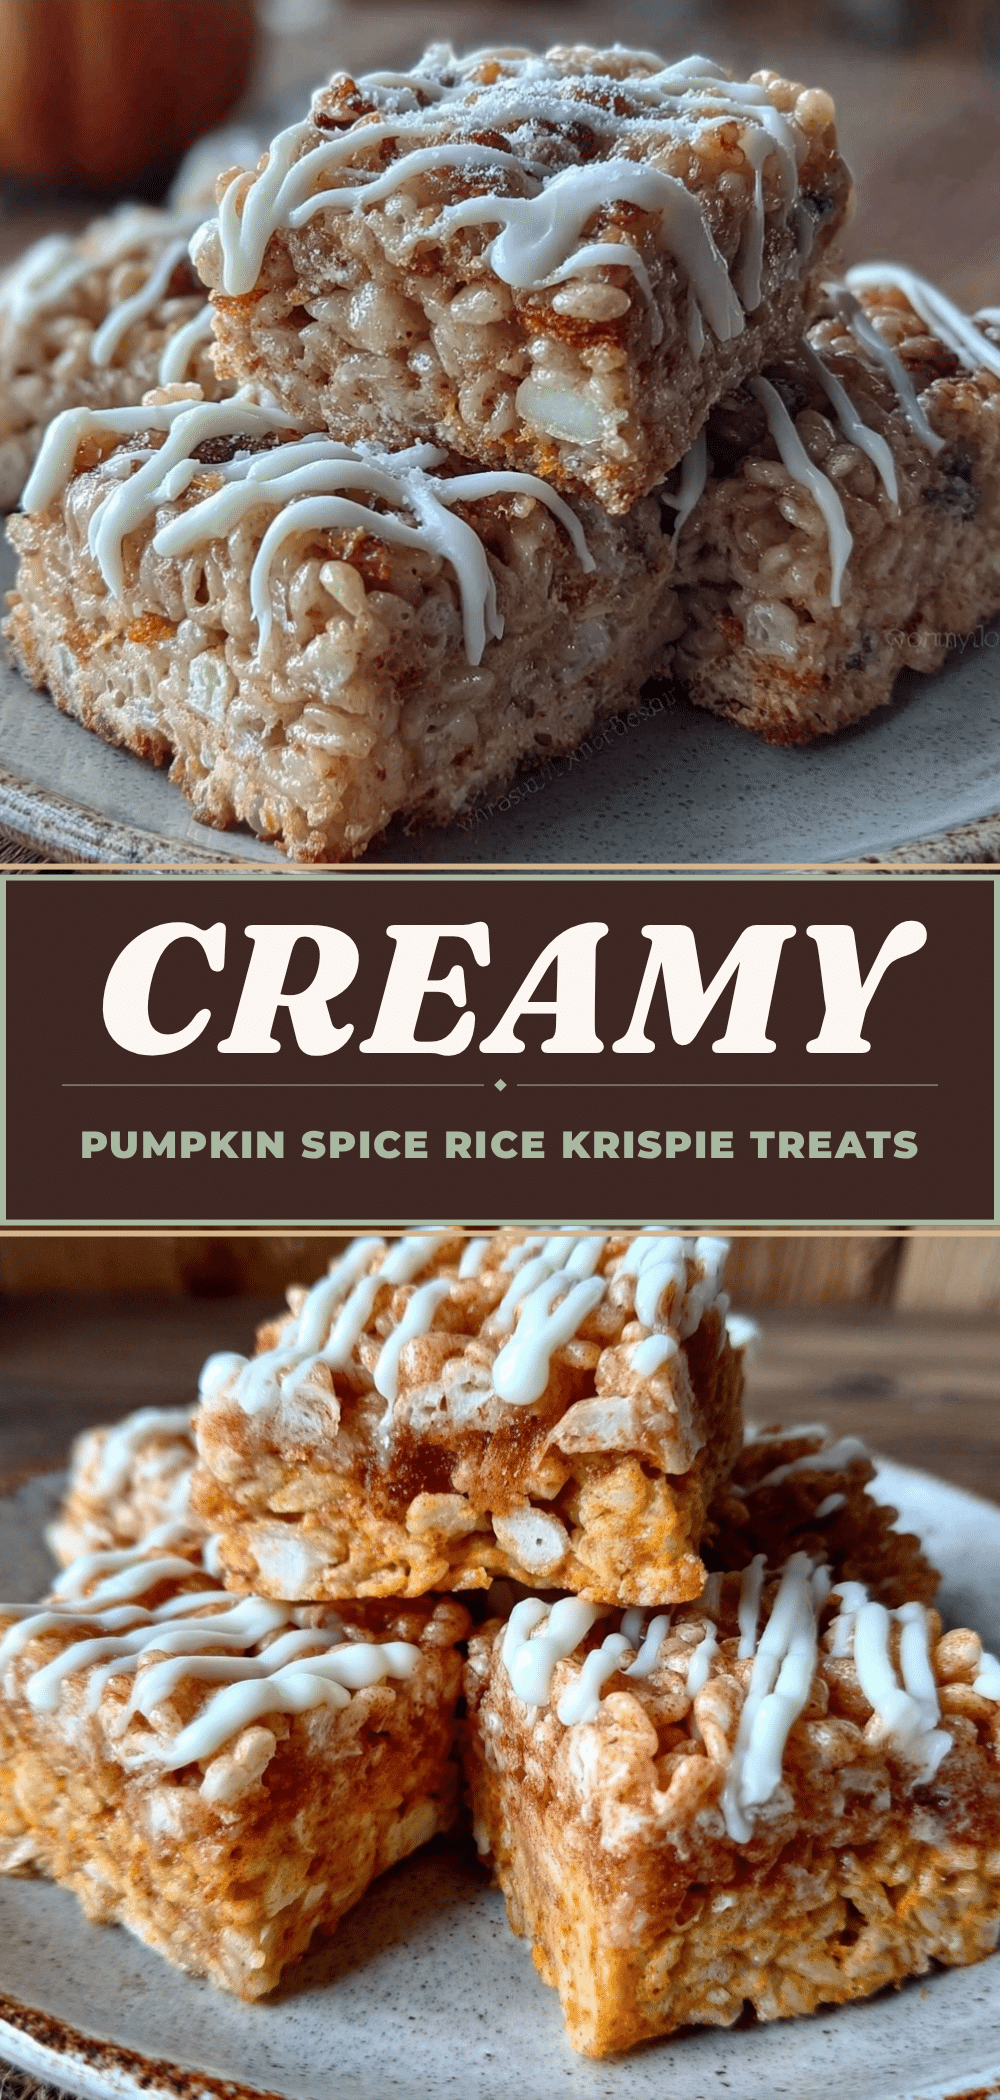
Pumpkin Spice Rice Krispie Treats with White Chocolate Drizzle
- Total Time: 45 minutes
- Yield: 24 servings 1x
Description
A nostalgic, no-bake autumn dessert featuring real pumpkin puree, warm spices, and a creamy white chocolate drizzle, offering a sophisticated twist on a classic childhood treat.
Ingredients
- 6 tablespoons (85g) unsalted butter
- 10 ounces (280g) regular white marshmallows
- 1/2 cup (120g) 100% pure pumpkin puree
- 6 cups (240g) Rice Krispies cereal
- 1 1/2 teaspoons pumpkin spice blend (1 tsp cinnamon, 1/2 tsp ginger, 1/4 tsp nutmeg, pinch of cloves)
- 1/4 teaspoon salt
- 1/2 cup (85g) high-quality white chocolate chips
- 1 tablespoon heavy cream
- 1/2 teaspoon vanilla extract
- Optional toppings: powdered sugar, crushed gingersnap cookies, toasted pumpkin seeds
Instructions
- Grease a 9×13 inch baking dish with butter or non-stick spray; line with parchment paper if desired.
- In a large saucepan over low heat, melt the butter. Stir in the pumpkin puree until smooth.
- Add the marshmallows to the butter-pumpkin mixture. Stir constantly over low heat until the marshmallows are almost completely melted and the mixture is smooth.
- Remove the pan from heat. Stir in the pumpkin spice blend and salt.
- Add the Rice Krispies cereal and fold gently with a spatula until every piece is coated.
- Transfer the mixture to the prepared baking dish. Grease hands with butter or spray and press the mixture evenly into the pan (do not press too hard).
- Let the treats cool at room temperature for at least 30 minutes to set.
- In a microwave-safe bowl, combine white chocolate chips and heavy cream. Microwave in 30-second intervals, stirring between each, until smooth. Stir in vanilla extract.
- Drizzle the white chocolate mixture over the cooled treats.
- Add optional toppings (gingersnaps, pumpkin seeds) while the chocolate is still wet.
- Allow the chocolate to set for about 15 minutes, then cut into 24 squares.
Notes
Use low heat to prevent marshmallows from seizing or burning. Ensure the pan is completely dry before starting. Do not use pumpkin pie filling; use 100% pure pumpkin puree. For clean cuts, use a sharp knife wiped clean between cuts or dipped in hot water. Treats are best stored at room temperature in an airtight container for up to 5 days.
- Prep Time: 15 minutes
- Cook Time: 30 minutes
- Category: Dessert
- Cuisine: American
Nutrition
- Serving Size: 1 square
- Calories: 180
- Sugar: 20
- Sodium: 80
- Fat: 7
- Saturated Fat: 4
- Carbohydrates: 28
- Fiber: 1
- Protein: 2
Keywords: pumpkin spice, rice krispie treats, no-bake dessert, fall baking, white chocolate drizzle, autumn treats, pumpkin puree, holiday dessert


