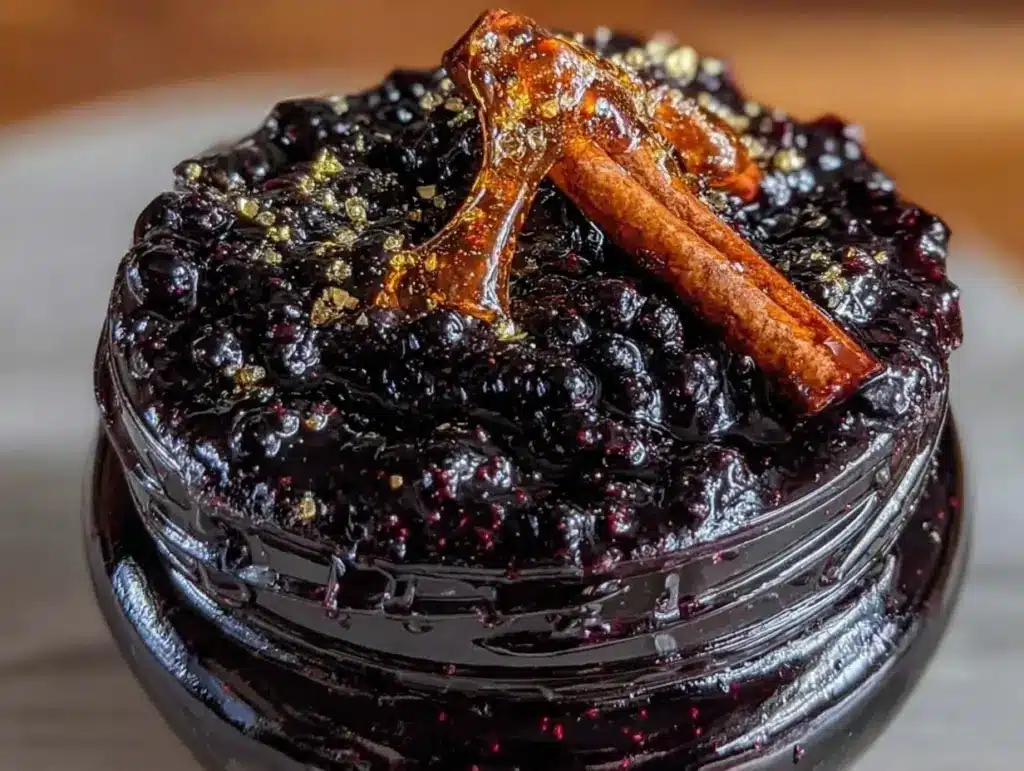
It was one of those evenings in late October when the light faded by five and my energy followed right behind it. I’d spent the day working on a project that kept shifting beneath my feet, and by the time I got home, I felt like my bones were humming with exhaustion. The usual comforts—a warm shower, a good book—felt like they were sliding off me. I needed something deeper. Something that felt like a hug from the inside out.
I didn’t want takeout. I didn’t want a complicated project. I just wanted to make something that would help me feel held. So I put on a kettle, found the dried elderberries I’d bought at the farmer’s market months ago, and started simmering. That simple act of watching the water turn a deep, jewel-toned purple became my reset button. The kitchen filled with the smell of cinnamon and berries, and for twenty minutes, I wasn’t worried about emails or deadlines. I was just here, making something gentle for myself.
That night, I sipped this homemade elderberry syrup with raw honey and cinnamon straight from a mug, letting the warmth spread through my chest. It wasn’t just about immunity (though I was hoping it would help). It was about slowing down. It was about acknowledging that I was tired and giving myself permission to rest. This syrup has become my go-to ritual for those days when the world feels a little too loud. It’s easy enough to make when you’re drained, but it feels like a little act of rebellion against the rush of modern life.
I’ve made this batch many times since that first night. Sometimes I add a pinch of cloves. Sometimes I use just honey. But the core of it remains the same: elderberries, cinnamon, and honey. It’s a tiny bottle of comfort that lasts for weeks. If you’re feeling worn out, or just want to invite a little more nourishment into your routine, I invite you to make this with me. It’s not about efficiency. It’s about care.
Why This Syrup Feels Like a Warm Blanket
There are about a dozen reasons I keep this recipe in my rotation, but the biggest one is how it makes me feel. It’s not just a health tonic; it’s a pause button. Here’s what makes this homemade elderberry syrup with raw honey and cinnamon so special to me:
- It slows down the day — The simmering process takes about 20 minutes, but you’re mostly just standing there watching. It’s meditative. I find myself breathing deeper just by being in the kitchen with the pot on low heat. It’s a gentle way to transition from work mode to home mode.
- It tastes like comfort, not medicine — Let’s be honest: a lot of immune boosters taste like dirt. This doesn’t. The cinnamon and raw honey mask the tartness of the elderberries perfectly. It tastes like a cozy autumn evening. I’ve made this for friends who hate “healthy” drinks, and they always ask for the recipe because it just tastes good.
- It’s gentle on the system — I’m not looking for harsh cleanses or drastic changes. This syrup is nourishing without being heavy. It sits well with my stomach, and the anti-inflammatory properties of the cinnamon help when I’m feeling a bit achy or tense.
- It’s a small ritual — Making it is a small act of self-care. Stirring the pot, tasting it, bottling it up. These little moments add up. It’s like making fall cranberry apple galette but without the crust. Just pure, simple flavor.
- It lasts — Once made, it keeps in the fridge for up to a month. So I make one batch, and I’m covered. I don’t have to think about it. I just reach for a spoonful when I need a boost. It’s reliable.
This isn’t about fixing yourself. It’s about tending to yourself. And sometimes, that tending looks like a dark purple syrup in a glass jar.
What You’ll Need
The beauty of this syrup is how few ingredients it uses. You don’t need a pantry full of obscure superfoods. Just a few simple, whole foods that work together beautifully. Here’s what I use:
For the Base
Dried elderberries (1 cup / 120g) — This is the star. Make sure you buy dried elderberries, not fresh ones (fresh ones can be toxic). I buy mine from bulk bins or reputable online suppliers. Look for plump, dark berries. If they’re shriveled or dusty, skip them.
Water (4 cups / 1 liter) — Just good old-fashioned tap or filtered water. You want enough to cover the berries and create a rich concentrate.
For the Flavor & Health
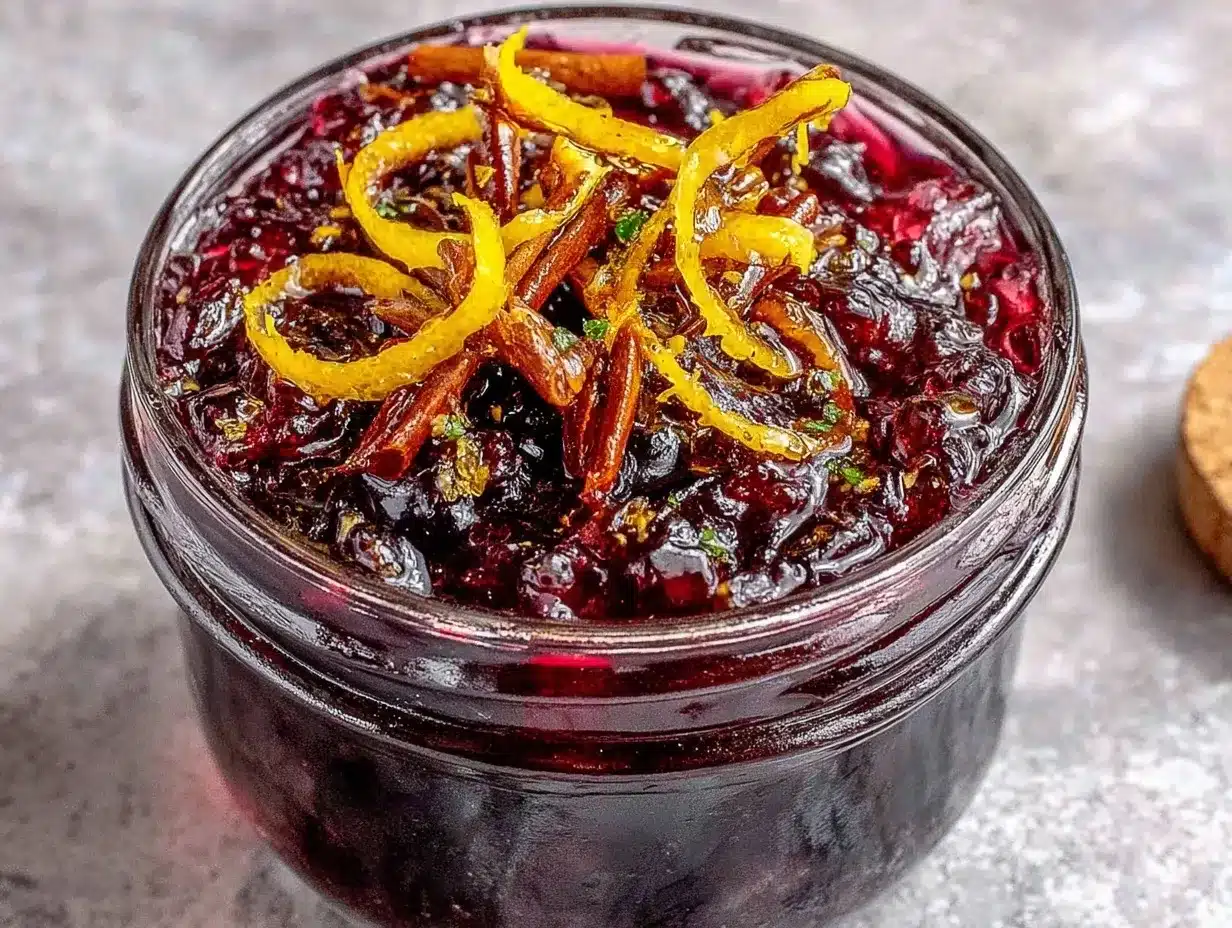
Cinnamon sticks (2 large sticks / or 1 teaspoon ground) — I prefer sticks because they infuse slowly and don’t make the syrup cloudy. Ceylon cinnamon is milder and sweeter, which I love. If you use ground cinnamon, add it in the last 5 minutes of simmering so it doesn’t burn.
Raw honey (½ cup / 170g) — This is crucial. Use raw, unfiltered honey. It has its own antimicrobial properties and adds a floral sweetness that balances the tart berries. Manuka honey is great but expensive; local raw honey is perfect and supports local pollinators.
Optional additions — I sometimes add a few whole cloves (3-4) or a piece of fresh ginger (1-inch slice, smashed) for extra warmth. These are optional, but they make the syrup feel even more like a hug.
For Storage
Glass jars — I use small, sterilized glass jars with tight-fitting lids. Amber glass is best to protect the syrup from light, but clear works too. You can reuse jam jars if you wash them well.
A fine-mesh strainer or nut milk bag — To separate the berries from the liquid. A nut milk bag gives a clearer syrup, but a strainer works fine if you don’t mind a little pulp.
Shopping Tips
I always check the expiration date on the elderberries. They lose potency over time. And for the honey, look for labels that say “raw” and “unfiltered.” The cloudiness is a good sign—it means it hasn’t been pasteurized.
Equipment You’ll Need
You don’t need fancy gadgets for this. Just a few basics:
- Medium saucepan — I use a 3-quart stainless steel pot. It needs to be big enough to hold the water and berries without boiling over.
- Wooden spoon — For stirring. Metal can scratch the pot, and plastic might melt if the heat gets too high.
- Strainer or nut milk bag — Essential for getting that smooth syrup texture.
- Glass jars — For storage. Clean and dry.
- Measuring cups and spoons — Standard stuff.
If you don’t have a nut milk bag, a fine-mesh strainer lined with cheesecloth works. Or just a really fine strainer. The goal is to get all the berry bits out.
How to Make It: Step-by-Step
Alright, let’s make this. I’m walking you through exactly how I do it, slowly and gently.
Step 1: Combine the Berries and Water
In your medium saucepan, add the dried elderberries and the water. Stir them together gently. You want the berries to be fully submerged. If they float, just push them down with a spoon. This step is simple—just getting everything into the pot.
Step 2: Bring to a Boil
Place the pot over medium-high heat. Bring it to a boil. You’ll see the water start to bubble and the color begin to change from clear to a deep, dark purple. This takes about 5-7 minutes. Keep an eye on it so it doesn’t boil over.
Step 3: Simmer with Cinnamon
Once it’s boiling, reduce the heat to low. Add the cinnamon sticks (and cloves or ginger if using). Let it simmer gently for 20 minutes. You’ll see the liquid darken significantly. The kitchen will start to smell amazing—warm, spicy, and fruity. This is the best part. Just let it simmer. Don’t rush it.
Pro tip: If the water level drops too much (less than halfway covered), add a splash more water. You want a rich concentrate, not a thin tea.
Step 4: Cool Slightly
After 20 minutes, turn off the heat. Let the pot cool for about 10-15 minutes. This is important because we’re adding honey next, and high heat destroys the beneficial enzymes in raw honey. So let it cool until it’s warm, not hot.
Step 5: Strain the Syrup
Place your strainer (or nut milk bag) over a large bowl or measuring cup. Pour the berry mixture through. Press down on the berries with the back of a spoon to squeeze out all the liquid. If using a bag, twist it tight and squeeze. You’ll be left with a pile of dark, mushy berries and a bowl of deep purple liquid.
Discard the solids. If you want, you can compost them—they’re rich in nutrients.
Step 6: Add the Honey
Once the liquid is warm (not hot), stir in the raw honey. Start with ½ cup and taste. If you like it sweeter, add more. I usually use about ⅓ to ½ cup, depending on how tart the berries were. Stir until the honey is completely dissolved. It should be smooth and glossy.
Step 7: Bottle and Store
Pour the syrup into your clean glass jars. Seal tightly. Label it with the date. Store it in the refrigerator.
Yield: About 1.5 to 2 cups of syrup, depending on how much liquid you pressed out.
Expert Tips for Success
Here’s everything I’ve learned from making this dozens of times. These tips will help you get the best flavor and longest shelf life.
- Don’t skip the cooling step — I’ve made the mistake of adding honey to hot liquid before, and it tastes flat. The heat kills the good stuff. Wait until it’s just warm to the touch.
- Press the berries hard — You’re leaving flavor (and nutrients) on the table if you don’t squeeze the berries. Use a spoon or a bag to get every drop.
- Adjust sweetness to taste — Elderberries can be quite tart. Don’t be afraid to add more honey. This is your syrup. Make it taste good to you.
- Use clean jars — Any moisture or bacteria can shorten the shelf life. Wipe the inside of your jars with a little vinegar or alcohol if you want to be extra safe.
- Add ginger for extra warmth — If you’re feeling chilly or have a sore throat, add a slice of fresh ginger during the simmer. It adds a nice kick.
Common mistake: Boiling the honey. Again, don’t do it. It ruins the enzymes. Cool first, then sweeten.
Variations & Substitutions
Once you’ve nailed the basic version, here’s how you can mix it up. I’ve tried all of these.
- Spiced Berry Syrup — Add a star anise or a bay leaf during simmering for a more complex flavor. It’s subtle but nice.
- Cherry Syrup — Swap half the elderberries for dried cherries. It’s sweeter and tangier. Great for colds.
- Vanilla Bean — Split a vanilla bean and add it with the cinnamon. It makes the syrup taste like dessert.
- Lower Sugar — Use less honey, or substitute with a small amount of maple syrup. It won’t keep as long, so make smaller batches.
- Alcohol Preservation — Add a splash of vodka or brandy to the syrup before bottling. It extends shelf life and adds warmth. (Not for kids.)
Dietary notes: This is naturally vegan if you use maple syrup instead of honey. It’s gluten-free and dairy-free. Just check your honey source if you’re strict about veganism.
Serving & Storage
How do you use this syrup? It’s versatile.
How to Serve
I usually take 1-2 teaspoons straight from the spoon when I feel a cold coming on. It’s potent and sweet. I also stir it into warm water with lemon for a soothing tea. Or I drizzle it over oatmeal or yogurt. It’s great in spiced caramel apple cider too, adding depth to the drink.
Serving suggestion: Mix 1 tablespoon of syrup with 1 cup of hot water and a squeeze of lemon. Sip slowly.
Storage Instructions
Refrigerator: Keeps for up to 1 month. The honey acts as a preservative, but the berries are perishable, so keep it cold.
Freezing: You can freeze this syrup! Pour it into ice cube trays, then transfer the cubes to a bag. Thaw a cube when you need a dose. It keeps for 6 months.
Signs it’s gone bad: If it molds, smells fermented, or changes color significantly, toss it. Trust your nose.
Nutrition Information
I’m not a nutritionist, but here’s the breakdown if you’re tracking. Note that this is an estimate based on 1 tablespoon servings.
| Per Serving (1 tbsp) | Amount |
|---|---|
| Calories | 45 |
| Carbs | 12g |
| Sugar | 11g |
| Protein | 0g |
| Fat | 0g |
What’s Good: Rich in antioxidants from the elderberries. Raw honey has enzymes and antimicrobial properties. Cinnamon helps regulate blood sugar.
What to Know: It’s high in natural sugar from the honey. Use in moderation if you’re watching sugar intake. But remember, this is a medicinal dose, not a dessert topping. A little goes a long way.
Final Thoughts
So that’s my homemade elderberry syrup with raw honey and cinnamon. It’s simple, it’s gentle, and it’s a small act of self-care that I cherish. I make it when I’m tired, when I’m sick, or just when I need to remember to slow down.
This syrup has saved me more times than I can count. It’s my answer to “what do I need right now?” when I’m feeling run down. It’s not magic, but it feels like it. It’s nourishing, it tastes good, and it reminds me that taking care of myself is worth the effort.
Make it yours. Add more cinnamon if you like it warm. Add less honey if you prefer tart. The best recipes are the ones that fit your body and your mood. If you make this, I’d love to hear how it goes. Drop a comment and let me know what you think. And if you’re feeling tired today, I hope you’ll take twenty minutes to make a pot of this for yourself.
Happy simmering. And I hope your kitchen smells like comfort right now.
Frequently Asked Questions
Can I use fresh elderberries?
I don’t recommend it. Fresh elderberries contain cyanogenic glycosides, which can be toxic if not prepared correctly. Dried elderberries are safer and more concentrated. If you must use fresh, you need to cook them thoroughly for a longer time, but dried is much easier and safer for home cooks.
How long does this syrup last?
In the fridge, it lasts up to 1 month. The honey helps preserve it, but the berries are perishable. If you want to keep it longer, freeze it in ice cube trays for up to 6 months.
Can I give this to kids?
Yes, but only if they are over 1 year old. Honey is not safe for infants under 1 due to the risk of botulism. For kids, start with 1 teaspoon a day. It’s a great immune booster for school-age children.
Why did my syrup turn out watery?
You might not have simmered it long enough, or you added too much water. Simmer for a full 20 minutes to concentrate the flavors. If it’s too thin, you can simmer it a bit longer to reduce it, but be careful not to burn it.
Can I add other herbs?
Absolutely. I love adding a sprig of thyme or a slice of fresh ginger. They complement the elderberries well. Just add them during the simmering step.
Does this actually boost immunity?
Elderberries are rich in antioxidants and vitamin C, and studies suggest they may help reduce the duration of colds. Raw honey has antimicrobial properties. Cinnamon is anti-inflammatory. While it’s not a cure-all, it’s a supportive, nourishing tonic that helps your body when it needs it.
Can I make this without honey?
You can use maple syrup, but it won’t preserve as well. The syrup will need to be used faster or frozen. Also, the flavor will be different—maple is stronger. For best results, stick with raw honey.
Pin This Recipe!
Homemade Elderberry Syrup: Gentle Self-Care Recipe
- Total Time: 35 minutes
- Yield: 1.5 to 2 cups 1x
Description
A soothing, meditative elderberry syrup made with dried berries, cinnamon, and raw honey. This gentle tonic supports immunity and serves as a comforting ritual for self-care during tired or stressful times.
Ingredients
- 1 cup (120g) dried elderberries
- 4 cups (1 liter) water
- 2 large cinnamon sticks (or 1 teaspoon ground cinnamon)
- ½ cup (170g) raw honey
- Optional: 3-4 whole cloves
- Optional: 1-inch slice fresh ginger, smashed
Instructions
- Combine dried elderberries and water in a medium saucepan. Ensure berries are fully submerged.
- Place pot over medium-high heat and bring to a boil. Watch closely to prevent boiling over.
- Reduce heat to low. Add cinnamon sticks (and optional cloves or ginger). Simmer gently for 20 minutes until the liquid darkens significantly.
- Turn off heat and let the mixture cool for 10-15 minutes until warm, not hot.
- Strain the liquid through a fine-mesh strainer or nut milk bag into a bowl, pressing down on the berries to extract all liquid. Discard solids.
- Stir in raw honey while the liquid is warm (not hot) to preserve enzymes. Adjust sweetness to taste.
- Pour syrup into clean, sterilized glass jars. Seal tightly and store in the refrigerator.
Notes
Do not add honey to hot liquid as high heat destroys beneficial enzymes. Ensure elderberries are dried, not fresh, as fresh ones can be toxic. For longer storage, freeze syrup in ice cube trays. If using ground cinnamon, add it in the last 5 minutes of simmering to prevent burning.
- Prep Time: 5 minutes
- Cook Time: 30 minutes
- Category: Beverages
- Cuisine: American
Nutrition
- Serving Size: 1 tablespoon
- Calories: 45
- Sugar: 11
- Carbohydrates: 12
Keywords: elderberry syrup, homemade syrup, immune booster, raw honey, cinnamon syrup, self-care recipe, natural remedies, winter wellness


