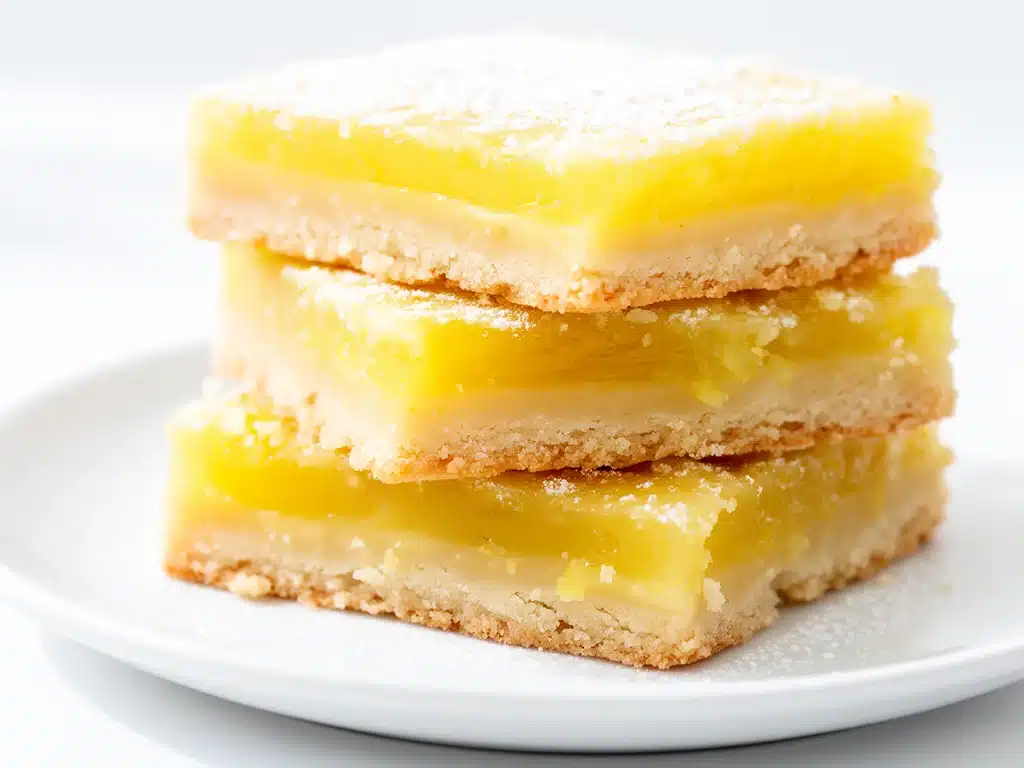
One summer afternoon, my neighbor knocked on my door with a plate of these tangy lemon bars. I’d never been a huge fan of lemon desserts—too tart or too sweet, usually—but these bars were different. The first bite was a revelation: bright, zesty lemon balanced perfectly with a buttery, crumbly shortbread crust that melted in my mouth. Ever since that day, these lemon bars have become the dessert everyone asks for at neighborhood potlucks and family dinners. I’ve tested this tangy lemon bars recipe with buttery shortbread crust at least a dozen times, tweaking it just enough to get that perfect balance of tang and richness every single time.
Here’s the thing: this isn’t your overly sweet, fake lemon bar. It’s all about fresh lemon juice, just enough sugar, and that dreamy crust that holds everything together without stealing the show. I’ve learned the hard way that shortcuts in the crust or lemon filling just don’t cut it. So, if you want a lemon bar recipe everyone will be begging you to make again, keep reading. I’m sharing everything—how to nail the crust, avoid a soggy bottom, and get that perfect tangy punch that keeps people coming back.
Why You’ll Love This Recipe
This tangy lemon bars recipe with buttery shortbread crust has completely changed the way I think about lemon desserts. There are a handful of reasons I keep making it, but here are the big ones:
- Perfectly Balanced Tang: The lemon filling is bright and zesty without being mouth-puckering sour. I use fresh lemon juice and zest, which gives it that fresh zing that’s impossible to fake.
- Buttery Shortbread Crust: The crust is rich, flaky, and buttery—never dry or crumbly. I’ve tried store-bought crusts, and trust me, nothing beats homemade.
- Easy to Make: No fancy equipment or complicated steps. If you can whisk, zest, and bake, you’re golden. I’ve made this recipe while juggling kids and dinner prep, and it still comes out flawless.
- Make-Ahead Friendly: These bars hold up well for a few days in the fridge, and actually taste better the next day once the flavors have melded.
- Crowd-Pleaser: I’ve brought these to everything from neighborhood picnics to after-school snacks, and they disappear fast—especially among lemon lovers.
Real talk, this recipe has become my go-to when I want something refreshing and homemade that isn’t a cookie or cake. And if you’re anything like me, juggling busy days—maybe even packing lunches like the turkey and cheese pinwheels or whipping up quick dinners like the crunchy ranch chicken wraps—this lemon bar recipe is just the kind of sweet treat you’ll want waiting in the fridge.
Ingredients You’ll Need
Here’s the best part: most of these ingredients are pantry staples or easy to find in any grocery store. I’m a stickler for a few key ingredients here, so I’ll explain why they matter.
- All-purpose flour (2 cups / 250g) — This is the base for the crust. Make sure it’s fresh; old flour can smell off and affect flavor.
- Powdered sugar (1/2 cup / 60g) — Adds sweetness and tenderness to the crust. I always sift it to avoid lumps.
- Salt (1/4 teaspoon) — Just a pinch to balance the sweetness and bring out buttery notes.
- Unsalted butter (3/4 cup / 170g, cold, cut into cubes) — Cold butter is essential for flaky shortbread crust. Don’t substitute margarine or salted butter here.
- Granulated sugar (1 1/2 cups / 300g) — For the lemon filling. Adjust slightly if you prefer a less sweet bar.
- Fresh lemon juice (2/3 cup / 160ml, about 3-4 lemons) — Fresh is non-negotiable here. Bottled lemon juice won’t give the same brightness.
- Lemon zest (1 tablespoon) — Adds a punch of lemony aroma and flavor. Use a microplane for the best results.
- Large eggs (4) — Help set the filling and give it a silky texture.
- All-purpose flour (1/4 cup / 30g) — Just a little to stabilize the filling so it holds together but stays tender.
- Powdered sugar (for dusting) — Optional but highly recommended for that classic finish.
Quick tip: I always zest my lemons before juicing them—that way I don’t waste any of that vibrant zest. Also, if you’re short on time, you could prep the crust the night before and keep it chilled in the fridge. It actually helps the crust hold its shape better during baking.
Equipment Needed
You don’t need anything fancy to make these lemon bars. Here’s what I use:
- 9×13-inch baking pan — I line mine with parchment paper for easy removal. Glass or metal pans both work, but metal gives a slightly crisper crust.
- Mixing bowls — One for the crust and one for the filling. I like medium-sized bowls to avoid spills.
- Whisk — For beating eggs and mixing the filling smoothly.
- Microplane or fine grater — Essential for zesting lemons finely.
- Measuring cups and spoons — Accurate measurements matter in baking.
- Rubber spatula — To scrape down mixing bowls and fold ingredients gently.
- Rolling pin (optional) — I usually press the crust into the pan with my hands, but a rolling pin helps spread it evenly.
Honestly, I’ve made these bars in everything from a vintage metal pan to a fancy ceramic dish, and they turn out great either way. If you’re interested in easy weeknight recipes, you might also enjoy the thermos mac and cheese that’s a lifesaver for busy days.
How to Make It: Step-by-Step

Alright, let’s get into it! I’m sharing my exact process, including the little tricks that make these lemon bars shine.
Step 1: Make the Shortbread Crust (10 minutes)
Preheat your oven to 350°F (175°C). In a mixing bowl, whisk together 2 cups flour, 1/2 cup powdered sugar, and 1/4 teaspoon salt. Add the cold, cubed butter and use your fingers or a pastry cutter to blend it in until the mixture resembles coarse crumbs—some pea-sized pieces are fine. Press this evenly into your lined 9×13-inch pan (I usually just use my hands). The crust should be packed firmly so it holds together. Bake for 18-20 minutes, or until the edges start to turn golden. You want the crust to be set but not browned.
Step 2: Prepare the Lemon Filling (5 minutes)
While the crust bakes, whisk together 1 1/2 cups granulated sugar and 1/4 cup flour in a bowl. Add the eggs, fresh lemon juice, and zest, whisking until smooth and slightly frothy. The filling will be thin but that’s perfect—it sets as it bakes.
Step 3: Bake the Bars (20-25 minutes)
Once the crust is lightly golden, carefully pour the lemon filling over it. Return the pan to the oven and bake for another 20-25 minutes, until the filling is just set and the center doesn’t jiggle much when you gently shake the pan. It will firm up more as it cools.
Step 4: Cool and Chill (2+ hours)
Remove the pan and let it cool on a wire rack for about 30 minutes, then transfer it to the fridge for at least 2 hours. Chilling is key—it helps the bars slice cleanly and lets the flavors meld.
Step 5: Slice and Serve
Use the parchment paper to lift the bars out of the pan. Dust generously with powdered sugar and cut into squares or rectangles. Serve chilled or at room temperature.
Expert Tips & Tricks
- Don’t skip chilling the crust before adding the filling. If it’s too warm, the filling can seep in and make the crust soggy.
- Use fresh lemons only. Bottled lemon juice lacks the vibrant flavor and brightness that make these bars special.
- Press the crust firmly. I learned the hard way that a loose crust breaks apart when slicing. Use the flat bottom of a glass or measuring cup to pack it down tight.
- Don’t overbake the lemon filling. It should still have a slight wobble when you take it out. It firms as it cools.
- Clean your knife between cuts. Wiping the blade clean after each slice gives you pretty, clean edges instead of crumbly mess.
- For extra richness, try adding a tablespoon of cream cheese to the filling. It adds a subtle tang and luxurious texture.
I used to rush through the zesting step, but now I make sure to zest right over the bowl so none of that fragrant lemon oil gets wasted. Also, if you’re curious about other easy, no-fuss desserts, the honey garlic pretzel bites are a fun snack twist.
Variations & Substitutions
Once you’ve nailed the classic, here’s how to switch things up without losing what makes these lemon bars so loved:
- Berry Lemon Bars: Add 1 cup fresh raspberries or blueberries on top of the crust before pouring the filling. The tart berries complement the lemon beautifully.
- Lavender Lemon Bars: Stir 1 teaspoon culinary lavender into the crust mixture for a floral twist. Be careful—too much lavender can overwhelm.
- Gluten-Free: Swap the all-purpose flour in the crust for a 1:1 gluten-free baking blend. Make sure it has xanthan gum for structure.
- Lower Sugar: Reduce granulated sugar in the filling by 1/4 cup if you prefer less sweetness. I usually do this when serving to folks who prefer tart over sweet.
- Coconut Crust: Substitute 1/2 cup shredded unsweetened coconut for 1/2 cup flour in the crust for a tropical vibe.
Serving & Storage
I usually serve these lemon bars straight from the fridge, dusted with powdered sugar, alongside a cup of tea or a glass of iced lemonade. They’re perfect for summer picnics, afternoon snacks, or as a bright finish to dinner. If you want to make a full meal around them, they pair really well with simple, fresh flavors like a crisp green salad or roasted vegetables.
For storage, keep the bars in an airtight container in the refrigerator for up to 4 days. They hold up beautifully, but the crust will soften slightly. If you find the crust getting too soft, a quick 5-minute warm-up in a 350°F (175°C) oven before serving revives the crispiness.
Reheating in the microwave isn’t ideal—it makes the crust chewy. Instead, opt for the oven method if you want that fresh-baked texture back. These bars don’t freeze well because the filling can become watery when thawed, so plan to enjoy them fresh.
Nutrition Information
| Nutrient | Amount per Serving (1 bar) |
|---|---|
| Calories | 210 |
| Protein | 3g |
| Carbohydrates | 28g |
| Fat | 9g |
| Saturated Fat | 5g |
| Sugar | 18g |
| Fiber | 1g |
| Sodium | 75mg |
Look, this is a dessert, so it’s on the indulgent side. But it’s made with real ingredients, no weird preservatives or additives. Plus, it’s a smaller portion than many bakery versions, so you can enjoy it guilt-free. If you want to lighten it up, try the lower sugar option I mentioned, or add a side of fresh fruit to bulk up the snack.
Final Thoughts
So that’s my tangy lemon bars recipe with buttery shortbread crust that everyone always asks for. I’ve probably shared more than you bargained for, but when you make something this often, you pick up all the little secrets that make it shine. It’s my answer when I want to impress with something fresh and homemade but don’t have hours to fuss in the kitchen.
These bars have saved me countless times—whether it’s a last-minute dessert for friends, a treat after a busy day, or a bright snack to pack alongside baked apple cinnamon oatmeal cups for an after-school boost. The best part? You can customize them to your taste and still come out with a crowd-pleaser every time.
If you make this recipe, please drop a comment and tell me how it went! I love hearing about your kitchen wins (and your “oops” moments, too). Happy baking, and I hope your kitchen smells half as good as mine does every time I make these lemon bars.
Frequently Asked Questions
Q: Can I use bottled lemon juice instead of fresh?
A: You can, but the flavor won’t be as bright or fresh. Bottled lemon juice often has preservatives and tastes a bit dull. If you’re in a pinch, use it, but I highly recommend fresh lemons for that zingy tang that makes these bars special.
Q: Why did my crust turn out crumbly and fall apart?
A: Most likely, the butter wasn’t cold enough or the crust wasn’t pressed firmly into the pan before baking. Cold butter creates the flaky texture, and pressing the crust tightly helps it hold together. Also, make sure you’re measuring flour correctly—too much flour can make it dry.
Q: My lemon filling didn’t set—what went wrong?
A: The filling needs enough flour and eggs to set properly. Make sure you measured the flour in the filling accurately and baked the bars long enough. The center should have a slight wobble but not be liquid. If it’s underbaked, give it a few more minutes in the oven.
Q: Can I make these lemon bars ahead of time?
A: Absolutely! They actually taste better after chilling for a few hours or overnight. Just store them in an airtight container in the fridge for up to 4 days. Perfect for prepping ahead of parties or busy weeks.
Q: How do I cut neat squares without crumbling?
A: Use a sharp knife and wipe it clean between cuts. Cutting when the bars are fully chilled helps a lot, too. If your crust is crumbly, chilling longer or pressing the crust more firmly before baking can help.
Q: Can I freeze these lemon bars?
A: I don’t recommend freezing. The lemon filling can become watery and separate after thawing. Better to enjoy them fresh or refrigerated for a few days.
Q: Can I substitute butter with margarine or oil?
A: Butter is key for the shortbread crust’s flavor and texture. Margarine or oil won’t give the same richness or flakiness. If you must substitute, use a high-quality butter substitute, but results may vary.
Pin This Recipe!


Tangy Lemon Bars Recipe with Buttery Shortbread Crust
- Total Time: 2 hours 55 minutes
- Yield: 12 servings 1x
Description
Bright, zesty lemon bars with a buttery, flaky shortbread crust that melts in your mouth. Perfectly balanced tang and richness make these bars a crowd-pleaser.
Ingredients
- 2 cups all-purpose flour (250g)
- 1/2 cup powdered sugar (60g), sifted
- 1/4 teaspoon salt
- 3/4 cup unsalted butter (170g), cold, cut into cubes
- 1 1/2 cups granulated sugar (300g)
- 2/3 cup fresh lemon juice (about 3–4 lemons, 160ml)
- 1 tablespoon lemon zest
- 4 large eggs
- 1/4 cup all-purpose flour (30g)
- Powdered sugar for dusting (optional)
Instructions
- Preheat oven to 350°F (175°C). In a mixing bowl, whisk together 2 cups flour, 1/2 cup powdered sugar, and 1/4 teaspoon salt.
- Add cold, cubed butter and blend with fingers or pastry cutter until mixture resembles coarse crumbs with some pea-sized pieces.
- Press crust evenly and firmly into a lined 9×13-inch baking pan. Bake for 18-20 minutes until edges start to turn golden but crust is not browned.
- While crust bakes, whisk together 1 1/2 cups granulated sugar and 1/4 cup flour in a bowl.
- Add eggs, fresh lemon juice, and lemon zest; whisk until smooth and slightly frothy.
- Pour lemon filling over the baked crust carefully.
- Return pan to oven and bake for 20-25 minutes until filling is just set with a slight wobble in the center.
- Remove from oven and cool on wire rack for 30 minutes, then chill in refrigerator for at least 2 hours.
- Use parchment paper to lift bars from pan, dust with powdered sugar, and cut into squares or rectangles.
- Serve chilled or at room temperature.
Notes
Chill the crust before adding the filling to avoid sogginess. Use fresh lemons for best flavor. Press crust firmly to prevent crumbling. Do not overbake the filling; it should have a slight wobble when done. Clean knife between cuts for neat slices. For extra richness, add 1 tablespoon cream cheese to filling. Bars taste better after chilling overnight. Avoid freezing as filling may become watery.
- Prep Time: 15 minutes
- Cook Time: 40-45 minutes
- Category: Dessert
- Cuisine: American
Nutrition
- Serving Size: 1 bar (approximate)
- Calories: 210
- Sugar: 18
- Sodium: 75
- Fat: 9
- Saturated Fat: 5
- Carbohydrates: 28
- Fiber: 1
- Protein: 3
Keywords: lemon bars, lemon dessert, shortbread crust, tangy lemon bars, homemade lemon bars, easy lemon bars, summer dessert


