I have a confession to make: I used to think banana pudding was just something you bought in a plastic tub at the grocery store. You know the kind—the one with the slightly soggy wafers and the pudding that tasted like it had been sitting in the back of a deli case since Tuesday. I was wrong. So, so wrong.
The first time I made homemade banana cream pudding with vanilla wafer crumble, I was trying to impress a date who claimed to have “seen it all” when it came to desserts. I was nervous. I didn’t want to overcomplicate things, so I stuck to the classics: real custard, ripe bananas, and plenty of vanilla. I didn’t even have a fancy recipe book open; I just cooked from memory and instinct. When I pulled the dish out of the oven and let it cool, the kitchen smelled like a warm, comforting hug. It smelled like Sunday mornings.
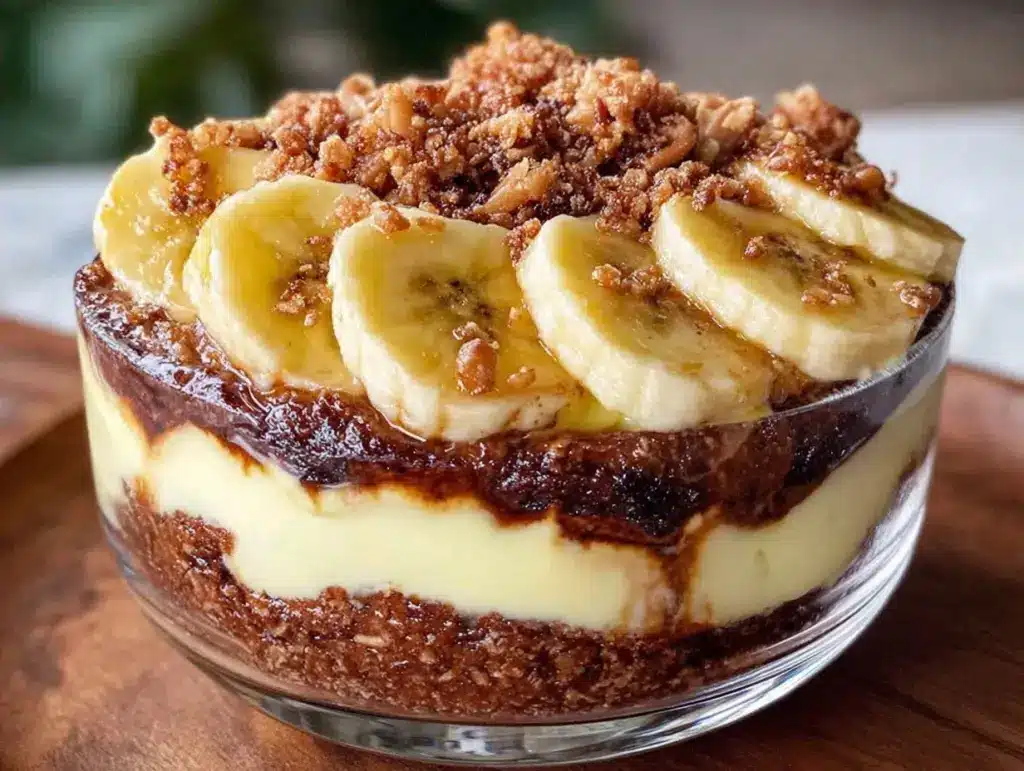
He took one bite and stopped talking. That was the moment I knew I had struck gold. The contrast of the crisp, buttery vanilla wafer crumble on top against the silky, warm custard underneath was pure magic. It wasn’t just dessert; it was an experience. Since that night, this banana cream pudding has become my go-to for everything from casual weeknight treats to dinner party showstoppers. It’s rich, it’s nostalgic, and it’s incredibly easy to make if you know a few tricks.
Over the last year, I’ve tested this recipe dozens of times. I’ve tweaked the custard thickness, experimented with different types of vanilla, and even tried swapping out the wafers for graham crackers (don’t bother—the vanilla wafer is king here). I’ve learned that the secret isn’t in complicated techniques; it’s in the quality of your ingredients and the patience to let it set. This banana cream pudding with vanilla wafer crumble everyone will crave is about simplicity done right. It’s the kind of dessert that makes people close their eyes and smile. And trust me, once you make it, they’ll be asking for your recipe before the last bite is even gone.
Why You’ll Love This Banana Cream Pudding
There are a few reasons this dessert has completely taken over my kitchen, and honestly, it’s probably going to take over yours too. It’s not just about taste; it’s about how it makes you feel. Here’s why I keep coming back to this banana cream pudding with vanilla wafer crumble:
- It’s Pure Comfort — Seriously, there’s nothing quite like it. It tastes like your grandma’s kitchen, but better. The combination of warm custard and crisp wafers hits every single nostalgia button I have. I make this when I need a little pick-me-up or when I just want to feel cozy.
- It’s Impressively Simple — Don’t let the elegance fool you. This isn’t a finicky dessert that requires a degree in pastry arts. You whisk, you layer, you bake. That’s it. I’ve made this while watching TV, and it turned out perfectly every time. It’s foolproof, which means you can focus on enjoying yourself rather than stressing over the oven.
- It’s a Crowd-Pleaser — I’ve served this to picky eaters, health-conscious friends, and serious foodies. Everyone loves it. The vanilla wafer crumble adds a texture that everyone appreciates, and the banana flavor is universally loved. It’s safe enough for kids but sophisticated enough for a dinner party.
- It Tastes Better the Next Day — I know, I know, it’s hard to wait. But this banana cream pudding actually improves with time. The flavors meld together, the custard sets perfectly, and the wafers soften just enough to become part of the experience rather than just a topping. I usually make it the night before, which takes the stress out of hosting.
Real talk? This is the dessert I make when I want to show I care without spending hours in the kitchen. It’s rich, it’s indulgent, and it’s totally worth the few minutes of prep. Plus, it looks stunning on the table. Everyone wants a piece.
Ingredients You’ll Need
Here’s the best part: you probably have most of these ingredients already. This banana cream pudding with vanilla wafer crumble relies on simple, high-quality staples. I’m particular about a few things here, and I’ll tell you exactly why, because it makes a huge difference in the final result.
For the Custard Base
Whole milk (4 cups / 960ml) — Don’t skimp on the fat. Low-fat milk will make the custard taste watery and thin. Whole milk gives you that rich, creamy mouthfeel that defines a good pudding. If you’re feeling extra indulgent, you can swap half the milk for heavy cream, but whole milk is perfect.
Vanilla extract (2 tablespoons) — Yes, two tablespoons. And please, use real vanilla extract, not imitation. I know it’s more expensive, but the flavor difference is night and day. I use a high-quality bourbon vanilla extract for its deep, complex notes. If you want to go fancy, use the seeds from one vanilla bean, but extract works beautifully.
Granulated sugar (¾ cup / 150g) — This adds sweetness and helps with the texture. You can reduce it to ½ cup if you prefer it less sweet, but I find that the bananas add enough natural sweetness that you need the sugar to balance it out.
Unsalted butter (3 tablespoons / 42g) — This adds richness and a silky finish. I use unsalted so I can control the salt level. Room temperature butter blends in easier, but cold butter works too if you whisk vigorously.
Egg yolks (4 large) — We’re using just the yolks for a richer, yellower custard. The whites can be saved for meringue if you want to go all out, but I usually just scramble them for breakfast. The yolks give that luxurious, pudding-like consistency.
Heavy cream (1 cup / 240ml) — This is folded in at the end to lighten the custard and add extra creaminess. Full-fat is non-negotiable here. Half-and-half will make it too thin.
All-purpose flour (¼ cup / 30g) — This is the thickener. Some recipes use cornstarch, but I prefer flour for this specific pudding because it gives a slightly more “homestyle” texture. It’s not gluey; it’s smooth.
For the Vanilla Wafer Crumble
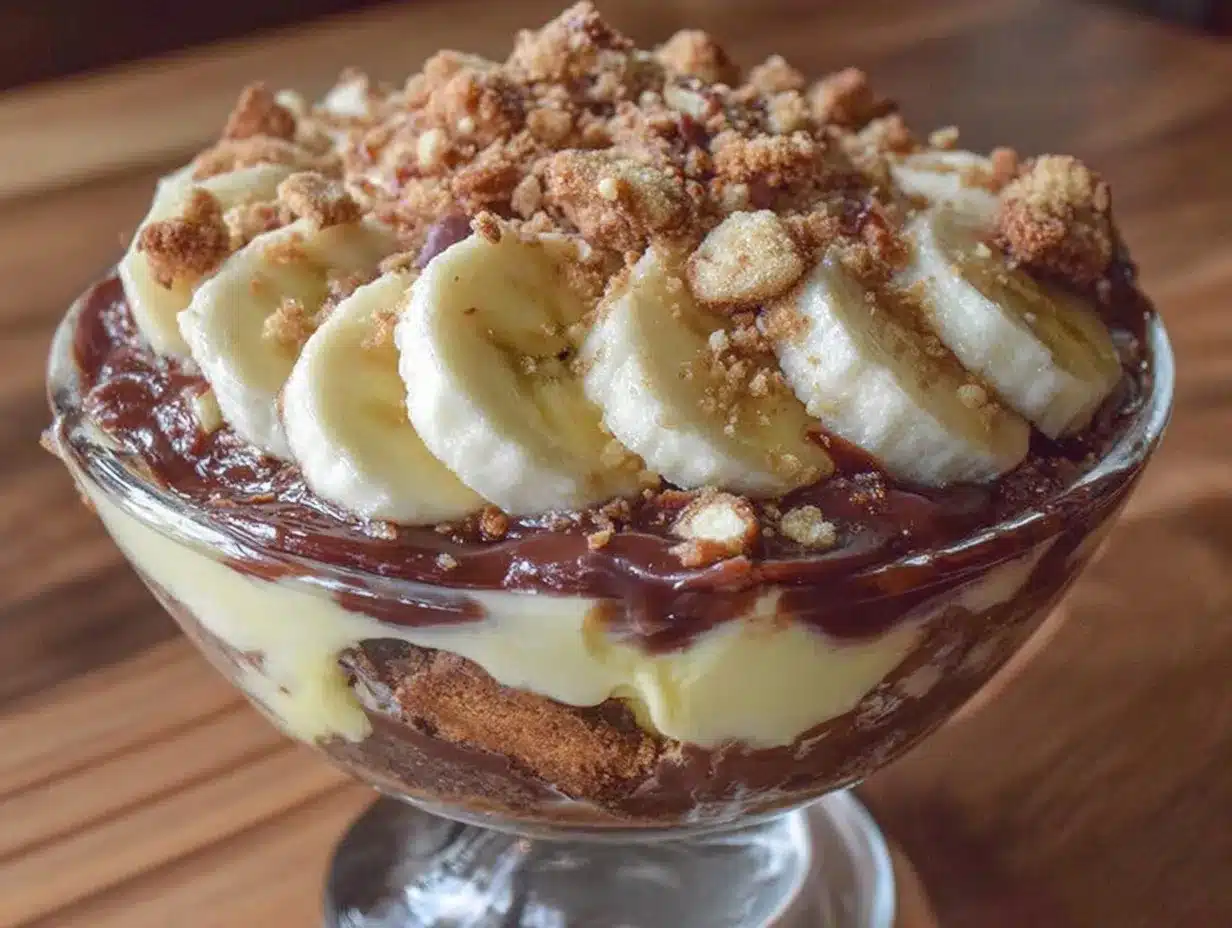
Vanilla wafers (1 package, about 20-25 cookies) — I use Nilla Wafers. They’re the classic choice for a reason. They hold up well in the oven and have that perfect vanilla-chocolate-adjacent flavor. Don’t use generic store brand if you can avoid it; the flavor is just too weak.
Unsalted butter (4 tablespoons / 56g) — Melted. This binds the crumbs together and adds that buttery crunch.
Granulated sugar (2 tablespoons / 25g) — Just a touch to sweeten the crumble and help it caramelize slightly in the oven.
Salt (a pinch) — This is crucial. It cuts through the sweetness and enhances the vanilla flavor. Don’t skip it.
For the Fresh Bananas
Ripe bananas (3-4 medium) — This is the most important variable. You want bananas that are yellow with brown spots. They need to be soft and sweet. If they’re too green, they’ll be tart and firm. If they’re too mushy, they’ll turn to soup. Aim for that perfect “just right” ripeness. I usually buy bananas a few days ahead and let them sit on the counter.
Equipment Needed
You don’t need fancy equipment for this. Here’s what I actually use, and what you can swap out.
Medium saucepan — I use a 3-quart saucepan with a thick bottom. This ensures even heating and prevents scorching. If you have a copper-bottomed pan, even better. But a standard stainless steel or non-stick saucepan works fine.
Whisk — A good silicone whisk is essential. You need to whisk constantly while making the custard to prevent lumps. I have a cheap one from the dollar store that works perfectly, but a sturdy stainless steel whisk is nice too.
Large mixing bowl — For cooling the custard and folding in the cream. A glass or ceramic bowl works best because it doesn’t retain heat.
9×9 inch baking dish — This is the classic size for banana pudding. It gives you nice layers and a good ratio of custard to wafers. A 9×13 dish will work, but you’ll need to double the recipe. I prefer the 9×9 because it’s more manageable for my family of four.
Small bowl — For mixing the vanilla wafer crumbs with butter and sugar.
Measuring cups and spoons — Standard stuff. I use metal measuring cups for dry ingredients and glass for liquids.
Pastry brush (optional) — I use this to brush the sides of the saucepan with water while cooking the custard to prevent crystallization on the sides. It’s a pro tip, but not strictly necessary.
Blender or food processor (optional) — If you want an ultra-smooth custard, you can blend it after cooking. I usually just strain it through a fine-mesh sieve to catch any cooked egg bits. It’s worth the extra minute.
How to Make It: Step-by-Step
Alright, let’s make this banana cream pudding with vanilla wafer crumble! I’m walking you through exactly how I do it, including the little tricks I’ve picked up over the years. It’s easier than you think, and the result is worth every second.
Step 1: Prep Your Bananas and Wafers (10 minutes)
Before you start cooking, peel and slice your bananas. Slice them into quarter-inch rounds. If they’re very ripe, handle them gently so they don’t break apart. Place them in a bowl and toss with a teaspoon of lemon juice. This prevents browning and adds a bright flavor that cuts the sweetness. Set aside.
Next, make the vanilla wafer crumble. Place your vanilla wafers in a small bowl. If you have a food processor, pulse them until they’re coarse crumbs. If not, put them in a zip-top bag and crush them with a rolling pin. You want a mix of fine crumbs and small chunks for texture. Stir in the melted butter and sugar until it looks like wet sand. Set aside.
Step 2: Heat the Milk and Vanilla (5 minutes)
In your medium saucepan, combine the whole milk and vanilla extract. Heat over medium heat until it just starts to simmer. You’ll see small bubbles forming around the edges. Do not let it boil vigorously, or you’ll scald the milk. Remove from heat and set aside.
Step 3: Whisk the Sugar and Flour (2 minutes)
In a large mixing bowl, whisk together the granulated sugar and flour. Make sure there are no lumps. This step is important because if you add the flour to the hot milk all at once, it will clump. Whisking it with the sugar first ensures a smooth custard.
Step 4: Temper the Eggs (3 minutes)
Whisk the egg yolks in a separate small bowl. Slowly pour about half of the hot milk mixture into the egg yolks while whisking constantly. This is called tempering, and it prevents the eggs from scrambling. Once combined, pour the egg-milk mixture back into the saucepan with the remaining milk. Whisk to combine.
Step 5: Cook the Custard (5-7 minutes)
Return the saucepan to medium heat. Whisk constantly. This is the most important step. You must not stop whisking. The custard will thicken quickly. After about 3-4 minutes, you’ll see bubbles forming on the surface. Let it boil gently for 1 minute while whisking. This cooks out the flour taste and ensures the custard is safe to eat. Remove from heat immediately.
Stir in the butter until it’s fully melted and incorporated. The custard should be thick enough to coat the back of a spoon. If you run your finger across the spoon, the line should stay clear.
Step 6: Cool the Custard (20 minutes)
Pour the hot custard into your large mixing bowl. To prevent a skin from forming, press plastic wrap directly onto the surface of the custard. Let it cool to room temperature. This takes about 20 minutes. You can speed it up by placing the bowl in the fridge, but let it come back to room temperature before the next step.
Step 7: Fold in the Cream (2 minutes)
Once the custard is cool, remove the plastic wrap. Whip the heavy cream until it forms soft peaks. Don’t over-whip it into stiff peaks, or it will be gritty. Gently fold the whipped cream into the custard using a spatula. Use a figure-eight motion. Stop as soon as it’s combined. You want light, airy custard now.
Step 8: Layer the Pudding (10 minutes)
Take your 9×9 baking dish. Start with a layer of vanilla wafers on the bottom. You might need to break a few to fit. Then, add a layer of sliced bananas. Then, spoon a generous layer of the custard over the bananas. Repeat: wafers, bananas, custard. Finish with a final layer of custard on top.
Here’s the trick: save about half of your vanilla wafer crumble for the top. Sprinkle the rest over the final layer of custard. This gives you the crisp texture right at the end.
Step 9: Chill and Serve (4 hours minimum)
Cover the dish with plastic wrap or foil. Refrigerate for at least 4 hours, but overnight is best. This allows the wafers to soften and absorb the custard, creating that perfect pudding texture. When you’re ready to serve, sprinkle the reserved vanilla wafer crumble on top. Slice into squares and serve cold.
Expert Tips & Tricks
Here’s everything I’ve learned from making this banana cream pudding dozens of times. These tips will save you from my mistakes.
Use Ripe Bananas
I can’t stress this enough. The bananas are the star of the show. If you use under-ripe bananas, the pudding will be bland and firm. If you use over-ripe bananas, they’ll turn to mush. Look for bananas that are yellow with brown speckles. They should yield slightly to pressure but not feel mushy.
Don’t Skip the Lemon Juice
Tossing the bananas in lemon juice isn’t just about preventing browning. The acidity brightens the flavor and balances the sweetness of the custard and wafers. It’s a subtle detail that makes a big difference. Don’t worry, you won’t taste the lemon.
Temper the Eggs Properly
If you rush this step, you’ll end up with egg drop soup. Add the hot milk slowly while whisking constantly. It takes about a minute, but it’s worth it for a smooth custard.
Let It Cool Completely
Don’t skip the cooling step. If you fold the whipped cream into hot custard, it will melt and you’ll lose all the air. The custard needs to be room temperature before you add the cream. This ensures a light, fluffy texture.
Chill Overnight
I know it’s tempting to eat it right away, but this banana cream pudding with vanilla wafer crumble is best after chilling overnight. The flavors meld, and the texture becomes perfectly creamy. If you’re in a hurry, chill it for at least 4 hours, but plan ahead if you can.
Variations & Substitutions
Once you’ve nailed the basic version, here’s how you can mix it up. I’ve tried all of these.
Chocolate Banana Pudding
Swap ¼ cup of the flour for ¼ cup of unsweetened cocoa powder. Add 2 tablespoons of chocolate chips to the custard before folding in the cream. It’s like a banana split in a dish.
Cookie Crumble Variation
If you don’t have vanilla wafers, you can use graham crackers, but the flavor will be different. For a more decadent version, use shortbread cookies. Crush them and mix with butter and sugar as directed.
Gluten-Free Version
Use gluten-free vanilla wafers. They’re widely available now and work perfectly. Make sure your flour is gluten-free too, or use cornstarch instead.
Dairy-Free Option
Use coconut milk instead of whole milk and heavy cream. Use dairy-free butter and vanilla wafers. The flavor will be slightly coconutty, which pairs well with banana.
Mini Pudding Cups
Instead of one large dish, layer the ingredients in individual mason jars or ramekins. This is perfect for parties because everyone gets their own portion, and it looks adorable. Just reduce the chilling time to 2 hours.
With Whipped Cream Topping
For an extra special presentation, pipe a rosette of whipped cream on top of each serving just before serving. It adds a restaurant-quality look.
Serving & Storage
I usually serve this straight from the fridge at the dinner table. It looks rustic and stays cold. Here are some ideas for how to serve it:
How to Serve
Slice into squares with a sharp knife. Wipe the knife between cuts for clean edges. Serve with a spoon. If you want to get fancy, add a mint leaf on top. It’s not traditional, but it looks beautiful.
Side Dishes
This is a rich dessert, so keep sides light. A simple green salad or some fresh berries work well if you’re serving it as part of a larger meal. But honestly, it’s usually the star of the show.
Storage Instructions
Refrigerator: Store in an airtight container or covered with plastic wrap for up to 4 days. The wafers will continue to soften, which is actually desired. After 4 days, they might get too soggy.
Freezing: I don’t recommend freezing this banana cream pudding with vanilla wafer crumble. The custard separates when thawed, and the texture becomes grainy. It’s best enjoyed fresh from the fridge.
Reheating: Do not reheat. This is a cold dessert. Reheating will melt the custard and make the wafers mushy in an unpleasant way.
Nutrition Information
I’m not a nutritionist, but here’s the breakdown if you’re tracking. Keep in mind that this is a rich dessert, so portion control is key.
Per serving (based on 9 servings):
- Calories: 380
- Protein: 6g
- Carbs: 52g
- Fiber: 2g
- Sugar: 32g
- Fat: 16g
- Saturated Fat: 9g
- Cholesterol: 110mg
- Sodium: 220mg
Look, this is comfort food with cream, sugar, and butter. It’s not a diet recipe. But it’s way better than store-bought, and I know exactly what’s in it. When I want to make it lighter, I use half-and-half instead of heavy cream and reduce the sugar. But usually? I just enjoy a small square and savor it.
Final Thoughts
So that’s my go-to banana cream pudding with vanilla wafer crumble! I’ve probably talked your ear off at this point, but when you make a recipe this often, you have a lot to say about it. This dessert has saved my dinner parties more times than I can count. It’s my answer to “what’s for dessert” when I want to impress without stressing. My family loves it, my friends ask for the recipe, and I love making it because it’s so simple yet so rewarding.
Make it yours! Try different types of bananas, swap in your favorite cookies, or add a layer of caramel sauce if you’re feeling adventurous. The best recipes are the ones you adapt to your tastes. If you make this, drop a comment and let me know what you think! I love hearing how recipes turn out in your kitchen. And if something doesn’t work, tell me that too—I’m here to help troubleshoot.
Happy cooking! And I hope your kitchen smells half as good as mine does right now.
Frequently Asked Questions
Q: Can I use instant pudding mix instead of making custard from scratch?
A: You can, but I highly recommend against it. Instant pudding mix tastes artificial and has a different texture. Homemade custard is so much richer and smoother. If you’re short on time, you can use a high-quality instant pudding mix, but add fresh whipped cream and real bananas to elevate it. It’s not the same, but it’s acceptable in a pinch.
Q: Why did my custard get lumpy?
A: Usually, this means the eggs scrambled or the flour clumped. Make sure you temper the eggs properly by adding the hot milk slowly while whisking. Also, whisk the flour with the sugar before adding the milk. If your custard is already lumpy, you can strain it through a fine-mesh sieve to remove the lumps.
Q: Can I make this ahead of time?
A: Absolutely! This banana cream pudding with vanilla wafer crumble actually tastes better the next day. I usually make it the night before. Just cover it tightly with plastic wrap and refrigerate. The flavors will meld, and the texture will be perfect.
Q: How do I prevent the bananas from browning?
A: Tossing the sliced bananas with a little lemon juice is the best way. The acid slows down the oxidation process. You can also add them just before layering the pudding to minimize exposure to air.
Q: Can I use frozen bananas?
A: No. Frozen bananas release too much water when they thaw, which will make the pudding watery. Always use fresh, ripe bananas for the best texture and flavor.
Q: What kind of vanilla wafers should I use?
A: I recommend Nilla Wafers. They have the right balance of sweetness and vanilla flavor, and they hold up well in the pudding. Avoid thin, crispy wafers as they will dissolve too quickly.
Q: Can I add whipped cream on top?
A: Yes! If you want a lighter texture, you can pipe whipped cream on top just before serving. It adds a nice visual appeal and a fresh contrast to the rich custard.
Pin This Recipe!
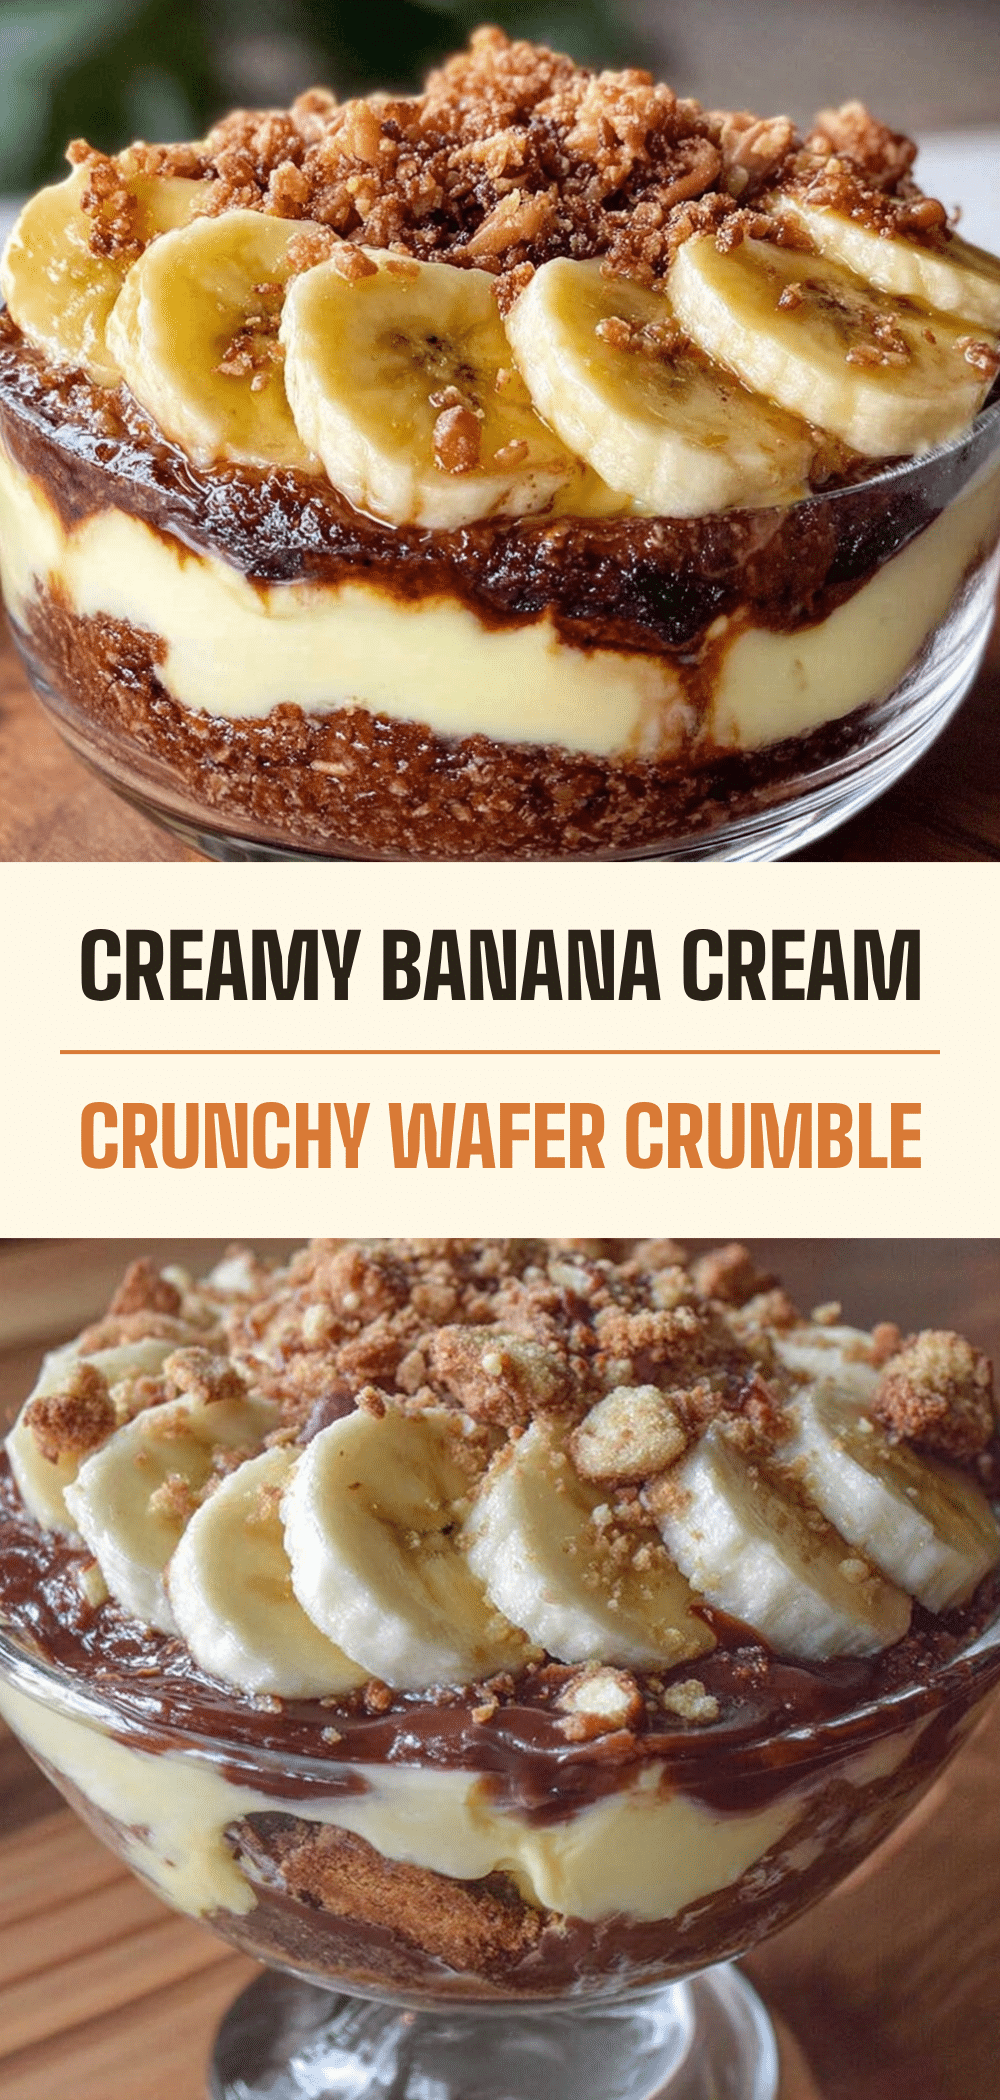
Banana Cream Pudding: 5-Step Easy Recipe
- Total Time: 4 hours 45 minutes
- Yield: 9 servings 1x
Description
A rich, nostalgic homemade banana cream pudding featuring a silky custard base, fresh ripe bananas, and a buttery vanilla wafer crumble topping. This dessert is easy to make, improves overnight, and is perfect for dinner parties or cozy weeknight treats.
Ingredients
- 4 cups whole milk
- 2 tablespoons vanilla extract (preferably bourbon vanilla)
- ¾ cup granulated sugar
- 3 tablespoons unsalted butter
- 4 large egg yolks
- 1 cup heavy cream
- ¼ cup all-purpose flour
- 1 package (20-25 cookies) vanilla wafers
- 4 tablespoons unsalted butter (melted, for crumble)
- 2 tablespoons granulated sugar (for crumble)
- A pinch of salt (for crumble)
- 3–4 medium ripe bananas
- 1 teaspoon lemon juice
Instructions
- Prep bananas and wafers: Peel and slice bananas into quarter-inch rounds. Toss with lemon juice to prevent browning. Crush vanilla wafers into coarse crumbs and mix with melted butter and sugar to form a crumble; set aside.
- Heat milk and vanilla: In a medium saucepan, combine whole milk and vanilla extract. Heat over medium heat until it just starts to simmer (small bubbles around edges). Do not boil. Remove from heat.
- Whisk sugar and flour: In a large mixing bowl, whisk together granulated sugar and flour until no lumps remain.
- Temper eggs: Whisk egg yolks in a separate small bowl. Slowly pour about half of the hot milk mixture into the yolks while whisking constantly. Pour the egg-milk mixture back into the saucepan with the remaining milk.
- Cook custard: Return saucepan to medium heat. Whisk constantly until the custard thickens and bubbles form on the surface. Let it boil gently for 1 minute while whisking to cook out the flour taste. Remove from heat immediately.
- Finish custard base: Stir in 3 tablespoons of butter until fully melted. Pour hot custard into the large mixing bowl with the sugar-flour mixture. Press plastic wrap directly onto the surface to prevent a skin. Cool to room temperature (about 20 minutes).
- Fold in cream: Whip heavy cream until soft peaks form. Gently fold the whipped cream into the cooled custard using a figure-eight motion until combined.
- Layer pudding: In a 9×9 inch baking dish, layer vanilla wafers, sliced bananas, and custard. Repeat layers, finishing with a layer of custard. Sprinkle most of the vanilla wafer crumble over the top.
- Chill: Cover the dish and refrigerate for at least 4 hours, preferably overnight, to allow flavors to meld and wafers to soften.
- Serve: Sprinkle reserved crumble on top just before serving. Slice into squares and serve cold.
Notes
Use ripe bananas with brown spots for the best flavor and texture. Do not skip the tempering step to avoid scrambled eggs. The pudding tastes better after chilling overnight. Do not freeze as the custard will separate and become grainy. Do not reheat; serve cold.
- Prep Time: 30 minutes
- Cook Time: 15 minutes
- Category: Dessert
- Cuisine: American
Nutrition
- Serving Size: 1 square slice
- Calories: 380
- Sugar: 32
- Sodium: 220
- Fat: 16
- Saturated Fat: 9
- Carbohydrates: 52
- Fiber: 2
- Protein: 6
Keywords: banana pudding, banana cream pudding, vanilla wafer crumble, homemade custard, dessert recipe, comfort food, easy baking