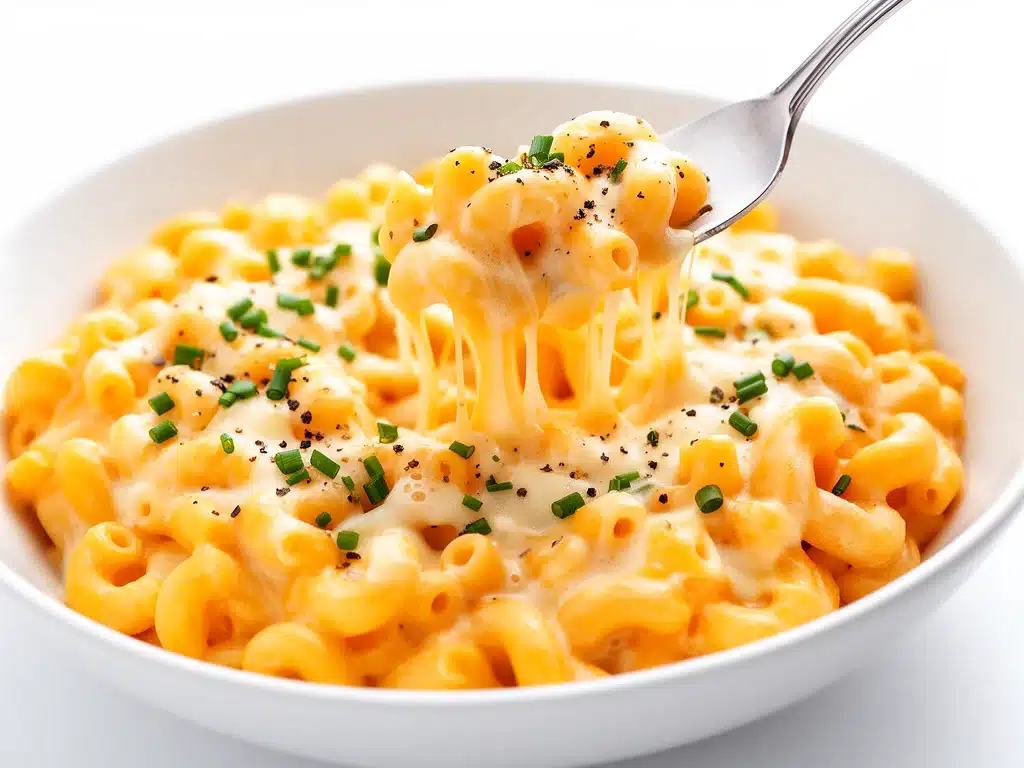
One rainy Thursday evening, I found myself staring blankly into the fridge after a long day, desperately wishing for dinner to just make itself. My toddler was fussing, my husband was late from work, and I had zero energy to pull off anything complicated. Then I remembered a recipe I’d been perfecting over the past month: creamy stovetop three-cheese mac and cheese. It’s my secret weapon for those busy weeknights when I want comfort food fast without sacrificing flavor.
After whipping it up in about 20 minutes, the whole family devoured it before I could even sit down. That night, I realized this mac and cheese isn’t just a quick fix—it’s the kind of creamy, cheesy, melt-in-your-mouth dish that makes everyone happy and keeps me sane. I’ve made this recipe at least a dozen times since, tweaking the cheese blend and timing until it’s just right.
This creamy stovetop three-cheese mac and cheese is now a staple in our dinner rotation, especially when I need something fast but satisfying. It’s rich, cheesy, and easy enough to make while juggling everything else life throws at you. And the best part? No baking pans or extra dishes—just one pot, a whisk, and a hungry crowd.
Why You’ll Love This Recipe
This recipe has completely changed how I tackle busy weeknight dinners. Here’s why I keep coming back to this creamy stovetop three-cheese mac and cheese:
- Super Fast and Fuss-Free — From boiling water to creamy goodness in under 25 minutes. I’ve literally made this while helping with homework and answering emails. No stress.
- Decadently Creamy — Thanks to the trio of cheeses (cheddar, mozzarella, and Parmesan), it’s got layers of flavor and that perfect stretchy, gooey texture.
- Minimal Cleanup — Only one pot and a spoon needed. No baking dish, no extra pans. Perfect for busy nights when I don’t want to face a mountain of dishes.
- Kid-Approved (and Adult-Approved) — I’ve served this to my picky toddler, my husband who’s a cheese fanatic, and even friends who claimed they didn’t like mac and cheese. Everyone asks for seconds.
- Customizable — This recipe is a fantastic base for adding extras like crispy bacon, steamed broccoli, or even a dash of hot sauce for grown-up flair.
When I’m short on time but craving something cozy, this creamy stovetop three-cheese mac and cheese is my go-to. It feels indulgent but comes together in a flash, making weeknight dinners feel like a treat instead of a chore.
Ingredients You’ll Need
Here’s the cool part: you probably already have most of these ingredients hanging out in your fridge or pantry. I’m pretty picky about the cheese blend here, so I’ll explain why each one matters.
- Elbow macaroni (1 pound / 450g) — Classic shape for catching the sauce. I use Barilla elbow pasta because it cooks evenly every time.
- Unsalted butter (4 tablespoons / 60g) — For that silky base. Unsalted lets you control the saltiness better.
- All-purpose flour (¼ cup / 30g) — Thickens the cheese sauce. Don’t skip this step or your sauce will be runny.
- Whole milk (3 cups / 720ml) — I use whole milk for creaminess without the heaviness of cream. If you want it richer, swap ½ cup with heavy cream.
- Sharp cheddar cheese (1½ cups shredded / 170g) — The star cheese for flavor and color. Sharp cheddar packs a punch.
- Mozzarella cheese (1 cup shredded / 115g) — Brings that ooey-gooey stretchiness. Use low-moisture mozzarella if you can find it.
- Parmesan cheese (½ cup grated / 50g) — Adds salty, nutty depth. Grate fresh from a block—trust me, pre-grated just doesn’t melt right.
- Salt (1 teaspoon / to taste) — Essential for balancing flavors.
- Black pepper (½ teaspoon freshly ground) — Adds a subtle kick and depth.
- Dry mustard powder (½ teaspoon) — Small secret that brightens the cheese flavor.
- Garlic powder (¼ teaspoon) — Optional, but it adds a nice savory undertone without overpowering.
If you want to jazz it up, I love tossing in some cooked bacon or steamed veggies. When I’m in full-on busy mode, though, just these basics create a creamy stovetop three-cheese mac and cheese that feels indulgent but doesn’t take forever.
Equipment Needed
You don’t need anything fancy for this recipe. Here’s what I actually use:
- Large pot — To boil your pasta. I use a 6-quart pot so the pasta has room to swim and doesn’t stick together.
- Large heavy-bottomed saucepan or Dutch oven — For making the cheese sauce. A thick bottom helps prevent burning.
- Whisk — Crucial for stirring the roux and cheese sauce smoothly without lumps.
- Measuring cups and spoons — Standard, nothing special here.
- Colander — For draining the pasta.
- Cheese grater — Freshly grated cheese makes all the difference.
Optional but nice:
- Wooden spoon or silicone spatula — For folding in the pasta gently without breaking it.
- Thermometer — Not necessary, but I use it to keep an eye on the milk temperature. You want warm but not boiling.
How to Make It: Step-by-Step
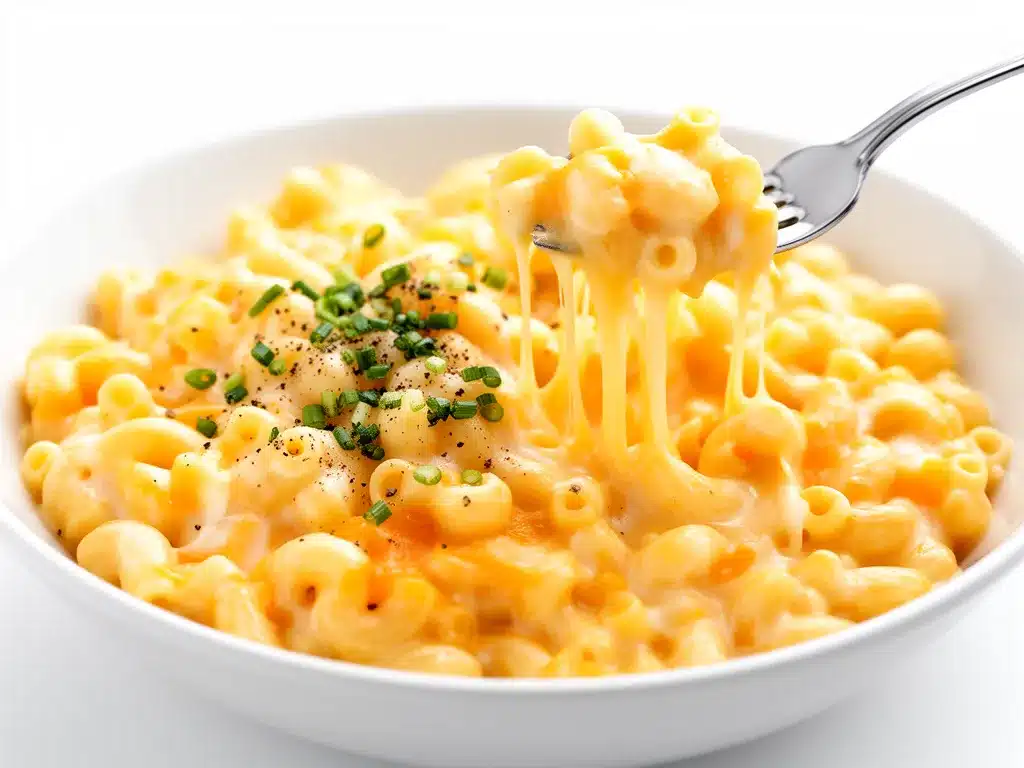
Alright, here’s the exact way I make this creamy stovetop three-cheese mac and cheese. I include my little tricks that keep it smooth and velvety every time.
Step 1: Cook the Pasta (8-10 minutes)
Bring a large pot of salted water to a rolling boil. Add the elbow macaroni and cook until just al dente—usually about 8 minutes. Don’t overcook because it’ll soften more in the sauce later. Drain the pasta and set aside. (Quick tip: toss the pasta with a tiny drizzle of olive oil to keep it from sticking if you’re not mixing it into the sauce immediately.)
Step 2: Make the Roux (4-5 minutes)
In your heavy-bottomed saucepan over medium heat, melt the butter. Once bubbly, whisk in the flour. Keep whisking constantly for about 2 minutes to cook off the raw flour taste. You want a smooth paste (roux) that’s just starting to turn golden—this is the base for your creamy sauce.
Step 3: Add the Milk and Spices (5-6 minutes)
Slowly pour in the whole milk while whisking to keep the sauce smooth. Add the dry mustard, garlic powder, salt, and black pepper. Keep stirring frequently as the mixture heats. It will start to thicken after a few minutes—aim for a consistency that coats the back of a spoon but isn’t pudding thick. If it gets too thick, add a splash of milk.
Step 4: Stir in the Cheeses (3-4 minutes)
Reduce heat to low and remove the pan from direct heat. Gradually add the shredded cheddar, mozzarella, and grated Parmesan, stirring constantly until completely melted and smooth. This step is crucial—adding cheese over too high heat makes the sauce grainy. The sauce should be creamy, rich, and glossy.
Step 5: Combine Pasta and Sauce (2 minutes)
Add the drained pasta to the cheese sauce and fold gently with a wooden spoon or silicone spatula until every piece is coated. Taste and adjust salt and pepper if needed. If the sauce feels too thick, add a tablespoon or two of warm milk to loosen it up.
Step 6: Serve Immediately
Serve hot, right from the pot or transfer to bowls. For an extra touch, sprinkle a little extra Parmesan and freshly cracked black pepper on top. If you want to get fancy, add a sprinkle of paprika or some fresh herbs like chopped parsley or chives.
Total time: About 25 minutes, with only 15 minutes active cooking.
Expert Tips & Tricks
- Don’t rush the roux. Cooking the butter and flour properly is what gives the sauce a silky texture without lumps.
- Low and slow for melting cheese. High heat makes cheese seize up and turn grainy. Always remove from heat when adding cheese.
- Use freshly grated cheese. Pre-shredded cheese often has anti-caking agents that mess with melting. Freshly grated makes a huge difference.
- Dry mustard powder is magic. It brightens the cheese flavor without making it taste like mustard. Don’t skip it!
- Save a splash of pasta water. If your sauce gets too thick, a little starchy water helps loosen it and helps the sauce cling to the noodles.
- Room temperature milk works best. Cold milk can cause the sauce to seize. Take it out of the fridge 10 minutes before cooking.
- Make it extra creamy. Stir in a tablespoon of cream cheese or a dollop of sour cream at the end for richer texture.
- For a crispy topping, sprinkle breadcrumbs and broil for 2 minutes—but this is optional and adds cleanup.
Variations & Substitutions
Once you’ve mastered this basic creamy stovetop three-cheese mac and cheese, it’s fun to mix things up. Here are some of my favorite tested variations:
- Chicken and Broccoli Mac: Stir in 2 cups cooked diced chicken and 1 cup steamed broccoli at the end. Protein and veggies in one!
- Bacon Mac and Cheese: Add 6 slices cooked and crumbled bacon for smoky crunch.
- Spicy Jalapeño: Add 1 finely chopped jalapeño or a pinch of cayenne for heat.
- Lighter Version: Use 2% milk and reduce cheese by ¼ cup each. Still tasty but less rich.
- Gluten-Free: Use gluten-free elbow pasta and substitute all-purpose flour with a gluten-free blend.
- Dairy-Free: Use plant-based milk (unsweetened almond or oat) and dairy-free cheese shreds. Sauce won’t be quite as creamy but still good.
- Extra Cheesy: Swap mozzarella for fontina or gouda for a creamier melt.
For busy weeknights, I often pair this mac and cheese with simple sides like a crisp salad or crunchy ranch chicken wraps for a complete meal. And when packing lunches, this thermos mac and cheese recipe is a lifesaver with just a few swaps.
Serving & Storage
Serving Suggestions: I usually serve this mac and cheese straight from the pot to keep it warm and cozy. It pairs beautifully with a simple green salad, turkey and cheese pinwheels for the kids, or roasted veggies like broccoli or green beans.
Storage: Store leftovers in an airtight container in the fridge for up to 4 days. The sauce will thicken and firm up—that’s totally normal.
Reheating: Warm gently on the stovetop over low heat with a splash of milk, stirring frequently to bring back the creamy texture. Microwaving works too but add milk and heat in short bursts to avoid drying out.
Freezing: I don’t recommend freezing this because the dairy-based sauce tends to separate when thawed.
Meal Prep Tip: Make the cheese sauce ahead and refrigerate. Cook pasta fresh when ready to eat and combine. It saves time and tastes fresher than reheated pasta.
Nutrition Information
I’m not a nutritionist, but here’s a rough breakdown per serving based on 6 servings:
| Calories | 450 |
|---|---|
| Protein | 20g |
| Carbohydrates | 50g |
| Fiber | 2g |
| Sugar | 6g |
| Fat | 20g |
| Saturated Fat | 12g |
| Cholesterol | 65mg |
| Sodium | 400mg |
| Calcium | 300mg |
What’s good here: decent protein from cheese and pasta, calcium for bones, and you can boost nutrition by adding veggies. It’s definitely comfort food with cream and cheese but homemade, way better than takeout, and you control what goes in.
Final Thoughts
So that’s my go-to creamy stovetop three-cheese mac and cheese! I know I’ve probably rambled, but when you make a recipe this often, you gather little tips and secrets that make it foolproof.
This dish has saved me on more busy weeknights than I can count. It’s the answer to “what’s for dinner?” when I’m tired, short on time, and craving something that feels like a warm hug. My kids love it, my husband requests it, and I’m happy because it’s easy, fast, and delicious.
Make it your own—try different cheeses, toss in veggies, or add some heat. The best recipes are the ones you tweak to fit your family’s tastes and your crazy schedule.
If you try this recipe, please drop a comment and share your experience! I love hearing how it turns out in your kitchen, and if you hit any snags, I’m here to help troubleshoot. Happy cooking—and may your weeknight dinners be forever creamy and cheesy!
Frequently Asked Questions
Q: Can I use milk instead of heavy cream for the sauce?
A: Absolutely! This recipe actually uses whole milk, not heavy cream, for a lighter but still creamy sauce. If you want to add richness, swap ½ cup of the milk for cream. Using just milk keeps it lighter and easier on the budget.
Q: Why did my sauce turn grainy?
A: The most common reason is adding the cheese over high heat. High heat causes the cheese to seize and become grainy. Always remove the pan from heat before stirring in cheese, and stir gently until smooth.
Q: Can I make this recipe ahead of time?
A: You can prep the cheese sauce up to 2 days ahead and keep it refrigerated. Cook pasta fresh when you’re ready to eat and combine. Reheat gently on the stove with a splash of milk for best texture.
Q: Can I substitute gluten-free pasta?
A: Yes! Gluten-free elbow pasta works great here. Just watch cooking times as they vary by brand.
Q: Can I add vegetables or protein?
A: Definitely. I love adding cooked chicken, steamed broccoli, or even crispy bacon. For a kid-friendly way to sneak in veggies, stir in some pureed cauliflower or butternut squash into the sauce.
Q: How do I keep the mac and cheese from sticking when reheating?
A: Add a splash of milk or cream when reheating and stir frequently over low heat. This helps loosen the sauce and keeps it creamy.
Q: Can I double this recipe?
A: Yes! Just double all ingredients and use a large enough pot and saucepan. Cooking times stay pretty much the same.
Pin This Recipe!

Creamy Stovetop Three-Cheese Mac and Cheese
- Total Time: 25 minutes
- Yield: 6 servings 1x
Description
A quick and easy creamy stovetop mac and cheese made with a blend of sharp cheddar, mozzarella, and Parmesan cheeses. Perfect for busy weeknights, this recipe delivers rich, cheesy comfort food in about 25 minutes with minimal cleanup.
Ingredients
- 1 pound elbow macaroni
- 4 tablespoons unsalted butter
- 1/4 cup all-purpose flour
- 3 cups whole milk
- 1 1/2 cups shredded sharp cheddar cheese
- 1 cup shredded mozzarella cheese
- 1/2 cup grated Parmesan cheese
- 1 teaspoon salt (to taste)
- 1/2 teaspoon freshly ground black pepper
- 1/2 teaspoon dry mustard powder
- 1/4 teaspoon garlic powder (optional)
Instructions
- Bring a large pot of salted water to a rolling boil. Add the elbow macaroni and cook until just al dente, about 8 minutes. Drain and set aside.
- In a heavy-bottomed saucepan over medium heat, melt the butter. Whisk in the flour and cook for about 2 minutes until the roux is smooth and starting to turn golden.
- Slowly pour in the whole milk while whisking constantly to keep the sauce smooth. Add dry mustard, garlic powder, salt, and black pepper. Stir frequently as the sauce thickens, about 5-6 minutes.
- Remove the pan from heat and gradually stir in the shredded cheddar, mozzarella, and grated Parmesan cheeses until melted and smooth.
- Add the drained pasta to the cheese sauce and fold gently until every piece is coated. Adjust seasoning with salt and pepper as needed. If sauce is too thick, add a tablespoon or two of warm milk to loosen.
- Serve immediately, optionally topped with extra Parmesan and freshly cracked black pepper.
Notes
Do not add cheese over high heat to avoid grainy sauce; remove pan from heat before adding cheese. Use freshly grated cheese for best melting. Save a splash of pasta water to loosen sauce if needed. Room temperature milk works best. For extra creaminess, stir in cream cheese or sour cream at the end. Optional crispy topping: sprinkle breadcrumbs and broil for 2 minutes.
- Prep Time: 5 minutes
- Cook Time: 20 minutes
- Category: Main Course
- Cuisine: American
Nutrition
- Serving Size: 1/6 of recipe
- Calories: 450
- Sugar: 6
- Sodium: 400
- Fat: 20
- Saturated Fat: 12
- Carbohydrates: 50
- Fiber: 2
- Protein: 20
Keywords: mac and cheese, stovetop mac and cheese, three cheese mac and cheese, quick dinner, comfort food, easy recipe, cheesy pasta