There’s a specific kind of panic that sets in when you realize it’s August 28th. You’ve spent the last three months grilling, eating watermelon, and pretending you’re going to start a fitness routine (you haven’t). But now, the light is hitting the backyard at 7:30 PM instead of 8:30 PM, and the humidity is starting to break. It’s the end of summer, which means one thing: it’s time for the last big backyard party before the leaves start turning.
Last year, I made the mistake of bringing a complex, three-layer cake to our neighborhood gathering. It looked gorgeous, sure. But by the time I tried to slice it, the sun had gone down, the ice had melted, and the dessert was a sad, sweaty mess on the platter. Nobody wanted to dig for it. Instead, I brought a tray of end of summer no-bake cookie bars this year, and let me tell you—it was the first thing to disappear. And not just disappear; it was the subject of the entire evening’s dessert conversation.
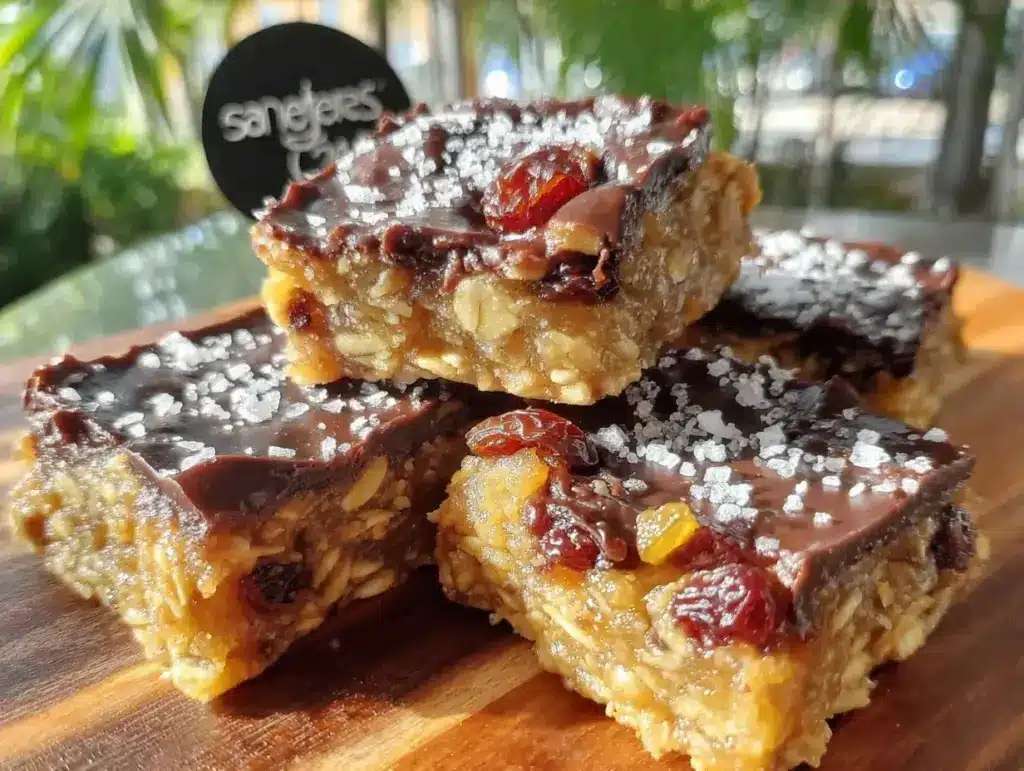
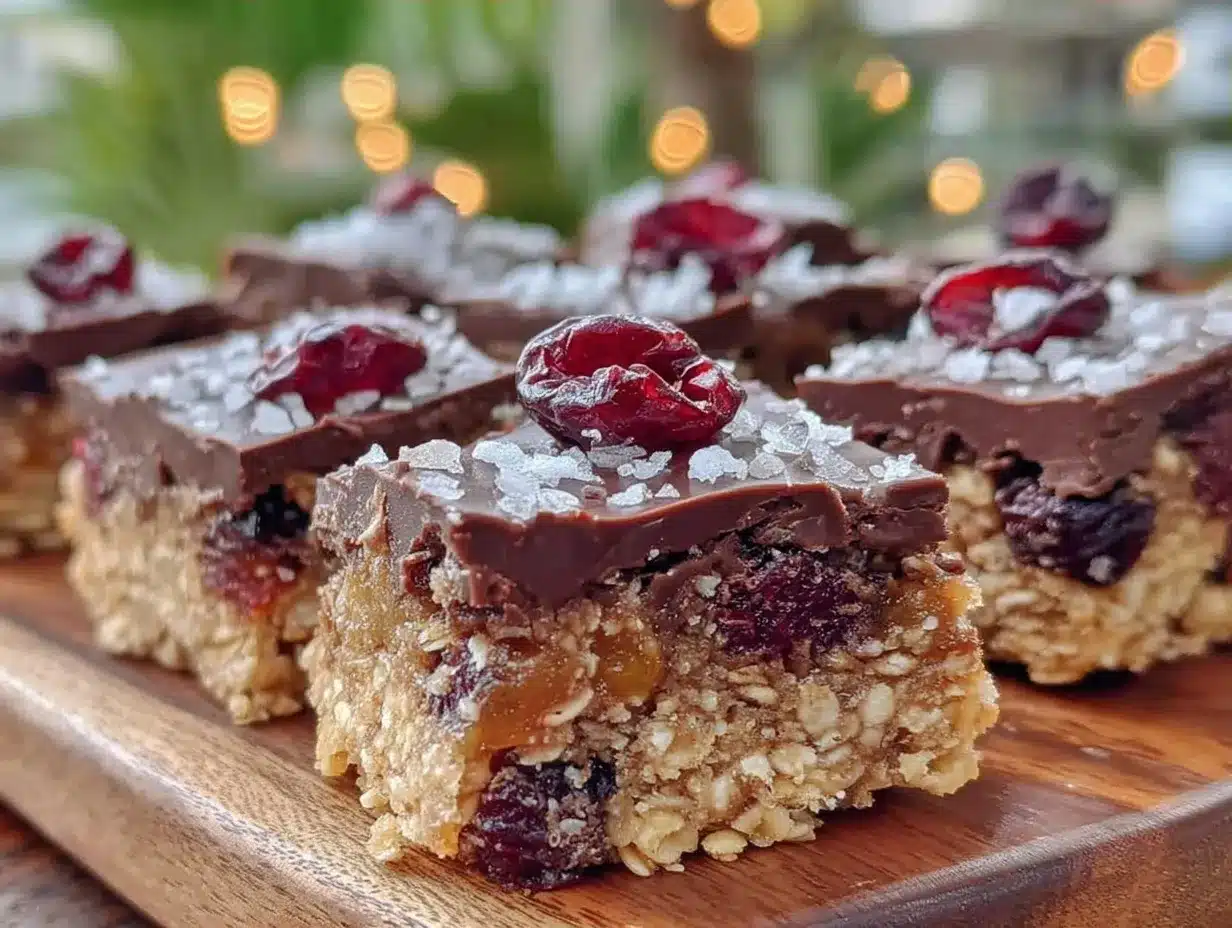
These bars are the perfect bridge between summer indulgence and cozy autumn cravings. They’re rich, chewy, and packed with the flavors of late-season peaches, warm cinnamon, and toasted oats. Best of all? You don’t need to turn on the oven. If you’re already running around with Labor Day BBQ chicken skewers on the grill, the last thing you want is to heat up your kitchen. These bars stay cool, cut cleanly, and travel beautifully. They’re the ultimate crowd-pleaser for anyone who loves the taste of fresh-baked cookies without the hassle.
Why You’ll Love This Recipe
I’ve been hosting backyard gatherings for years, and I’ve learned that dessert needs to be the hero without being the villain. It shouldn’t require a PhD in pastry arts or a tripod to photograph. These no-bake cookie bars check every single box. Here’s why they’ve become my secret weapon for end-of-summer entertaining:
- Zero Oven Required — Seriously. If your kitchen is already hot from grilling, these bars are your best friend. You just mix, press, and chill. It’s that simple. I’ve made these while balancing a tray of drinks and helping my kids with the last of their summer homework.
- Make-Ahead Magic — You can make these three days in advance. In fact, they taste even better after sitting in the fridge overnight because the flavors meld together. I usually whip them up on Thursday for a Saturday party, which takes the stress off my Friday.
- Summer-to-Fall Flavor Bridge — These bars taste like summer peaches but feel like fall cinnamon rolls. It’s that nostalgic, comforting vibe that makes people stop talking and start eating. I’ve served these alongside Labor Day Crockpot BBQ pulled chicken sliders, and the sweet-savory balance is unmatched.
- Sturdy & Travel-Friendly — Unlike delicate tarts or fluffy mousses, these bars hold their shape. I’ve transported them in a cooler bag over bumpy driveway roads, and they came out perfect. No cracking, no sliding, no mess.
- Gluten-Free Option Built-In — I use certified gluten-free oats in mine, so they’re safe for my celiac friend who always brings a side dish. The texture is identical to regular oats—chewy and hearty. It’s inclusive without feeling like an afterthought.
Real talk? These bars are the reason I keep hosting parties again. They’re easy enough for me to make on a Tuesday night, but fancy enough to impress my picky aunt. They’re the kind of treat that makes people say, “Wait, you made these yourself? They taste like a bakery!”
Ingredients You’ll Need
Here’s the best part: you probably have most of this already. These bars rely on pantry staples, but the quality of a few key ingredients makes all the difference. I’m particular about the oats and the butter, so pay attention there.
For the Base & Chewy Center
Old-Fashioned Rolled Oats (3 cups / 270g) — Do not use instant oats or steel-cut oats. You need the chew. I swear by Bob’s Red Mill for their consistency. If you need gluten-free, get certified GF oats—they behave the same way here.
All-Purpose Flour (1 cup / 125g) — Just regular flour. It gives the bars structure so they don’t crumble apart. Cake flour is too tender; bread flour is too tough. All-purpose is the sweet spot.
Unsalted Butter (1 cup / 225g / 2 sticks) — Use good quality butter. I use Kerrygold or Plugrá. This is where the richness comes from. Don’t skimp on the butter, or they’ll be dry and crumbly.
Granulated Sugar (1 cup / 200g) — White sugar for sweetness and chew. I’ve tried brown sugar, but it makes them too gooey and sticky. White sugar keeps them sliceable.
Packed Brown Sugar (1 cup / 220g) — Wait, why both? The white sugar gives structure, the brown sugar gives that deep, caramel-like flavor and moisture. It’s a dynamic duo.
For the Flavor & Moisture
Whole Milk (1 cup / 240ml) — Adds creaminess to the oat mixture. Skim milk works in a pinch, but whole milk makes them richer. I like the extra fat content for that bakery taste.
Vanilla Extract (2 teaspoons) — Pure vanilla only. The fake stuff tastes chemical. I use Nielsen-Massey or Simply Organic. It’s a small cost for a big flavor boost.
Cinnamon (1 teaspoon) — Ground cinnamon. Essential for that cozy, end-of-summer vibe. If you’re feeling fancy, add a pinch of nutmeg or allspice, but keep it simple.
Salt (½ teaspoon) — Just a pinch to balance the sweetness. Don’t skip it. Sweet food without salt tastes flat.
For the Topping
Heavy Cream (½ cup / 120ml) — For the glaze. You want it rich enough to coat the spoon but not so thick it’s impossible to spread.
Powdered Sugar (1 cup / 120g) — Sifted, please. Lumps in the glaze are the enemy. I sift it directly into the cream.
Vanilla Bean Paste (1 teaspoon) — Optional but amazing. It gives little black specks that look professional and adds a deeper vanilla flavor. If you don’t have it, regular vanilla extract works fine.
Chopped Toasted Pecans (½ cup / 60g) — For crunch and elegance. Toasting them first brings out their natural oils. I toast them in a dry pan for 3 minutes while I boil the oat mixture.
Equipment Needed
You don’t need fancy equipment for this. Here’s what I actually use.
Large Heavy-Bottomed Pot — I use a 4-quart saucepan. It needs to handle the boiling sugar and butter mixture without scorching. A thin pot will burn the sugar on the bottom.
Wooden Spoon — For stirring. Silicone works too, but wood absorbs heat and feels more traditional. Don’t use metal—it scratches the pot.
9×13 Inch Baking Dish — Glass or ceramic is best because it conducts heat evenly when you chill it. I use my Pyrex dish—it’s scratched up from years of use, and it’s perfect for this.
Parchment Paper — Line the pan! This is non-negotiable. It makes removing the bars for cutting so much easier. I line it with a cross-hatch pattern so it covers the whole bottom and sides.
Whisk — For the glaze. A small whisk works best to avoid splashing.
Measuring Cups and Spoons — Standard stuff. Dollar store versions work fine.
Pastry Brush — Optional, but I use it to brush down the sides of the pot with water while boiling sugar to prevent crystallization. It’s a pro trick that saves you from grainy sugar.
How to Make It: Step-by-Step
Alright, let’s make this! I’m walking you through exactly how I do it, including the little tricks I’ve picked up over years of making these.
Step 1: Prep Your Pan and Oats
Line your 9×13 inch baking dish with parchment paper, leaving an overhang on the long sides. This is your handle for lifting the bars out later. Set aside. If you’re using pecans, toast them in a dry skillet over medium heat for 3-5 minutes until fragrant. Set them aside to cool.
Step 2: Boil the Oat Mixture
In your large pot, combine the butter, granulated sugar, brown sugar, and milk. Place over medium-high heat and stir constantly until the butter melts and the sugars dissolve. This takes about 5 minutes. Once it starts to bubble, let it boil vigorously for exactly 2 minutes. Do not rush this step, but do not overcook it either. Two minutes is the sweet spot for chewy, not hard, bars.
Step 3: Combine and Mix
Remove the pot from heat. Stir in the vanilla extract and salt. Immediately add the oats and flour. Stir vigorously until everything is evenly coated. The mixture will look thick and sticky—that’s good. It should hold together when you press it with a spoon.
Step 4: Press into the Pan
Transfer the hot oat mixture into your prepared pan. Use a greased spatula or your hands (careful, it’s hot!) to press it down firmly. I recommend using the bottom of a measuring cup to press it evenly. You want it flat and compact. If it’s too loose, the bars will fall apart. If it’s too tight, they’ll be dense. Aim for even pressure across the whole pan.
Step 5: Chill
Let the bars cool to room temperature for 20 minutes, then refrigerate for at least 2 hours, or overnight. This step is crucial. It sets the structure so the glaze doesn’t soak in and the bars cut cleanly.
Step 6: Make the Glaze
While the bars chill, make the glaze. In a small bowl, whisk together the heavy cream and vanilla bean paste until smooth. Gradually whisk in the powdered sugar until you have a thick but spreadable consistency. If it’s too thick, add a teaspoon more cream. If it’s too thin, add a tablespoon more sugar.
Step 7: Glaze and Top
Lift the chilled bars out of the pan using the parchment overhang. Place them on a cutting board. Spread the glaze evenly over the top using an offset spatula or butter knife. Sprinkle the toasted pecans over the wet glaze, pressing them in gently so they stick.
Step 8: Cut and Serve
Use a sharp knife to cut into squares. I cut them in half, then in thirds for a total of 24 bars. Wipe the knife clean between cuts for clean edges. Serve at room temperature for the best texture.
Expert Tips & Tricks
Here’s everything I’ve learned from making these dozens of times. These tips will save you from my mistakes.
Don’t Skip the Boil Time
The 2-minute boil is what cooks the raw flour taste out of the flour and sets the sugar structure. If you boil for only 1 minute, the bars will be raw and gummy. If you boil for 3 minutes, they’ll be hard as rocks. Use a timer. I set mine on my phone before I start.
Toast Your Nuts
Raw pecans are fine, but toasted pecans are amazing. The heat releases their oils and adds a nutty depth that complements the sweet glaze. It’s a small step that makes a huge difference in flavor complexity.
Use Parchment, Not Grease
Greasing the pan alone isn’t enough. These bars are sticky. Parchment paper ensures they lift out in one piece. I’ve learned this the hard way with a bar that stuck to the pan and broke in half.
Chill Thoroughly
I know it’s tempting to glaze them while they’re still slightly warm, but don’t. The glaze will melt into the bars, and you’ll lose your pretty white top. Patience pays off. Chill them until they’re cold to the touch.
Keep Them Covered
These bars dry out if exposed to air. Store them in an airtight container with parchment between layers. They’ll stay fresh for up to 5 days in the fridge.
Variations & Substitutions
Once you’ve nailed the basic version, here’s how you can mix it up. I’ve tried all of these.
Chocolate Chip Version
Add 1 cup of semi-sweet chocolate chips to the oat mixture before pressing. The chips will melt slightly into the warm bars, creating pockets of gooey chocolate. This is my kids’ favorite variation.
Peanut Butter Swirl
Swirl 2 tablespoons of peanut butter into the glaze before spreading. It adds a salty-sweet contrast that pairs beautifully with the oats. It’s like a Reese’s Cup in bar form.
Coconut Edition
Replace half the oats with shredded coconut. Toast the coconut lightly before adding. It adds a tropical twist that’s perfect for summer parties. Pair this with iced brown sugar oat milk shaken espresso for a cozy afternoon treat.
Gluten-Free
Use certified gluten-free oats and gluten-free flour. Everything else is naturally gluten-free. The texture is identical to regular oats.
Dairy-Free
Replace butter with coconut oil and milk with oat milk. Replace heavy cream with coconut cream. The flavor will be slightly coconut-forward, but it’s still delicious.
Serving & Storage
How to Serve:
I usually serve these straight from the cutting board at the party. They look rustic and homemade. But here are other ways I’ve enjoyed them:
- With Coffee: A warm cup of coffee and a cold bar is my perfect weekend morning.
- With Ice Cream: Top a bar with a scoop of vanilla bean ice cream for a decadent dessert.
- With Tea: These bars pair beautifully with Earl Grey or Chai tea.
Storage Instructions:
Store in an airtight container in the refrigerator for up to 5 days. They can also be frozen for up to 3 months. Wrap them individually in plastic wrap and freeze in a freezer bag. Thaw overnight in the fridge before serving.
Reheating:
No need to reheat. Eat them cold or at room temperature. If you prefer them softer, let them sit out for 15 minutes before serving.
Nutrition Information
I’m not a nutritionist, but here’s the breakdown if you’re tracking. These bars are indulgent, so enjoy them in moderation.
Per Serving (1 of 24 bars):
– Calories: 280
– Protein: 4g
– Carbs: 42g
– Fiber: 2g
– Sugar: 28g
– Fat: 12g
– Saturated Fat: 7g
– Cholesterol: 25mg
– Sodium: 150mg
What’s Good:
– Contains oats, which are a whole grain
– Provides some energy from complex carbs
– Can be made gluten-free
What to Know:
– High in sugar from the glaze and sugars
– Contains dairy and gluten (unless modified)
– Moderate calories per bar
Final Thoughts
So that’s my go-to end of summer no-bake cookie bars! I’ve probably talked your ear off at this point, but when you make a recipe this often, you have a lot to say about it.
These bars have saved my backyard parties more times than I can count. They’re my answer to “what’s for dessert” when I’m tired, don’t want to bake, and still want something that tastes really good. My guests are happy, my family is happy, and I’m happy because I’m not stressed about cooking.
Make it yours! Try different nuts, swap in chocolate chips, or adjust the glaze thickness. The best recipes are the ones you adapt to your family’s tastes.
If you make this, drop a comment and let me know what you think! I love hearing how recipes turn out in your kitchen. And if something doesn’t work, tell me that too—I’m here to help troubleshoot.
Happy cooking! And I hope your kitchen smells half as good as mine does right now.
Frequently Asked Questions
Can I use quick oats instead of old-fashioned oats?
You can, but the texture will be different. Quick oats are finer and will make the bars more cake-like and less chewy. I recommend sticking with old-fashioned rolled oats for that classic cookie bar texture. If you must use quick oats, reduce the liquid slightly.
Why did my bars fall apart when I cut them?
This usually means they weren’t chilled long enough. The bars need time to set. I recommend chilling them for at least 4 hours, or overnight. Also, make sure you pressed them down firmly into the pan. Loose bars are harder to cut cleanly.
Can I make these ahead of time?
Absolutely! These bars actually taste better after sitting in the fridge for a day. The flavors meld together, and the glaze sets perfectly. I usually make them 2-3 days in advance for parties.
Can I freeze these bars?
Yes! Wrap them individually in plastic wrap and store in a freezer-safe bag for up to 3 months. Thaw overnight in the fridge before serving. The texture remains soft and chewy after thawing.
What if I don’t have heavy cream for the glaze?
You can use whole milk, but the glaze will be thinner and less rich. You may need to add more powdered sugar to thicken it. Coconut cream is a good dairy-free alternative that adds richness.
Can I use a different nut?
Of course! Walnuts, almonds, or pecans all work well. Toast them first for the best flavor. If you’re nut-free, you can skip the nuts entirely or use toasted sunflower seeds for crunch.
How do I store these bars?
Store them in an airtight container in the refrigerator for up to 5 days. They can also be kept at room temperature for 1-2 days, but the glaze may soften. Refrigeration is best for maintaining the structure.
Pin This Recipe!
End of Summer No-Bake Cookie Bars
- Total Time: 2 hours 30 minutes
- Yield: 24 servings 1x
Description
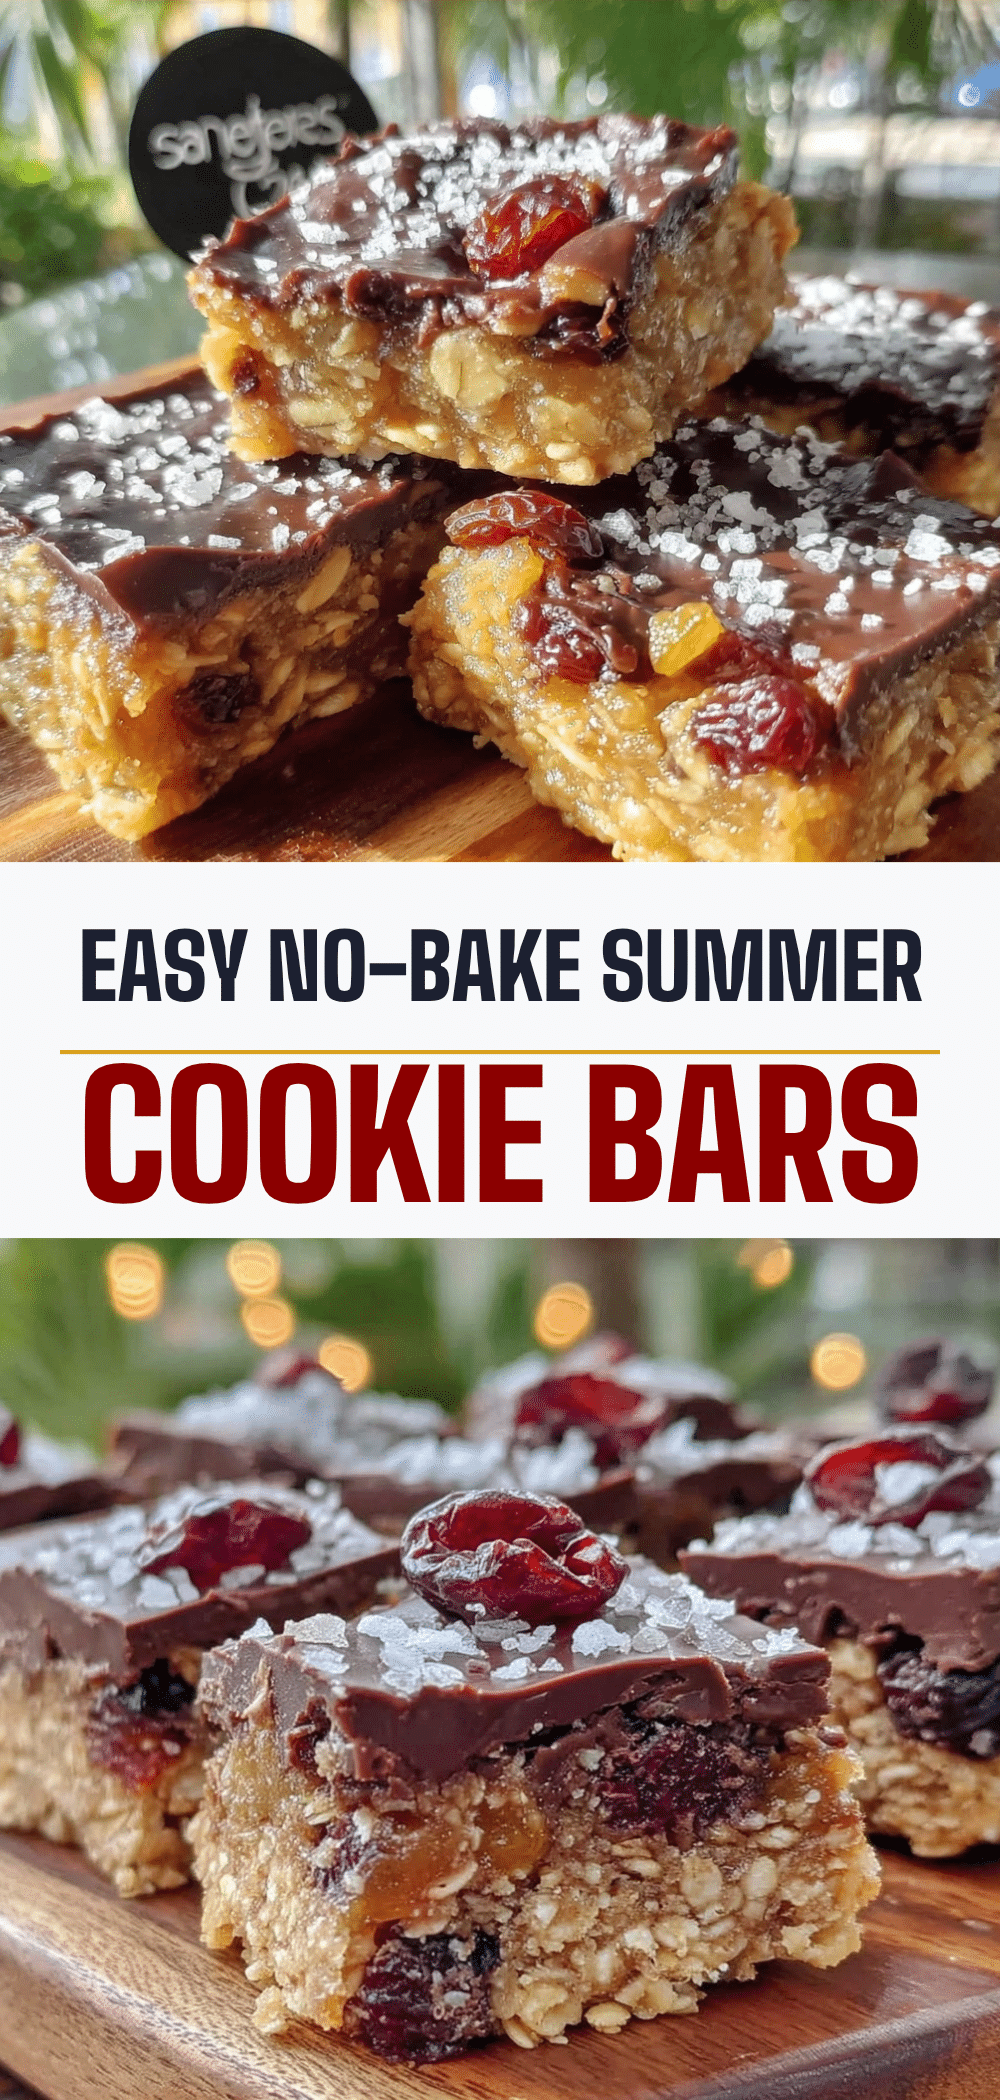
Rich, chewy no-bake cookie bars featuring late-season peach and cinnamon flavors, topped with a sweet glaze and toasted pecans. Perfect for backyard parties as they require no oven and can be made ahead.
Ingredients
- 3 cups (270g) Old-Fashioned Rolled Oats
- 1 cup (125g) All-Purpose Flour
- 1 cup (225g / 2 sticks) Unsalted Butter
- 1 cup (200g) Granulated Sugar
- 1 cup (220g) Packed Brown Sugar
- 1 cup (240ml) Whole Milk
- 2 teaspoons Vanilla Extract
- 1 teaspoon Ground Cinnamon
- ½ teaspoon Salt
- ½ cup (120ml) Heavy Cream
- 1 cup (120g) Powdered Sugar, sifted
- 1 teaspoon Vanilla Bean Paste (optional)
- ½ cup (60g) Chopped Toasted Pecans
Instructions
- Line a 9×13 inch baking dish with parchment paper, leaving an overhang on the long sides. Set aside.
- Toast pecans in a dry skillet over medium heat for 3-5 minutes until fragrant. Set aside to cool.
- In a large heavy-bottomed pot, combine butter, granulated sugar, brown sugar, and milk. Place over medium-high heat and stir constantly until butter melts and sugars dissolve (about 5 minutes).
- Once the mixture starts to bubble, let it boil vigorously for exactly 2 minutes. Remove from heat immediately.
- Stir in vanilla extract and salt. Immediately add oats and flour, stirring vigorously until everything is evenly coated.
- Transfer the hot mixture to the prepared pan. Use a greased spatula or the bottom of a measuring cup to press it down firmly and evenly.
- Let the bars cool to room temperature for 20 minutes, then refrigerate for at least 2 hours or overnight until set.
- While bars chill, whisk heavy cream and vanilla bean paste until smooth. Gradually whisk in powdered sugar until a thick but spreadable consistency is achieved.
- Lift chilled bars out of the pan using the parchment overhang. Spread glaze evenly over the top.
- Sprinkle toasted pecans over the wet glaze, pressing gently to adhere.
- Cut into 24 squares using a sharp knife, wiping the knife between cuts for clean edges. Serve at room temperature.
Notes
Do not skip the 2-minute boil time; it cooks the raw flour taste out and sets the sugar structure. Use parchment paper instead of just greasing the pan to ensure easy removal. Chill thoroughly before glazing to prevent the glaze from soaking in. Store in an airtight container in the fridge for up to 5 days or freeze for up to 3 months.
- Prep Time: 20 minutes
- Cook Time: 10 minutes
- Category: Dessert
- Cuisine: American
Nutrition
- Serving Size: 1 bar
- Calories: 280
- Sugar: 28
- Sodium: 150
- Fat: 12
- Saturated Fat: 7
- Carbohydrates: 42
- Fiber: 2
- Protein: 4
Keywords: no-bake cookies, end of summer dessert, backyard party treat, gluten-free option, make-ahead dessert, oat bars, cinnamon pecan bars