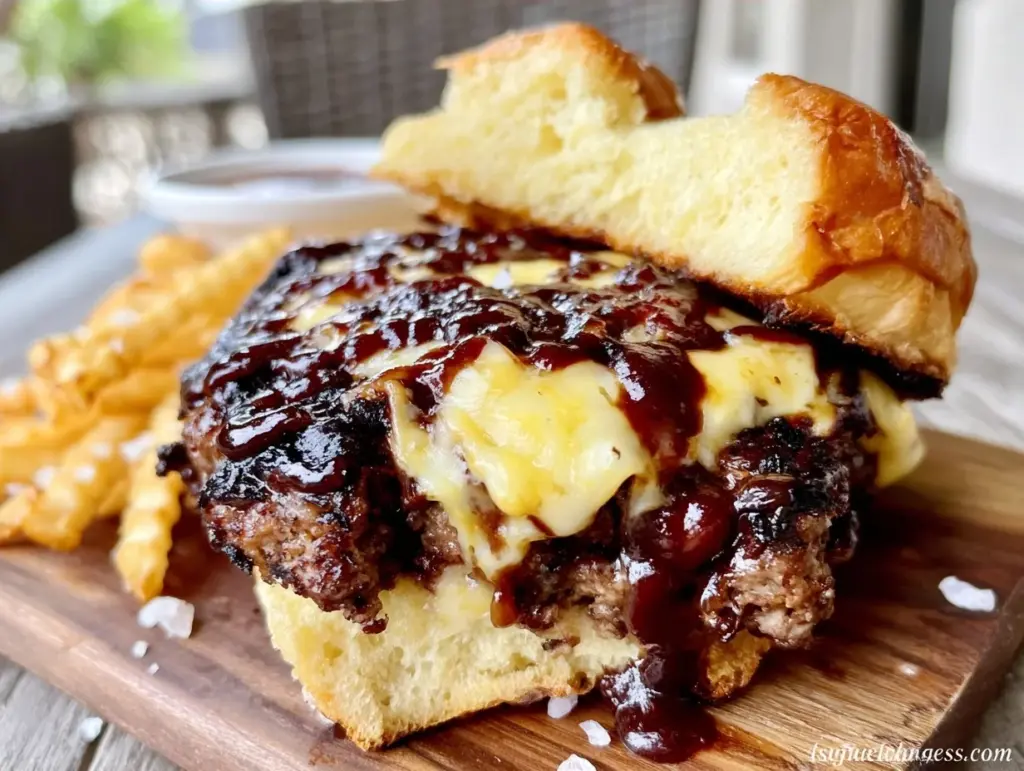
The smell of charcoal used to be my favorite part of Labor Day. It was the signal that summer wasn’t quite over yet, that we had one last big cookout before the school year started. But then I bought a Blackstone griddle, and honestly? I haven’t touched the charcoal grill in three years. There’s something magical about flipping dozens of burgers at once, the sizzle filling the backyard, and the way the smoke from the onions mixes with the beef. It’s efficient, sure, but it’s also the best way to feed a crowd without standing in the kitchen alone while everyone else is having fun.
I’ve made these Labor Day Blackstone Grill Burgers for summer gatherings at least a dozen times now. I started with just a basic cheeseburger, but after tweaking the seasoning and mastering the flip technique, these have become the star of every party. People ask me for the recipe before they’ve even taken a bite. It’s the kind of dish that feels like a treat but is actually just good, honest cooking.
What makes these burgers special isn’t just the griddle—it’s the texture. You get that perfect, crispy crust on the outside and a juicy, tender center that you can’t quite get on an open flame. Plus, you can cook everything at once. The patties, the buns, the veggies. It’s a one-pan wonder that keeps the party moving. I’ve paired these with some creamy chickpea salad on the side, which is the perfect cool, crunchy contrast to the hot, savory burgers. It’s the ultimate summer spread.
Why You’ll Love This Recipe
There are a lot of burger recipes out there, but this one has earned its spot in my summer rotation for some very specific reasons. It’s not just about the taste (though that’s huge). It’s about the experience of making it.
The Crispy Crust Factor — This is the game-changer. On a flat top, you get even contact with the heat. That means a deep, caramelized crust on every single patty. It’s the Maillard reaction at its finest. I’ve tried making these on a regular grill, and they just don’t get that same crunchy edge. It’s texture heaven.
Feed the Whole Crowd at Once — Let’s be real. Hosting a Labor Day party is stressful enough without worrying about burning the burgers or standing over a hot grill for an hour. The Blackstone lets me cook eight to ten burgers at the same time. I can flip them, check the cheese, and plate them up without missing a beat of the conversation. It keeps me present, not stuck in the back.
Customizable for Everyone — Some people like their burgers well-done, others like them rare. On the griddle, I can cook different patties to different temperatures simultaneously. I can toast the buns right next to the onions. It’s like a burger bar where I’m the chef. I even keep a few veggie patties going on the side for my vegetarian friends, using the same method.
Easy Cleanup (Relatively) — Yes, there’s a griddle to clean, but compared to scrubbing grill grates or dealing with ash, it’s a breeze. A quick scrape and a wipe down, and it’s ready for the next cookout. It’s low effort, high reward.
This is my go-to when I want to impress without trying too hard. It’s reliable, delicious, and it makes the whole backyard smell amazing. Plus, it pairs perfectly with a chilled spiced apple cider if you’re thinking ahead to the end of summer vibes.
Ingredients You’ll Need
Here’s the thing about Blackstone burgers: the quality of the beef matters more than anything else. You don’t need fancy spices or complicated marinades. You just need good meat and a few key additions to make it pop.
Ground Beef (2 pounds / 900g) — I swear by an 80/20 blend. That 20% fat content is non-negotiable. Lean beef will dry out on the high heat of the griddle. I buy it in bulk and form the patties myself. If you buy pre-formed patties, they’re often too thin and won’t hold up well. Look for chuck roast ground beef for the best flavor.
Salt and Black Pepper — I use kosher salt and freshly cracked black pepper. Simple. I mix about 1 teaspoon of salt and half a teaspoon of pepper into every pound of meat. It seasons the patty all the way through, not just on the surface. Some people just salt the top before cooking, but I prefer mixing it in for consistent flavor.
Burger Buns (8-10 buns) — Brioche buns are my favorite for parties because they’re sweet and sturdy. They hold up to the juices without getting soggy immediately. Potato buns are a close second. Avoid white sandwich buns—they’ll fall apart. I also like to toast them with a little butter on the griddle.
Cheese (8-10 slices) — American cheese is the classic choice for a reason. It melts perfectly and has that nostalgic flavor. But I also love cheddar for a sharper bite, or pepper jack for a little kick. Pro tip: buy the slices, not the block. Pre-sliced cheese melts faster and more evenly, which is crucial when you’re cooking fast.
Butter (2 tablespoons) — For brushing the buns. This gives them that golden, crispy exterior. It’s a small step that makes a big difference in the final bite.
Onions (2 large, sliced) — Sweet onions or yellow onions. I slice them into rings and cook them until they’re caramelized. They add a sweet, savory depth that balances the salty beef. You can also use red onions for a sharper flavor, but sweet onions are crowd-pleasers.
Cooking Oil (2 tablespoons) — I use a high smoke point oil like avocado oil or canola oil to grease the griddle. Olive oil isn’t great for high-heat griddling—it’ll smoke too much. Just a light coating to prevent sticking.
Optional Toppings — Pickles, lettuce, tomato, bacon, caramelized onions, special sauce. I set out a “topping bar” with all the fixings so everyone can build their dream burger. It’s interactive and fun for guests.
I also keep a stash of fudgy almond flour brownies on hand for dessert, because nothing says summer party like rich, chocolatey treats that don’t require an oven.
Equipment Needed
You don’t need a lot of fancy gear, but having the right tools makes the process smoother.
Blackstone Griddle — Obviously, this is the star of the show. I use a 36-inch model, which gives me plenty of space. A 22-inch works too, but you’ll have to cook in batches. Make sure it’s clean and seasoned before you start.
Grill Spatulas (2) — I use one wide spatula for flipping burgers and one narrower one for moving onions and buns. Stainless steel is best because it gets hot and helps sear the meat. Avoid plastic—it’ll melt.
Meat Thermometer — This is non-negotiable for food safety. I have an instant-read thermometer that I stick into the center of the thickest patty to check the temperature. It takes the guesswork out of doneness.
Plates and Tongs — Have plenty of plates ready. You’ll be plating quickly. Tongs are useful for handling buns and veggies without pressing them down.
Scraper Tool — Usually comes with the Blackstone. Essential for cleaning the griddle surface between batches or scraping off burnt bits.
Aluminum Foil — I keep a stack of foil-lined plates nearby to keep the cooked burgers warm while I finish the rest. This prevents them from drying out.
Basting Brush — For buttering the buns. A silicone brush works well and is easy to clean.
How to Make It: Step-by-Step
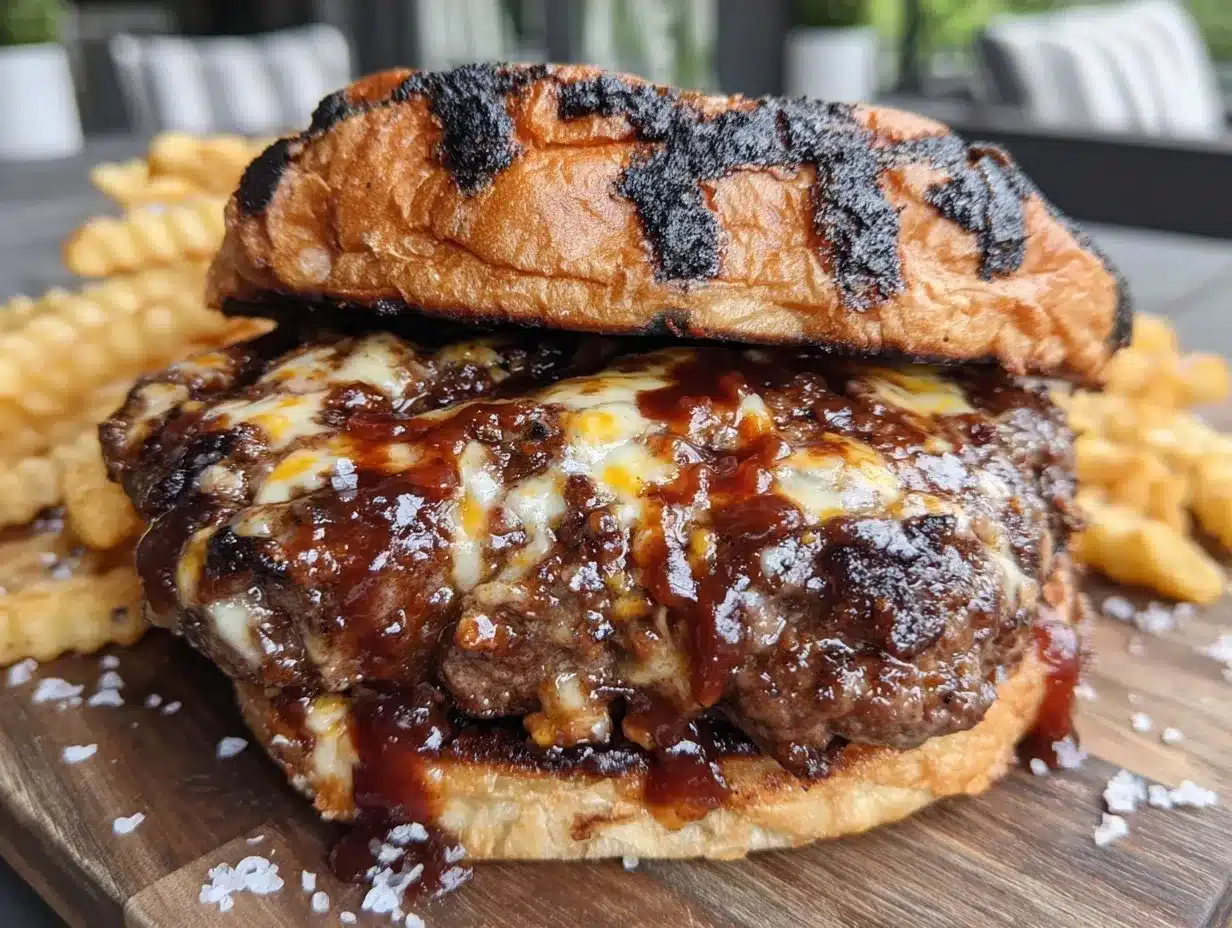
Alright, let’s get cooking! I’m walking you through exactly how I do it, including the little tricks I’ve picked up over the years.
Step 1: Prep the Patties (10 minutes)
Start by portioning your ground beef into 8 to 10 equal balls, about 4 to 5 ounces each. Gently form them into patties, about half an inch thick. Don’t overwork the meat—it’ll make the burgers tough. Press a small dimple in the center of each patty with your thumb. This prevents them from puffing up in the middle and ensures even cooking. Season both sides generously with your salt and pepper mixture. Set them on a tray in the fridge while you heat the griddle.
Step 2: Heat the Griddle (5-10 minutes)
Turn on your Blackstone to medium-high heat. Let it heat up for about 10 minutes. You’ll know it’s ready when a few drops of water sizzle and dance across the surface. Once it’s hot, spread a thin layer of oil across the entire cooking surface. Use a paper towel held with tongs to spread it evenly. You want a light sheen, not a pool of oil.
Step 3: Sear the Burgers (4-6 minutes)
Place the patties on the griddle, leaving space between them for airflow. Don’t touch them for the first 2-3 minutes. Let them develop that beautiful crust. You’ll see juices rising to the top. After 3 minutes, flip them. You should see a deep brown, crispy edge. Cook for another 2-3 minutes on the second side.
Step 4: Add Cheese and Cover (1-2 minutes)
When you flip the burgers for the second time, immediately place a slice of cheese on each patty. If you want them fully melted, you can cover the burgers with a metal dome or a sheet of foil for the last minute. This traps the heat and melts the cheese perfectly. Use your thermometer to check the internal temperature. For medium, aim for 160°F (71°C). For medium-rare, 135°F (57°C). Since we’re feeding a crowd, I usually aim for medium to be safe.
Step 5: Toast the Buns and Veggies (2-3 minutes)
Move the cooked burgers to a foil-lined plate. In the space you just cleared, brush the cut sides of the buns with melted butter. Place them butter-side down on the griddle. Toast for 30-60 seconds until golden brown. Right next to the buns, add your sliced onions. Cook them until they’re soft and caramelized, about 3-4 minutes. This is the perfect time to get everything ready.
Step 6: Assemble and Serve
Build your burgers! Start with the bottom bun, add a slice of lettuce (if using), the patty with melted cheese, onions, pickles, tomato, and any other toppings. Top with the bun. Serve immediately while the burgers are hot and the buns are crispy. Keep the rest of the burgers warm in the oven at 200°F (93°C) while you cook the next batch.
Total Time: About 30 minutes for the first batch, then 15 minutes per additional batch.
Expert Tips & Tricks
Here’s everything I’ve learned from making these dozens of times. These tips will save you from my mistakes.
Don’t Press the Patties — I know it’s tempting to press down on the burger to check doneness or make it thinner. Don’t do it. You’re squeezing out all the juices. Let the heat do the work. The dimple in the center helps them stay flat without pressing.
Keep the Griddle Clean — As you cook, scrape off any burnt bits from the surface. If you leave them there, they’ll burn and taste bitter. A clean griddle means cleaner flavor. I scrape the edges as I go.
Use a Thermometer — Eyes can be deceiving. A thermometer is the only way to know for sure. It takes the stress out of cooking for guests. You don’t want anyone getting sick.
Toast the Buns — This is the step most people skip, but it’s crucial. A soft bun will get soggy from the juices. A toasted bun has structure and flavor. It’s the difference between a good burger and a great one.
Batch Cooking Strategy — If you have more than 8 guests, cook in batches. Keep the cooked ones warm in the oven. Don’t try to cook everything at once on a small griddle—it’ll steam instead of sear.
Variations & Substitutions
Once you’ve nailed the basic version, here’s how you can mix it up. I’ve tried all of these.
Double Smash Burgers — Make smaller, thinner patties. Place them on the griddle and smash them flat with a spatula immediately. Cook for 1-2 minutes, flip, cook 1 minute more. This gives you maximum crust. Great for sliders.
Breakfast Burgers — Add a fried egg and bacon to the top. Cook the egg on the side of the griddle. It’s a Labor Day brunch winner.
Spicy Kick — Add jalapeños and pepper jack cheese. Mix a little chipotle powder into the beef for extra heat.
Gluten-Free — Use gluten-free buns or lettuce wraps. The rest of the recipe is naturally gluten-free. I’ve found that gluten-free buns can be fragile, so toast them gently.
Veggie Option — Use store-bought veggie patties or homemade black bean burgers. Cook them on the side with a little oil to prevent sticking. They don’t need to be seared the same way.
Serving & Storage
How to Serve: I usually set up a burger bar with all the toppings in small bowls. Let guests build their own. It’s interactive and fun. I serve these with cheesecake bars for dessert, which is a nice twist on the usual ice cream.
Side Dishes: Potato salad, corn on the cob, coleslaw, or a simple green salad. Keep it light and fresh to balance the rich burgers.
Storage: Store leftover burgers in an airtight container in the fridge for up to 3 days. Reheat in a skillet over medium heat to keep them juicy. Don’t microwave them—they’ll get rubbery. The buns can be toasted again briefly.
Freezing: You can freeze uncooked patties. Wrap them tightly in plastic wrap and place in a freezer bag. They’ll last for 3 months. Cook from frozen, adding a minute or two to the cook time.
Nutrition Information
I’m not a nutritionist, but here’s the breakdown if you’re tracking. Keep in mind this varies based on toppings and buns.
Per Serving (1 burger with bun, cheese, and standard toppings):
- Calories: 650
- Protein: 35g
- Carbs: 40g
- Fat: 35g
- Sodium: 800mg
It’s a hearty meal. If you want to lighten it up, use leaner beef, skip the cheese, or use a lettuce wrap. But honestly? It’s a treat. Enjoy it.
Final Thoughts
So that’s my go-to Labor Day Blackstone Grill Burgers for summer gatherings! I’ve probably talked your ear off at this point, but when you make a recipe this often, you have a lot to say about it.
This has saved my Labor Day celebrations more times than I can count. It’s my answer to “what’s for dinner” when I want to feed a crowd without stress. My guests are happy, my family is happy, and I’m happy because I’m actually enjoying the party instead of being stuck in the kitchen.
Make it yours! Try different cheeses, add your favorite sauces, or experiment with different buns. The best recipes are the ones you adapt to your family’s tastes.
If you make this, drop a comment and let me know what you think! I love hearing how recipes turn out in your kitchen. And if something doesn’t work, tell me that too—I’m here to help troubleshoot.
Happy cooking! And I hope your backyard smells half as good as mine does right now.
Frequently Asked Questions
Can I use lean beef instead of 80/20?
You can, but the burgers will be drier. The fat in 80/20 beef keeps them juicy on the high heat of the griddle. If you must use lean beef, consider adding a little olive oil or butter to the meat mixture, or don’t cook them as long. But for the best result, stick with 80/20.
Why do my burgers stick to the griddle?
Usually means the griddle wasn’t hot enough when you added the meat, or there wasn’t enough oil. Make sure the griddle is fully heated and oiled before adding the patties. Also, don’t try to flip them too early. Let the crust form, and they’ll release naturally.
Can I cook veggie patties on the same griddle?
Yes! Just cook them on the side with a little extra oil. They don’t need to be seared as aggressively as beef. Keep them separate to avoid cross-contamination if you’re serving vegetarians.
How do I keep the burgers warm without drying them out?
Place them on a foil-lined plate and cover loosely with foil. Keep them in a 200°F (93°C) oven. This keeps them warm without continuing to cook them. Don’t stack them directly on top of each other—let them breathe.
What’s the best cheese for Blackstone burgers?
American cheese melts the best and has that classic flavor. But cheddar, pepper jack, and Swiss are all great options. I like to use a mix—American for meltability, cheddar for flavor.
Can I make the patties ahead of time?
Yes! Form the patties, put them in the fridge covered for up to 24 hours. This actually helps them hold their shape better. Just take them out 15 minutes before cooking so they’re not cold when they hit the griddle.
Pin This Recipe!
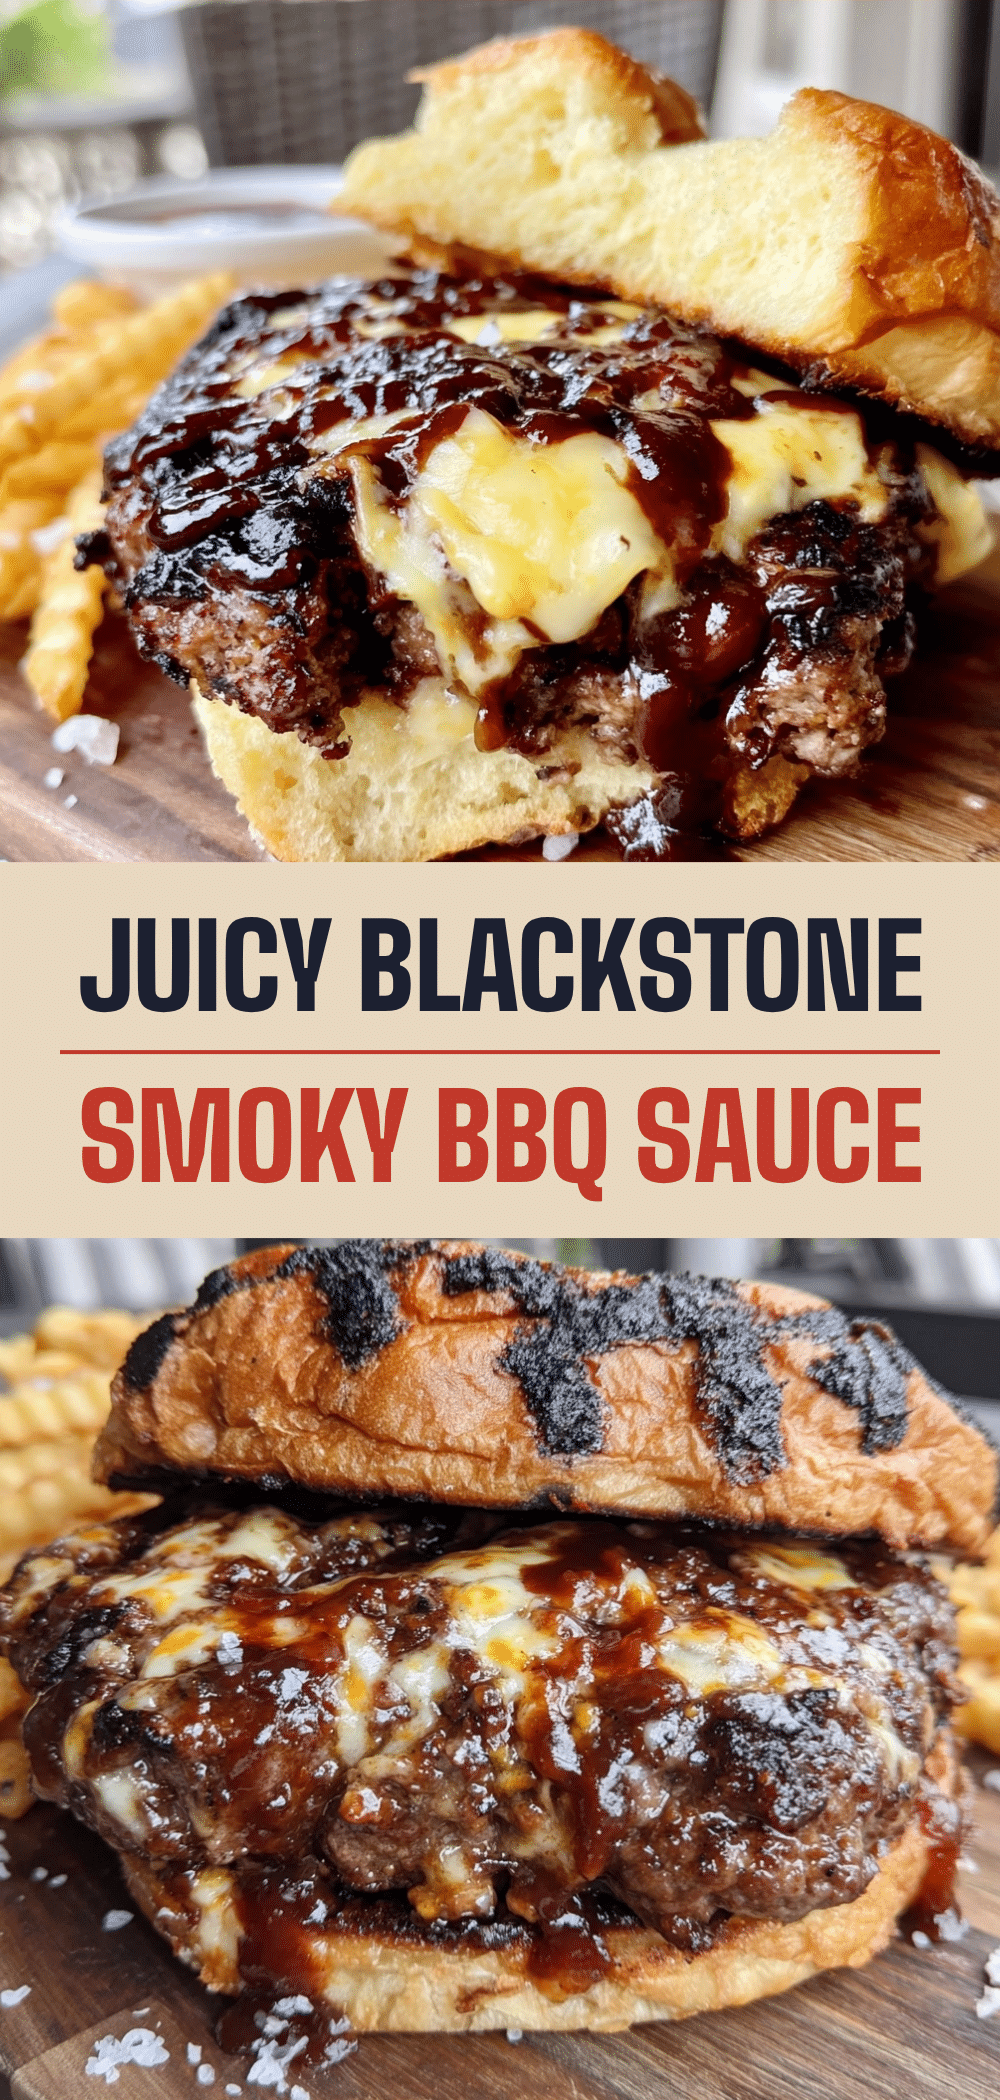
Labor Day Blackstone Grill Burgers: Best Summer Party Recipe
- Total Time: 30 minutes
- Yield: 8-10 servings 1x
Description
Juicy, crispy-crust burgers cooked on a Blackstone griddle, designed to feed a crowd efficiently with a perfect balance of texture and flavor.
Ingredients
- 2 pounds (900g) Ground Beef (80/20 blend, chuck roast)
- 1 teaspoon Kosher Salt (per pound of meat)
- 1/2 teaspoon Black Pepper (freshly cracked, per pound of meat)
- 8–10 Burger Buns (Brioche or Potato)
- 8–10 slices Cheese (American, Cheddar, or Pepper Jack)
- 2 tablespoons Butter (for brushing buns)
- 2 large Onions (sliced into rings)
- 2 tablespoons Cooking Oil (Avocado or Canola)
- Optional Toppings: Pickles, lettuce, tomato, bacon, special sauce
Instructions
- Portion ground beef into 8-10 equal balls (4-5 oz each) and form into patties about half an inch thick. Press a dimple in the center of each.
- Mix salt and pepper into the meat (1 tsp salt and 1/2 tsp pepper per pound) or season generously on both sides.
- Refrigerate patties while heating the Blackstone griddle to medium-high heat for 10 minutes.
- Grease the hot griddle with a thin layer of oil using a paper towel held with tongs.
- Place patties on the griddle, leaving space between them. Do not touch for 2-3 minutes to develop a crust.
- Flip patties after 3 minutes. Cook for another 2-3 minutes on the second side.
- Place a slice of cheese on each patty after the second flip. Cover with a metal dome or foil for 1 minute to melt cheese.
- Check internal temperature: 160°F (71°C) for medium, 135°F (57°C) for medium-rare.
- Move cooked burgers to a foil-lined plate. Brush cut sides of buns with melted butter and toast butter-side down for 30-60 seconds.
- Cook sliced onions on the griddle until soft and caramelized (3-4 minutes).
- Assemble burgers with buns, lettuce, patty, cheese, onions, and other toppings. Serve immediately.
Notes
Do not press the patties while cooking to retain juices. Keep the griddle clean by scraping burnt bits. Toast buns to prevent sogginess. For gluten-free options, use gluten-free buns or lettuce wraps. Store leftovers in an airtight container in the fridge for up to 3 days; reheat in a skillet, not a microwave.
- Prep Time: 10 minutes
- Cook Time: 20 minutes
- Category: Main Course
- Cuisine: American
Nutrition
- Serving Size: 1 burger with bun, c
- Calories: 650
- Sodium: 800
- Fat: 35
- Carbohydrates: 40
- Protein: 35
Keywords: Blackstone grill, burgers, Labor Day, summer party, griddle cooking, beef burgers, outdoor cooking