It was 6:45 PM on a Tuesday. The kind of Tuesday that feels like it’s been going on since Monday morning. I was staring into the open fridge, the light illuminating a sad half-jar of pickles, a wilted head of lettuce, and a package of ground beef that had been in there since Sunday. My husband had just walked in the door, looking like he wanted to negotiate a peace treaty with the concept of “dinner.” My kids were already arguing over who got the last cookie. We were all hungry, stressed, and definitely not in the mood for chopping vegetables or waiting on a complicated recipe.
I didn’t have time to cook a proper burger. I didn’t have the energy to assemble a salad. So, I did what any tired parent does: I threw everything into a baking dish and hoped for the best.
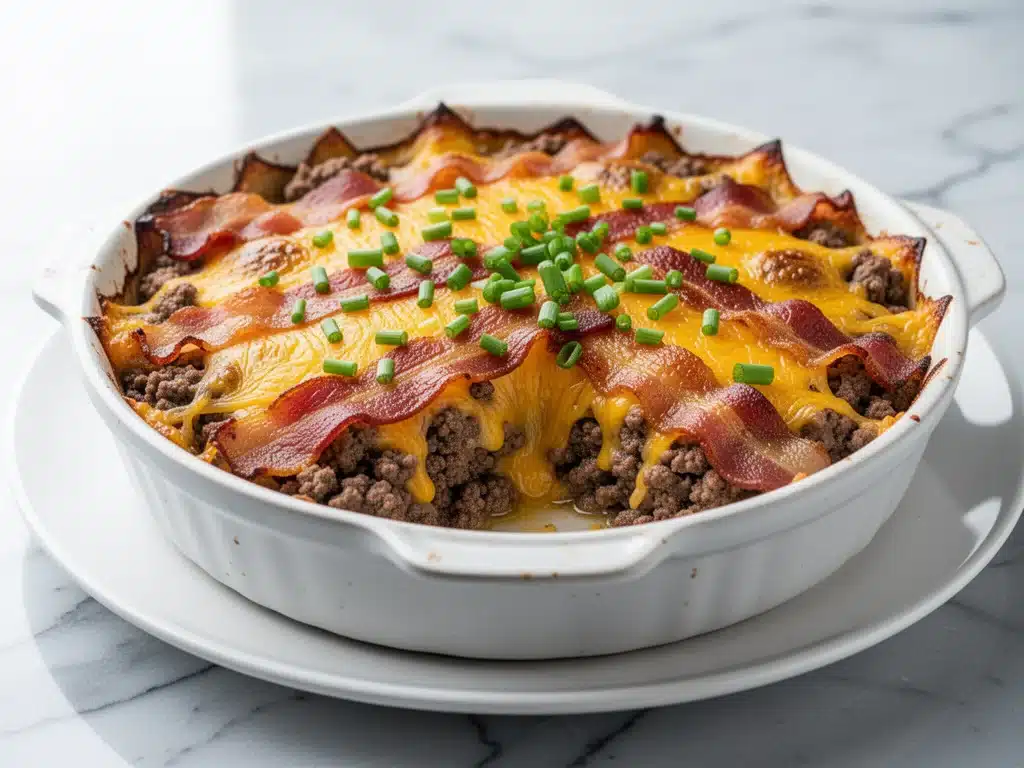
That was the birth of my Keto Bacon Cheeseburger Casserole. I wasn’t trying to create a masterpiece. I was trying to get food on the table before the house burned down. But when I pulled that dish out of the oven—golden, bubbly, smelling like a dream—the silence in the kitchen said it all. My husband took one bite, closed his eyes, and said, “We’re making this every week.” My kids, who usually pick the cheese off their burgers, ate the entire thing without complaining. Even my picky eater, who usually only eats chicken nuggets, asked for seconds.
I’ve made this Keto Bacon Cheeseburger Casserole at least twenty times since that chaotic Tuesday. Twenty. And it never gets old. It’s become my secret weapon for busy weeknights when I need something that tastes like indulgence but fits my low-carb lifestyle. It’s creamy, it’s savory, it’s packed with protein, and best of all? It comes together in about 15 minutes of active time. No fancy techniques. No hard-to-find ingredients. Just honest, comfort food that makes everyone happy.
If you’re tired of the same old weeknight routine, or if you’re hunting for a Keto Bacon Cheeseburger Casserole that actually tastes like the real thing, you need to try this. It’s stupid simple, incredibly satisfying, and it’s going to change your dinner game. Trust me on this one.
Why You’ll Love This Recipe
There are a million reasons I keep coming back to this dish, but let’s be real—you care about the ones that matter for your actual life. This isn’t just another casserole; it’s a lifesaver.
It’s a True One-Dish Wonder — Seriously, if you can brown meat and mix cheese, you can make this. I’ve made this while helping my middle child with math homework. The kids can even help with the assembly part. It’s foolproof. I’ve walked my teenage son through it over FaceTime, and he nailed it. No fancy skills required.
Lightning Fast — From start to finish, this dinner is on the table in under 30 minutes. And only about 15 of those minutes are active cooking. The rest is just baking time while you kick your feet up (or finish helping with homework). I make this on weeknights when I get home at 7 PM and still want something hot and homemade. It’s my go-to for “I’m exhausted but I refuse to order takeout.”
Keto-Friendly Without the Fuss — I know how hard it can be to stick to a low-carb diet when you’re craving comfort food. This Keto Bacon Cheeseburger Casserole hits that sweet spot. It satisfies the burger craving without the bun, the carbs, or the guilt. It’s high in protein and healthy fats, so you stay full for hours. No 3 PM sugar crash here.
Crowd-Pleaser (Even for Non-Keto Eaters) — I’ve served this to my carb-loving sister, my gluten-free neighbor, and my dad who thinks vegetables are a personal attack. Everyone loved it. They didn’t even miss the buns. It’s the kind of dish that makes people ask for the recipe immediately after dinner.
Makes Amazing Leftovers — This tastes even better the next day. The flavors meld together, and it reheats beautifully. I deliberately make extra for lunch throughout the week. It’s my go-to meal prep item because it’s filling, delicious, and doesn’t get soggy like some cassoles do.
Budget-Smart — Ground beef and cheese are pantry staples for me, but even if you’re buying fresh, this feeds 4-6 people for under $20. That’s less than one meal at a fast-food drive-thru, and it’s infinitely healthier. You’re getting actual food, not processed sludge.
This is my go-to when I need dinner to just work. No complicated techniques, no weird ingredients, just reliable, delicious food that makes everyone happy. It’s comfort food that loves you back.
Ingredients You’ll Need
Here’s the best part: you probably have most of this already. This isn’t a recipe that requires a trip to three different specialty stores. It’s built on simple, accessible ingredients that deliver maximum flavor. I’m particular about a few things here, and I’ll tell you exactly why.
For the Base
Ground Beef (1.5 pounds / 680g) — Use 80/20 fat ratio here. It adds flavor and moisture. Lean beef will make the casserole dry. I always buy the family pack and freeze what I don’t use immediately. It’s the backbone of this dish.
Bacon (8 strips / 225g) — Thick-cut is best. I cook it until it’s crispy, then crumble it up. The smoky, salty crunch is non-negotiable. If you can’t find thick-cut, regular bacon works, just watch it closely so it doesn’t burn. I use Applewood smoked bacon for that authentic burger taste.
Cheddar Cheese (2 cups / 200g, shredded) — Sharp cheddar is my pick. It has a stronger flavor that stands up to the beef. Grate it yourself from a block. Pre-shredded cheese has anti-caking agents that make it melt poorly. Trust me, your sauce will be smoother if you take the extra two minutes.
Mozzarella Cheese (1.5 cups / 150g, shredded) — This is for the stretchy, gooey top. I mix it with the cheddar for the best of both worlds. Sharp flavor plus melty texture.
Heavy Cream (½ cup / 120ml) — This binds everything together and keeps it moist. Don’t skip it. Half-and-half works in a pinch, but heavy cream gives that rich, restaurant-quality mouthfeel.
Garlic (3 cloves, minced / about 1 tablespoon) — Fresh only. No jarred garlic in this recipe. It’s too sharp and metallic. Fresh garlic adds that savory depth that makes it taste like a gourmet burger.
For the Flavor
Yellow Onion (1 medium, diced / about 200g) — Sweet onions work too, but yellow gives better depth. Dice it small so it cooks evenly with the beef. If you hate onions, you can skip it, but I don’t recommend it. It adds sweetness.
Pickles (½ cup, chopped / 75g) — Dill pickles. This is the secret ingredient that makes it taste like a *burger*. The tang cuts through the richness of the cheese and beef. If you’re not a pickle fan, you can use relish, but chopped pickles give better texture.
Mustard (1 tablespoon / 15ml) — Yellow mustard or Dijon. It adds that tangy kick you get from a burger sauce. Don’t be afraid of it. You won’t taste the mustard directly, but you’ll miss it if it’s gone.
Ketchup (2 tablespoons / 30ml) — Yes, ketchup. It adds sweetness and acidity. Look for a low-sugar or no-sugar-added version if you’re strict on keto. It balances the savory elements.
Spices — 1 teaspoon garlic powder, 1 teaspoon onion powder, ½ teaspoon paprika, salt, and black pepper to taste. These are pantry staples. I keep a full spice rack just for this. The paprika adds a subtle smokiness that pairs well with the bacon.
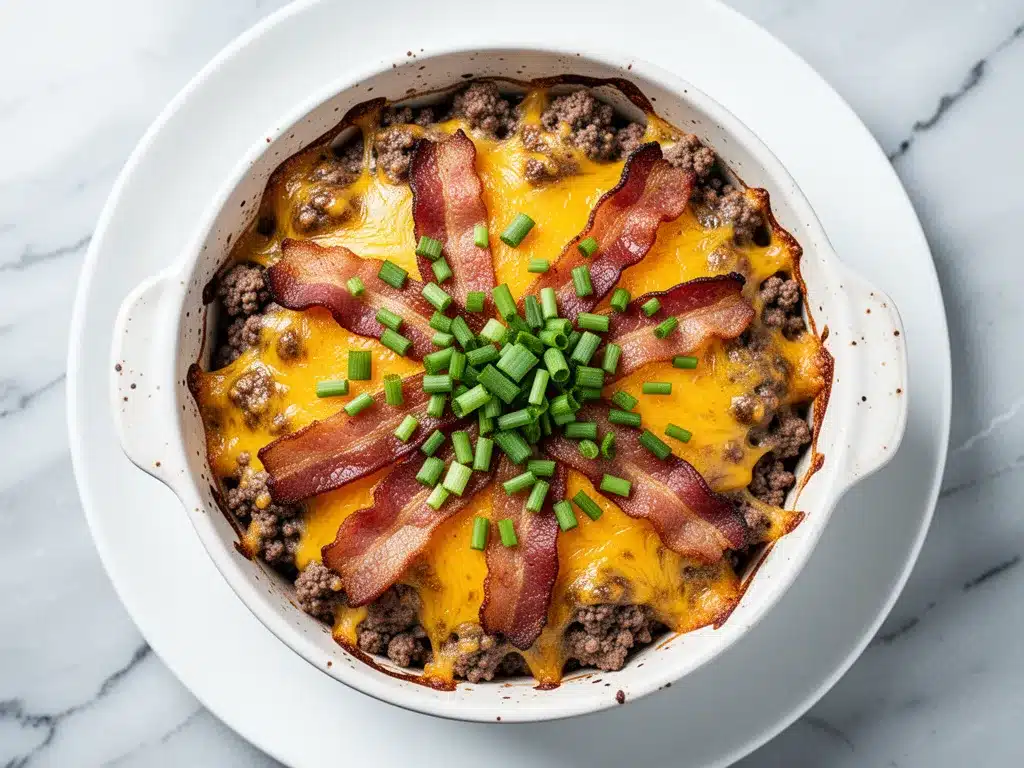
Green Onions (2 stalks, sliced) — For garnish. Adds color and a fresh bite. I sprinkle them on right before serving. It makes the dish look restaurant-worthy.
Butter (1 tablespoon / 15g) — For sautéing the onions and garlic. Adds richness. I use unsalted butter so I can control the salt.
I always use Kirkland Signature ground beef because it’s consistently good quality and affordable. For cheese, I buy blocks from Costco and grate them myself—it’s worth the effort. If you’re in a rush, pre-shredded works, but the texture won’t be as smooth.
Equipment Needed
You don’t need fancy equipment for this. Here’s what I actually use.
Large Skillet or Dutch Oven — I use a 12-inch cast iron skillet. It browns the beef beautifully and holds heat well. If you don’t have one, any large non-stick skillet works. I prefer cast iron because it gives the beef a nice crust.
Baking Dish — A 9×13 inch baking dish. Standard size. I use a ceramic one because it heats evenly. Glass works too, but ceramic is more durable.
Sharp Knife — For chopping onions, garlic, and pickles. Dull knives make you cry more—literally. Learn this the hard way with an onion.
Cutting Board — Any size works. I use plastic for easier cleanup. Wood is nice but requires more maintenance.
Wooden Spoon — For stirring. Silicone works too. Don’t use metal on non-stick.
Measuring Cups and Spoons — Pretty standard stuff. Dollar store versions work fine. Accuracy matters here for the spices.
Colander — Not strictly necessary, but if you want to drain excess grease from the beef, you’ll need one. I usually just tilt the skillet, but a colander is faster.
Cheese Grater — Box grater or microplane. Or food processor if you’re grating lots of cheese. I’m lazy, so I sometimes use the food processor, but hand-grating gives better texture.
Pastry Brush — Optional, but nice for brushing the top with butter if you want extra browning. I skip this most of the time.
Don’t have a Dutch oven? Any big pot works—doesn’t need to be fancy. I’m obsessed with my cast iron skillet from Lodge—it’s like $20 and makes life easier. If you’re using a non-stick skillet, make sure it’s large enough to hold all the ingredients without overcrowding.
How to Make It: Step-by-Step
Alright, let’s make this! I’m walking you through exactly how I do it, including the little tricks I’ve picked up over the years.
Step 1: Prep Your Ingredients (5 minutes)
Before you start cooking, chop your onion, mince your garlic, and slice your pickles. I know it seems fussy, but it makes the actual cooking way less stressful. Grate your cheese while you’re at it. Once you start cooking, things move fast. Set out your baking dish too. Preheat your oven to 375°F (190°C). This ensures it’s hot when you’re ready.
Step 2: Cook the Bacon (5 minutes)
In your large skillet over medium heat, cook the bacon until crispy. This renders the fat, which we’ll use to cook the beef. Remove the bacon and crumble it on a paper towel. Leave about 1 tablespoon of bacon fat in the pan. If there’s too much, drain some. You don’t want it swimming in grease.
Step 3: Brown the Beef (5-7 minutes)
Add the ground beef to the skillet with the bacon fat. Break it up with a wooden spoon as it cooks. Cook until browned and no longer pink. If you’re using lean beef, add a little olive oil. Drain excess grease if needed. This step is crucial for flavor. Don’t rush it—let the beef get a nice crust.
Step 4: Sauté Aromatics (3 minutes)
Add the diced onion to the beef. Cook for 2-3 minutes until softened. Add the minced garlic and cook for 1 more minute, stirring constantly. The garlic should smell amazing but not brown. Browned garlic tastes bitter. This builds the flavor base.
Step 5: Build the Sauce (2 minutes)
Stir in the mustard, ketchup, garlic powder, onion powder, paprika, salt, and pepper. Mix well. Pour in the heavy cream. Stir until everything is combined. The sauce should be creamy and smooth. Taste and adjust seasoning if needed. This is where you make it your own.
Step 6: Combine and Assemble (2 minutes)
Transfer the beef mixture to the 9×13 baking dish. Sprinkle half of the cheddar and mozzarella cheese over the top. Then, sprinkle the crumbled bacon and chopped pickles. Top with the remaining cheese. This layering ensures every bite has flavor.
Step 7: Bake (15-20 minutes)
Place the dish in the preheated oven. Bake for 15-20 minutes, or until the cheese is melted, bubbly, and slightly golden. The edges should be bubbling. This indicates it’s hot all the way through. Don’t overbake—it can dry out.
Step 8: Serve
Remove from the oven and let it rest for 5 minutes. This helps it set slightly so it’s easier to scoop. Garnish with sliced green onions. Serve immediately. It’s hot, cheesy, and delicious.
Total Time: About 30 minutes (15 minutes active, 15 minutes baking). This is perfect for a busy weeknight.
Troubleshooting:
- Sauce too runny? Let it bake a few minutes longer. The cheese will thicken it up.
- Beef too dry? You used lean beef or overcooked it. Next time, use 80/20 and don’t drain all the fat.
- Not cheesy enough? Add more cheese. Seriously, you can never have too much cheese in this dish.
Expert Tips & Tricks
Here’s everything I’ve learned from making this dozens of times. These tips will save you from my mistakes.
Don’t Skip the Bacon Fat
This is the #1 tip. Cooking the beef in bacon fat adds an incredible smoky flavor that you can’t get from oil alone. If you drain all the fat, you lose that essence. Leave a tablespoon. It’s worth it.
Use Sharp Cheddar
Mild cheddar will make the dish taste bland. Sharp cheddar has a bold flavor that stands up to the beef and bacon. It’s the difference between good and amazing. I always buy a block and grate it myself for the best melt.
Don’t Overcook the Beef
Ground beef continues to cook even after you remove it from the heat. Take it off the stove when it’s just barely cooked through. It’ll finish in the oven. Overcooked beef is dry and crumbly.
Rest Before Serving
I know it’s hard to wait, but letting the casserole rest for 5 minutes allows the cheese to set slightly. This makes it easier to serve and prevents it from falling apart. Patience pays off.
Customize Your Pickles
If you’re not a dill pickle fan, try bread and butter pickles for sweetness, or jalapeño pickles for heat. This dish is a blank canvas for your favorite burger toppings.
Common Mistakes (and how to avoid them):
- Mistake: Casserole is watery — Fix: Make sure you drain excess grease from the beef and don’t add too much cream. Let it bake longer.
- Mistake: Cheese is grainy — Fix: You heated it too high or used pre-shredded cheese. Grate your own and bake at 375°F.
- Mistake: Everything is too salty — Fix: Bacon and cheese are salty. Taste before adding extra salt. Use low-sodium broth if needed.
Pro Tricks I’ve Learned:
- For Restaurant-Quality Finish — Broil for the last 2 minutes to get a golden, crispy top. Watch it closely—it burns fast.
- For Extra Flavor — Add a splash of apple cider vinegar at the end for brightness. It’s a game-changer.
- For Better Texture — Toss the beef with the spices before adding the cream. It distributes flavor better.
Variations & Substitutions
Once you’ve nailed the basic version, here’s how you can mix it up. I’ve tried all of these.
Turkey Version
Swap ground beef for ground turkey. It’s leaner and lower in calories. Add a little extra olive oil and spices for flavor. It’s still delicious, just lighter.
Veggie-Loaded
Toss in 1 cup of diced bell peppers or mushrooms with the onions. They add texture and nutrients. This is how I get my kids to eat vegetables.
Spicy Jalapeño
Add 1 diced jalapeño with the onions and a sprinkle of cayenne pepper. Totally different vibe—spicy and bold. Great for heat lovers.
Lighter Version
Use half-and-half instead of heavy cream and reduce cheese to 1.5 cups. It’s thinner but still good. I make this when I’m trying to be “healthy.”
Mustard Swirl
Drizzle extra mustard on top before baking for a tangier flavor. It creates a nice contrast with the cheese.
Dietary Modifications:
- Gluten-Free — This is naturally gluten-free. Just check your ketchup and mustard labels.
- Dairy-Free — Replace cheese with nutritional yeast and use dairy-free cream. It’s different but still tasty.
- Lower-Carb — Use less ketchup and no pickles. It’s already low-carb, but this makes it even lower.
Different Proteins:
- Bacon — Use turkey bacon for less fat.
- Ham — Swap bacon for diced ham for a different flavor profile.
- Sausage — Use breakfast sausage crumbles for a breakfast twist.
Serving & Storage
How to Serve:
I usually serve this straight from the baking dish at the dinner table—it looks rustic and stays warm. But here are other ways I’ve enjoyed it:
Side Dishes:
- Simple green salad with balsamic vinaigrette
- Steamed broccoli or green beans
- Cauliflower rice (for extra low-carb)
- Zucchini noodles (zoodles) for a pasta-like feel
Toppings Bar:
When I have guests, I put out: extra bacon bits, chopped pickles, red pepper flakes, fresh chives. Everyone customizes their bowl.
Wine Pairing:
Not a wine expert, but my wine-snob friend says a crisp Pinot Grigio or a light Chardonnay works great with this. It cuts through the richness.
Storage Instructions:
Refrigerator:
Store in an airtight container for up to 4 days. The flavors actually get better after a day or two. I deliberately make extra for lunch.
Reheating:
Best method: Add to a skillet with a splash of water or cream over low heat. Stir until heated through.
Microwave method: Heat in 30-second intervals, stirring between. Add a splash of water if it’s too thick.
Never works: Trying to reheat in the pot you cooked it in. It always burns on the bottom. Ask me how I know.
Freezing:
This doesn’t freeze well because of the dairy. The sauce separates when thawed. Make it fresh or store in the fridge for up to 4 days.
Pro tip: If leftovers are drying out, stir in a tablespoon of butter and a splash of milk when reheating. Brings back that creamy texture.
Nutrition Information
I’m not a nutritionist, but here’s the breakdown if you’re tracking.
Per Serving (based on 6 servings):
- Calories: 450
- Protein: 35g
- Carbs: 4g
- Fiber: 1g
- Sugar: 2g
- Fat: 32g
- Saturated Fat: 15g
- Cholesterol: 120mg
- Sodium: 650mg
What’s Good:
- High protein from beef and cheese
- Very low carb, perfect for keto
- Good source of calcium and B vitamins
What to Know:
- Higher in calories from cheese and bacon
- Contains dairy
- Moderate sodium (use low-sodium bacon to reduce)
Look, this is comfort food with cheese and bacon. It’s not a diet recipe. But it’s way better than takeout, costs less, and I know exactly what’s in it. When I want to make it lighter, I use the turkey version and load up on vegetables. But usually? I just eat a reasonable portion and enjoy it.
Final Thoughts
So that’s my go-to Keto Bacon Cheeseburger Casserole! I’ve probably talked your ear off at this point, but when you make a recipe this often, you have a lot to say about it.
This has saved weeknight dinners more times than I can count. It’s my answer to “what’s for dinner” when I’m tired, don’t want takeout, and still want something that tastes really good. My kids are happy, my husband’s happy, and I’m happy because I’m not stressed about cooking.
Make it yours! Try different add-ins, swap in your favorite vegetables, adjust the spices. The best recipes are the ones you adapt to your family’s tastes. If you’re looking for other easy weeknight meals, check out my cheesy ground beef goulash for another comforting dish, or my garlic herb focaccia if you want a quick side.
If you make this, drop a comment and let me know what you think! I love hearing how recipes turn out in your kitchen. And if something doesn’t work, tell me that too—I’m here to help troubleshoot.
Happy cooking! And I hope your kitchen smells half as good as mine does right now.
Frequently Asked Questions
Can I use ground turkey instead of beef?
Absolutely. Ground turkey is leaner and lower in calories. Just make sure to add a little extra olive oil and spices since turkey is milder. It’s a great option if you want a lighter version.
Why did my casserole turn out watery?
Usually means you didn’t drain enough grease from the beef, or you added too much cream. Make sure to brown the beef well and drain excess fat. Also, let it bake long enough for the cheese to thicken the sauce.
Can I make this ahead for a dinner party?
Sort of. Assemble the casserole up to 24 hours ahead and store in the fridge. Bake it right before serving. It won’t be quite as good as fresh, but it’s close and saves you stress during the party. I do this all the time.
Why did my cheese get grainy?
The heat was too high, or you used pre-shredded cheese. Pre-shredded has anti-caking agents that prevent smooth melting. Always grate your own cheese from a block and bake at 375°F. If it’s already grainy, try whisking in a splash of warm cream—sometimes you can save it.
Can I use jarred garlic?
You can, but fresh tastes so much better in this recipe. Jarred garlic has a weird metallic taste that really shows up in creamy sauces. If you must use it, use half the amount because it’s stronger. But honestly, mincing 3 cloves takes like 1 minute.
How do I reheat leftovers without it getting dry?
Add a splash of water or cream to a skillet, add your leftover casserole, and heat gently over low heat, stirring frequently. The extra liquid brings back the creamy texture. Microwave sort of works but tends to dry it out. If you do microwave, definitely add a splash of water first and heat in short bursts, stirring between.
Can I double this recipe?
Yes! Double everything and use a larger baking dish (11×17 inch). The cooking time might increase by 5-10 minutes. I do this when I’m meal-prepping or feeding a crowd. Just make sure your skillet is big enough for the beef—you might need to cook in batches.
Pin This Recipe!
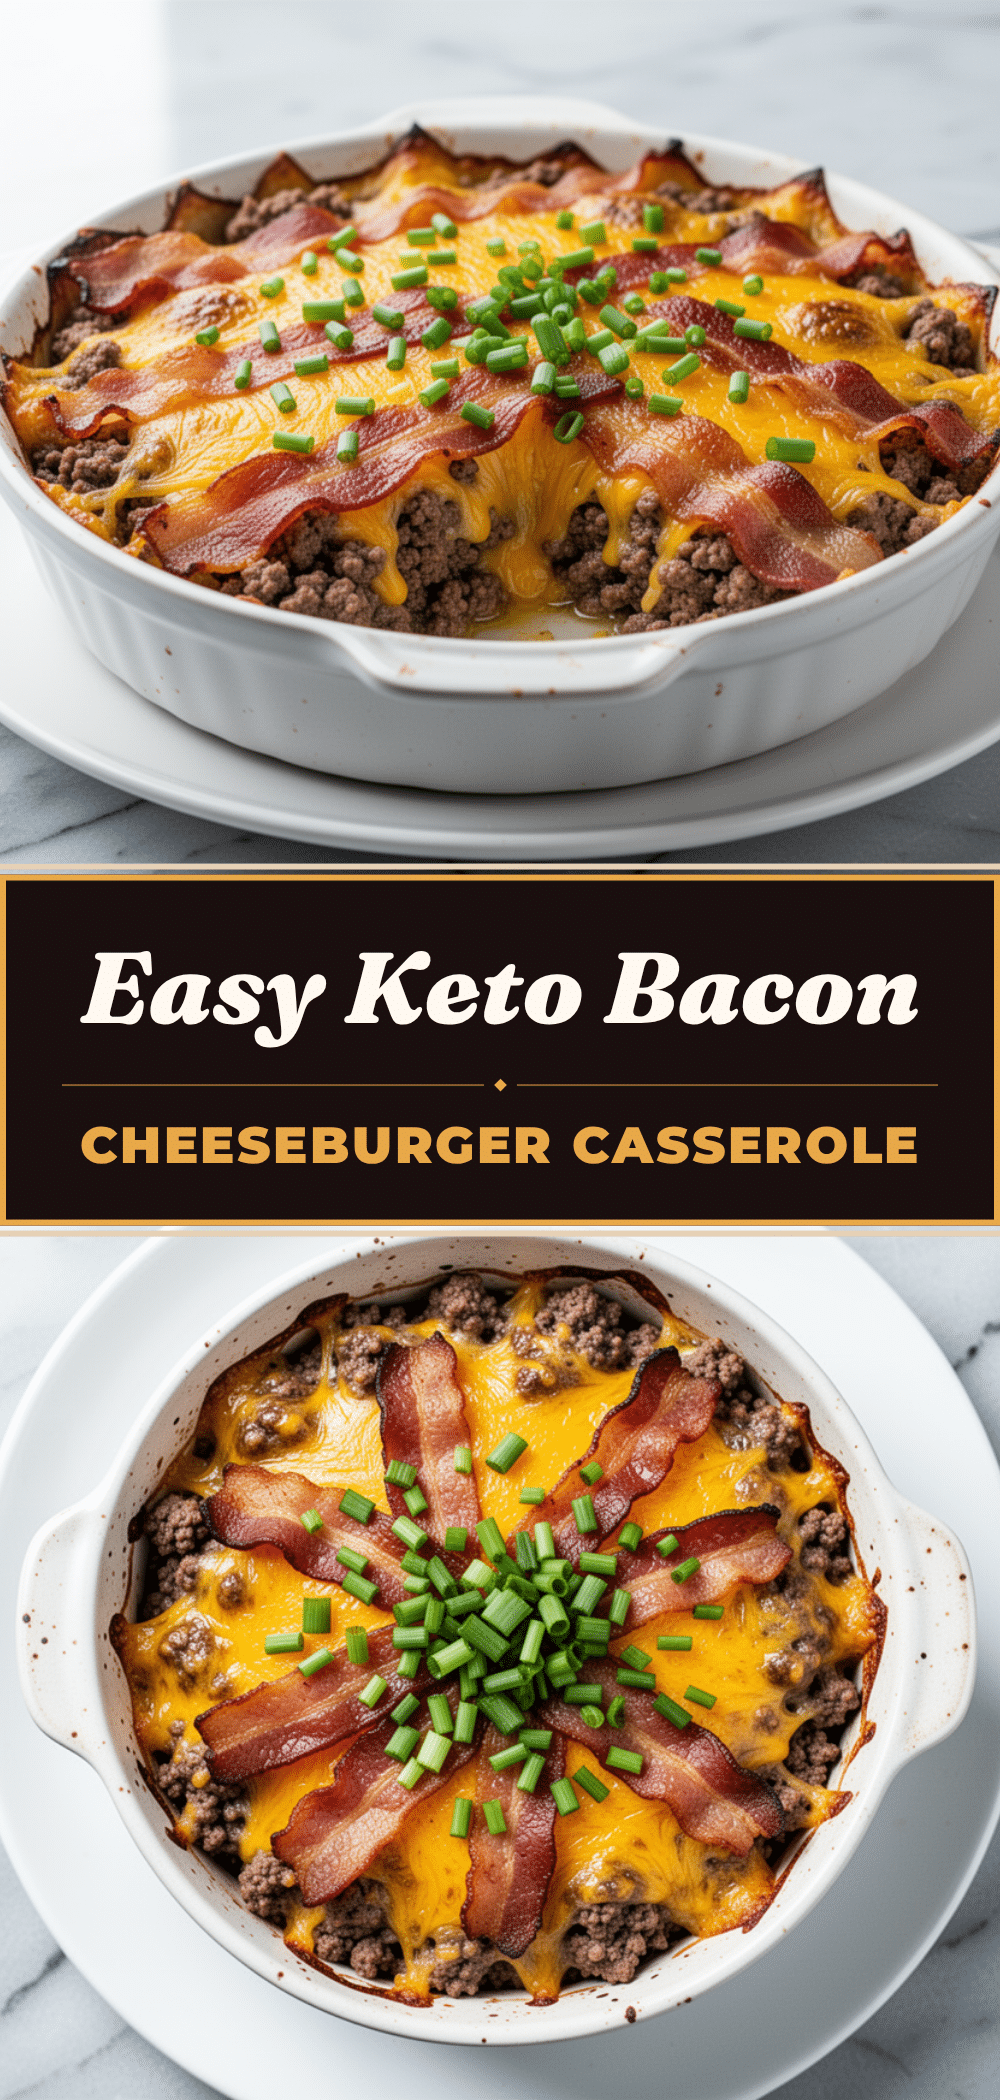
Keto Bacon Cheeseburger Casserole
- Total Time: 30 minutes
- Yield: 6 servings 1x
Description
A quick, one-dish keto-friendly casserole that tastes like a cheeseburger without the bun. It’s creamy, savory, and ready in under 30 minutes, making it perfect for busy weeknights.
Ingredients
- 1.5 pounds ground beef (80/20 fat ratio)
- 8 strips thick-cut bacon
- 2 cups sharp cheddar cheese, shredded
- 1.5 cups mozzarella cheese, shredded
- ½ cup heavy cream
- 3 cloves garlic, minced
- 1 medium yellow onion, diced
- ½ cup dill pickles, chopped
- 1 tablespoon yellow mustard or Dijon
- 2 tablespoons low-sugar ketchup
- 1 teaspoon garlic powder
- 1 teaspoon onion powder
- ½ teaspoon paprika
- Salt and black pepper to taste
- 2 stalks green onions, sliced (for garnish)
- 1 tablespoon butter
Instructions
- Preheat oven to 375°F (190°C). Prep ingredients by chopping onion, mincing garlic, slicing pickles, and grating cheese.
- In a large skillet over medium heat, cook bacon until crispy. Remove and crumble on paper towels, leaving 1 tablespoon of bacon fat in the pan.
- Add ground beef to the skillet with the bacon fat. Break up and brown until no longer pink. Drain excess grease if necessary.
- Add diced onion to the beef and cook for 2-3 minutes until softened. Add minced garlic and cook for 1 more minute.
- Stir in mustard, ketchup, garlic powder, onion powder, paprika, salt, and pepper. Pour in heavy cream and stir until combined.
- Transfer beef mixture to a 9×13 inch baking dish. Sprinkle half of the cheddar and mozzarella cheese over the top.
- Sprinkle crumbled bacon and chopped pickles over the cheese. Top with remaining cheese.
- Bake for 15-20 minutes until cheese is melted, bubbly, and slightly golden.
- Remove from oven and let rest for 5 minutes before serving. Garnish with sliced green onions.
Notes
Use 80/20 ground beef for moisture and flavor. Grate cheese from a block for better melting. Let the casserole rest for 5 minutes before serving to help it set. Do not freeze as the dairy sauce may separate.
- Prep Time: 15 minutes
- Cook Time: 15 minutes
- Category: Main Course
- Cuisine: American
Nutrition
- Serving Size: 1 serving
- Calories: 450
- Sugar: 2
- Sodium: 650
- Fat: 32
- Saturated Fat: 15
- Carbohydrates: 4
- Fiber: 1
- Protein: 35
Keywords: keto, low carb, bacon cheeseburger casserole, weeknight dinner, ground beef, one pot meal, comfort food, gluten free


