Last Tuesday, I came home to a kitchen that looked like a sugar factory had exploded. Flour was on the counter. Sesame seeds were in my hair. And my seven-year-old was standing on a step stool, tongue poking out in concentration, trying to stir a thick, amber-colored sauce in a small bowl without splashing it on the floor.
It was chaos. Beautiful, sticky, messy chaos.
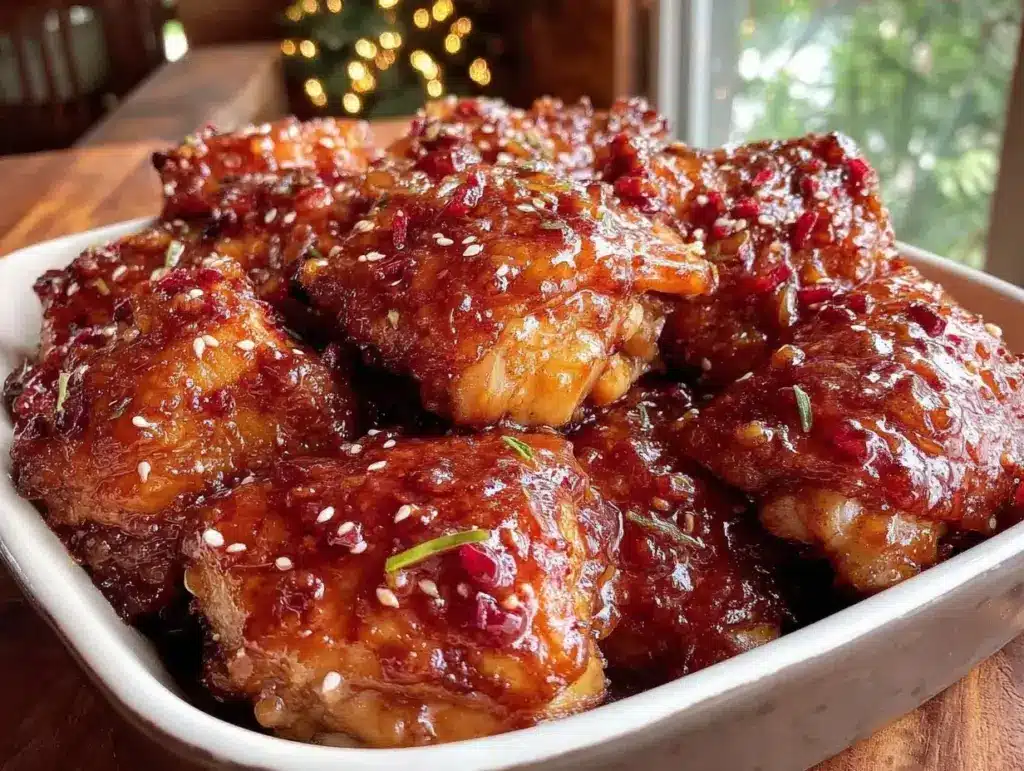
We were making Sticky Baked Sesame Chicken Thighs, and honestly? It was one of the best weeknight moments I’ve had in a long time. Not because the chicken turned out perfectly (it did, but that’s not the point), but because for the first time in months, my kids weren’t eating dinner separately or complaining about what was on their plates. They were involved. They were proud. And when we pulled that tray out of the oven, smelling like a Chinese takeout place but actually clean and homemade, they ate every single piece.
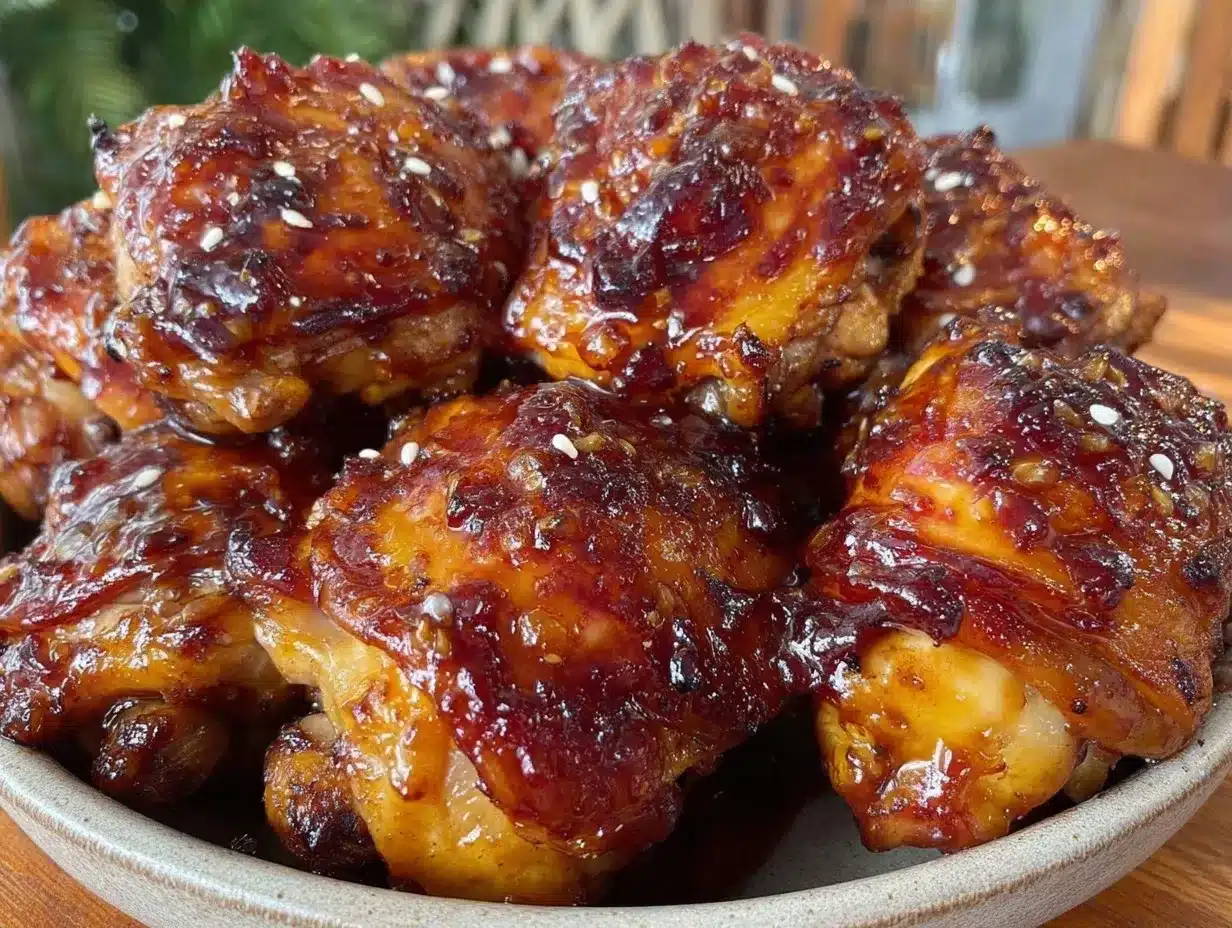
I’ve made this recipe about fifteen times over the last six months. Some times I rushed the sauce and it was too sweet. Some times I used breast meat and it dried out. But this version? The one with bone-in, skin-on thighs baked until crispy, then tossed in a sticky ginger-soy glaze? It’s the gold standard. It’s better than takeout. It’s cheaper. And it’s actually fun to make with little hands.
If you’re looking for a way to get your kids into the kitchen without stressing about complicated techniques or dangerous knives, this is your recipe. It’s simple, forgiving, and tastes amazing. Plus, the cleanup is minimal because everything happens on one baking sheet. Let me walk you through how we make this magic happen.
Why You’ll Love This Recipe
There are about ten reasons I keep coming back to this sticky baked sesame chicken, but I’ll keep it real with you. Here’s what makes it a staple in our house:
Kids Can Actually Help — Seriously. There’s no raw meat handling for them (I do that part), no hot oil, and no sharp knives. They get to mix the sauce, toss the chicken, and sprinkle the sesame seeds. It’s safe, it’s tactile, and it feels like real cooking.
Thighs Are Foolproof — Breast meat is tricky. It dries out if you look at it wrong. Thighs? They’re forgiving. They stay juicy even if you bake them a minute too long. Plus, the skin gets crispy in the oven, which kids love. It’s like chicken nuggets, but grown-up.
Better Than Takeout — I’ve compared this to the best local Chinese spots, and I’m not even sorry. The sauce is less sugary, the chicken is fresher, and you know exactly what’s in it. No mystery MSG packets. Just soy, ginger, garlic, and honey.
One Pan Cleanup — Line your baking sheet with foil or parchment paper, and you’re done. No scrubbing pots. No washing extra bowls. My kids love this part too because they get to help “set the table” for the oven.
Ready in 40 Minutes — It’s not a 15-minute meal, but it’s close. And most of that time is just baking. You have plenty of time to chat, help the kids with homework, or just breathe while the chicken does its thing.
This recipe has saved us from so many “what’s for dinner?” panics. It’s my go-to when I want something special but don’t have the energy to cook a complex meal. And when my kids help make it? They’re more likely to eat it. It’s psychology, but it works.
Ingredients You’ll Need
Here’s the best part: you probably have most of this already. I’m particular about three ingredients here, and I’ll tell you exactly why. For the rest, grab what you have.
For the Chicken
Chicken Thighs (2.5 pounds / 1.1 kg) — Bone-in, skin-on. This is non-negotiable for me. Boneless skinless thighs work, but they don’t get that crispy skin texture that makes this recipe special. If you must use breasts, cut them into bite-sized pieces and reduce baking time to 20 minutes.
Neutral Oil (2 tablespoons) — I use avocado oil or grapeseed oil. Vegetable oil works too. Don’t use olive oil here; it has a low smoke point and can get bitter in the oven.
Garlic Powder (1 teaspoon) — For that savory base flavor. Fresh garlic goes in the sauce, but powder on the chicken helps it brown evenly.
Onion Powder (½ teaspoon) — Adds depth without needing to chop anything. My kids hate onion bits, so this is perfect for them.
Black Pepper (½ teaspoon) — Freshly cracked is best, but pre-ground works in a pinch.
Sesame Seeds (2 tablespoons, plus more for garnish) — Toasted sesame seeds are amazing, but untoasted works fine. I buy the big jar; they last forever.
For the Sticky Sauce
Soy Sauce (¼ cup / 60ml) — Use low-sodium if you’re watching salt. Regular soy sauce is fine, just taste before adding extra salt.
Honey (3 tablespoons) — This is what makes it sticky. Maple syrup works, but it’s thinner. Agave is okay, but honey gives that classic takeout sweetness.
Rice Vinegar (2 tablespoons) — Adds brightness so it’s not just sweet. Don’t use white vinegar; it’s too harsh. Apple cider vinegar works in a pinch.
Fresh Ginger (1 tablespoon, grated) — Yes, fresh. I grate it on a microplane. If you’re feeling lazy, 1 teaspoon of ground ginger works, but fresh tastes so much better. My kids help me grate this—it’s safe and easy.
Garlic (3 cloves, minced) — Fresh garlic only. Jarred garlic has a weird metallic taste that clashes with the honey.
Cornstarch (1 teaspoon) — This thickens the sauce. Don’t skip it, or you’ll have a watery mess.
Water (2 tablespoons) — Helps dissolve the cornstarch so it doesn’t clump.
Red Pepper Flakes (¼ teaspoon, optional) — For a little kick. My kids skip this, but I add it to my portion.
Equipment Needed
You don’t need fancy equipment for this. Here’s what I actually use:
Baking Sheet — I use a half-sheet pan (18×13 inches). Make sure it’s big enough to fit the chicken in a single layer. Crowding the pan steams the chicken instead of baking it.
Parchment Paper or Foil — Line the pan! This is the secret to easy cleanup. I use foil because it’s easier to crumple up and throw away.
Small Mixing Bowls — You need one for the chicken and one for the sauce. Two medium bowls work perfectly.
Whisk — For the sauce. A small whisk is fine. My kids love using the whisk; it makes them feel like real chefs.
Tongs — For tossing the chicken in oil and flipping it. Tongs are safer than forks for kids to use.
Small Saucepan or Microwave — To heat the sauce. I use the microwave because it’s faster. 30 seconds, stir, 30 seconds. Done.
Microplane or Grater — For the ginger and garlic. If you don’t have one, a fine cheese grater works. Or just mince the garlic and grate the ginger with a knife.
How to Make It: Step-by-Step
Alright, let’s make this! I’m walking you through exactly how I do it, including the little tricks I’ve picked up. I’ll also note where your kids can help.
Step 1: Prep the Chicken (5 minutes)
Preheat your oven to 400°F (200°C). Line a baking sheet with foil or parchment paper.
Pat the chicken thighs dry with paper towels. This is important! Wet chicken doesn’t crisp up. If your kids want to help, let them pat the chicken dry. It’s messy but satisfying.
Place the chicken thighs on the prepared baking sheet, skin-side up. Drizzle with oil and sprinkle with garlic powder, onion powder, pepper, and 2 tablespoons of sesame seeds. Toss everything together with your hands or tongs until the chicken is evenly coated. Your kids can help with the tossing—it’s like playing with food, but it’s dinner.
Step 2: Bake the Chicken (25-30 minutes)
Put the chicken in the oven. Bake for 25-30 minutes, or until the skin is crispy and golden brown, and the internal temperature reaches 165°F (74°C). I flip the chicken halfway through cooking to ensure even browning. This is a good time for kids to help with homework or play quietly while the smell fills the house.
Tip: If you’re using boneless thighs, check them at 20 minutes. They cook faster.
Step 3: Make the Sauce (5 minutes)
While the chicken bakes, make the sauce. In a small bowl, whisk together the soy sauce, honey, rice vinegar, grated ginger, minced garlic, cornstarch, water, and red pepper flakes (if using). The cornstarch might clump at first—just whisk vigorously until it’s smooth.
Kid Helper: This is the perfect job for kids. Let them whisk the sauce. It’s safe, no heat involved, and they get to see the colors mix. I let my kids smell the ginger—it smells spicy and fresh.
Step 4: Heat and Combine (5 minutes)
Once the chicken is done, remove it from the oven. Pour the sauce into a small saucepan and heat over medium heat, stirring constantly, until it thickens and bubbles. This takes about 2-3 minutes. If you’re using the microwave, heat in 30-second intervals, stirring in between, until thickened.
Place the hot chicken back on the baking sheet. Pour the thickened sauce over the chicken. Use a spoon or brush to coat every piece evenly. The sauce will bubble and stick immediately.
Kid Helper: Let your kids spoon the sauce over the chicken. It’s messy, but they’ll be so proud of their “sticky” chicken.
Step 5: Broil for Sticky Goodness (2-3 minutes)
Turn your oven to broil. Put the chicken back in for 2-3 minutes, watching closely. You want the sauce to caramelize and get slightly charred in spots. This is what makes it taste like takeout. Watch it like a hawk—the difference between perfect and burnt is just one minute.
Step 6: Serve
Remove from the oven. Sprinkle with extra sesame seeds and chopped green onions if you have them. Serve hot with steamed rice or fried rice. My kids love dipping the chicken in extra sauce on the side.
Tip: If you want to go the extra mile, serve with cozy fall chicken and dumplings for a different comfort food vibe, or pair it with a simple green salad.
Expert Tips & Tricks
Here’s everything I’ve learned from making this dozens of times. These tips will save you from my mistakes.
Don’t Skip the Dry Pat
I know it’s annoying, but drying the chicken is crucial. Moisture is the enemy of crispiness. If the skin is wet, it steams. Pat it dry. Every time.
Use a Wire Rack (Optional)
If you have a wire rack that fits on your baking sheet, place the chicken on it. This allows air to circulate underneath, making the bottom crispy too. I don’t always do this, but when I do, the difference is noticeable.
Thicken the Sauce Properly
Don’t just pour raw sauce over the chicken. It’ll be runny. Heat it first to activate the cornstarch. If you skip this step, you’ll have chicken swimming in liquid. Not good.
Watch the Broiler
Broilers vary. Some are hot, some are mild. Watch your chicken closely during the broil step. Sugar burns fast. If it’s browning too quickly, lower the rack or take it out early.
Make Extra Sauce
I always make a little extra sauce. My kids love dipping their chicken in it. It’s like having chicken nuggets with sauce on the side.
Variations & Substitutions
Once you’ve nailed the basic version, here’s how you can mix it up. I’ve tried all of these.
Spicy Version
Add 1 teaspoon of Sriracha or chili garlic sauce to the sauce. Or add more red pepper flakes. My husband likes it hot, so I make a separate batch for him.
Dairy-Free
This recipe is naturally dairy-free! Just make sure your soy sauce is dairy-free (most are). Serve with rice or butternut squash mac and cheese if you want a dairy side.
Gluten-Free
Use tamari instead of soy sauce. Everything else is naturally gluten-free. I use tamari and it tastes exactly the same.
Chicken Breast Version
Use boneless, skinless chicken breasts cut into bite-sized pieces. Bake at 400°F for 15-18 minutes. Don’t broil, or they’ll dry out. Add the sauce at the end and serve immediately.
Veggie Add-In
Toss broccoli or bell peppers on the baking sheet with the chicken. They’ll roast alongside it and absorb the sauce. My kids eat the veggies this way without complaining.
Serving & Storage
How to Serve:
I usually serve this straight from the baking sheet at the dinner table—it looks rustic and stays warm. But here are other ways I’ve enjoyed it:
Side Dishes:
- Steamed white rice (classic)
- Fried rice (leftover rice works great)
- Simple green salad with sesame dressing
- Steamed broccoli or bok choy
- Creamy pumpkin alfredo pasta if you want a different carb option
Toppings Bar:
When I have guests, I put out: extra sesame seeds, chopped green onions, red pepper flakes, and extra sauce. Everyone customizes their bowl.
Storage Instructions:
Refrigerator: Store in an airtight container for up to 3 days. The chicken will get softer as it sits, which is normal. The sauce continues to penetrate the meat.
Reheating: Best method: Oven or toaster oven at 350°F for 10-15 minutes. This keeps the skin somewhat crispy. Microwave works but makes the skin soggy. If you microwave, add a splash of water to keep it moist.
Freezing: This doesn’t freeze well. The skin gets rubbery, and the sauce separates. Make it fresh or store in the fridge for up to 3 days.
Nutrition Information
I’m not a nutritionist, but here’s the breakdown if you’re tracking. These are estimates based on 4 servings.
Per Serving:
- Calories: 450
- Protein: 35g
- Carbs: 20g
- Fiber: 1g
- Sugar: 15g
- Fat: 25g
- Sodium: 800mg
What’s Good:
- High protein from the chicken
- Healthy fats from the skin (if you eat it)
- Lower carb than takeout (no fried batter)
What to Know:
- Higher sodium from soy sauce
- Contains sugar from honey
- Not low-carb or keto-friendly as written
My Take:
Look, this is comfort food. It’s sweet, savory, and sticky. It’s not a diet recipe. But it’s way better than takeout, costs less, and I know exactly what’s in it. When I want to make it lighter, I use less honey and more vinegar, and I skip the skin. But usually? I just eat a reasonable portion and enjoy it.
Final Thoughts
So that’s my go-to sticky baked sesame chicken thighs! I’ve probably talked your ear off at this point, but when you make a recipe this often, you have a lot to say about it.
This has saved weeknight dinners more times than I can count. It’s my answer to “what’s for dinner” when I’m tired, don’t want takeout, and still want something that tastes really good. But more importantly, it’s my answer to “how do I get my kids to help in the kitchen?”
Make it yours! Try different add-ins, swap in your favorite vegetables, adjust the garlic (though more is always better in my opinion). The best recipes are the ones you adapt to your family’s tastes.
If you make this, drop a comment and let me know what you think! I love hearing how recipes turn out in your kitchen. And if something doesn’t work, tell me that too—I’m here to help troubleshoot.
Happy cooking! And I hope your kitchen smells half as good as mine does right now.
Frequently Asked Questions
Can I use chicken breasts instead of thighs?
You can, but the texture will be different. Breasts are leaner and can dry out. If you use breasts, cut them into bite-sized pieces and reduce baking time to 15-18 minutes. Don’t broil them, or they’ll dry out. Thighs are juicier and more forgiving, so I recommend them.
Why did my sauce turn out watery?
Usually, this means you didn’t heat the sauce long enough to thicken the cornstarch. Cornstarch needs heat to activate. Heat the sauce in a pan over medium heat until it bubbles and thickens. If it’s still watery, simmer it for another minute. Also, make sure you’re using cornstarch, not flour. Flour doesn’t thicken as quickly or as clearly.
Can I make this ahead for a dinner party?
Sort of. You can prep the chicken and make the sauce ahead of time. Store them separately in the fridge. When you’re ready to cook, bake the chicken and then heat the sauce. It won’t be quite as good as fresh, but it’s close and saves you stress during the party. I do this all the time.
Can I use jarred ginger?
You can, but fresh tastes so much better in this recipe. Jarred ginger has a weird, preserved taste that doesn’t match the fresh honey and soy. If you must use it, use half the amount because it’s stronger. But honestly, grating fresh ginger takes like 2 minutes. Buy pre-peeled ginger roots if you want to save time.
How do I reheat leftovers without it getting dry?
Add a splash of water or chicken broth to a skillet, add your leftover chicken, and heat gently over low heat, stirring frequently. The extra liquid brings back the moisture. Microwave sort of works but tends to dry it out. If you do microwave, definitely add a splash of water first and heat in short bursts, stirring between.
Can I double this recipe?
Absolutely! Double everything and use your biggest baking sheet. You might need to use two pans if you don’t have enough space. The cooking times stay the same. I do this when I’m meal-prepping or feeding a crowd. Just make sure your skillet is big enough for the sauce—you might need to use two pans or a very large skillet.
Pin This Recipe!
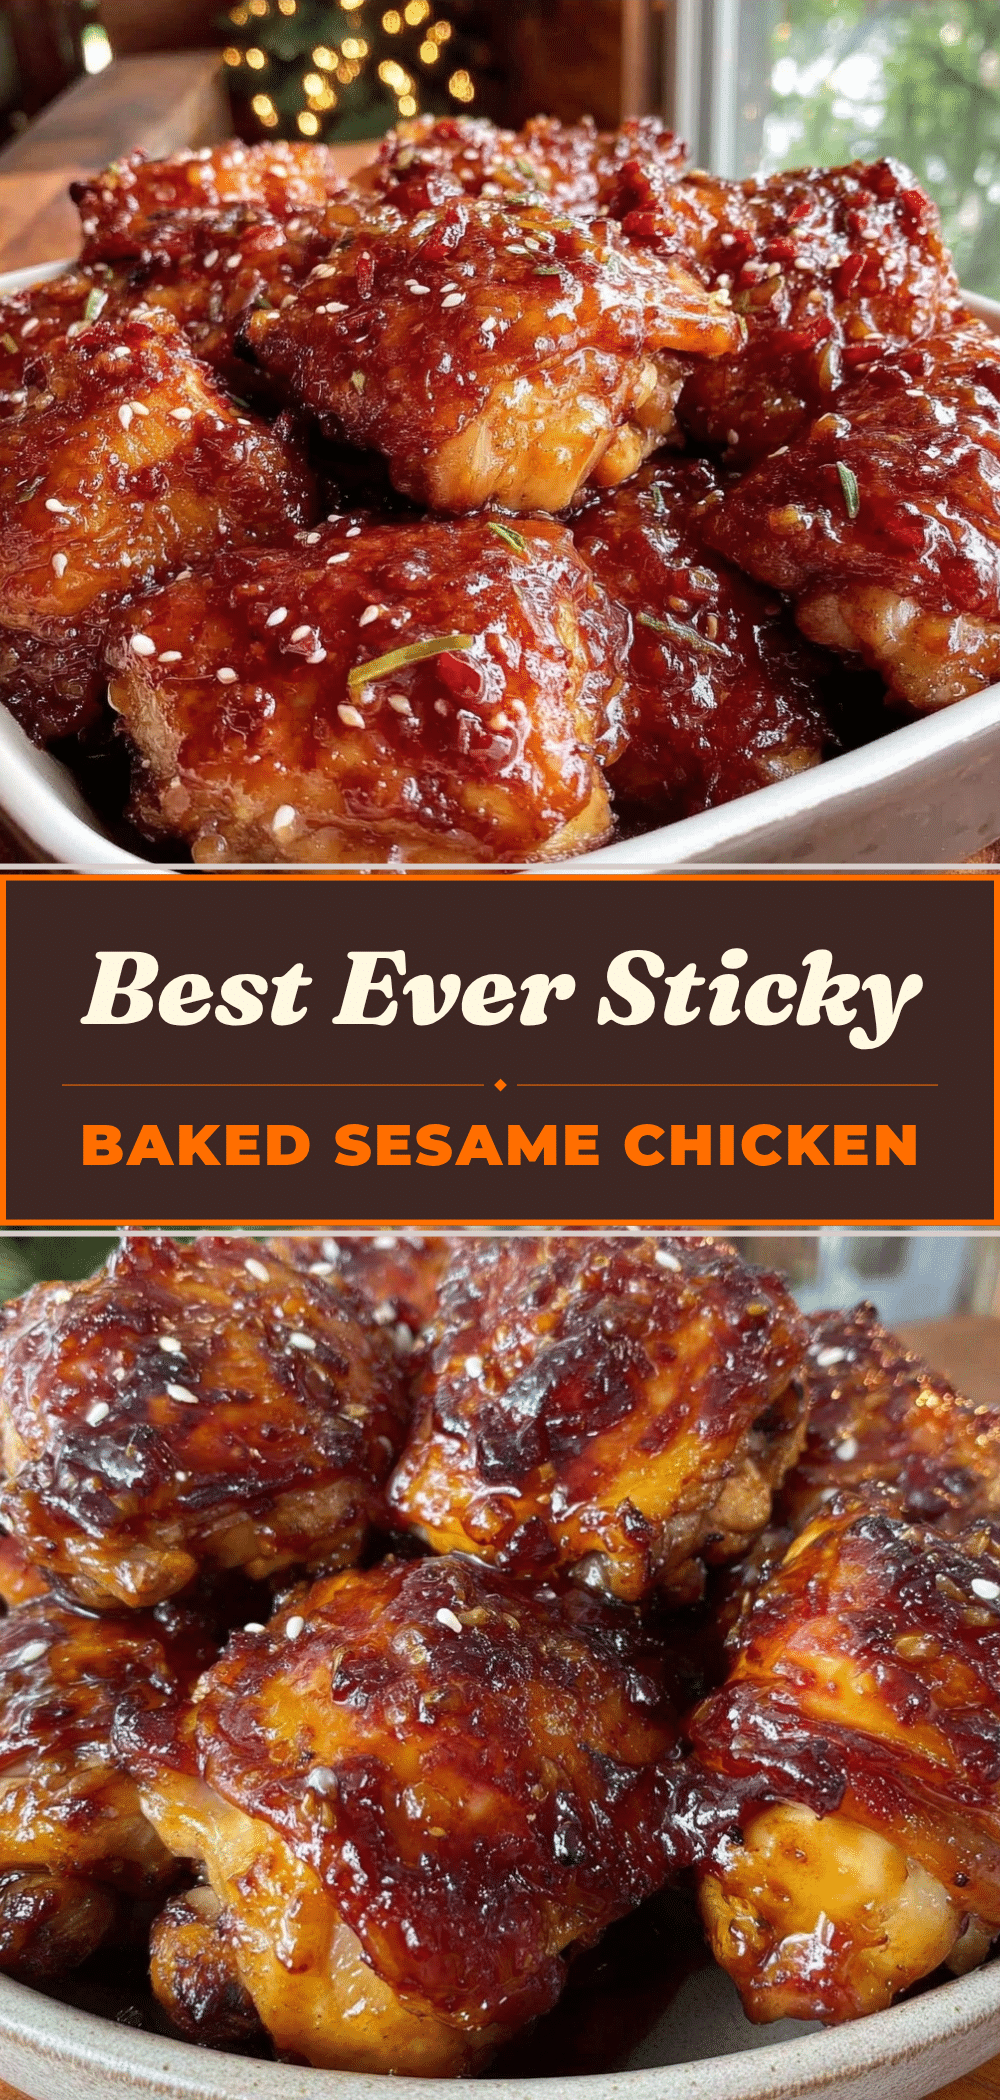

Sticky Baked Sesame Chicken Thighs: Kids Help Make
- Total Time: 40 minutes
- Yield: 4 servings 1x
Description
A family-friendly weeknight dinner featuring crispy, bone-in chicken thighs tossed in a homemade sticky ginger-soy glaze. This one-pan meal is easy to make, forgiving for beginners, and perfect for getting kids involved in the kitchen.
Ingredients
- 2.5 pounds bone-in, skin-on chicken thighs
- 2 tablespoons neutral oil (avocado, grapeseed, or vegetable)
- 1 teaspoon garlic powder
- ½ teaspoon onion powder
- ½ teaspoon black pepper
- 2 tablespoons sesame seeds (plus more for garnish)
- ¼ cup soy sauce (low-sodium or regular)
- 3 tablespoons honey
- 2 tablespoons rice vinegar
- 1 tablespoon fresh ginger, grated
- 3 cloves garlic, minced
- 1 teaspoon cornstarch
- 2 tablespoons water
- ¼ teaspoon red pepper flakes (optional)
Instructions
- Preheat oven to 400°F (200°C). Line a half-sheet baking pan with foil or parchment paper.
- Pat chicken thighs dry with paper towels to ensure crispiness.
- Place chicken skin-side up on the prepared baking sheet.
- Drizzle with oil and sprinkle with garlic powder, onion powder, pepper, and 2 tablespoons of sesame seeds.
- Toss chicken to coat evenly.
- Bake for 25-30 minutes, flipping halfway through, until skin is crispy and internal temperature reaches 165°F (74°C).
- While chicken bakes, whisk together soy sauce, honey, rice vinegar, ginger, garlic, cornstarch, water, and red pepper flakes in a small bowl until smooth.
- Remove chicken from oven. Heat the sauce in a small saucepan over medium heat or microwave in 30-second intervals until thickened and bubbling.
- Pour the thickened sauce over the hot chicken and toss to coat evenly.
- Broil for 2-3 minutes, watching closely, until the sauce caramelizes and gets slightly charred.
- Sprinkle with extra sesame seeds and serve hot.
Notes
Patting the chicken dry is crucial for crispy skin. If using boneless thighs, reduce baking time to 20 minutes. For a gluten-free version, use tamari instead of soy sauce. Do not broil chicken breasts as they will dry out. The sauce must be heated to activate the cornstarch; otherwise, it will remain watery.
- Prep Time: 5 minutes
- Cook Time: 30 minutes
- Category: Main Course
- Cuisine: Chinese
Nutrition
- Serving Size: 1 chicken thigh with
- Calories: 450
- Sugar: 15
- Sodium: 800
- Fat: 25
- Saturated Fat: 7
- Carbohydrates: 20
- Fiber: 1
- Protein: 35
Keywords: sticky sesame chicken, baked chicken thighs, kid-friendly dinner, weeknight meals, one pan dinner, homemade takeout, ginger soy sauce, crispy chicken


