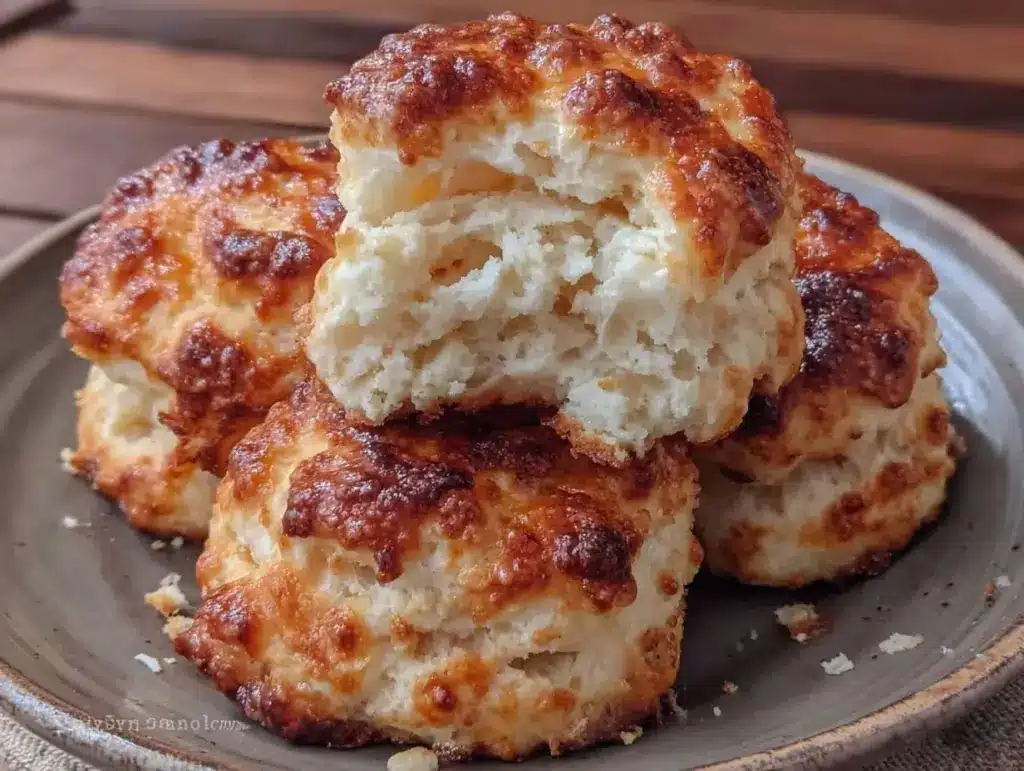
It’s 6:30 AM on a Tuesday. The house is quiet, the coffee pot is gurgling its final breath, and I am staring at a stick of butter that feels heavier than it did last year. I want biscuits. Not a dozen. Not a loaf of bread. Just two or three flaky, golden, buttermilk biscuits for my morning coffee. But every recipe I find on the internet assumes I am hosting a brunch for twelve people or running a bakery in Savannah. They call for four cups of flour. Four cups! Who needs four cups of flour for one person?
For years, I compromised. I’d make a giant batch of fluffy herb biscuits for dinner, hoping I’d have leftovers for breakfast. Spoiler alert: I never did. By Wednesday, those biscuits were dry, stale bricks that tasted like regret and old pantry dust. I was stuck in a loop of either starving in the morning or wasting good food because the standard recipes were just too big for my small-batch life.
Then, last autumn, I decided to stop trying to scale down other people’s recipes and actually write one for just me (and sometimes my partner, if he’s up early). This Golden Buttermilk Biscuits for Small Batch Mornings recipe is the result. It makes exactly four biscuits. Four. That’s it. It’s the perfect amount for two people to split with their morning coffee, or for one person to have a proper breakfast without the guilt of a freezer full of dough.
I’ve tested this recipe at least a dozen times, tweaking the ratio of buttermilk to flour until the dough was just right—shaggy but not sticky, tender but not tough. The secret isn’t fancy ingredients; it’s respecting the small scale. When you work with small quantities, you need precision. You need to know exactly how cold your butter is and how gently you handle the dough. These biscuits are golden on the outside, soft on the inside, and most importantly, they disappear by 8:00 AM.
Why You’ll Love This Small Batch Recipe
There are a few reasons I keep this recipe bookmarked and make it more often than I care to admit. But honestly? It’s mostly because it solves the biggest problem in small-batch cooking: the leftover dilemma.
- Zero Waste Guarantee — Seriously. Four biscuits. No more, no less. If you’re eating alone, you get two. If you’re with someone, you each get two. There is no “oops, I made too much” moment. It’s right-sized from the start.
- Fastest Morning Win — Because the batch is small, the prep is quick. You don’t need a giant bowl or a rolling pin the size of a baseball bat. You can mix this up in a single bowl in under 10 minutes. I’ve made these while half-asleep, and they still came out perfect.
- Buttermilk Magic — The tang of the buttermilk cuts through the richness of the butter, giving you that classic bakery flavor without needing a dozen ingredients. It’s simple, honest cooking.
- Freezer-Friendly (If You Must) — Okay, I said zero waste, but life happens. If you somehow have leftover dough, these freeze beautifully. You can bake them from frozen, though they’ll need a few extra minutes in the oven. They reheat surprisingly well, too.
This isn’t just a biscuit recipe. It’s a permission slip to eat a proper breakfast without committing to a weekend brunch. It’s for the mornings when you want to feel fancy but only have time for five minutes.
Ingredients You’ll Need
Here’s the best part: you probably have most of this already. Small-batch cooking means you don’t need to buy a giant carton of buttermilk that will sit in your fridge for three weeks until it turns into soup. You just need a little bit.
For the Dough
All-Purpose Flour (1 ½ cups / 190g) — The base. Don’t use self-rising flour unless you adjust the leavening (more on that below). All-purpose gives the best texture. I use Gold Medal because it’s consistent, but any brand works.
Baking Powder (2 teaspoons) — This is your lift. Make sure it’s fresh! Old baking powder makes flat, dense biscuits. If your canister has been sitting since 2021, toss it. Fresh baking powder is non-negotiable for fluffy biscuits.
Baking Soda (½ teaspoon) — This reacts with the buttermilk to create bubbles. It’s what gives those biscuits their height and that slight tang.
Granulated Sugar (1 tablespoon) — Just a little. It helps with browning and balances the tang. Don’t skip it; it makes the crust golden and sweet.
Salt (¾ teaspoon) — Essential for flavor. Use kosher salt if you have it. If you use table salt, you might want to reduce it slightly, but ¾ tsp is usually fine.
Cold Unsalted Butter (4 tablespoons / 56g) — This is the most important ingredient. Cold butter creates steam pockets, which create flaky layers. Cube it yourself. Do not use pre-cubed butter from the freezer; it’s usually too warm by the time you get it to the bowl. Cut it into ½-inch cubes and keep them in the fridge until the last second.
Buttermilk (⅔ cup / 160ml) — Full-fat buttermilk is best. It adds flavor and tenderness. If you don’t have buttermilk, make a substitute: add 1 tablespoon of lemon juice or white vinegar to a measuring cup, then fill the rest with whole milk. Let it sit for 5 minutes until it curdles. It’s not quite the same, but it works in a pinch.
Egg Yolk (1 large egg yolk) — This is my secret weapon. The fat in the yolk makes the crumb richer and softer. It’s optional, but I don’t recommend skipping it if you want that bakery-style tenderness.
Heavy Cream for Brushing (1-2 tablespoons) — For brushing the tops before baking. This helps them brown evenly and gives them that shiny, golden top.
Equipment Needed
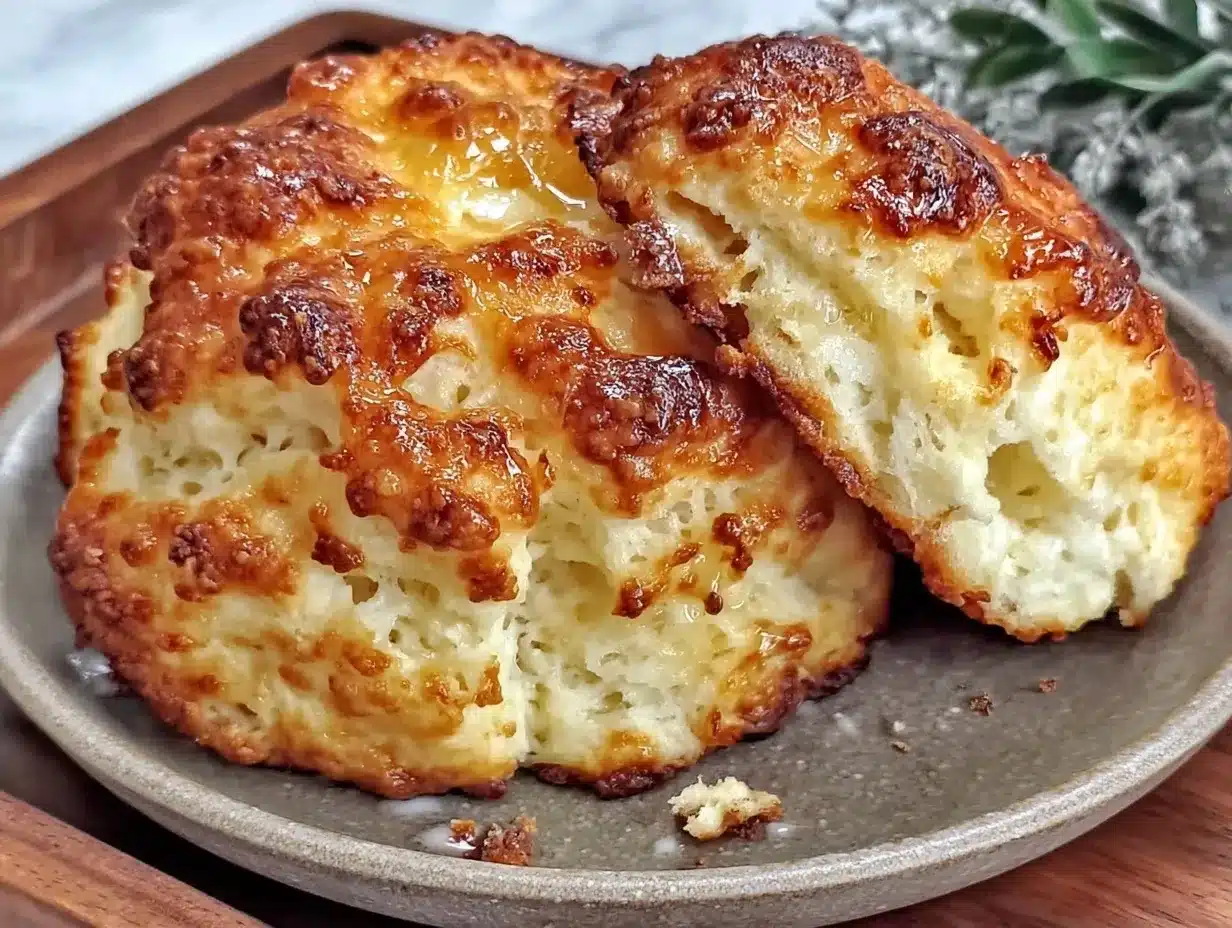
You don’t need fancy gadgets. In fact, keeping it simple is part of the small-batch charm.
Large Mixing Bowl — A medium-sized bowl works perfectly for four biscuits. No need for a huge mixing bowl that takes up half your counter.
Fork or Pastry Cutter — To cut the butter into the flour. I use a fork because it’s faster for small batches. A pastry cutter is great if you have one, but not required.
Rolling Pin — A small one is fine. You’re only rolling out a small disc of dough.
Biscuit Cutter or Glass — A 2.5-inch cutter is ideal. If you don’t have one, use a drinking glass. Just make sure it’s sharp-edged (not rounded) so you don’t seal the edges. Sealed edges stop the biscuits from rising properly.
Baking Sheet — Any standard baking sheet works. Line it with parchment paper for easy cleanup.
Parchment Paper — I always use it. It prevents sticking and makes cleanup a breeze. No scrubbing pans later.
How to Make It: Step-by-Step
Alright, let’s make these biscuits! I’m walking you through exactly how I do it, including the little tricks I’ve picked up over years of small-batch baking.
Step 1: Prep Your Oven and Pan (5 minutes)
Preheat your oven to 425°F (220°C). This high heat is crucial. It creates an instant burst of steam, which helps the biscuits rise quickly before the crust sets. Line your baking sheet with parchment paper. Have your butter cubes ready in the fridge.
Step 2: Whisk the Dry Ingredients (2 minutes)
In your large bowl, whisk together the flour, baking powder, baking soda, sugar, and salt. Make sure there are no clumps of baking powder. This ensures even rising. I usually do this while the oven is heating up.
Step 3: Cut in the Butter (3 minutes)
Add the cold, cubed butter to the dry ingredients. Using a fork or your fingers, work the butter into the flour. You’re looking for a coarse, crumbly texture with some pea-sized chunks of butter remaining. Those chunks are key—they melt in the oven and create flaky layers. Don’t overwork it. If the butter gets too warm, your biscuits will be dense. If you’re worried, put the bowl back in the fridge for 5 minutes.
Step 4: Mix the Wet Ingredients (1 minute)
In a separate small bowl or measuring cup, whisk together the buttermilk and egg yolk until combined. This ensures the yolk is evenly distributed.
Step 5: Combine the Dough (2 minutes)
Pour the wet ingredients into the dry ingredients. Use a fork or your hands to gently mix until the dough comes together. It will look shaggy and messy. That’s good. Do not overmix. Overmixing develops gluten, which makes biscuits tough. You want them tender. Stop mixing as soon as there are no dry patches. The dough should hold together when you squeeze it.
Step 6: Shape the Biscuits (3 minutes)
Turn the dough out onto a lightly floured surface. Gently press it into a disc about ¾-inch thick. Do not knead it. Just pat it out. If it sticks, add a tiny sprinkle of flour, but try not to use too much. Too much flour makes the biscuits dry.
Cut out four biscuits. If you’re using a glass, dip it in flour first, then press straight down. Don’t twist! Twisting seals the edges. Place the biscuits on the prepared baking sheet, leaving about an inch between them so they can expand.
Step 7: Bake to Golden Perfection (12-15 minutes)
Brush the tops with heavy cream. This helps them brown and gives them a soft crust. Bake for 12-15 minutes, or until the tops are golden brown and the bottoms are set. If your oven runs hot, check them at 12 minutes. If they’re browning too fast, cover them loosely with foil.
Let them cool on the baking sheet for 5 minutes before eating. They’re incredibly hot inside when they come out of the oven, and the structure is still setting. Wait those five minutes. Trust me.
Expert Tips & Tricks
Here’s everything I’ve learned from making these dozens of times. These tips will save you from my mistakes.
Keep Everything Cold
This is the #1 rule. Cold butter, cold buttermilk, cold bowl. If your kitchen is hot, put your bowl in the fridge for 10 minutes before cutting in the butter. Warm butter melts into the flour instead of staying in chunks, and you lose your flaky layers.
Don’t Overwork the Dough
I know it’s tempting to smooth it out, but don’t. Shaggy dough means tender biscuits. Smooth dough means tough biscuits. Embrace the mess.
Use a Sharp Cutter
If you use a dull glass or a rounded cutter, you seal the edges of the biscuit. This prevents them from rising. A sharp edge cuts cleanly, allowing the biscuit to expand upward. If you don’t have a biscuit cutter, use a knife to cut squares. Same principle.
Brush with Cream, Not Milk
Heavy cream has more fat than milk, which promotes browning. Milk can make the tops pale. If you don’t have cream, use a little melted butter, but cream is best.
Adjust for Altitude
If you live at high altitude, you might need to reduce the baking powder by ¼ teaspoon and increase the liquid slightly. I live at sea level, so I haven’t tested this extensively, but it’s worth noting if you’re in the mountains.
Variations & Substitutions
Once you’ve nailed the basic version, here’s how you can mix it up. I’ve tried all of these.
Herb and Cheese Biscuits
Add 2 tablespoons of fresh chives or parsley and ½ cup of shredded sharp cheddar cheese to the dry ingredients. These are amazing with soup. I often make these alongside roasted red pepper soup for a perfect lunch.
Brown Butter Biscuits
Melt the butter and brown it slightly before cooling it back to solid (or use clarified butter). This adds a nutty, deep flavor. It’s more work, but worth it for a special morning.
Gluten-Free Option
Use a 1:1 gluten-free flour blend. The texture might be slightly more crumbly, but it still works. I’ve used Bob’s Red Mill and King Arthur’s blend with success.
Dairy-Free Version
Use dairy-free butter sticks (not tub margarine) and oat milk with lemon juice for the buttermilk substitute. It’s not quite the same richness, but it’s edible. My lactose-intolerant sister loves these when made this way.
Sweet Variation
Add 1 teaspoon of cinnamon and 1 tablespoon of maple syrup to the wet ingredients. Top with a simple glaze after baking. These are great with pumpkin spice overnight oats for a fall-themed breakfast.
Serving & Storage
How to Serve:
These are best served warm. Split them open and slather with salted butter. They’re also amazing with jam, honey, or apple butter. I usually serve them straight from the oven, sitting at the counter with my coffee. It’s a simple, cozy ritual.
Storage:
If you somehow have leftovers (unlikely, but possible), store them in an airtight container at room temperature for up to 2 days. They will stale quickly because they don’t have preservatives. Reheat in a toaster oven or air fryer at 350°F for 3-4 minutes to restore crispiness. Microwave reheating makes them chewy, so avoid that.
Freezing:
You can freeze the baked biscuits for up to 1 month. Let them cool completely, then freeze in a freezer-safe bag. Reheat in the oven from frozen. Alternatively, you can freeze the raw dough balls on a baking sheet, then transfer to a bag. Bake from frozen, adding 2-3 minutes to the baking time.
Nutrition Information
I’m not a nutritionist, but here’s the breakdown if you’re tracking. This is per biscuit (based on 4 biscuits).
Per Serving:
- Calories: 180
- Protein: 4g
- Carbs: 22g
- Fiber: 1g
- Sugar: 2g
- Fat: 8g
- Saturated Fat: 5g
- Cholesterol: 35mg
- Sodium: 320mg
What’s Good: Decent protein, relatively low sugar. The buttermilk adds calcium.
What to Know: Higher in calories from butter and cream. Contains gluten and dairy.
My Take: These are a treat, not a health food. But they’re homemade, so you know exactly what’s in them. Much better than store-bought refrigerated dough, which is full of preservatives.
Final Thoughts
So that’s my Golden Buttermilk Biscuits for Small Batch Mornings! I know I’ve talked a lot about the importance of small batches, but when you make a recipe this often, you realize how much it changes your relationship with food. Cooking for one or two people doesn’t mean compromising on quality. It means being intentional.
These biscuits have saved my mornings. They’ve turned boring Tuesdays into cozy, aromatic experiences. They’ve made me feel like I’m in a bakery, even if I’m just in my pajamas at 7 AM. Make them yours! Add herbs, add cheese, add jam. The best recipes are the ones you adapt to your life.
If you make this, drop a comment and let me know what you think! I love hearing how small-batch recipes work in your kitchen. And if something doesn’t work, tell me that too—I’m here to help troubleshoot. Happy baking! And I hope your kitchen smells half as good as mine does right now.
Frequently Asked Questions
Can I use self-rising flour instead of all-purpose?
You can, but you need to adjust the recipe. Self-rising flour already contains baking powder and salt. So, omit the baking powder and salt in this recipe, and reduce the sugar slightly if you want. However, I find that using all-purpose flour gives you more control over the leavening and flavor. If you use self-rising, your biscuits might spread more.
Why did my biscuits turn out flat?
This usually happens for one of three reasons: 1) The butter was too warm. 2) The baking powder was old. 3) You overworked the dough. Make sure your butter is cold, check the expiration date on your baking powder, and handle the dough as little as possible. Also, don’t twist your cutter!
Can I make these ahead of time?
You can prepare the dough ahead of time. Cut out the biscuits, place them on the baking sheet, and cover tightly with plastic wrap. Refrigerate for up to 24 hours. Bake them straight from the fridge, adding 1-2 minutes to the baking time. This is great for meal prep if you want to have them ready for the morning.
What if I don’t have buttermilk?
Make a substitute! Add 1 tablespoon of lemon juice or white vinegar to a liquid measuring cup. Fill the rest with whole milk. Stir and let it sit for 5-10 minutes until it thickens and curdles slightly. It’s not exactly the same, but it provides the acidity needed to react with the baking soda.
How do I store leftover biscuits?
Store them in an airtight container at room temperature for up to 2 days. For longer storage, freeze them. Reheat in a toaster oven or air fryer to restore crispiness. Avoid the microwave, as it makes them chewy.
Can I double this recipe?
Absolutely! Double the ingredients and make 8 biscuits. Just make sure your baking sheet is large enough to hold them with space in between. If your sheet is small, bake in two batches. The cooking time stays the same.
Why do my biscuits stick to the pan?
Make sure you’re using parchment paper or a well-greased pan. If you don’t use parchment, grease the pan generously with butter or oil. Also, don’t flip the biscuits while they’re baking; let them set for the full 12-15 minutes.
Pin This Recipe!


Golden Buttermilk Biscuits: Easy Small Batch Recipe
- Total Time: 27-30 minutes
- Yield: 4 servings 1x
Description
A small-batch recipe for golden, flaky buttermilk biscuits that makes exactly four servings, perfect for a quick morning breakfast without the waste of larger batches.
Ingredients
- 1 ½ cups (190g) All-Purpose Flour
- 2 teaspoons Baking Powder
- ½ teaspoon Baking Soda
- 1 tablespoon Granulated Sugar
- ¾ teaspoon Salt
- 4 tablespoons (56g) Cold Unsalted Butter, cubed
- ⅔ cup (160ml) Full-fat Buttermilk
- 1 large Egg Yolk
- 1–2 tablespoons Heavy Cream for brushing
Instructions
- Preheat oven to 425°F (220°C) and line a baking sheet with parchment paper.
- In a large bowl, whisk together the flour, baking powder, baking soda, sugar, and salt until no clumps remain.
- Add the cold, cubed butter to the dry ingredients and work it in with a fork or fingers until the mixture resembles coarse crumbs with pea-sized butter chunks remaining.
- In a separate small bowl, whisk together the buttermilk and egg yolk until combined.
- Pour the wet ingredients into the dry ingredients and gently mix with a fork or hands until the dough comes together and is shaggy but not sticky. Do not overmix.
- Turn the dough out onto a lightly floured surface and gently press it into a disc about ¾-inch thick. Do not knead.
- Cut out four biscuits using a 2.5-inch cutter or a sharp-edged glass, pressing straight down without twisting.
- Place biscuits on the prepared baking sheet, leaving about an inch between them.
- Brush the tops with heavy cream.
- Bake for 12-15 minutes until tops are golden brown and bottoms are set.
- Let cool on the baking sheet for 5 minutes before serving.
Notes
Keep all ingredients cold for flaky layers. Do not twist the cutter when shaping biscuits to allow them to rise properly. If you don’t have buttermilk, substitute with 1 tablespoon lemon juice or vinegar plus enough whole milk to make ⅔ cup. For gluten-free, use a 1:1 gluten-free flour blend. For dairy-free, use dairy-free butter and oat milk substitute.
- Prep Time: 15 minutes
- Cook Time: 12-15 minutes
- Category: Breakfast
- Cuisine: American
Nutrition
- Serving Size: 1 biscuit
- Calories: 180
- Sugar: 2
- Sodium: 320
- Fat: 8
- Saturated Fat: 5
- Carbohydrates: 22
- Fiber: 1
- Protein: 4
Keywords: small batch biscuits, buttermilk biscuits, easy breakfast, golden biscuits, flaky biscuits, quick breakfast recipe


