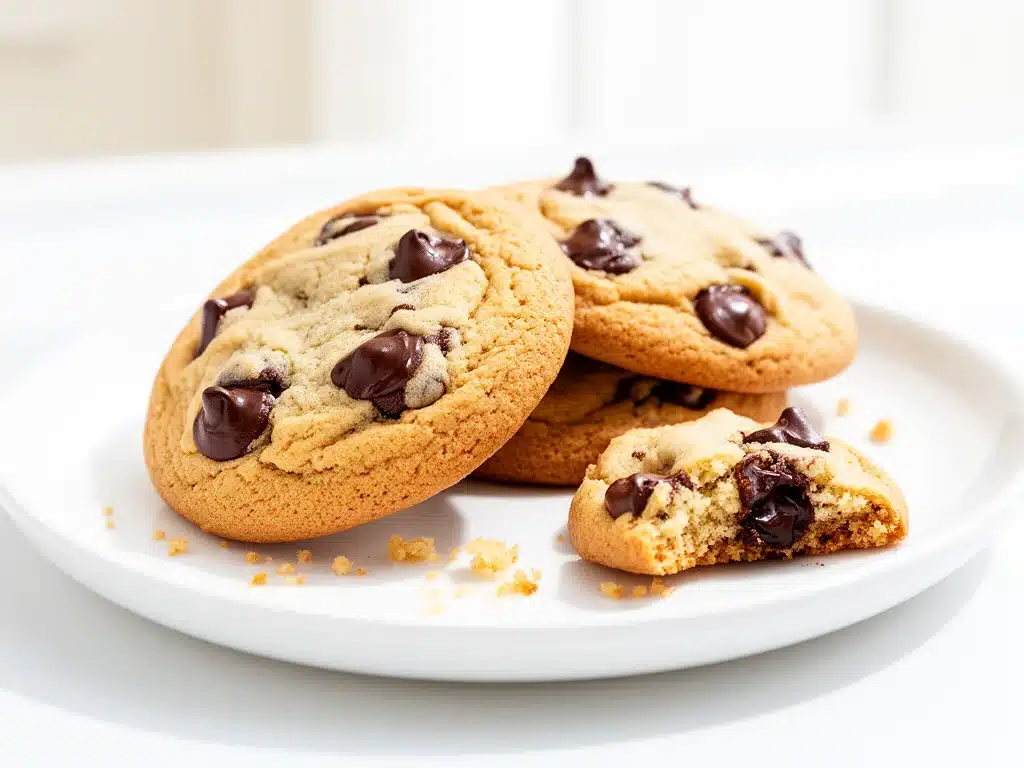
Last September, I found myself standing in the kitchen at 7:30 a.m., desperately trying to throw together something better than store-bought cookies for my kids’ lunchboxes. The clock was ticking, and the usual crunchy cookies were met with polite nods but little enthusiasm. That’s when I decided to whip up a batch of soft chocolate chip cookies—something tender, chewy, and just sweet enough to make their eyes light up when they opened their lunch.
These back-to-school soft lunchbox chocolate chip cookies quickly became the highlight of their day. I’ve made them over and over (sometimes twice a week) because, honestly, they’re that good. They’re soft enough to avoid any cracked teeth during recess but packed with ooey-gooey chocolate chips that keep the smiles coming. After testing this recipe about a dozen times, I finally nailed the balance of softness and flavor that kids—and adults—crave.
Here’s the thing: these cookies aren’t just another chocolate chip cookie. They’re the secret weapon in my back-to-school arsenal, right alongside our turkey and cheese pinwheels and homemade mac and cheese. Soft, sweet, and perfectly sized for little hands, these cookies are the kind of treat that makes lunchboxes unforgettable.
Why You’ll Love This Recipe
This recipe has totally transformed my approach to lunchbox treats. Here’s why I keep coming back to it:
- Soft and Chewy Every Time — I’ve burned these twice before perfecting the bake time. Now they come out soft, never dry or overly crispy, which my kids absolutely adore.
- Simple Ingredients — No weird stuff here. Just pantry staples like butter, brown sugar, and plenty of chocolate chips. I make these when I’m running low on time and ingredients.
- Kid-Tested, Mom-Approved — I’ve made these for picky eaters and even my teenager who claims to “not really like sweets.” Spoiler: they ask for seconds.
- Perfect Lunchbox Size — I make them smallish (think two bites) so they’re easy to pack and don’t overwhelm the lunch. Plus, they stay soft until lunchtime if packed right.
- Great for Meal Prep — I bake a batch on Sunday and stash them in an airtight container. They last all week and sometimes disappear faster than I expect.
This recipe is my go-to when I want a cookie that feels homemade but can survive the chaos of a school day. It’s the sweet pause in a busy morning that my kids genuinely look forward to.
Ingredients You’ll Need
Here’s the best part: you probably have most of this already. These ingredients come together to create that perfect soft texture and rich flavor.
- Unsalted butter (1 cup / 227g, softened) — Softened, not melted. Using unsalted lets me control the salt better. I learned the hard way that melted butter makes cookies spread too thin.
- Brown sugar (¾ cup packed / 150g) — This is the magic behind the softness and chewiness. Dark brown sugar adds a deeper molasses flavor if you want a richer cookie.
- Granulated sugar (¼ cup / 50g) — Balances the brown sugar and helps with a slight crisp edge.
- Large egg (1) — Room temperature is best. It helps with binding and texture.
- Vanilla extract (2 teaspoons) — Real vanilla makes a big difference. I usually grab Nielsen-Massey when I can.
- All-purpose flour (2 cups / 250g) — I sift it to avoid lumps. Some days I replace ¼ cup with whole wheat for a nuttier flavor.
- Baking soda (1 teaspoon) — The rising agent that gives a little lift without puffing the cookies too much.
- Salt (½ teaspoon) — Enhances flavor. Don’t skip it!
- Semi-sweet chocolate chips (1 ½ cups / 270g) — The star of the show. I’m loyal to Ghirardelli chips for their melt and flavor.
- Optional: Rolled oats (½ cup / 45g) — Adds a bit of chew and fiber if you want to sneak in some extra nutrition without sacrificing softness.
Quick note: I keep a batch of softened butter in the fridge during cookie season because it saves me time. If you want to swap chocolate chips for chunks or even mini chips, go for it—it’s your kitchen!
Equipment Needed
You don’t need fancy gear for these cookies. Here’s what I actually use:
- Mixing bowls — One large for wet ingredients and one for dry. I use glass bowls because they’re easy to clean and don’t hold onto odors.
- Electric mixer — I love my handheld mixer, but you can mix by hand if you’re feeling ambitious (or out of luck).
- Measuring cups and spoons — Accuracy matters, especially with baking soda and salt.
- Baking sheets — Two standard rimmed sheets. I line them with parchment paper—trust me, it’s a game-changer for easy cleanup and even baking.
- Cooling rack — Letting these cookies cool properly keeps them soft but not soggy.
- Spoon or cookie scoop — I use a small cookie scoop for uniform size. It helps the cookies bake evenly and look adorable.
Don’t have parchment paper? Grease the pan lightly, but watch the cookies—they might brown faster on the bottom.
How to Make It: Step-by-Step
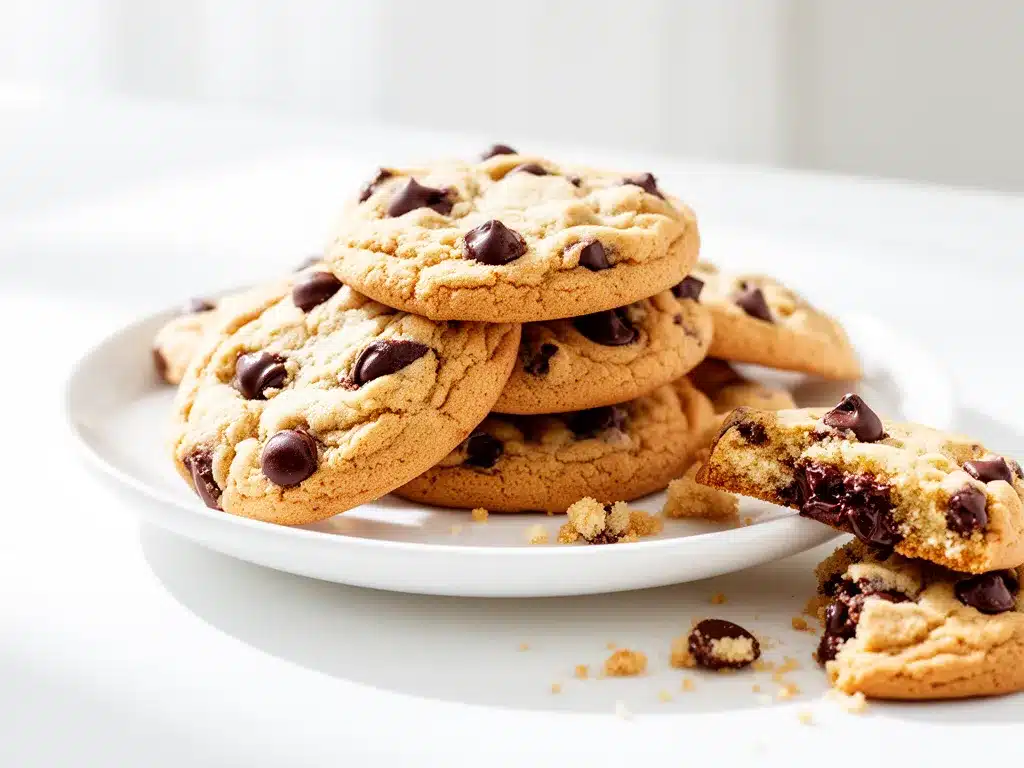
Alright, let’s dive in! I’m walking you through exactly how I make these soft chocolate chip cookies, including the little tricks I’ve learned.
Step 1: Preheat and Prep (5 minutes)
Set your oven to 350°F (175°C) and line your baking sheets with parchment paper. This little step makes all the difference in getting a soft bottom and easy cookie release.
Step 2: Cream Butter and Sugars (3-4 minutes)
In a large bowl, beat the softened butter, brown sugar, and granulated sugar together until light and fluffy. This usually takes about 3-4 minutes with an electric mixer. You’ll notice it gets pale and creamy—that’s exactly what you want.
Step 3: Add Egg and Vanilla (1 minute)
Beat in the egg and vanilla extract until fully combined. The batter will look glossy and smooth now.
Step 4: Combine Dry Ingredients (2 minutes)
In a separate bowl, whisk together the flour, baking soda, and salt. If you’re adding oats, mix them in here. Sifting helps prevent clumps and keeps the texture light.
Step 5: Mix Dry into Wet (2-3 minutes)
Gradually add the dry ingredients to the wet mixture. Mix on low speed or fold by hand until just combined. Overmixing can make cookies tough, so stop as soon as you see no more flour.
Step 6: Fold in Chocolate Chips (1-2 minutes)
Stir in the chocolate chips evenly. I like to reserve a handful to press on top of the dough balls before baking—it makes them look irresistible.
Step 7: Scoop and Bake (10-12 minutes)
Use a small cookie scoop or spoon to drop rounded tablespoons of dough about 2 inches apart on the baking sheets. Press a couple of chocolate chips on top if you like. Bake for 10-12 minutes until the edges are set but the centers look slightly underbaked. This is key for softness.
Step 8: Cool Properly (15 minutes)
Let the cookies cool on the baking sheet for 5 minutes—this helps them set without getting hard. Then transfer to a cooling rack to finish cooling. If you can wait that long.
Quick tip: If you want to prep ahead, freeze the cookie dough balls on a tray, then transfer to a zip-top bag. Bake straight from frozen, adding 2-3 extra minutes to the bake time.
Expert Tips & Tricks
Here’s everything I’ve learned from making these cookies dozens of times. These tips will save you from my mistakes.
- Don’t overbake — The secret to soft cookies is pulling them out when the centers are just set but still look a little gooey. They firm up as they cool.
- Use brown sugar generously — It locks in moisture and gives that chewy bite everyone loves.
- Softened butter, not melted — Melted butter causes flat, crispy cookies. Soft but still solid butter gives the perfect rise and texture.
- Resist the urge to flatten dough balls — The dough spreads enough on its own. Flattening makes them thin and crispy.
- Press some chocolate chips on top — It’s a small touch that makes the cookies look bakery-worthy and extra chocolatey.
- Store properly — Keep cookies in an airtight container with a slice of bread inside to maintain softness. The bread absorbs excess air moisture and keeps cookies tender.
- Try adding a pinch of cinnamon — It adds warmth and depth without overpowering the chocolate.
Variations & Substitutions
Once you’ve nailed the classic, here’s how you can mix it up. I’ve tried all these with great results.
- Oatmeal Chocolate Chip Cookies — Add ½ cup rolled oats for extra chew and fiber. My kids love the texture, and it pairs perfectly with the soft cookie base.
- Peanut Butter Chocolate Chip — Swap half the butter for creamy peanut butter. It adds richness and a hint of nutty flavor.
- Gluten-Free — Use a 1:1 gluten-free baking flour blend. The texture changes slightly but stays soft and delicious.
- Dairy-Free — Replace butter with vegan butter and use dairy-free chocolate chips. I tested this for a friend, and it’s surprisingly good.
- Mini Cookies — Make smaller dough balls for bite-sized treats perfect for lunchboxes or snack platters.
- Add-ins — Toss in chopped nuts, dried cranberries, or even white chocolate chunks for variety.
Serving & Storage
I usually pack these soft chocolate chip cookies in my kids’ lunchboxes wrapped individually in parchment paper or a reusable silicone pouch to keep them from sticking together. They travel well and stay soft until lunchtime if stored properly.
Here are some of my favorite ways to serve and store them:
- Serve with milk or a thermos of hot chocolate — It’s the ultimate cozy combo for after school.
- Pair with savory lunchbox favorites — Like the turkey and cheese pinwheels or crunchy ranch chicken wraps for a balanced meal.
- Store in an airtight container at room temperature for up to 5 days. If you want to keep them soft longer, add a slice of fresh bread to the container.
- Freeze baked cookies — Wrap individually and freeze for up to 3 months. Thaw at room temperature or pop in the microwave for 10 seconds before eating.
Nutrition Information
I’m not a nutritionist, but here’s a quick breakdown for those tracking calories or macros. This is based on 24 small cookies.
| Nutrient | Per Cookie |
|---|---|
| Calories | 90 |
| Protein | 1g |
| Carbohydrates | 12g |
| Fiber | 0.3g |
| Sugar | 7g |
| Fat | 4.5g |
| Saturated Fat | 2.5g |
| Cholesterol | 10mg |
| Sodium | 70mg |
| Calcium | 20mg |
Look, these are treats—soft and sweet, not health food. But they’re homemade, so you know exactly what’s inside. Adding oats or swapping some flour for whole wheat can boost nutrition without sacrificing softness.
Final Thoughts
So that’s my back-to-school soft lunchbox chocolate chip cookies recipe! I’ve probably talked your ear off, but when you make a recipe this often, you collect a lot of tips and tweaks.
This recipe has saved many hectic mornings by giving me a reliable, kid-approved cookie that travels well and tastes amazing. It’s my answer to the “I want something sweet” lunchbox request without reaching for pre-packaged snacks. My kids are happy, and I’m happy because I’m not scrambling for a last-minute dessert.
Make it yours! Try adding a dash of cinnamon or swapping in your favorite chocolate chips. The best recipes are the ones you tweak for your family’s tastes.
If you make these cookies, drop a comment and let me know how they turned out! I love hearing from you, and if you hit any snags, I’m here to help troubleshoot.
Happy baking! And may your kitchen smell as warm and comforting as mine does right now.
Frequently Asked Questions
Q: Can I use melted butter instead of softened butter?
A: You can, but the texture will change. Melted butter causes the cookies to spread out too thin and become crispy instead of soft and chewy. I learned this the hard way when my first batch looked more like cookie pancakes. Stick to softened butter for best results.
Q: How do I keep my cookies soft in the lunchbox?
A: Pack them in an airtight container or wrap individually in parchment paper. Adding a slice of fresh bread to the container helps keep moisture in, preventing the cookies from drying out. Avoid plastic bags without ventilation—they tend to make cookies soggy.
Q: Can I freeze the cookie dough?
A: Absolutely! Scoop the dough onto a tray and freeze until solid, then transfer to a freezer-safe bag. When you want cookies, bake them straight from frozen, adding a couple extra minutes to the baking time. It’s perfect for busy mornings.
Q: My cookies came out flat and greasy. What happened?
A: Most likely your butter was too warm or melted when you mixed the dough. Softened butter should be solid but pliable. Also, make sure you’re measuring flour correctly—too little flour can cause spreading. I recommend spooning flour into your measuring cup and leveling it off rather than scooping directly.
Q: Can I substitute chocolate chips for something else?
A: Yes! You can use chunks of chocolate, white chocolate chips, or even dried fruit like cranberries or raisins. Just keep the amount similar to maintain the cookie balance. I’ve also added chopped nuts for crunch.
Q: Why are my cookies hard after cooling?
A: Overbaking is usually the culprit. Take them out as soon as the edges are set and the centers still look slightly underbaked. Let them cool on the pan for a few minutes before moving to a rack. Also, storing them with a slice of bread helps keep them soft.
Q: Can I make these cookies vegan?
A: You can! Replace butter with vegan butter and use a flax egg (1 tablespoon ground flaxseed + 3 tablespoons water, chilled) instead of the egg. Swap chocolate chips for dairy-free versions. I tested this for a friend and it worked well, though the texture is slightly different.
Pin This Recipe!


Back-to-School Soft Chocolate Chip Cookies Recipe Kids Will Love
- Total Time: 22 minutes
- Yield: 24 small cookies 1x
Description
Soft, chewy chocolate chip cookies perfect for lunchboxes, loved by kids and adults alike. These cookies are tender, sweet, and easy to make with simple pantry ingredients.
Ingredients
- 1 cup (227g) unsalted butter, softened
- 3/4 cup (150g) packed brown sugar
- 1/4 cup (50g) granulated sugar
- 1 large egg, room temperature
- 2 teaspoons vanilla extract
- 2 cups (250g) all-purpose flour, sifted
- 1 teaspoon baking soda
- 1/2 teaspoon salt
- 1 1/2 cups (270g) semi-sweet chocolate chips
- Optional: 1/2 cup (45g) rolled oats
Instructions
- Preheat oven to 350°F (175°C) and line baking sheets with parchment paper.
- In a large bowl, beat softened butter, brown sugar, and granulated sugar together until light and fluffy, about 3-4 minutes.
- Beat in the egg and vanilla extract until fully combined and glossy.
- In a separate bowl, whisk together flour, baking soda, salt, and oats if using.
- Gradually add dry ingredients to wet mixture, mixing on low speed or folding by hand until just combined.
- Fold in chocolate chips evenly, reserving some to press on top of dough balls if desired.
- Use a small cookie scoop or spoon to drop rounded tablespoons of dough about 2 inches apart on baking sheets. Press a few chocolate chips on top.
- Bake for 10-12 minutes until edges are set but centers look slightly underbaked.
- Let cookies cool on baking sheet for 5 minutes, then transfer to a cooling rack to cool completely.
Notes
Do not overbake to keep cookies soft; pull them out when centers are slightly underbaked. Use softened butter, not melted, to avoid flat cookies. Press chocolate chips on top for a bakery look. Store in airtight container with a slice of bread to maintain softness. Dough can be frozen and baked from frozen with extra 2-3 minutes baking time.
- Prep Time: 10 minutes
- Cook Time: 10-12 minutes
- Category: Dessert
- Cuisine: American
Nutrition
- Serving Size: 1 small cookie
- Calories: 90
- Sugar: 7
- Sodium: 70
- Fat: 4.5
- Saturated Fat: 2.5
- Carbohydrates: 12
- Fiber: 0.3
- Protein: 1
Keywords: soft chocolate chip cookies, lunchbox cookies, back to school cookies, chewy cookies, kid-friendly cookies


