
One late afternoon last fall, I found myself staring at a fridge full of random pizza toppings and a lonely loaf of bread. My kids had just stormed in from school, hungry and cranky, and I needed something fast but satisfying. I wasn’t about to pull out the takeout menus, so I threw together what I thought would be a simple snack—little did I know, this After-School Cheesy Pizza Pull-Apart Bread was about to become a household legend.
It’s got all the best parts of pizza—gooey cheese, tangy sauce, and pepperoni—wrapped up in this fun, shareable pull-apart loaf. And honestly? It’s the kind of recipe that sneaks up on you. One pull, one bite, and suddenly everyone’s gathered around the kitchen counter, fingers sticky and smiles wide. I’ve made it over a dozen times since that day, and it’s saved me from more than one hanger-fueled meltdown.
Here’s the thing about this cheesy pizza pull-apart bread: it’s easy enough to throw together on a school night, but special enough that the whole family actually looks forward to it. I’m talking about a recipe that works as an after-school snack, a casual dinner, or even a game-day treat. Over the years, I’ve tweaked the balance of sauce, cheese, and spices until it hits just the right note of melty, savory, and fun. This is one you’ll want to keep in your back pocket.
Why You’ll Love This After-School Cheesy Pizza Pull-Apart Bread Recipe
This cheesy pizza pull-apart bread has totally changed how I handle those chaotic afternoons when hunger and crankiness collide.
- Super Kid-Friendly — My picky eaters (and their friends) can’t get enough. It’s hands-on, fun to eat, and packed with familiar pizza flavors they already love.
- Quick to Make — From fridge to table in under 30 minutes. I’ve whipped this up right after school while helping with homework and it’s never a scramble.
- Customizable — Whether you’re a pepperoni fan, veggie lover, or cheese enthusiast, this bread adapts. I’ve even tossed in some spinach and olives for a sneaky veggie boost.
- Shareable and Social — It’s perfect for family nights or casual get-togethers. Everyone grabs a piece, which keeps the vibe easy and relaxed.
- Minimal Ingredients — You probably have most of these in your pantry or fridge already. I keep pizza sauce, shredded mozzarella, and a sturdy loaf on hand just for days like this.
- Great Leftovers — Cold or reheated, leftovers are still delicious. I often pack slices for my kids’ lunchboxes—they love it even the next day.
This recipe is the answer to those “What’s for snack/dinner?” moments that can feel so overwhelming. It’s comforting, cheesy, and just plain fun to eat. Honestly, it’s one of the few things that makes everyone at my house happy without me breaking a sweat.
Ingredients You’ll Need
Here’s the best part: this recipe looks impressive but only calls for simple, easy-to-find ingredients. I’ve got a few personal favorites and tips for you along the way.
- Loaf of Italian or French bread (1 large loaf / about 12-14 inches) — Choose a crusty but soft bread that pulls apart easily. I like using a rustic Italian loaf because it holds up well without getting soggy.
- Pizza sauce (1 cup / 240ml) — Use your favorite store-bought or homemade sauce. I keep a jar of classic marinara on hand, but a spicy arrabbiata works if you want a little heat.
- Shredded mozzarella cheese (2 cups / 200g) — Freshly shredded melts best. I buy blocks and grate it myself because pre-shredded has that anti-caking stuff that can affect meltiness.
- Pepperoni slices (1 cup / about 25 slices) — Classic, but feel free to swap for cooked sausage, ham, or keep it veggie.
- Grated Parmesan cheese (½ cup / 50g) — Adds a sharp, salty kick on top before baking. Worth it for that flavor boost.
- Dried Italian seasoning (1 teaspoon) — A blend of oregano, basil, and thyme rounds out the flavor.
- Garlic powder (½ teaspoon) — Adds a subtle savory depth without overpowering.
- Butter (4 tablespoons / 60g, melted) — Brushed over the bread for richness and helps everything brown nicely.
- Fresh basil or parsley (optional, for garnish) — Adds freshness and color when you serve.
Pro tip: I like to keep a jar of pizza sauce and shredded mozzarella on hand, which makes this an easy throw-together snack any time. If you want to mix things up, try swapping pepperoni for cooked chicken or olives. This recipe is flexible.
Equipment Needed
You don’t need fancy gear here—just the basics you probably already have.
- Baking sheet or pizza stone — I use a rimmed baking sheet lined with parchment to catch any drips. A pizza stone works great if you have one.
- Sharp knife — For slicing the bread in a crosshatch pattern. A serrated bread knife works best here.
- Basting brush — To brush on the melted butter evenly. If you don’t have one, a spoon or your fingers work fine.
- Mixing bowl — To combine the cheese and seasonings before stuffing the bread.
- Measuring cups and spoons — For accuracy, but eyeballing works too if you’re in a hurry.
Quick note: I’ve made this with just a sheet pan and a bread knife from my college days, so don’t stress if your kitchen is basic. It will still turn out great.
How to Make It: Step-by-Step
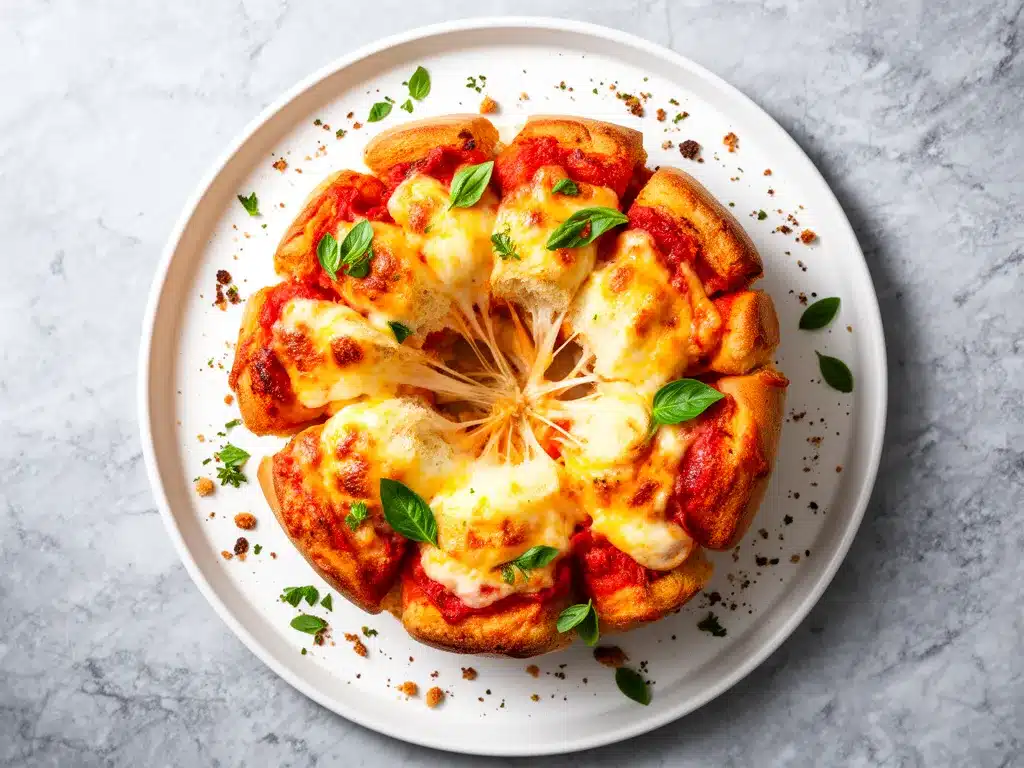
Alright, let’s get into the good stuff. I’m walking you through exactly how I make this after-school cheesy pizza pull-apart bread, including the little tricks that make it pop.
Step 1: Prep the Bread (5 minutes)
Place your loaf on a cutting board. Using a serrated knife, carefully slice the bread vertically about ¾ of the way down, then horizontally across, creating a grid pattern. Don’t cut all the way through—leave about half an inch at the bottom so the loaf holds together. The goal is to create little “pockets” to stuff with cheese and pepperoni.
Step 2: Mix the Cheese Filling (3 minutes)
In a bowl, combine the shredded mozzarella, Italian seasoning, and garlic powder. Toss together so the seasoning is evenly distributed. This step ensures every bite is flavorful.
Step 3: Stuff the Bread (5-7 minutes)
Carefully pull apart each section of the bread just enough to stuff in a spoonful of pizza sauce, a pinch of the cheese mixture, and a slice or two of pepperoni. I like to work methodically, filling each gap so every piece is loaded. It’s messy but so worth it.
Step 4: Brush with Butter and Top with Parmesan (2 minutes)
Mix the melted butter with a little extra Italian seasoning if you like. Brush this all over the outside of the loaf, especially the top and sides. Then sprinkle the grated Parmesan cheese over the top. This gives the bread a golden, crispy crust and an extra layer of flavor.
Step 5: Bake (15-18 minutes)
Place the stuffed loaf on a baking sheet and pop it in a preheated oven at 375°F (190°C). Bake until the cheese is melted, the sauce is bubbly, and the top is golden brown. You’ll know it’s ready when the bread looks crispy and smells irresistible.
Step 6: Garnish and Serve (2 minutes)
Let the bread cool for a couple of minutes, then sprinkle with fresh basil or parsley if you have it. Serve warm and watch everyone dive in, pulling apart cheesy, saucy pieces.
Expert Tips & Tricks
- Don’t skip the butter — It might seem minor, but brushing melted butter on the outside before baking makes the crust golden and irresistible.
- Cut carefully — Use a serrated knife and don’t slice all the way through the bread to keep it from falling apart.
- Stuff generously — Don’t be shy with sauce and cheese. The pockets should be bursting but not dripping. A little mess is part of the fun.
- Customize your fillings — I often add cooked sausage or sautéed mushrooms instead of pepperoni. Try a mix of cheeses like mozzarella and provolone for extra gooeyness.
- Make it ahead — You can prep the stuffed loaf the day before and bake it fresh when ready. Just cover tightly with foil and refrigerate overnight.
- Watch the oven — Baking times vary slightly depending on your oven and bread size. Start checking at 15 minutes to avoid burning.
Variations & Substitutions
Once you’ve got the basic cheesy pizza pull-apart bread down, try mixing it up.
- Veggie Lover’s — Swap pepperoni for a mix of sautéed bell peppers, olives, and spinach. Adds color and sneaky nutrition.
- Meat Feast — Add cooked Italian sausage or bacon bits with the pepperoni for a heartier version.
- Spicy Kick — Add red pepper flakes or chopped jalapeños to the cheese mixture for some heat.
- Cheese Blend — Mix mozzarella with sharp cheddar or gouda for a different flavor profile.
- Gluten-Free — Use a gluten-free bread loaf, though it won’t pull apart quite the same.
- Dairy-Free — Substitute vegan cheese and use a dairy-free butter alternative. Texture changes but still tasty.
Serving & Storage
This pull-apart bread is best enjoyed warm and fresh, but leftovers are still a crowd-pleaser.
- Serving Suggestions — Pair it with a simple green salad or crunchy ranch chicken wraps for a full meal. I love that you can also set out extra pizza sauce for dipping.
- Storage — Store leftovers in an airtight container in the fridge for up to 3 days. The bread will firm up but can be reheated easily.
- Reheating — Warm in the oven at 350°F (175°C) for 10 minutes or microwave in short bursts with a damp paper towel to keep it from drying out.
- Freezing — I don’t recommend freezing stuffed bread—it tends to get soggy. Make fresh for best results.
Nutrition Information
I’m not a nutritionist, but here’s a rough idea per serving (based on 8 servings):
| Nutrient | Amount |
|---|---|
| Calories | 320 |
| Protein | 14g |
| Carbohydrates | 28g |
| Fat | 16g |
| Saturated Fat | 7g |
| Sodium | 580mg |
| Fiber | 2g |
This recipe is a comforting, cheesy treat with decent protein and carbs to keep you fueled. It’s definitely indulgent, thanks to the cheese and butter, but perfect for those after-school hunger pangs or casual dinners.
Final Thoughts
So that’s my After-School Cheesy Pizza Pull-Apart Bread—a recipe born out of necessity but perfected through love (and many hungry kids). It’s become my go-to when I want something easy, fun, and totally satisfying without the hassle of delivery or complicated cooking.
What I love most is how this recipe brings everyone together—literally reaching in to grab their favorite cheesy, saucy piece. It’s a reminder that food doesn’t have to be fancy to be memorable.
Make it your own! Add your favorite toppings, switch up the cheeses, or serve it alongside something fresh like a green salad or even a batch of crunchy ranch chicken wraps for a full meal. And if you want a kid-friendly lunchbox idea to pair with this kind of comfort food vibe, the turkey and cheese pinwheel recipe is a great option.
If you make this, please drop a comment and tell me how it turned out! I love hearing your twists and tips (or mishaps). Happy baking—and may your after-school hours be filled with melted cheese and smiles!
Frequently Asked Questions
Q: Can I use a different kind of bread?
A: Absolutely! Any sturdy loaf that’s not too dense works well. Rustic Italian, French baguettes, or even sourdough are great. Just make sure it’s fresh enough to pull apart but firm enough to hold the fillings.
Q: What if I don’t have pepperoni?
A: No worries! Swap in cooked sausage, ham, veggies, or just extra cheese. I’ve made this with sautéed mushrooms and spinach and it’s delicious. The key is to have something flavorful to complement the cheese and sauce.
Q: Can I prepare this ahead of time?
A: Yes! You can stuff the bread and cover it with foil, then refrigerate it for up to 24 hours before baking. Just add a couple of extra minutes to the baking time if it’s cold from the fridge.
Q: How do I keep the bread from getting soggy?
A: Be careful not to overdo the sauce. A tablespoon per pocket is plenty. Also, brushing the outside with melted butter helps create a barrier and adds crunch. Baking it until golden is key.
Q: Can I make this vegan or dairy-free?
A: You can swap mozzarella and Parmesan for vegan cheese alternatives and use a plant-based butter. The texture won’t be exactly the same, but it still works well if you’re avoiding dairy.
Q: What’s the best way to reheat leftovers?
A: Pop leftovers in a 350°F (175°C) oven for 10 minutes or microwave in short bursts with a damp paper towel to keep moisture. Avoid reheating too long or it dries out.
Q: Can I double the recipe for a bigger crowd?
A: Definitely! Double or even triple the ingredients, and bake stuffed loaves on multiple sheet pans. Makes great party food or meal prep for the week.
Pin This Recipe!

After-School Cheesy Pizza Pull-Apart Bread
- Total Time: 30-33 minutes
- Yield: 8 servings 1x
Description
A fun, shareable pull-apart bread loaded with gooey cheese, tangy pizza sauce, and pepperoni. Perfect for after-school snacks, casual dinners, or game-day treats.
Ingredients
- 1 large loaf Italian or French bread (about 12–14 inches)
- 1 cup (240 ml) pizza sauce
- 2 cups (200 g) shredded mozzarella cheese
- 1 cup (about 25 slices) pepperoni slices
- ½ cup (50 g) grated Parmesan cheese
- 1 teaspoon dried Italian seasoning
- ½ teaspoon garlic powder
- 4 tablespoons (60 g) melted butter
- Fresh basil or parsley (optional, for garnish)
Instructions
- Place the loaf on a cutting board. Using a serrated knife, slice the bread vertically about ¾ of the way down, then horizontally across, creating a grid pattern. Do not cut all the way through; leave about half an inch at the bottom so the loaf holds together.
- In a mixing bowl, combine shredded mozzarella, Italian seasoning, and garlic powder. Toss to evenly distribute the seasoning.
- Carefully pull apart each section of the bread just enough to stuff in a spoonful of pizza sauce, a pinch of the cheese mixture, and one or two slices of pepperoni. Fill each gap generously.
- Mix melted butter with a little extra Italian seasoning if desired. Brush the butter mixture all over the outside of the loaf, especially the top and sides. Sprinkle grated Parmesan cheese over the top.
- Place the stuffed loaf on a baking sheet and bake in a preheated oven at 375°F (190°C) for 15-18 minutes, until the cheese is melted, sauce is bubbly, and the top is golden brown.
- Let the bread cool for 2 minutes, then garnish with fresh basil or parsley if using. Serve warm and enjoy.
Notes
Do not cut all the way through the bread to keep it intact. Brush melted butter on the outside before baking for a golden crust. Stuff pockets generously but avoid over-saucing to prevent sogginess. Can be prepared ahead and refrigerated before baking. Reheat leftovers in a 350°F oven for 10 minutes or microwave with a damp paper towel.
- Prep Time: 15 minutes
- Cook Time: 15-18 minutes
- Category: Snack
- Cuisine: Italian-American
Nutrition
- Serving Size: 1/8 of the loaf
- Calories: 320
- Sodium: 580
- Fat: 16
- Saturated Fat: 7
- Carbohydrates: 28
- Fiber: 2
- Protein: 14
Keywords: pizza pull-apart bread, cheesy bread, after-school snack, pepperoni bread, easy pizza recipe, kid-friendly snack, pull-apart bread


