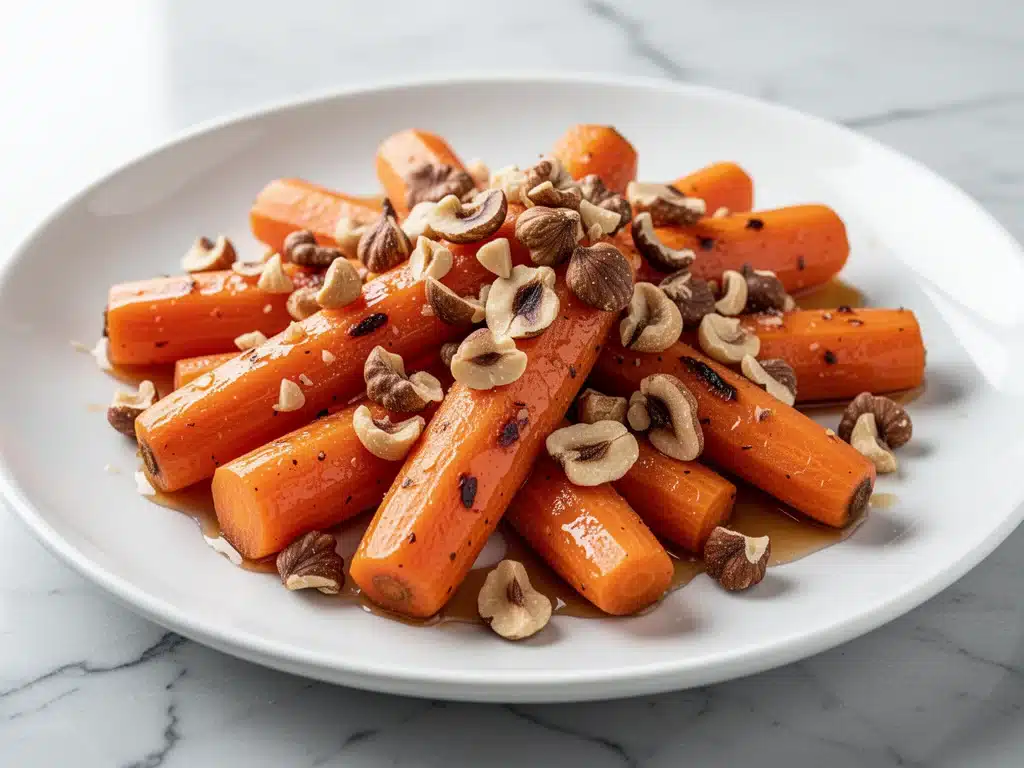
There is a specific kind of panic that sets in around 4 PM on Thanksgiving. You’re staring at a turkey that just came out of the oven, a mountain of mashed potatoes that needs to stay warm, and a cranberry sauce that looks suspiciously like it came out of a can. And then there’s the vegetables. The forgotten stepchildren of the holiday meal.
For years, my family’s Thanksgiving was defined by what I called “the sad green bean casserole.” You know the one—canned soup, fried onions, and a texture that defies physics. It was filling, sure, but it wasn’t memorable. That changed three years ago when I decided to finally do something right with the carrots. I was looking for something that felt distinctly Canadian—earthy, warm, and not overly sweet like the American-style marshmallow-topped versions we see in movies.
I wanted carrots that tasted like the season. I wanted them to have a bit of crunch, a deep savory-sweet glaze, and a nutty finish that made people stop chewing long enough to ask, “Wait, what is in this?” So, I started experimenting. I tried roasting them until they were mush. I tried steaming them until they were bland. I even tried boiling them in maple syrup, which was a sticky, sugary disaster.
Then I found the sweet spot. Sautéing them first to get some color, then finishing them in a glaze of pure maple syrup and butter, and finally tossing them with toasted hazelnuts. The result? These Canadian Thanksgiving Maple Glazed Carrots with Toasted Hazelnuts. They are glossy, tender but not mushy, and the hazelnuts add this incredible earthy crunch that cuts through the sweetness perfectly. My brother-in-law, who usually ignores anything orange on the plate, cleared his bowl. That’s the moment I knew this was the one.
Now, this maple glazed carrot recipe is the only vegetable dish I make with any real intention. It’s elegant enough for guests but simple enough that I’m not standing over the stove when the turkey is resting. It’s the side dish that saves Thanksgiving, and once you try it, I promise you’ll never go back to canned green beans.
Why You’ll Love This Maple Glazed Carrot Recipe
There are about ten reasons I keep making this for every gathering, but if you’re skeptical about swapping out your usual side, here are the big ones. This isn’t just “carrots with sugar.” It’s a balanced, sophisticated dish that highlights the natural flavor of the vegetable rather than masking it.
It’s Actually Crunchy — Most holiday carrots are overcooked mush. I use a two-step cooking method that keeps a slight bite. The hazelnuts add extra texture, so every spoonful has a contrast that keeps your palate interested. It’s not just soft; it’s interesting.
Real Maple, Not Syrup — I’m very particular about this. You need real maple syrup (Grade A or B), not the pancake syrup stuff that’s mostly corn syrup and red dye. The flavor difference is massive. Real maple has those vanilla and wood notes that make the dish taste expensive. I keep a bottle of 100% pure maple syrup in my pantry specifically for this.
Prep is Under 15 Minutes — I’m a big fan of sides that don’t require babysitting. While the turkey rests or the potatoes mash, I throw these together in about 15 minutes of active time. They cook in a skillet, which means less dirty dishes. I love a side dish that respects my time.
It’s Naturally Gluten-Free — Thanksgiving can be tricky for dietary restrictions. This recipe is naturally gluten-free (just double-check your maple syrup brand, though most are fine). It’s also vegetarian and vegan-friendly if you swap the butter for olive oil or vegan butter. I’ve served this to my gluten-sensitive friends, and they never miss the bread.
Leftovers are Surprisingly Good — I know, I know. Leftover Thanksgiving food is usually just cold turkey on bread. But these carrots? They hold up well. The glaze thickens in the fridge, and the hazelnuts stay crunchy if you store them separately. I’ve actually eaten these cold the next day for lunch, and they were delicious. Okay, maybe that’s just me, but it means less waste.
This is my go-to when I need a side dish that looks impressive but doesn’t require a culinary degree. It’s reliable, delicious, and makes everyone happy—even the pickiest eaters at the table.
Ingredients You’ll Need
Here’s the best part: you probably have most of this already, or it’s something you grab on the way home. I’m particular about three ingredients here, and I’ll tell you exactly why. This isn’t a long list, and it’s mostly pantry basics.
Carrots (2 pounds / 900g) — I prefer medium-sized carrots because they cook evenly. Baby carrots work, but I find they’re often pre-soaked and can be a bit watery. Look for carrots that are firm and bright orange. If you can find organic, even better, since we’re eating the skin (just scrub them well). Peeled or unpeeled is your call, but unpeeled has more nutrients.
Butter (3 tablespoons / 45g) — Use unsalted butter so you can control the salt. I use European-style butter if I have it because it’s richer, but regular salted butter works fine too. Just reduce the added salt in the recipe. The butter helps carry the maple flavor and adds that glossy sheen.
Pure Maple Syrup (½ cup / 120ml) — This is the star. Look for the label “100% Pure Maple Syrup.” Avoid anything that says “pancake syrup” or “table syrup.” Grade A Dark Robust or Grade B will give you a deeper, more maple-forward flavor. I like Grade B for cooking because the flavor stands up better to the carrots.
Toasted Hazelnuts (½ cup / 60g) — These add the crunch and earthiness. You can buy them pre-toasted, but toasting them yourself takes 5 minutes and makes a huge difference. Skinned hazelnuts are easier to eat, but you can toast them with the skins on and rub them in a towel afterward to remove most of the skin.
Garlic (2 cloves, minced) — Don’t skip the garlic. It adds a savory depth that balances the sweetness. Fresh garlic only. No jarred stuff here. The flavor is too subtle for the artificial taste of jarred garlic.
Fresh Thyme (1 teaspoon, leaves stripped) — Thyme and carrots are a classic pairing. It adds a floral, earthy note. If you don’t have fresh thyme, ½ teaspoon of dried thyme works, but fresh is best. I always grow thyme in a pot on my windowsill because it’s so useful.
Salt and Black Pepper — Kosher salt is my go-to for cooking. Use about ½ teaspoon of salt, or to taste. Freshly cracked black pepper adds a little heat and visual contrast. I like to see those little black specks in the glaze.
Optional Add-ins:
– Orange zest (1 teaspoon) — Adds a bright citrus note that cuts the richness. Great for spring, but nice here too.
– Cinnamon (¼ teaspoon) — If you’re feeling festive, a pinch of cinnamon works well. But don’t overdo it; you want the maple to shine.
– Parsley (1 tablespoon, chopped) — For a pop of green color. It’s not traditional, but it makes the dish look more vibrant.
Shopping Tips:
– I buy my hazelnuts from the bulk section at the grocery store. It’s cheaper and you get fresher nuts.
– If you can’t find fresh thyme, rosemary works too, but it’s stronger. Use half the amount.
– Keep your maple syrup in the fridge after opening to prevent mold, though it’s not strictly necessary if you use it within a few months.
Equipment Needed
You don’t need fancy equipment for this. Here’s what I actually use.
Large Skillet or Sauté Pan — I use a 12-inch stainless steel skillet. It needs to be wide enough to spread the carrots out in a single layer. If you crowd them, they steam instead of sauté. My non-stick pan works too, but stainless steel gives a better sear.
Vegetable Peeler or Knife — If you’re peeling your carrots, a Y-peeler is fastest. If you’re leaving the skin on, a good vegetable brush is essential. I use a stiff brush to scrub away dirt. Learned this the hard way with a gritty carrot once.
Cutting Board — Any size works. I use a large plastic one because it’s easy to clean. Make sure it’s stable so your carrots don’t slide around while you’re slicing them.
Small Saucepan or Microwave-Safe Bowl — For melting the butter and heating the maple syrup together. I usually do this in the microwave for 30 seconds to make it easier to pour. A small saucepan on low heat works too.
Wooden Spoon or Spatula — For stirring. Silicone works too. Don’t use metal on non-stick pans.
Measuring Cups and Spoons — Pretty standard stuff. Dollar store versions work fine for this.
Colander — For rinsing the carrots. Or just rinse them under the tap in the pan.
Optional but nice:
– Nutcracker or rolling pin — If you’re toasting hazelnuts with skins on, you’ll need to crack them and rub off the skins.
– Zester or Microplane — For the orange zest if you’re adding it.
Tool Tips:
– Don’t have a large skillet? Use two smaller ones and cook in batches. Crowding is the enemy of good texture.
– I’m obsessed with my wooden spoon from IKEA—it’s like $2 and makes life easier.
How to Make It: Step-by-Step
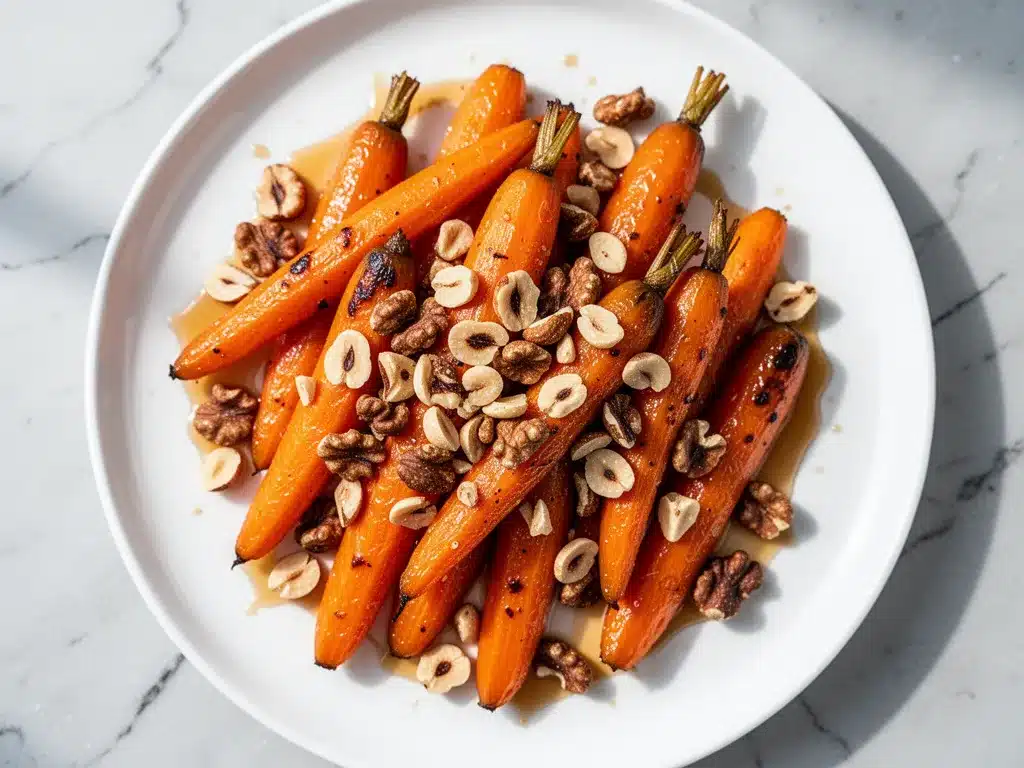
Alright, let’s make this! I’m walking you through exactly how I do it, including the little tricks I’ve picked up over the years.
Step 1: Prep Your Carrots (5-8 minutes)
Wash your carrots thoroughly under cold water. If they’re organic, you can leave the skin on, but scrub them well with a vegetable brush. If they’re conventional, I recommend peeling them. Cut off the tops and tails. Then, slice the carrots into uniform pieces. I like to cut them on a bias (diagonally) because it looks pretty and increases the surface area for the glaze. Cut them into ½-inch thick rounds or batons. Uniform size is key so they cook evenly.
Step 2: Par-Cook the Carrots (8-10 minutes)
Bring a large pot of salted water to a boil. It should taste like the ocean. Add the carrots and cook for 3-5 minutes. You want them to be tender-crisp, not fully soft. They’ll finish cooking in the skillet. Drain them well and set aside. This step ensures they’re cooked through without getting mushy in the glaze. If you skip this, you might end up with burnt carrots or raw centers.
Step 3: Toast the Hazelnuts (3-5 minutes)
While the carrots boil, heat a small skillet over medium heat. Add the hazelnuts in a single layer. Toast them, shaking the pan frequently, for 3-5 minutes until they’re fragrant and lightly browned. Be careful—they burn quickly. Once toasted, transfer them to a cutting board and let them cool slightly. If they have skins, rub them in a clean kitchen towel to remove as much skin as possible. Chop them roughly. You don’t want them powdered, just chunky.
Step 4: Make the Glaze (2 minutes)
In a small saucepan or microwave-safe bowl, combine the butter and maple syrup. Heat until the butter is melted and the mixture is smooth. If using the microwave, do it in 15-second bursts, stirring in between. Set aside. This mixture is your glaze. It should be runny but syrupy.
Step 5: Sauté and Glaze (5-7 minutes)
Heat the large skillet over medium heat. Add a little olive oil or butter if your pan is dry. Add the par-cooked carrots. Sauté them for 2 minutes to get some color. Then, pour the maple-butter glaze over the carrots. Add the minced garlic and fresh thyme. Toss everything together until the carrots are well coated. Let them simmer for 3-4 minutes, stirring occasionally. The glaze will reduce and become thick and glossy. You’ll know it’s ready when the sauce coats the back of a spoon.
Step 6: Finish and Serve (2 minutes)
Remove the skillet from heat. Taste and adjust salt and pepper if needed. Sprinkle the toasted hazelnuts over the top. Toss gently to distribute. Serve immediately while hot. The carrots should be glossy, tender, and fragrant with maple and thyme.
Total Time: About 25 minutes (10 minutes active, 15 minutes mostly hands-off)
Troubleshooting:
– Sauce too thin? Let it simmer longer.
– Sauce too thick? Add a splash of water or broth.
– Garlic burning? Lower the heat immediately. Garlic burns fast.
Expert Tips & Tricks
Here’s everything I’ve learned from making this dozens of times. These tips will save you from my mistakes.
Don’t Skip the Par-Cooking
This is the #1 tip. Raw carrots take a long time to soften, and by the time they do, the glaze is either burnt or evaporated. Par-cooking ensures they’re tender inside. I forgot this once and ended up with hard carrots and a scorched pan. Now I always boil them first.
Toast Your Nuts
Raw hazelnuts are bland. Toasting releases their oils and brings out that nutty flavor. It takes 5 minutes and makes a huge difference. I learned this the hard way with a dish that tasted flat.
Use Real Maple Syrup
Pancake syrup is just sugar water with flavoring. It will make your carrots cloyingly sweet and one-dimensional. Real maple has complexity. I always buy Grade A or B from a reputable brand. It’s worth the extra dollar.
Uniform Cuts
Cutting your carrots into similar sizes ensures even cooking. If you have some thick and some thin pieces, the thin ones will turn to mush before the thick ones are done. Take the time to cut them evenly.
Room Temperature Butter
If your butter is cold, it might clump in the maple syrup. Let it sit out for 10 minutes or microwave it briefly to soften. This helps it emulsify with the syrup for a smoother glaze.
Common Mistakes (and how to avoid them):
Mistake: Carrots are mushy
Fix: Don’t par-cook for too long. 3-5 minutes is enough. They should still have a bite.
Mistake: Glaze is too sweet
Fix: Add more salt and pepper. A pinch of salt cuts the sweetness. Also, make sure you’re using Grade B maple syrup, which is less sweet than Grade A Light.
Mistake: Hazelnuts are burnt
Fix: Toast them on medium-low heat and watch them closely. They burn in seconds. If you’re nervous, toast them in the oven at 350°F for 10 minutes instead.
Pro Tricks I’ve Learned:
For Restaurant-Quality Finish
Add a tablespoon of cold butter at the very end and swirl it in. Makes the sauce glossy and rich. This is a chef trick called “monter au beurre.”
For Extra Flavor
Add a splash of orange juice to the glaze. It brightens the maple flavor. Great for spring, but nice here too.
For Better Texture
Chop the hazelnuts roughly. Tiny bits get lost in the glaze. You want chunks to bite into.
Variations & Substitutions
Once you’ve nailed the basic version, here’s how you can mix it up. I’ve tried all of these.
Pumpkin Seed Version
Swap hazelnuts for toasted pumpkin seeds (pepitas). Adds a different crunch and is nut-free. Great for schools or nut-allergy-friendly gatherings.
Cinnamon-Spiced
Add ½ teaspoon of cinnamon and a pinch of nutmeg to the glaze. Makes it taste like dessert. My kids love this version.
Herb-Forward
Add more fresh herbs. Rosemary or sage works well with maple. Use 1 tablespoon of chopped fresh rosemary.
Lighter Version
Use half the butter and replace with olive oil. Reduce maple syrup to ¼ cup. It’s lighter but still tasty. I make this when I’m trying to be “healthy.”
Vegan Version
Use coconut oil or vegan butter instead of dairy butter. Everything else is naturally vegan. My lactose-intolerant friend requests this version.
Gluten-Free
Everything is naturally gluten-free. Just check your maple syrup label to be sure.
Different Nuts:
– Pecans (toasted)
– Walnuts (toasted)
– Almonds (sliced, toasted)
– Pistachios (for color)
Serving & Storage
How to Serve:
I usually serve this straight from the skillet at the dinner table—it looks rustic and stays warm. But here are other ways I’ve enjoyed it:
Side Dishes:
– Roasted turkey
– Mashed potatoes
– Cranberry sauce
– Stuffing
– Green bean casserole (if you must)
Wine Pairing:
Not a wine expert, but my wine-snob friend says Pinot Noir or Chardonnay works great with this.
Storage Instructions:
Refrigerator:
Store in an airtight container for up to 3 days. The glaze will thicken in the fridge—totally normal.
Reheating:
Best method: Add to a skillet with a splash of water or broth over low heat. Stir until heated through and glossy again.
Microwave method: Heat in 30-second intervals, stirring between. Add a splash of water if it’s too thick.
Freezing:
Honestly, this doesn’t freeze well because of the butter and maple syrup. The texture changes. Make it fresh or store in the fridge for up to 3 days.
Pro tip: If leftovers are drying out, stir in a tablespoon of butter and a splash of milk when reheating. Brings back that creamy texture.
Nutrition Information
I’m not a nutritionist, but here’s the breakdown if you’re tracking.
Per Serving (based on 6 servings):
– Calories: 180
– Protein: 3g
– Carbs: 28g
– Fiber: 4g
– Sugar: 20g
– Fat: 8g
– Saturated Fat: 3g
– Cholesterol: 10mg
– Sodium: 120mg
– Calcium: 60mg
What’s Good:
– High in fiber from carrots and nuts
– Good source of Vitamin A
– Contains healthy fats from hazelnuts
– More filling than it looks
What to Know:
– Higher in sugar from maple syrup
– Contains nuts
– Moderate calories
My Take:
“Look, this is a side dish with maple syrup and butter. It’s not a diet recipe. But it’s way better than takeout, costs less, and I know exactly what’s in it. When I want to make it lighter, I reduce the syrup and use olive oil. But usually? I just eat a reasonable portion and enjoy it.”
Final Thoughts
So that’s my go-to maple glazed carrot recipe! I’ve probably talked your ear off at this point, but when you make a recipe this often, you have a lot to say about it.
This has saved Thanksgiving dinners more times than I can count. It’s my answer to “what’s for dinner” when I’m tired, don’t want takeout, and still want something that tastes really good. My kids are happy, my husband’s happy, and I’m happy because I’m not stressed about cooking.
Make it yours! Try different add-ins, swap in your favorite vegetables, adjust the garlic (though more is always better in my opinion). The best recipes are the ones you adapt to your family’s tastes.
If you make this, drop a comment and let me know what you think! I love hearing how recipes turn out in your kitchen. And if something doesn’t work, tell me that too—I’m here to help troubleshoot.
Happy cooking! And I hope your kitchen smells half as good as mine does right now.
Frequently Asked Questions
Can I use pancake syrup instead of maple syrup?
You can, but the flavor will be one-dimensional and overly sweet. Real maple syrup has depth and complexity that pancake syrup lacks. If you must use pancake syrup, reduce the amount and add a pinch of salt to balance the sweetness. But honestly, real maple is worth the cost.
Why did my glaze turn out watery?
Usually means you didn’t let it simmer long enough to reduce. Let the glaze bubble gently for 3-4 minutes until it coats the back of a spoon. If it’s already watery, turn up the heat and let it reduce for another few minutes. The starch from the carrots will also help thicken it.
Can I make this ahead for a dinner party?
Sort of. You can par-cook the carrots and toast the nuts up to 2 days ahead. Reheat the carrots gently in a skillet with the glaze right before serving. It won’t be quite as good as fresh, but it’s close and saves you stress during the party. I do this all the time.
Why did my hazelnuts burn?
They burn quickly! Toast them on medium-low heat and watch them closely. Shake the pan frequently. If you’re nervous, toast them in the oven at 350°F for 10 minutes instead. They’re done when they’re fragrant and lightly browned.
Can I use frozen carrots?
I don’t recommend it. Frozen carrots are often pre-blanched and can be mushy. Fresh carrots have better texture and flavor. If you must use frozen, thaw them completely and pat them dry before cooking. But fresh is best.
How do I reheat leftovers without it getting dry?
Add a splash of water or broth to a skillet, add your leftover carrots, and heat gently over low heat, stirring frequently. The extra liquid brings back the glossy texture. Microwave sort of works but tends to dry it out. If you do microwave, definitely add a splash of water first and heat in short bursts, stirring between.
Can I double this recipe?
Absolutely! Double everything and use your biggest skillet. The cooking times stay the same. I do this when I’m meal-prepping or feeding a crowd. Just make sure your skillet is big enough for the carrots—you might need to use two pans or a very large skillet.
Pin This Recipe!
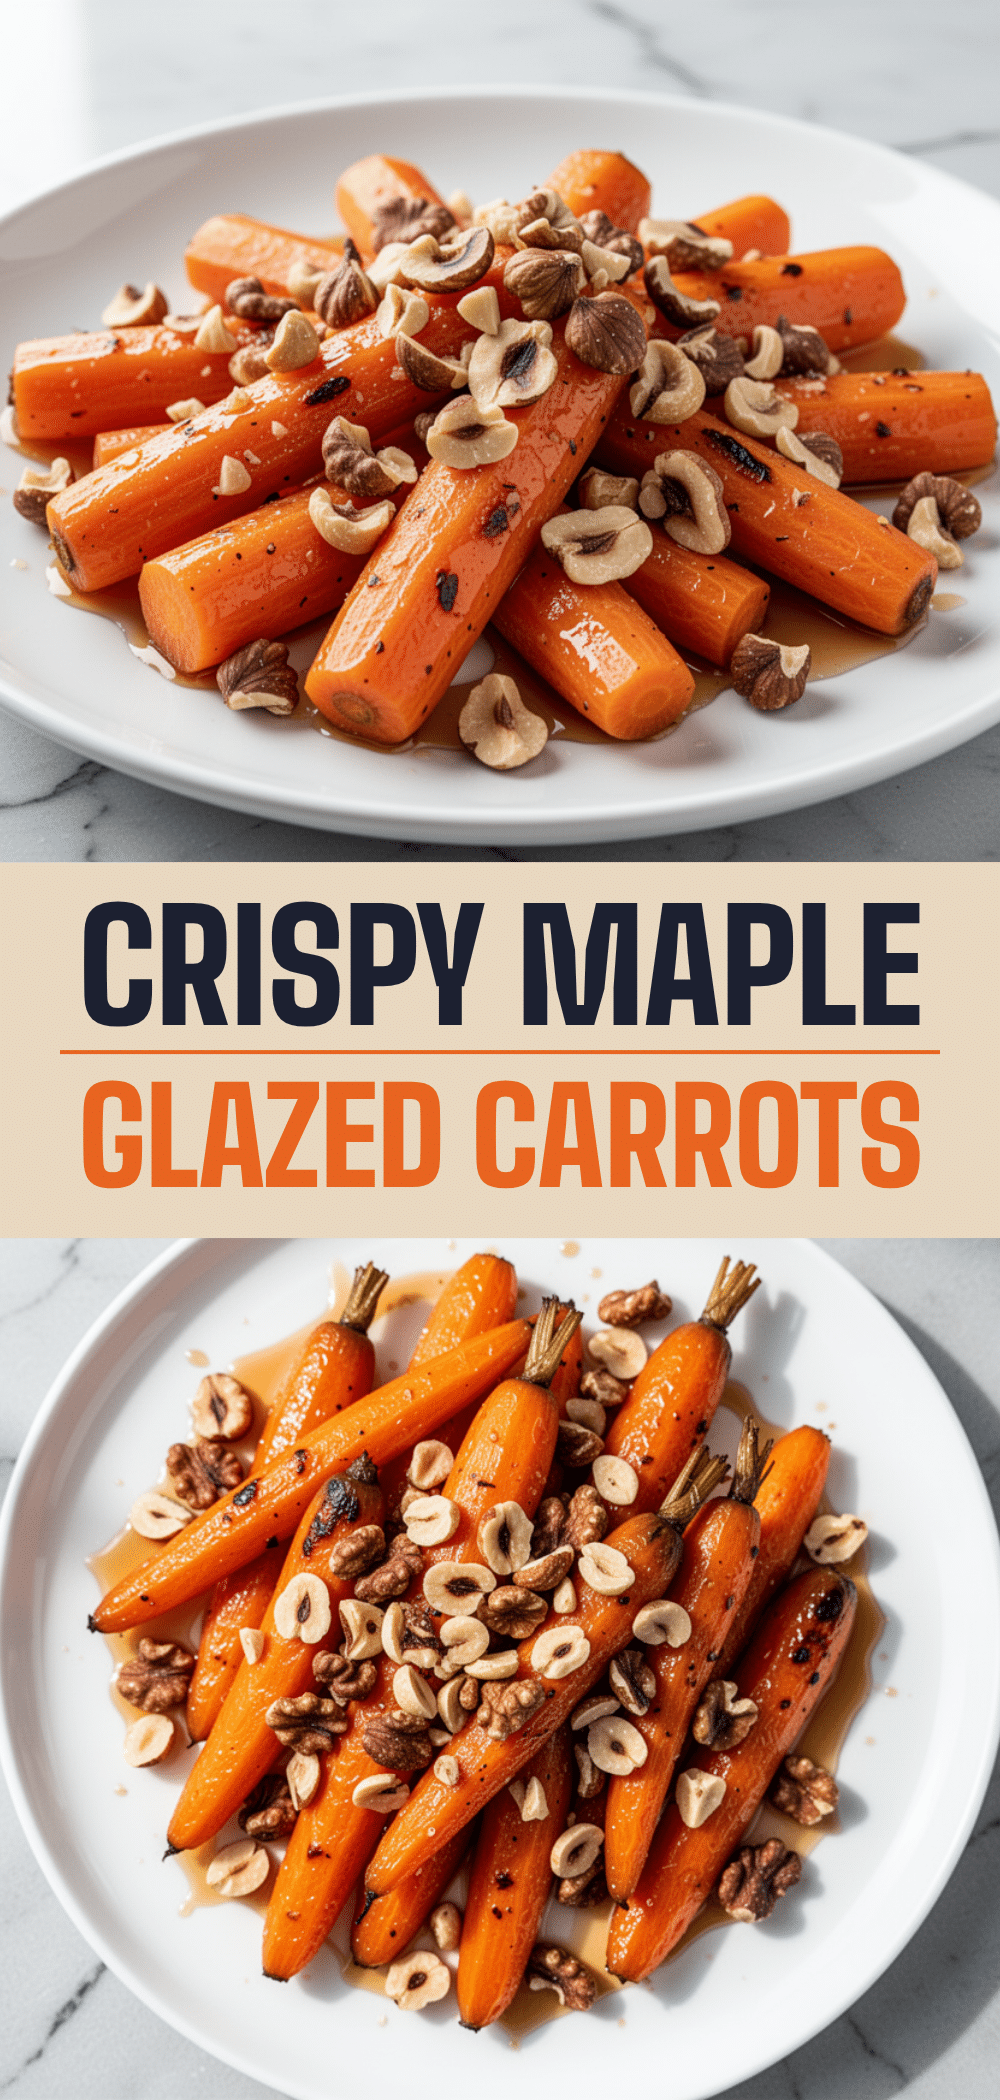
Canadian Thanksgiving Maple Glazed Carrots with Toasted Hazelnuts
- Total Time: 25 minutes
- Yield: 6 servings 1x
Description
A sophisticated holiday side dish featuring tender carrots sautéed in a glossy pure maple syrup and butter glaze, finished with earthy, crunchy toasted hazelnuts and fresh thyme.
Ingredients
- 2 pounds (900g) medium carrots, scrubbed or peeled and cut into ½-inch rounds or batons
- 3 tablespoons (45g) unsalted butter
- ½ cup (120ml) 100% pure maple syrup (Grade A or B)
- ½ cup (60g) toasted hazelnuts, roughly chopped
- 2 cloves garlic, minced
- 1 teaspoon fresh thyme leaves
- ½ teaspoon kosher salt, or to taste
- Freshly cracked black pepper, to taste
- Optional: 1 teaspoon orange zest, ¼ teaspoon cinnamon, or 1 tablespoon chopped parsley
Instructions
- Wash carrots thoroughly. If conventional, peel them; if organic, scrub well. Cut off tops and tails, then slice into uniform ½-inch rounds or batons.
- Bring a large pot of salted water to a boil. Add carrots and par-cook for 3-5 minutes until tender-crisp. Drain well and set aside.
- While carrots boil, toast hazelnuts in a small skillet over medium heat for 3-5 minutes until fragrant and lightly browned. Transfer to a cutting board, cool slightly, rub off skins if necessary, and chop roughly.
- In a small saucepan or microwave-safe bowl, combine butter and maple syrup. Heat until melted and smooth.
- Heat a large skillet over medium heat. Add a little oil or butter if needed, then add par-cooked carrots. Sauté for 2 minutes to develop color.
- Pour the maple-butter glaze over the carrots. Add minced garlic and fresh thyme. Toss to coat.
- Simmer for 3-4 minutes, stirring occasionally, until the glaze reduces and becomes thick and glossy, coating the back of a spoon.
- Remove from heat. Taste and adjust salt and pepper. Sprinkle toasted hazelnuts over the top and toss gently to distribute.
- Serve immediately while hot.
Notes
Use real maple syrup, not pancake syrup, for authentic flavor. Par-cooking ensures carrots are tender without becoming mushy. Toasting hazelnuts enhances their nutty flavor. For a vegan version, substitute butter with olive oil or vegan butter. Leftovers can be stored in the refrigerator for up to 3 days; reheat gently with a splash of water or broth.
- Prep Time: 15 minutes
- Cook Time: 15 minutes
- Category: Side Dish
- Cuisine: Canadian
Nutrition
- Serving Size: Approximately 1 cup
- Calories: 180
- Sugar: 20
- Sodium: 120
- Fat: 8
- Saturated Fat: 3
- Carbohydrates: 28
- Fiber: 4
- Protein: 3
Keywords: maple glazed carrots, thanksgiving side dish, hazelnut carrots, maple syrup recipe, holiday vegetables, gluten-free side, vegetarian recipe


