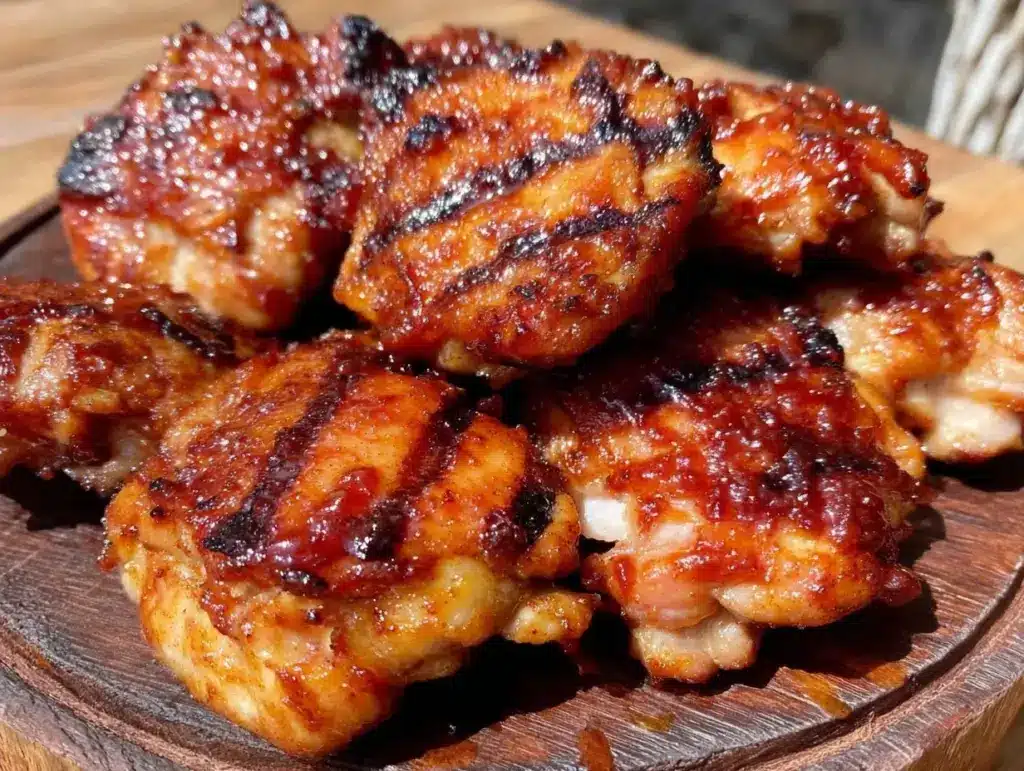
Last Labor Day, I made the mistake of buying expensive, pre-marinated chicken breasts from the grocery store. They were dry, bland, and frankly, an insult to the concept of a summer barbecue. My husband didn’t say anything, but his face said it all. That night, I swore I’d never make that mistake again. I wanted something juicy, something with a glaze so sticky it made you lick your fingers, and something that screamed “celebration” without requiring me to spend all day in the kitchen.
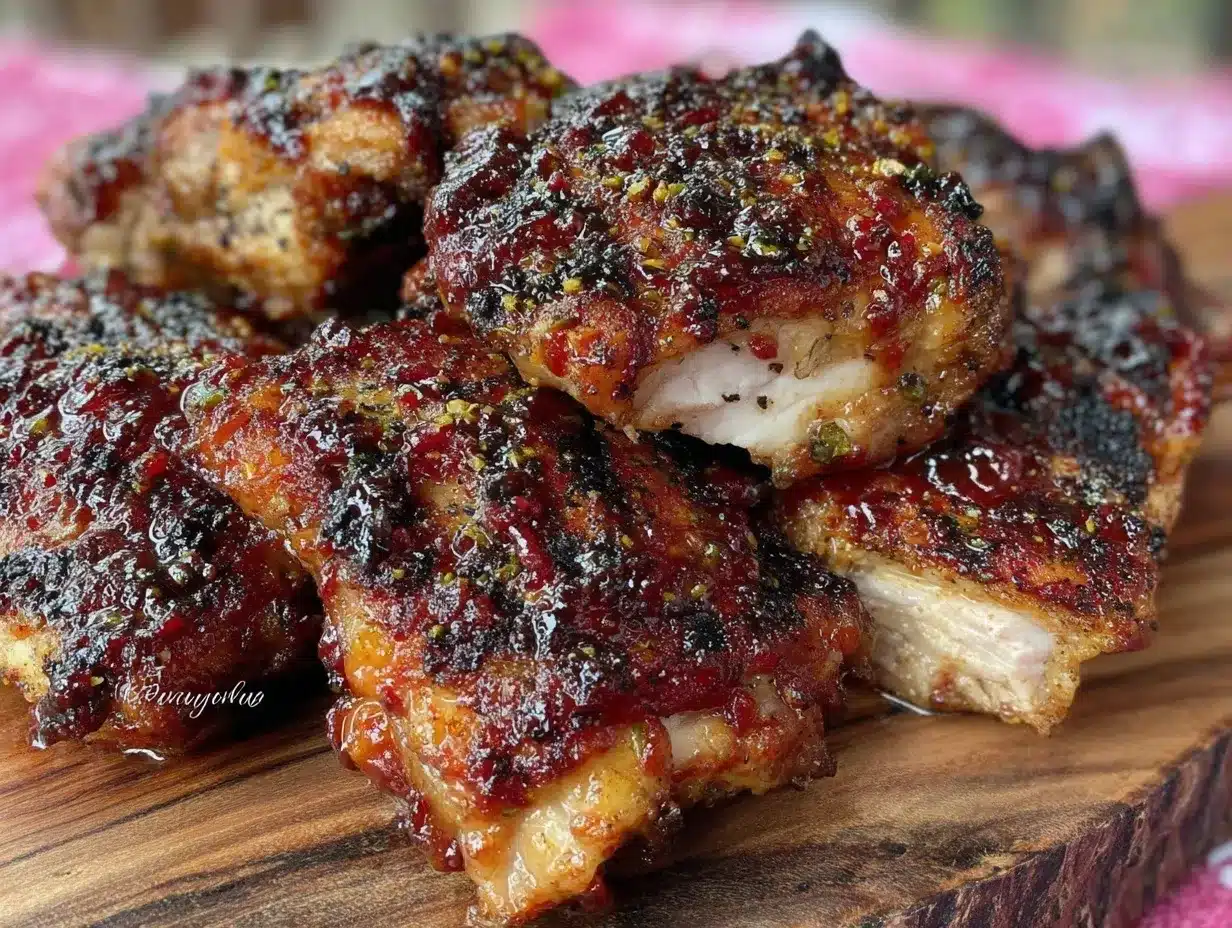
That’s when I decided to pivot to chicken thighs. Bone-in, skin-on thighs. It’s a move I’ve made a hundred times since, and I’ve never looked back. These Labor Day Grilled BBQ Chicken Thighs with Sticky Honey Glaze are the reason our backyard gatherings are legendary. The skin gets shatteringly crisp over the grill, the meat stays impossibly tender, and that honey-BBQ glaze? It caramelizes into this dark, glossy, sticky treasure that clings to every nook and cranny.
I’ve tested this glaze recipe about a dozen times—sometimes with too much honey, sometimes with too much smoke, and once, embarrassingly, with a glaze so thick it turned into a sugar rock on the grill grate. But the version I’m sharing today? It’s the sweet spot. It’s tangy enough to cut through the richness, sweet enough to make your kids beg for seconds, and smoky enough to make your neighbors ask for the recipe. If you’re looking for a main dish that feels special but is actually foolproof, this is it. It’s better than takeout, cheaper than catering, and infinitely more delicious.
Why You’ll Love This Recipe
There are a few reasons I keep coming back to these grilled chicken thighs, but they mostly boil down to flavor and ease. Here’s the real deal on why this recipe works so well:
- Juicy Meat Guaranteed — Thighs have more fat than breasts, which means they don’t dry out even if you leave them on the grill a few minutes too long. I’ve grilled these for picky eaters who usually complain about dry chicken, and they always come back for more.
- The Glaze is Addictive — It’s not just sweet; it’s complex. The combination of honey, apple cider vinegar, and a touch of Worcestershire sauce creates a sticky, tangy-sweet profile that’s perfect for dipping or drizzling. It’s the kind of glaze that makes you stop mid-bite and think, “Wait, let me get another piece.”
- Perfect for Crowds — Chicken thighs are forgiving and easy to scale up. Whether you’re feeding four or forty, this recipe holds up beautifully. I served these at a potluck last summer, and they were the first plate to disappear.
- Minimal Active Time — Most of the work is in the prep and the waiting. You spend about 20 minutes getting everything ready, and then the grill does the heavy lifting. You can hang out with your guests while the chicken cooks.
- Leftovers Are Amazing — If you’re lucky enough to have any left (spoiler: there usually aren’t), they’re fantastic cold in sandwiches or reheated with a splash of water to revive the glaze.
This recipe has become my go-to for any occasion where I want to impress without stressing. It’s rustic, it’s flavorful, and it’s just plain satisfying to eat.
Ingredients You’ll Need
Here’s the best part: most of these ingredients are probably already in your pantry or fridge. I’m particular about a few things here, so pay attention to the details.
For the Chicken:
- Chicken Thighs (3-4 pounds / 1.5-2 kg) — Bone-in, skin-on is non-negotiable for this recipe. The bones add flavor, and the skin keeps the meat moist. You can use drumsticks too, but thighs are juicier.
- Vegetable Oil (2 tablespoons) — For rubbing the chicken before grilling. Helps the skin crisp up.
- Kosher Salt (1 tablespoon) — Use kosher salt for even seasoning. If using table salt, reduce by half.
- Black Pepper (1 teaspoon) — Freshly cracked is best.
- Garlic Powder (1 teaspoon) — Adds a subtle savory depth.
- Smoked Paprika (1 teaspoon) — This is crucial for that smoky flavor. Don’t skip it.
For the Sticky Honey Glaze:
- Honey (½ cup / 120ml) — Use good quality honey. Clover or wildflower works well. It’s the star of the show.
- BBQ Sauce (½ cup / 120ml) — I use a sweet and smoky variety like Sweet Baby Ray’s or a homemade blend. Avoid vinegar-heavy sauces here; you want balance.
- Apple Cider Vinegar (2 tablespoons) — Adds tang to cut the sweetness. This is the secret ingredient that makes the glaze taste professional.
- Worcestershire Sauce (1 teaspoon) — Adds umami and depth. It’s subtle but necessary.
- Garlic (2 cloves, minced) — Fresh garlic adds brightness. Minced finely.
- Ginger (1 teaspoon, freshly grated) — Optional, but adds a nice zing. I love it, but you can skip it if you’re not a fan.
- Soy Sauce (1 tablespoon) — Adds saltiness and color. Don’t worry, it won’t taste like soy sauce.
Optional Garnishes:
- Green Onions (2-3, sliced) — For a fresh, crunchy finish.
- Sesame Seeds (1 tablespoon) — For texture and visual appeal.
- Red Pepper Flakes — A little heat if you want it.
Pro Tip: I always make extra glaze (about ½ cup) and reserve it for serving. You don’t want to use all your glaze on the grill because it might burn. Having fresh glaze on the side keeps the flavor bright.
Equipment Needed
You don’t need fancy equipment for this. Here’s what I actually use:
- Grill — A charcoal grill gives the best smoky flavor, but a gas grill works perfectly fine. Just keep the lid closed to trap the smoke.
- Grill Grates — Make sure they’re clean and well-oiled to prevent sticking. I use a grill brush before heating.
- Small Saucepan — For cooking the glaze. A small skillet works too.
- Basting Brush — Silicone is best because it doesn’t burn as easily as natural bristles.
- Meat Thermometer — Essential for ensuring the chicken is cooked through without drying out. Target 165°F (74°C) in the thickest part.
- Large Bowl — For mixing the dry rub.
Tool Tip: If you don’t have a thermometer, poke the thickest part of the thigh. The juices should run clear, not pink. But a thermometer is way more reliable.
How to Make It: Step-by-Step
Alright, let’s make this! I’m walking you through exactly how I do it, including the little tricks I’ve picked up.
Step 1: Prep the Chicken (10 minutes)
Pat the chicken thighs dry with paper towels. This is crucial for getting crispy skin. Moisture is the enemy of crispiness. In a small bowl, mix the kosher salt, black pepper, garlic powder, and smoked paprika. Rub this mixture all over the chicken, including under the skin if you can gently loosen it. Drizzle with vegetable oil and rub it in evenly. Let the chicken sit at room temperature for 30 minutes while you preheat the grill.
Step 2: Preheat the Grill (15 minutes)
Heat your grill to medium-high heat (about 375-400°F / 190-200°C). You want a hot grill to sear the skin and lock in juices. If using charcoal, arrange the coals for indirect heat in the center, leaving the edges for direct heat.
Step 3: Make the Glaze (5 minutes)
In a small saucepan over medium heat, combine the honey, BBQ sauce, apple cider vinegar, Worcestershire sauce, minced garlic, ginger, and soy sauce. Whisk until smooth. Bring to a gentle simmer and cook for 5-7 minutes, stirring occasionally, until the glaze thickens slightly. It should coat the back of a spoon. Remove from heat and set aside. Remember to reserve ½ cup for serving later.
Step 4: Grill the Chicken (25-30 minutes)
Place the chicken thighs skin-side down on the hot grill grates. Close the lid and cook for 15-20 minutes. Do not move the chicken! Let the skin get nice and charred. Flip the chicken and cook for another 10-15 minutes, or until the internal temperature reaches 165°F (74°C). If the chicken is cooking too fast, move it to indirect heat.
Step 5: Glaze the Chicken (5 minutes)
In the last 5 minutes of cooking, brush the chicken generously with the glaze. Flip and brush again. You want the glaze to caramelize and get sticky, but be careful not to burn it. If the glaze is getting too dark, move the chicken to indirect heat. Repeat the brushing 2-3 times for a thick, glossy finish.
Step 6: Rest and Serve (5 minutes)
Remove the chicken from the grill and let it rest for 5 minutes. This allows the juices to redistribute. Drizzle with the reserved fresh glaze, sprinkle with green onions and sesame seeds, and serve immediately.
Total Time: About 1 hour (including prep and resting)
Expert Tips & Tricks
Here’s everything I’ve learned from making this dozens of times. These tips will save you from my mistakes.
Don’t Rush the Skin
The key to crispy skin is patience. Let the chicken sit skin-side down for at least 15 minutes without touching it. If you try to flip it too early, the skin will stick and tear. Trust the process.
Watch the Glaze
Honey burns quickly. Once you start glazing, keep a close eye on the chicken. If you see smoke coming from the glaze, move the chicken to indirect heat immediately. You want caramelization, not charcoal.
Use a Thermometer
This is the only way to ensure perfect doneness. Overcooked chicken is dry and tough. Pull the chicken at 165°F (74°C) and let it rest. The temperature will rise slightly during resting.
Make Extra Glaze
As mentioned, reserve half the glaze for serving. The glaze that cooks on the grill loses some of its brightness. Fresh glaze adds a vibrant, sticky finish that’s irresistible.
Pair with the Right Sides
These chicken thighs are rich and flavorful, so balance them with light, fresh sides. I love serving them with a simple Korean Chickpea Salad or a crisp coleslaw. The crunch and acidity cut through the sweetness of the glaze perfectly.
Variations & Substitutions
Once you’ve nailed the basic version, here’s how you can mix it up. I’ve tried all of these.
Spicy Version
Add 1-2 teaspoons of cayenne pepper or chili flakes to the dry rub. For the glaze, mix in a tablespoon of sriracha or hot sauce. This adds a nice kick that balances the sweetness.
Teriyaki Style
Swap the BBQ sauce for teriyaki sauce and add a tablespoon of rice vinegar. Garnish with more sesame seeds and green onions. It’s a totally different vibe but just as delicious.
Maple Glaze
Replace half the honey with pure maple syrup. This adds a deeper, earthier sweetness that pairs beautifully with the smoked paprika.
Gluten-Free
Use gluten-free BBQ sauce and tamari instead of soy sauce. Everything else is naturally gluten-free.
Dairy-Free
This recipe is already dairy-free, so no changes needed. Perfect for dairy-sensitive guests.
Serving & Storage
How to Serve:
I usually serve these straight from the grill, piled high on a platter with the reserved glaze on the side. It looks rustic and inviting. Great sides include grilled corn on the cob, potato salad, or a fresh garden salad.
Storage:
Store leftovers in an airtight container in the refrigerator for up to 3 days. The chicken will keep well, but the glaze may lose some of its stickiness.
Reheating:
Reheat in the oven at 350°F (175°C) for 10-15 minutes, or until warmed through. You can also reheat in a skillet over medium heat with a splash of water to revive the glaze. Avoid the microwave, as it can make the skin soggy.
Freezing:
You can freeze the cooked chicken for up to 3 months. Thaw in the refrigerator overnight and reheat as above. The glaze may separate slightly, so brush with fresh glaze before serving.
Nutrition Information
I’m not a nutritionist, but here’s the breakdown if you’re tracking.
Per Serving (based on 4 servings):
- Calories: 450
- Protein: 35g
- Carbs: 25g
- Fiber: 1g
- Sugar: 20g
- Fat: 25g
- Saturated Fat: 6g
- Cholesterol: 120mg
- Sodium: 650mg
What’s Good:
- High in protein from the chicken thighs.
- Rich in flavor, making it satisfying.
What to Know:
- Higher in calories and sugar due to the honey glaze.
- Contains sodium from the BBQ sauce and soy sauce.
My Take:
Look, this is a treat. It’s sweet, smoky, and indulgent. It’s not a diet food, but it’s made with real ingredients and is far better than processed alternatives. When I make this, I enjoy it as a special meal, not every day. Balance is key.
Final Thoughts
So that’s my Labor Day Grilled BBQ Chicken Thighs with Sticky Honey Glaze! I’ve probably talked your ear off at this point, but when you make a recipe this often, you have a lot to say about it.
This recipe has saved my summer gatherings more times than I can count. It’s my answer to “what’s for dinner?” when I want something impressive but easy. My family is happy, my guests are happy, and I’m happy because I’m not stressed about cooking.
Make it yours! Try different glazes, add some heat, or serve it with your favorite sides. The best recipes are the ones you adapt to your family’s tastes.
If you make this, drop a comment and let me know what you think! I love hearing how recipes turn out in your kitchen. And if something doesn’t work, tell me that too—I’m here to help troubleshoot.
Happy grilling! And I hope your backyard smells half as good as mine does right now.
Frequently Asked Questions
Q: Can I use chicken breasts instead of thighs?
A: You can, but the results will be different. Chicken breasts are leaner and can dry out quickly on the grill. If you use breasts, reduce the cooking time and watch them closely. Thighs are more forgiving and stay juicier, so I highly recommend sticking with them.
Q: Why did my glaze burn on the grill?
A: Honey burns easily because of its sugar content. This usually happens if the grill is too hot or if you glaze too early. Always glaze in the last 5 minutes of cooking and keep an eye on the chicken. If you see smoke, move the chicken to indirect heat immediately.
Q: Can I make the glaze ahead of time?
A: Absolutely! You can make the glaze up to 3 days ahead and store it in the refrigerator. Warm it up slightly before using. Just remember to reserve half for serving fresh.
Q: What sides go well with this chicken?
A: I love serving these with grilled vegetables, corn on the cob, or a light salad. A salted caramel apple crisp would be a sweet treat for dessert, though it’s more of a fall recipe. For summer, try a berry salad or watermelon slices.
Q: How do I know when the chicken is done?
A: The safest way is to use a meat thermometer. Insert it into the thickest part of the thigh, avoiding the bone. It should read 165°F (74°C). If you don’t have a thermometer, the juices should run clear, not pink.
Q: Can I grill these indoors?
A: You can use a grill pan or stovetop grill. Heat the pan over medium-high heat and cook the chicken as directed. You won’t get the same smoky flavor, but the texture and taste will still be delicious.
Pin This Recipe!
Labor Day Grilled BBQ Chicken Thighs: Perfect Sticky Honey Glaze
- Total Time: 1 hour
- Yield: 4 servings 1x
Description
Juicy bone-in, skin-on chicken thighs grilled to perfection with a sticky, tangy-sweet honey BBQ glaze. This foolproof recipe ensures crispy skin and tender meat, making it ideal for summer gatherings.
Ingredients
- 3–4 pounds bone-in, skin-on chicken thighs
- 2 tablespoons vegetable oil
- 1 tablespoon kosher salt
- 1 teaspoon black pepper
- 1 teaspoon garlic powder
- 1 teaspoon smoked paprika
- ½ cup honey
- ½ cup BBQ sauce
- 2 tablespoons apple cider vinegar
- 1 teaspoon Worcestershire sauce
- 2 cloves garlic, minced
- 1 teaspoon ginger, freshly grated
- 1 tablespoon soy sauce
- Optional garnishes: green onions, sesame seeds, red pepper flakes
Instructions
- Pat chicken thighs dry with paper towels. In a small bowl, mix kosher salt, black pepper, garlic powder, and smoked paprika. Rub mixture all over chicken, including under the skin. Drizzle with vegetable oil and rub in evenly. Let sit at room temperature for 30 minutes.
- Preheat grill to medium-high heat (375-400°F / 190-200°C). Arrange coals for indirect heat if using charcoal.
- In a small saucepan over medium heat, combine honey, BBQ sauce, apple cider vinegar, Worcestershire sauce, minced garlic, ginger, and soy sauce. Whisk until smooth. Simmer for 5-7 minutes until slightly thickened. Remove from heat and reserve ½ cup for serving.
- Place chicken thighs skin-side down on hot grill grates. Close lid and cook for 15-20 minutes without moving. Flip and cook for another 10-15 minutes until internal temperature reaches 165°F (74°C).
- In the last 5 minutes of cooking, brush chicken generously with glaze. Flip and brush again. Repeat 2-3 times for a glossy finish, moving to indirect heat if glaze darkens too quickly.
- Remove chicken from grill and let rest for 5 minutes. Drizzle with reserved fresh glaze and garnish with green onions and sesame seeds before serving.
Notes
Patting the chicken dry is crucial for crispy skin. Do not rush the skin side; let it char for at least 15 minutes. Honey burns easily, so glaze only in the last 5 minutes of cooking and monitor closely. Reserve half the glaze for serving fresh to maintain brightness. Chicken is done when internal temperature reaches 165°F (74°C).
- Prep Time: 10 minutes
- Cook Time: 30 minutes
- Category: Main Course
- Cuisine: American
Nutrition
- Serving Size: 1 chicken thigh with
- Calories: 450
- Sugar: 20
- Sodium: 650
- Fat: 25
- Saturated Fat: 6
- Carbohydrates: 25
- Fiber: 1
- Protein: 35
Keywords: grilled chicken, BBQ chicken, honey glaze, Labor Day recipe, summer grilling, chicken thighs, sticky glaze, easy dinner


