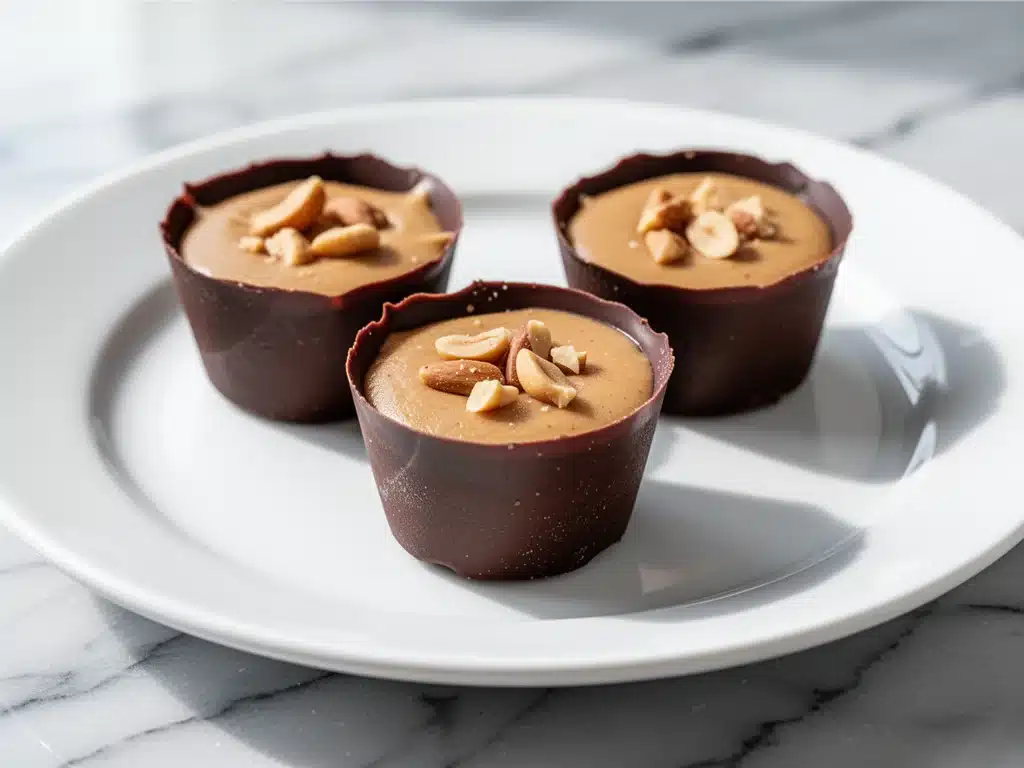
Let me tell you about the time I tried to hide a stash of sugar-free candy in my purse for a road trip and ended up eating the entire batch before we even left the driveway. It was 2019, I was deep in the thick of my keto journey, and my cravings were hitting harder than a toddler’s tantrum at bedtime. I had tried every store-bought “keto candy” on the market. Some tasted like wax. Some were so sweet they made my teeth hurt. And the peanut butter ones? Dry as sand. Crumbly. Disappointing.
That was the moment I decided to stop buying other people’s compromises and start making my own. I wanted something that tasted like a Reese’s Peanut Butter Cup but actually kept me in ketosis. I wanted rich, dark chocolate on the outside and a peanut butter center that was creamy, not gritty. I wanted a treat I could keep in my office drawer without feeling guilty about breaking my fast or spiking my blood sugar.
After five failed attempts (yes, five—don’t ask about the chocolate that seized up in my first try), I finally cracked the code. These low-carb chocolate peanut butter fat bomb cups are the result. They’re the only keto dessert I make in bulk. They’re the reason my husband asks, “Wait, is that sugar-free?” every single time I hand him one. And honestly? They’re the reason I’ve stopped buying expensive, disappointing keto snacks at the grocery store.
There’s something deeply satisfying about dipping your finger into a smooth, sweet peanut butter filling and then wrapping it in a hard, glossy shell of dark chocolate. It’s indulgent. It’s satisfying. And it’s completely low-carb. If you’ve been struggling to find a dessert that doesn’t taste like “diet food,” these cups are your answer. I’ve tested this recipe so many times that I can probably make it blindfolded now. And I’m going to walk you through exactly how to get it right, every single time.
Why You’ll Love This Recipe
I don’t say this lightly, but these low-carb chocolate peanut butter fat bomb cups have completely changed my relationship with sweets. When you’re cutting carbs, the temptation to cheat is always there. But when you have something this good in your freezer, you don’t even think about it. Here’s why this recipe has earned a permanent spot in my kitchen routine:
Stupid Simple Ingredients — Seriously, you only need five ingredients. I’m not exaggerating. You don’t need rare powders, expensive substitutes, or a trip to three different specialty stores. If you can go to a regular grocery store, you can make this. I’ve made this while my kids were screaming in the background, and it still turned out perfect.
Lightning Fast Prep — From start to finish, including the chill time, this takes about 30 minutes of active work. The rest is just waiting in the freezer. I make a batch every Sunday while I meal prep my lunches. It takes less time than it takes to watch one episode of my favorite show.
Actually Tastes Like Candy — I’m serious. The texture is spot-on. The chocolate shell snaps. The peanut butter center is soft and creamy. My non-keto friends eat these and think I’m lying when I tell them they’re sugar-free. They ask for the recipe. They beg for more. It’s my secret weapon for dinner parties.
Budget-Friendly — Store-bought keto candies are ridiculously expensive. A box of three can cost $6. Making these at home costs pennies per cup. I save at least $30 a month just by making these instead of buying snacks. That’s money I can put toward better ingredients for dinner.
Meal Prep Perfect — These are the ultimate grab-and-go snack. I keep a container in the freezer at work. When 3pm hits and my energy dips, I grab one. It lasts for hours. It stops the sugar craving dead in its tracks. I’ve even started packing them for camping trips because they don’t melt as fast as regular chocolate (though they do soften if it’s hot enough).
This is my go-to when I need a treat that just works. No complicated techniques, no weird ingredients, just reliable, delicious food that makes everyone happy. Even my picky teenage son loves them.
Ingredients You’ll Need
Here’s the best part: you probably have most of this already. This recipe relies on simple, accessible ingredients. I’m particular about three things here, and I’ll tell you exactly why they matter.
Dark Chocolate Chips (Sugar-Free) (1 cup / 170g) — This is the foundation. I use Lily’s Dark Chocolate Chips because they’re widely available and taste great. But you can use any brand you prefer. Look for chips made with stevia, erythritol, or monk fruit. Avoid chips with maltitol if you’re sensitive to sugar alcohols, as they can cause digestive issues for some people. The chocolate needs to be high quality for a smooth melt.
Natural Peanut Butter (½ cup / 120g) — This is the most important ingredient. You need 100% natural peanut butter. No added sugar, no hydrogenated oils. Just peanuts and salt. I use brands like Smucker’s Natural or Kirkland Signature. The key is to stir it really well before measuring. If the oil has separated, stir it until it’s completely uniform. Some people add a little extra oil to make it runnier, but I find that stirring well is enough. Avoid “processed” peanut butters with additives—they don’t melt the same way and can make the filling grainy.
Erythritol or Monk Fruit Sweetener (2-3 tablespoons) — Since natural peanut butter isn’t sweet, you need to add sweetness. I prefer erythritol-based blends because they measure like sugar. Monk fruit is great too, but it’s sweeter, so start with less. I use 2 tablespoons for a mildly sweet treat, and 3 tablespoons if I really want that candy-shop sweetness. Grind it in a blender if you can—it makes the texture smoother.
Coconut Oil (1 tablespoon) — This is the secret weapon. A little bit of coconut oil makes the peanut butter center softer and creamier. It helps it spread easier into the molds. If you don’t like coconut flavor, use a neutral oil like avocado oil. But honestly, you won’t taste the coconut once it’s coated in chocolate.
Salt (½ teaspoon) — I use fine sea salt. Salt is crucial. It balances the sweetness and enhances the peanut flavor. Don’t skip this. A little salt makes a huge difference.
Optional Add-ins:
- Crushed Peanuts (2 tablespoons) — For extra crunch on top. I love the texture contrast.
- Sea Salt Flakes — A pinch on top before the chocolate sets makes it taste like a gourmet candy.
- Vanilla Extract (½ teaspoon) — Adds a nice depth of flavor to the peanut butter layer.
Shopping Tip: I always buy my chocolate chips in bulk when they’re on sale. They keep for months in the pantry. And for peanut butter, the big jars are always cheaper per ounce. Stock up!
Equipment Needed
You don’t need fancy equipment for this. Here’s what I actually use. Most of it is probably sitting in your kitchen right now.
Muffin Tin — I use a standard 12-cup muffin tin. It’s what I have. It works perfectly. If you want smaller cups, you can use a mini-muffin tin, but the cooking time stays the same.
Paper Liners or Silicone Cups — I prefer silicone cups because they’re reusable and easy to pop the candies out of. But paper liners work fine too. Just make sure they fit snugly in the tin. If you don’t have liners, you can just grease the tin well with coconut oil.
Microwave-Safe Bowl — For melting the chocolate. I use a glass bowl because it’s easy to clean and doesn’t retain heat as much as plastic. A ceramic bowl works too.
Small Mixing Bowl — For mixing the peanut butter filling. Any size works. I use a small one so I don’t waste space.
Spoon or Small Spatula — For stirring the peanut butter and layering the chocolate. A regular teaspoon works great.
Freezer — Obviously. You need a freezer that gets cold. If your freezer is set to a weird temperature, your chocolate might not set properly. Make sure it’s at least 0°F (-18°C).
Optional: Blender or Food Processor — If you want to grind your sweetener to a finer consistency, a blender works well. It’s not necessary, but it makes the texture smoother.
Tool Tip: I’m obsessed with my silicone muffin cups from Amazon. They’re like $10 for a set of 12, and they make cleanup a breeze. No sticky residue, no washing paper liners. Just pop them out and rinse.
How to Make It: Step-by-Step
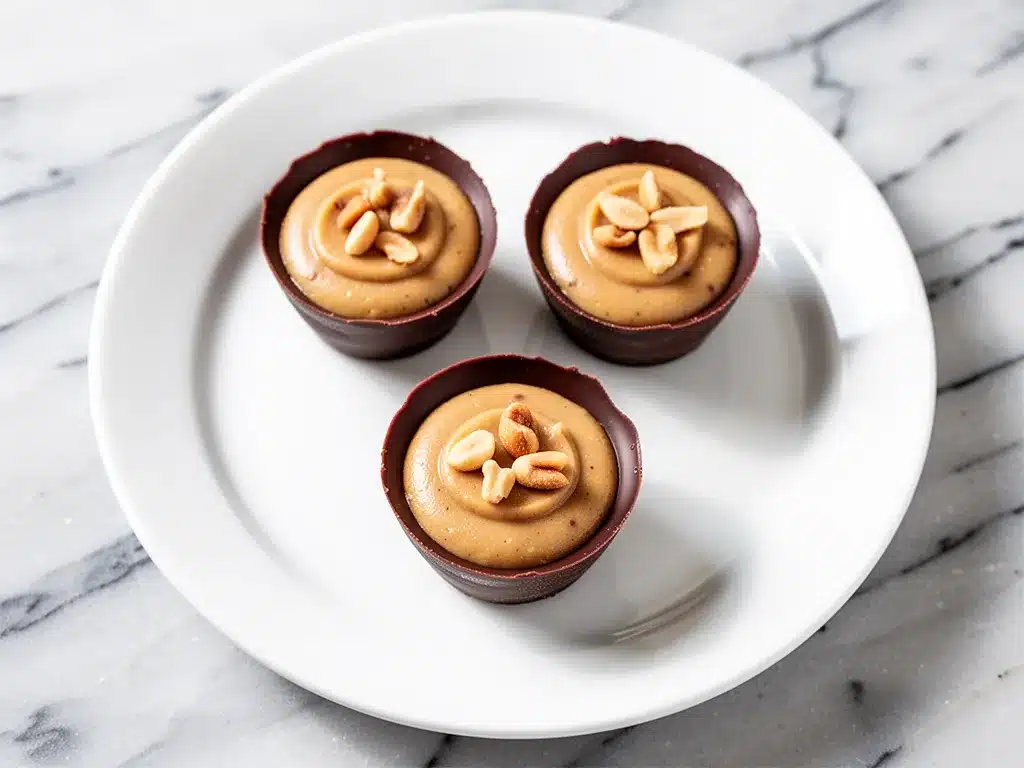
Alright, let’s make this! I’m walking you through exactly how I do it, including the little tricks I’ve picked up over the years.
Step 1: Prep Your Molds (2 minutes)
Line your muffin tin with paper liners or silicone cups. If you’re using paper liners, make sure they’re standing up straight. If you’re using silicone, just place them in the tin. This step is crucial because it makes removing the finished cups so much easier. I always set out my liners before I start melting chocolate so I don’t forget.
Step 2: Melt the Chocolate (2-3 minutes)
Place your sugar-free dark chocolate chips in a microwave-safe bowl. Microwave on high for 30 seconds. Stir. Then microwave for another 15-20 seconds. Stir again. You want the chocolate to be mostly melted, with just a few small chunks left. The residual heat will melt the rest. Do not overheat the chocolate! If it gets too hot, it will seize up and become grainy. It’s better to underheat and stir than to overheat and ruin it. The chocolate should be smooth, glossy, and pourable.
Step 3: Create the Bottom Layer (5 minutes)
Take a spoonful of melted chocolate (about 1 teaspoon) and place it at the bottom of each liner. Use the back of the spoon to spread it evenly across the bottom and slightly up the sides. You want a thin, even layer. This is your base. If you make this layer too thick, you won’t have enough room for the peanut butter. Be generous with the chocolate—it’s the best part! I usually have a little chocolate left over, which I save for drizzling on top later.
Pro Tip: Put the tin in the freezer for 5 minutes to let this layer set. It makes the next step easier because the chocolate won’t mix with the peanut butter.
Step 4: Mix the Peanut Butter Filling (3 minutes)
In a small mixing bowl, combine the natural peanut butter, sweetener, coconut oil, and salt. Stir vigorously until everything is completely smooth and combined. If the peanut butter is too stiff, microwave it for 10 seconds to soften it. The mixture should be creamy and spreadable. If it’s too thick to spread, add a tiny bit more coconut oil. If it’s too runny, add a bit more peanut butter. You want a consistency like soft peanut butter candy.
Step 5: Add the Peanut Butter Layer (5 minutes)
Remove the muffin tin from the freezer. Spoon the peanut butter mixture into the chocolate-lined cups. Fill them almost to the top, leaving a little space for the top chocolate layer. Use the back of the spoon to smooth the top. You want it flat and even. If you have any crushed peanuts, sprinkle them on top now. This adds a nice crunch.
Visual Cue: The peanut butter should look smooth and creamy. If you see air bubbles, poke them with a toothpick. You don’t want air pockets in your final product.
Step 6: Seal with Chocolate (5 minutes)
Melt the remaining chocolate if you didn’t use it all in Step 2. If you saved some for drizzling, use that. Spoon or pipe the chocolate over the peanut butter layer. Cover it completely. You want a solid seal so the peanut butter doesn’t leak out. Smooth the top with a spoon. If you want a fancy look, drizzle the remaining chocolate in a zigzag pattern over the top. It’s not necessary, but it looks pretty.
Step 7: Chill and Set (20-30 minutes)
Place the entire muffin tin in the freezer. Let them sit for at least 20 minutes, or until the chocolate is completely hard. If you’re in a rush, 15 minutes might work, but 20-30 is safer. You’ll know they’re ready when you touch the bottom of the cup and it feels firm and cold.
Total Time: About 30 minutes (15 minutes active, 15-30 minutes chilling)
Troubleshooting:
- Chocolate seized up: This happens if water gets in. Make sure your bowl and spoon are completely dry. If it seizes, add a tiny splash of warm water and whisk vigorously to bring it back.
- Filling is too runny: Your peanut butter might have too much oil. Stir it better or add a bit more sweetener to thicken it.
- Chocolate won’t set: Your freezer might not be cold enough, or you used chocolate with a different melting point. Try leaving them in longer.
Expert Tips & Tricks
Here’s everything I’ve learned from making this dozens of times. These tips will save you from my mistakes.
Stir Your Peanut Butter Well
I cannot stress this enough. Natural peanut butter separates. If you don’t stir it until it’s completely uniform, your filling will be oily and grainy. I stir it for at least 30 seconds before measuring. It’s worth the extra effort.
Don’t Overheat the Chocolate
Chocolate is sensitive. If you microwave it for too long, it burns. Always go in short bursts (15-30 seconds) and stir in between. The goal is to melt it gently, not to cook it. If it gets too hot, it becomes grainy and loses its shine.
Use High-Quality Chocolate
Since chocolate is the main flavor, you want it to taste good. Cheap sugar-free chocolate often has a weird aftertaste. I’ve tried many brands, and Lily’s is my favorite. But any good brand will work. Don’t skimp here.
Keep Everything Cold
Work quickly. If the peanut butter gets too warm, it will melt into the chocolate layer. Keep your filling in the fridge until you’re ready to spoon it into the cups. This keeps the layers distinct and clean.
Add a Pinch of Sea Salt
After you add the top chocolate layer, sprinkle a tiny pinch of flaky sea salt on top. It enhances the peanut and chocolate flavors. It’s a small touch that makes a big difference. I do this every time.
Grind Your Sweetener
If you’re using granulated erythritol, grind it in a blender for 10 seconds. It becomes a finer powder that mixes better into the peanut butter. It prevents gritty texture in the final product.
Variations & Substitutions
Once you’ve nailed the basic version, here’s how you can mix it up. I’ve tried all of these, and they’re all delicious.
Almond Butter Version
Swap the peanut butter for almond butter. It’s slightly more expensive but tastes amazing. The texture is a bit firmer, so you might need a little more coconut oil. My almond butter fans love this version.
Salted Caramel Swirl
Add a tiny drizzle of sugar-free caramel sauce into the peanut butter layer before adding the top chocolate. Swirl it with a toothpick. It looks pretty and tastes incredible. I make this for holidays.
Coconut Peanut Butter
Add 1 tablespoon of shredded coconut to the peanut butter mixture. It adds a nice tropical flavor. Great for summer. I sprinkle extra coconut on top for decoration.
Double Chocolate
Add 1 tablespoon of unsweetened cocoa powder to the peanut butter mixture. It makes the center chocolatey too. For chocolate lovers, this is the way to go.
Mini Cups
Use a mini-muffin tin to make bite-sized versions. Perfect for portion control. They take the same amount of time to set. I love these for snacking because I can eat two or three without feeling guilty.
Dairy-Free
This recipe is already dairy-free if you use dairy-free chocolate chips. Most sugar-free dark chocolates are naturally dairy-free, but check the label. I use Lily’s, which is dairy-free.
Nut-Free
Use sunflower seed butter instead of peanut butter. It’s a great alternative for schools or friends with nut allergies. The taste is slightly different, but still good. Just make sure the sunflower butter is natural.
Serving & Storage
How to Serve:
I usually serve these straight from the freezer. They’re best cold because the chocolate is snappy and the peanut butter is firm. But if you let them sit out for 5 minutes, the peanut butter gets softer and creamier. I like them cold, but my husband likes them slightly softened. It’s a matter of preference.
Storage Instructions:
Freezer: Store in an airtight container in the freezer for up to 3 months. They keep forever, basically. I make a batch every month. Just make sure the container is sealed tight so they don’t absorb freezer smells.
Fridge: You can store them in the fridge for up to 2 weeks. But they’ll be softer. I prefer the freezer because the texture is better.
Counter: Don’t store them on the counter. The chocolate will melt in warm weather. If it’s cold outside, you can keep them there for a day or two, but the freezer is safer.
Reheating: You don’t need to reheat these. Just eat them as they are. If they’re too hard, let them sit for a minute. But honestly, I love them straight from the freezer.
Meal Prep Strategy: Make a double batch on Sunday. Store them in a container in the freezer. Grab one each day for a week. It’s the perfect afternoon snack. I keep one in my bag when I’m out running errands, just in case I get hungry.
Nutrition Information
I’m not a nutritionist, but here’s the breakdown if you’re tracking. These numbers are approximate and will vary based on the specific brands you use.
Per Cup (based on 12 cups):
- Calories: 110
- Total Fat: 9g
- Saturated Fat: 3g
- Cholesterol: 0mg
- Sodium: 45mg
- Total Carbs: 3g
- Fiber: 1g
- Sugar Alcohols: 2g
- Net Carbs: 1g
- Sugar: 1g
- Protein: 3g
What’s Good:
- Very low net carbs (1g per cup)
- Good source of healthy fats from peanuts and coconut oil
- Decent amount of protein
- No added sugar
What to Know:
- Calorie-dense due to fats. Portion control is key.
- Contains nuts. Not suitable for nut allergies.
- Sweeteners vary by brand. Check labels for erythritol vs. monk fruit.
My Take:
Look, these are treats. They’re not health food. But they’re way better than regular candy, and they fit into a keto lifestyle. I enjoy one or two a day as a snack. When I want to make it lighter, I use less chocolate and more peanut butter. But usually? I just enjoy them and move on with my day.
Final Thoughts
So that’s my go-to low-carb chocolate peanut butter fat bomb cups! I’ve probably talked your ear off at this point, but when you make a recipe this often, you have a lot to say about it.
This has saved me from buying overpriced, disappointing keto snacks more times than I can count. It’s my answer to “I want something sweet” when I’m on a diet. My kids are happy, my husband’s happy, and I’m happy because I’m not stressed about breaking my keto streak.
Make it yours! Try different nut butters, add different toppings, adjust the sweetness. The best recipes are the ones you adapt to your family’s tastes. And if you’re looking for other easy keto snacks, check out my no-bake peanut butter energy balls for a different texture, or my fudgy sea salt caramel brownies for a warmer treat.
If you make this, drop a comment and let me know what you think! I love hearing how recipes turn out in your kitchen. And if something doesn’t work, tell me that too—I’m here to help troubleshoot.
Happy cooking! And I hope your kitchen smells half as good as mine does right now.
Frequently Asked Questions
Can I use almond butter instead of peanut butter?
Yes! Almond butter works great. It’s slightly firmer, so you might need a little more coconut oil to make it spreadable. The taste is a bit more subtle, but still delicious. I use it when I’m out of peanut butter, and it’s just as good.
Why did my chocolate seize up?
Chocolate seizes when water gets in. Even a tiny drop of water can cause it to become grainy and clumpy. Make sure your bowl and spoon are completely dry. If it seizes, add a tiny splash of warm water and whisk vigorously. It might not come back to perfect gloss, but it’ll still be edible.
Can I freeze these?
Absolutely! That’s the best way to store them. Keep them in an airtight container in the freezer for up to 3 months. They actually taste better after they’ve been frozen for a day or two because the flavors meld together.
Are these sugar-free?
Yes, as long as you use sugar-free chocolate chips and a sugar-free sweetener. Most sugar-free chocolates use stevia or erythritol. Just check the label to make sure there’s no added sugar. These are keto-friendly and low-carb.
Can I make these without a freezer?
Not really. The chocolate needs to harden to create the shell. If you don’t have a freezer, you can try putting them in the fridge, but it will take much longer, and the texture might be softer. A fridge is around 37°F (3°C), while a freezer is 0°F (-18°C). The colder temp is what makes the chocolate snap.
How many carbs are in these?
Each cup has about 1g net carb. This depends on the chocolate and sweetener you use. Always check the nutrition labels of your specific ingredients. But generally, these are very low-carb and keto-friendly.
Can I use honey or maple syrup instead of erythritol?
No. Honey and maple syrup are high in sugar and carbs. They will throw you out of ketosis and make the filling sticky rather than firm. Stick to sugar-free sweeteners like erythritol, monk fruit, or allulose.
Do I have to use natural peanut butter?
It’s highly recommended. Natural peanut butter has no added sugar or stabilizers. Processed peanut butter has emulsifiers that can affect the melting and texture. Plus, you’re avoiding extra sugar. If you must use processed, make sure it’s sugar-free, but the texture won’t be as good.
Pin This Recipe!
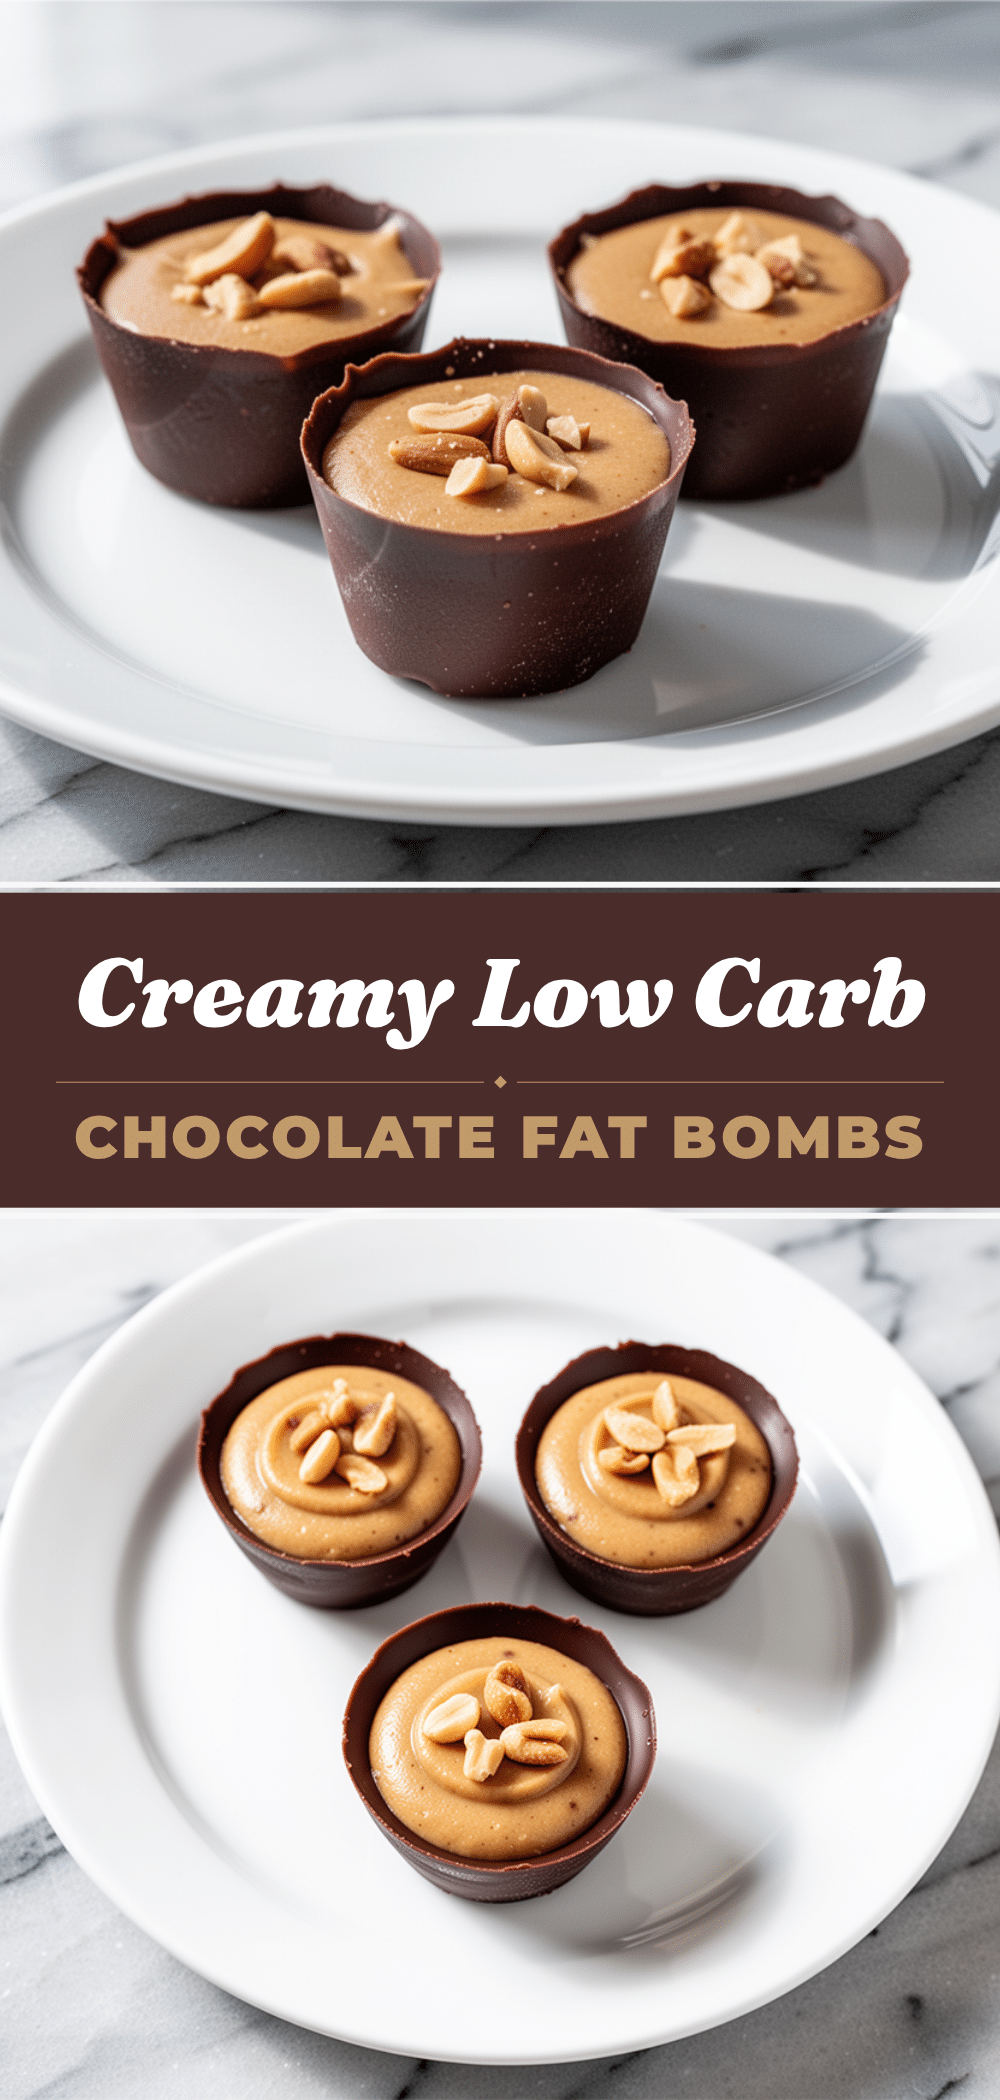
Low-Carb Chocolate Peanut Butter Fat Bomb Cups: 5-Ingredient Keto Treat
- Total Time: 30 minutes
- Yield: 12 servings 1x
Description
Rich, dark chocolate cups filled with a creamy, sugar-free peanut butter center. These low-carb fat bombs are easy to make, budget-friendly, and perfect for satisfying sweet cravings while staying in ketosis.
Ingredients
- 1 cup (170g) sugar-free dark chocolate chips (e.g., Lily’s)
- 1/2 cup (120g) natural peanut butter (stirred well)
- 2–3 tablespoons erythritol or monk fruit sweetener
- 1 tablespoon coconut oil
- 1/2 teaspoon fine sea salt
- Optional: 2 tablespoons crushed peanuts
- Optional: Sea salt flakes for topping
- Optional: 1/2 teaspoon vanilla extract
Instructions
- Line a standard 12-cup muffin tin with paper liners or silicone cups.
- Melt the sugar-free dark chocolate chips in a microwave-safe bowl in 30-second intervals, stirring between each, until mostly melted and smooth. Do not overheat.
- Place about 1 teaspoon of melted chocolate at the bottom of each liner, spreading it up the sides to create a base layer.
- Freeze the tin for 5 minutes to set the chocolate base.
- In a small mixing bowl, combine the natural peanut butter, sweetener, coconut oil, and salt. Stir vigorously until smooth and creamy. If too stiff, microwave for 10 seconds to soften.
- Remove the tin from the freezer and spoon the peanut butter mixture into the chocolate-lined cups, filling almost to the top.
- Smooth the top of the peanut butter layer. Sprinkle with optional crushed peanuts if desired.
- Spoon or pipe the remaining melted chocolate over the peanut butter layer to seal it completely. Smooth the top and optionally drizzle with remaining chocolate.
- Sprinkle with sea salt flakes if desired.
- Freeze for 20-30 minutes until the chocolate is completely hard.
- Store in an airtight container in the freezer.
Notes
Ensure your bowl and spoon are completely dry to prevent chocolate from seizing. Stir natural peanut butter thoroughly before measuring to ensure a uniform consistency. For a smoother texture, grind erythritol in a blender before adding to the peanut butter mixture. These can be stored in the freezer for up to 3 months.
- Prep Time: 15 minutes
- Cook Time: 0 minutes
- Category: Dessert
- Cuisine: American
Nutrition
- Serving Size: 1 cup
- Calories: 110
- Sugar: 1
- Sodium: 45
- Fat: 9
- Saturated Fat: 3
- Carbohydrates: 3
- Fiber: 1
- Protein: 3
Keywords: keto, low-carb, sugar-free, peanut butter, chocolate, fat bombs, dessert, snack, gluten-free, dairy-free


