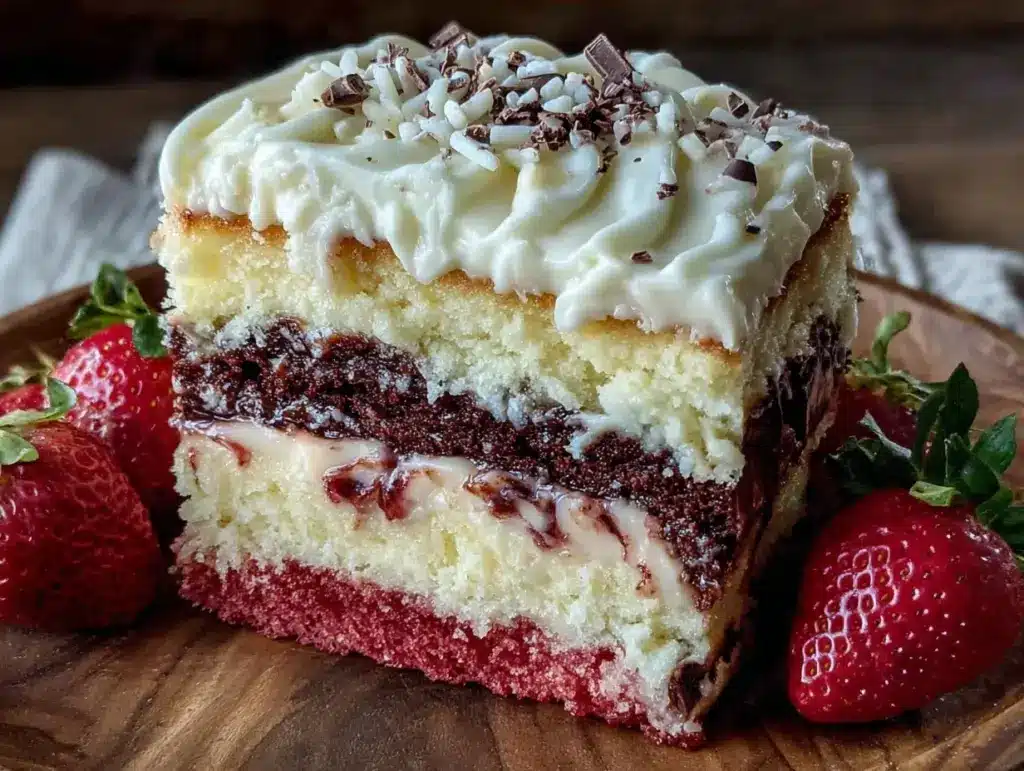
I still remember the smell of my Aunt Maria’s kitchen on a humid July afternoon in 1998. It wasn’t the smell of yeast or burnt sugar—it was the sharp, bright scent of melting butter mixed with the distinct, floral aroma of vanilla bean and the deep, earthy perfume of cocoa powder. Three separate pans, three separate bowls, and a whole lot of patience. My aunt didn’t believe in shortcuts. She believed that if you wanted a cake that tasted like childhood, you had to build it layer by layer, letting each part breathe before you stacked them.
That was the first time I truly understood what a Neapolitan cake was. Not the box mix version with the pre-colored frosting, but the real deal. The one where the red velvet layer is actually red (from the cocoa and buttermilk reaction, not just food coloring), the chocolate layer is dark and fudgy, and the vanilla layer is light as a cloud. It’s a cake that tastes like a birthday party where everyone is wearing their Sunday best, even if it’s just a Tuesday.
I’ve made this Neapolitan layer cake for every birthday since I was old enough to hold a whisk. My daughter’s fifth birthday? This cake. My husband’s fortieth? This cake. Even when I was too tired to think straight, I’d make this cake because it was the one thing that felt like coming home. It’s a lot of work, sure. But some things are worth the effort. This isn’t about speed; it’s about tradition. And once you taste it, you’ll understand why I make it on repeat.
Why You’ll Love This Neapolitan Layer Cake
There are a hundred birthday cakes out there. Some are fancy, some are minimalist, some are just chocolate with sprinkles. But this Neapolitan cake is different. It’s a conversation starter. It’s the cake that makes people ask, “How did you make three different flavors in one?” It’s the cake that tastes like nostalgia, even if you’re making it for the first time.
Three Flavors, One Cake — Seriously, who doesn’t love getting three different tastes in every bite? You get the rich cocoa, the sweet vanilla, and the tangy red velvet (which is just chocolate with buttermilk and a little extra color). It’s like getting three desserts in one. I’ve seen people argue over which slice to take next, and honestly, it’s the best kind of problem to have.
It’s a Conversation Piece — When you bring this cake to a party, heads turn. It’s not just a cake; it’s a statement. People remember it. I’ve had guests ask for the recipe three years later. It’s the kind of cake that becomes part of your family’s story. You’ll be the one making it for your kids’ kids one day.
Perfect for Celebrations — Whether it’s a birthday, a graduation, or just because you want to celebrate a small win, this cake fits. It’s festive without being overly sweet. The frosting is creamy and not too heavy, so you can eat a big slice without feeling guilty. Plus, it looks stunning. The layers are distinct, the frosting is smooth, and the sprinkles? Well, sprinkles are always a good idea.
It’s a Tradition — This isn’t just a recipe; it’s a ritual. The process of making it—mixing the batters, baking them separately, letting them cool, stacking them—takes time. But that time is the point. It’s a chance to slow down, to focus, to create something beautiful. I find it meditative. And the result? It’s worth every minute.
It Freezes Well — Real talk: sometimes you need to make a cake a day or two ahead. This cake freezes beautifully. You can bake the layers, wrap them tight, and freeze them. When you’re ready to assemble, just thaw and frost. It’s a lifesaver for busy planners. I’ve done this more times than I can count, and the texture never suffers.
Ingredients You’ll Need for the Real Deal
I’m particular about three things here: the butter, the cocoa, and the vanilla. If you skimp on those, the cake won’t taste right. But don’t worry, most of this is pantry staples. Here’s what you need to make the magic happen.
For the Vanilla Layer
All-purpose flour (2 cups / 250g) — The base of the cake. Don’t use self-rising; you need to control the leavening. I use Gold Medal, but any good all-purpose works.
Granulated sugar (1 ½ cups / 300g) — Not too much, not too little. Just enough to sweeten without being cloying.
Unsalted butter (½ cup / 115g, softened) — Room temperature is key. If it’s cold, it won’t cream properly. I leave it out while I prep the other ingredients.
Eggs (2 large) — Room temperature again. Cold eggs can make the batter curdle. I take them out of the fridge 30 minutes before baking.
Vanilla extract (2 teaspoons) — Real vanilla, please. I use Nielsen-Massey. It makes a huge difference. If you use imitation, the flavor will be flat.
Baking powder (1 ½ teaspoons) — Fresh is best. If your baking powder is older than 6 months, replace it. It won’t rise properly.
Salt (½ teaspoon) — Just a pinch to balance the sweetness.
Whole milk (1 cup / 240ml) — Room temperature. Adds moisture and richness.
For the Chocolate Layer
All-purpose flour (1 ½ cups / 185g) — Same as above.
Granulated sugar (1 ½ cups / 300g)
Unsalted butter (½ cup / 115g, softened)
Eggs (2 large, room temperature)
Dutch-process cocoa powder (½ cup / 50g) — This is crucial. Dutch-process is darker and less bitter. I use Ghirardelli. Natural cocoa is more acidic and tastes different.
Baking powder (1 ½ teaspoons)
Baking soda (½ teaspoon) — Reacts with the cocoa and buttermilk for lift.
Salt (½ teaspoon)
Buttermilk (1 cup / 240ml) — Room temperature. If you don’t have buttermilk, add 1 tablespoon of vinegar to milk and let it sit for 10 minutes.
Vanilla extract (1 teaspoon)
For the Red Velvet Layer
All-purpose flour (1 ½ cups / 185g)
Granulated sugar (1 ½ cups / 300g)
Unsalted butter (½ cup / 115g, softened)
Eggs (2 large, room temperature)
Dutch-process cocoa powder (2 tablespoons) — Just a little for color and depth.
Baking powder (1 ½ teaspoons)
Baking soda (½ teaspoon)
Salt (½ teaspoon)
Buttermilk (1 cup / 240ml)
Red food coloring (2 tablespoons) — Gel food coloring works best for vibrant color. I use AmeriColor. Liquid works, but you’ll need more.
Vanilla extract (1 teaspoon)
For the Frosting
Unsalted butter (1 cup / 225g, softened) — Lots of butter. This is a buttercream, not a cream cheese frosting.
Confectioners’ sugar (4 cups / 480g) — Sifted to avoid lumps. I sift mine twice.
Heavy cream (3-4 tablespoons) — Adjust for consistency.
Vanilla extract (2 teaspoons)
Salt (¼ teaspoon)
Red food coloring (optional, for tinting)
Equipment Needed
You don’t need fancy gadgets, but you do need the right pans. I use three 8-inch round cake pans. If you don’t have three, you can bake in two batches, but that takes longer.
Three 8-inch round cake pans — I use the heavy-duty aluminum ones. They conduct heat evenly. Grease them well with butter and flour, or use baking spray with flour.
Electric mixer — A hand mixer works, but a stand mixer is easier. I use a KitchenAid. If you’re mixing by hand, be prepared for some arm work.
Three mixing bowls — One for each batter. Or you can wash and reuse, but three is easier.
Wire cooling racks — Essential. You need to cool the layers completely before frosting. If they’re warm, the frosting will melt.
Offset spatula — For spreading the frosting smoothly. I have a cheap one from the dollar store, and it works fine.
Parchment paper — Cut circles to line the bottoms of the pans. This ensures the cakes don’t stick.
How to Make It: Step-by-Step
Alright, let’s make this! I’m walking you through exactly how I do it, including the little tricks I’ve picked up over the years. It’s not hard, but it does take time. So grab a cup of coffee and settle in.
Step 1: Prep Your Pans and Oven (10 minutes)
Preheat your oven to 350°F (175°C). Line the bottoms of your three 8-inch cake pans with parchment paper. Grease the sides and bottom with butter, then dust with flour. Tap out the excess. This is crucial for easy removal.
Step 2: Make the Vanilla Batter (10 minutes)
In a large bowl, cream the softened butter and sugar until light and fluffy. This takes about 3-4 minutes. Add the eggs one at a time, mixing well after each. Stir in the vanilla extract. In a separate bowl, whisk together the flour, baking powder, and salt. Alternately add the dry ingredients and the milk to the butter mixture, beginning and ending with the dry ingredients. Mix until just combined. Don’t overmix!
Step 3: Make the Chocolate Batter (10 minutes)
In another bowl, cream the butter and sugar. Add the eggs one at a time. In a third bowl, whisk the flour, cocoa powder, baking powder, baking soda, and salt. Alternately add the dry ingredients and the buttermilk to the butter mixture. Stir in the vanilla. The batter will be dark and rich.
Step 4: Make the Red Velvet Batter (10 minutes)
Repeat the process for the red velvet batter. Cream butter and sugar, add eggs, then alternate dry ingredients and buttermilk. Add the red food coloring last. Mix until the color is even. The batter should be a vibrant red.
Step 5: Bake the Layers (25-30 minutes)
Distribute the batters evenly among the three prepared pans. Bake for 25-30 minutes, or until a toothpick inserted into the center comes out clean. The vanilla layer may bake slightly faster, so check it first. Let the cakes cool in the pans for 10 minutes, then turn them out onto wire racks to cool completely. This is important. If you frost them warm, the cake will collapse.
Step 6: Make the Frosting (15 minutes)
In a large bowl, beat the softened butter until creamy. Gradually add the sifted confectioners’ sugar, one cup at a time, beating on low speed. Add the vanilla, salt, and heavy cream. Beat on high speed for 3 minutes until light and fluffy. If you want red frosting, add a little red food coloring now.
Step 7: Assemble the Cake (20 minutes)
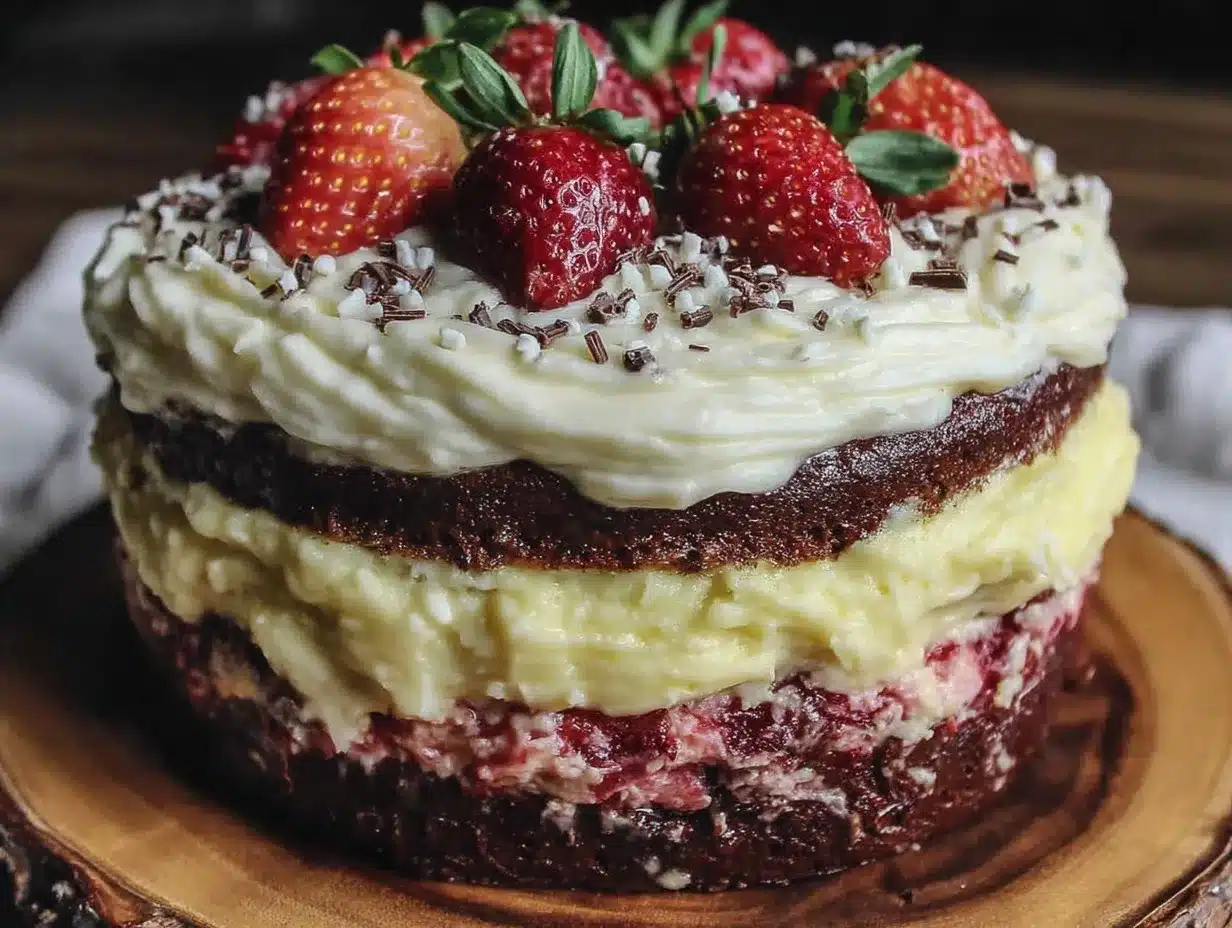
Place the vanilla layer on a cake stand or plate. Spread a layer of frosting on top. Add the chocolate layer, then frost. Add the red velvet layer, then frost the top and sides. Smooth the frosting with an offset spatula. Decorate with sprinkles if you like. This is where you get creative.
Expert Tips & Tricks
Here’s everything I’ve learned from making this cake dozens of times. These tips will save you from my mistakes.
Room Temperature Ingredients — This is non-negotiable. Cold butter, cold eggs, cold milk—they won’t emulsify properly. Your batter will be lumpy, and your cake will be dense. I set everything out the night before.
Don’t Overmix — Once you add the flour, mix until just combined. Overmixing develops gluten, which makes the cake tough. You want tender, not chewy.
Cool Completely — I know it’s tempting to frost while it’s warm, but don’t. The heat will melt the frosting and make the cake soggy. Let it cool on a rack for at least 2 hours.
Use Gel Food Coloring — Liquid food coloring can thin out your batter. Gel coloring is more potent and doesn’t affect the texture. It gives you that vibrant red without watering down the cake.
Chill Before Serving — Once the cake is frosted, chill it in the fridge for at least 30 minutes. This sets the frosting and makes it easier to slice. It also firms up the cake layers, so you get clean cuts.
Common Mistakes
Mistake: Cakes are dense. Fix: You overmixed the batter or your baking powder is old. Check your leavening agents.
Mistake: Frosting is too sweet. Fix: Add a pinch of salt or a splash of lemon juice to balance the sugar.
Mistake: Layers are uneven. Fix: Use a kitchen scale to weigh your batters. They should be equal weight for even layers.
Variations & Substitutions
Once you’ve nailed the basic version, here’s how you can mix it up. I’ve tried all of these.
Strawberry Red Velvet — Add ½ cup of pureed strawberries to the red velvet batter. It adds a natural sweetness and flavor. My kids love this version.
Chocolate Chip — Fold ½ cup of chocolate chips into the chocolate layer. It’s like a cookie in cake form.
Buttermilk Substitution — If you don’t have buttermilk, mix 1 cup of milk with 1 tablespoon of white vinegar or lemon juice. Let it sit for 10 minutes. It works just as well.
Gluten-Free — Use a 1:1 gluten-free flour blend. The texture will be slightly different, but it’s still delicious. I’ve used Bob’s Red Mill and it works great.
Dairy-Free — Use dairy-free butter and milk. The frosting will be less rich, but still tasty. My lactose-intolerant friend requests this version.
Serving & Storage
How to Serve: I usually serve this cake at room temperature. It’s softer and the flavors are more pronounced. But if it’s hot outside, chill it first. Slice with a sharp knife, wiping it clean between cuts.
Side Dishes: This cake is rich, so pair it with something light. A simple green salad or some fresh fruit works well. I also like to serve it with a cup of creamy iced caramel latte—the coffee cuts through the sweetness perfectly.
Storage: Store the cake in an airtight container at room temperature for up to 3 days. If it’s very humid, store it in the fridge. Bring it to room temperature before serving.
Freezing: You can freeze the unfrosted layers. Wrap them tightly in plastic wrap and foil. They’ll keep for up to 3 months. Thaw overnight in the fridge before frosting.
Nutrition Information
I’m not a nutritionist, but here’s the breakdown if you’re tracking. This is a indulgent cake, so enjoy in moderation.
Per Serving (based on 12 servings):
| Nutrient | Amount |
|---|---|
| Calories | 450 |
| Protein | 5g |
| Carbs | 60g |
| Fat | 22g |
| Sugar | 45g |
| Sodium | 250mg |
What’s Good: It’s a source of calcium from the dairy. It’s also a treat that brings people together.
What to Know: It’s high in sugar and fat. This is a celebration cake, not a daily snack. When I want to make it lighter, I use less frosting and add more fruit on top.
Final Thoughts
So that’s my Neapolitan layer cake! I’ve probably talked your ear off at this point, but when you make a recipe this often, you have a lot to say about it. This cake has saved birthdays, celebrations, and even just rainy Sundays. It’s my answer to “what’s for dessert” when I want something that tastes really good and feels special. My kids are happy, my husband’s happy, and I’m happy because I’m not stressed about cooking.
Make it yours! Try different add-ins, swap in your favorite vegetables, adjust the garlic (though more is always better in my opinion). The best recipes are the ones you adapt to your family’s tastes.
If you make this, drop a comment and let me know what you think! I love hearing how recipes turn out in your kitchen. And if something doesn’t work, tell me that too—I’m here to help troubleshoot.
Happy cooking! And I hope your kitchen smells half as good as mine does right now.
Frequently Asked Questions
Can I use box mix for this cake?
You can, but it won’t taste the same. Homemade batter is richer and has better texture. If you’re short on time, you can use box mixes as a base, but add an extra egg and use real vanilla instead of the packet flavor. It’s a compromise, but it’s better than nothing.
Why did my cake layers sink?
Usually, this means the cake was underbaked or you opened the oven door too early. Check the cake with a toothpick 5 minutes before the timer goes off. Also, make sure your oven temperature is accurate. An oven thermometer is a cheap investment that saves cakes.
Can I make this cake ahead?
Yes! Bake the layers a day ahead, wrap them tight, and freeze them. Thaw them in the fridge overnight. Make the frosting the day you plan to assemble. This takes the stress out of the day of the party.
Why is my frosting too sweet?
Buttercream is naturally sweet. If it’s too sweet, add a pinch of salt or a splash of lemon juice. You can also add a little unsweetened cocoa powder to the chocolate layer to balance the sweetness.
Can I use a different size pan?
You can, but the baking time will change. If you use 9-inch pans, the layers will be thinner and bake faster. If you use 6-inch pans, they’ll be taller and take longer. Adjust your baking time accordingly.
What’s the best way to store leftovers?
Store the cake in an airtight container at room temperature for up to 3 days. If it’s very hot, store it in the fridge. Bring it to room temperature before serving for the best flavor.
Can I freeze the frosted cake?
It’s not recommended. The frosting can become grainy or separate when frozen and thawed. It’s better to freeze the unfrosted layers and frost them fresh.
Pin This Recipe!
Neapolitan Layer Cake: The Real Way I Learned
- Total Time: 1 hour 10 minutes
- Yield: 12 servings 1x
Description
A traditional three-layer cake featuring distinct vanilla, chocolate, and red velvet batters, finished with a creamy vanilla buttercream. This recipe emphasizes quality ingredients and proper technique for a nostalgic, celebration-worthy dessert.
Ingredients
- 2 cups (250g) all-purpose flour
- 1 ½ cups (300g) granulated sugar
- ½ cup (115g) unsalted butter, softened
- 2 large eggs, room temperature
- 2 teaspoons vanilla extract
- 1 ½ teaspoons baking powder
- ½ teaspoon salt
- 1 cup (240ml) whole milk, room temperature
- 1 ½ cups (185g) all-purpose flour
- ½ cup (50g) Dutch-process cocoa powder
- ½ teaspoon baking soda
- 1 cup (240ml) buttermilk, room temperature
- 2 tablespoons red food coloring (gel works best)
- 1 cup (225g) unsalted butter, softened (for frosting)
- 4 cups (480g) confectioners’ sugar, sifted
- 3–4 tablespoons heavy cream
- ¼ teaspoon salt (for frosting)
Instructions
- Preheat oven to 350°F (175°C). Line three 8-inch round cake pans with parchment paper and grease sides/bottom with butter and flour.
- For the vanilla layer: Cream butter and sugar until fluffy. Add eggs one at a time, then vanilla. Alternately add dry ingredients (flour, baking powder, salt) and milk, mixing until just combined.
- For the chocolate layer: Cream butter and sugar. Add eggs. Whisk dry ingredients (flour, cocoa, baking powder, baking soda, salt). Alternately add dry ingredients and buttermilk, then stir in vanilla.
- For the red velvet layer: Repeat the creaming process. Add dry ingredients (flour, cocoa, baking powder, baking soda, salt) and buttermilk alternately. Stir in red food coloring and vanilla last.
- Divide batters evenly among the three prepared pans.
- Bake for 25-30 minutes or until a toothpick inserted in the center comes out clean. Cool in pans for 10 minutes, then turn out onto wire racks to cool completely.
- For the frosting: Beat softened butter until creamy. Gradually add sifted confectioners’ sugar, vanilla, salt, and heavy cream. Beat on high speed for 3 minutes until light and fluffy.
- Assemble the cake: Place vanilla layer on a stand, frost, add chocolate layer, frost, then add red velvet layer. Frost top and sides smoothly.
- Chill the assembled cake for at least 30 minutes before slicing.
Notes
Ensure all ingredients are at room temperature for proper emulsification. Do not overmix the batter to avoid a dense cake. Cool layers completely before frosting to prevent melting. Gel food coloring is preferred over liquid to maintain batter consistency. The cake can be frozen unfrosted for up to 3 months.
- Prep Time: 40 minutes
- Cook Time: 30 minutes
- Category: Dessert
- Cuisine: American
Nutrition
- Serving Size: 1 slice
- Calories: 450
- Sugar: 45
- Sodium: 250
- Fat: 22
- Saturated Fat: 13
- Carbohydrates: 60
- Fiber: 2
- Protein: 5
Keywords: Neapolitan cake, layer cake, red velvet, chocolate cake, vanilla cake, birthday cake, homemade cake, buttercream frosting


