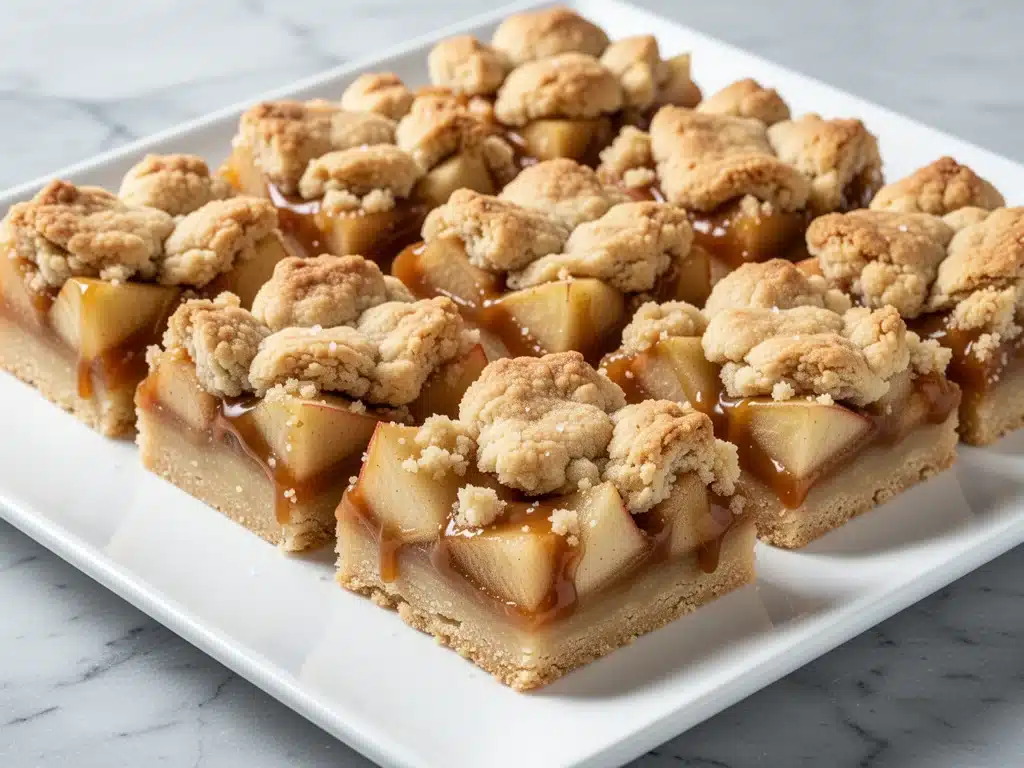
Last November, I walked into a local bakery and made the mistake of ordering a slice of apple pie. It was supposed to be the star of my afternoon, the sweet reward after a long, gray workday. What I got was a sad, soggy bottom crust that fell apart the moment my fork touched it, topped with a dollop of whipped cream that tasted like it had been sitting under a heat lamp since Tuesday. The “caramel” drizzle was just overly sweet syrup that did absolutely nothing to enhance the flavor. I paid $8 for that disappointment.
I came home furious. Not just at the bakery, but at the idea that I had to settle for mediocre dessert. I wanted something warm, something that smelled like my grandmother’s kitchen in October, but with a twist that felt modern and indulgent. I wanted salted caramel. I wanted crisp apples. I wanted a crust that actually held its structure. And I definitely didn’t want to spend four hours making a traditional pie that would only feed six people.
So I started experimenting. I realized that the problem with most apple pie bars is that they try too hard to be a pie. They’re just baked apple pie in a square pan. Boring. I needed layers. I needed texture. I needed that sticky, gooey, salty-sweet magic that makes you close your eyes when you take a bite.
After three failed attempts (one involved a crust so tough I thought I was eating cardboard, and another where the caramel turned into a rock-hard toffee), I finally nailed it. These best salted caramel apple pie bars are my answer to bad bakery desserts. They’re easier to make than a whole pie, easier to serve, and honestly? They taste better. The combination of a buttery shortbread base, spiced apple filling, and that rich, homemade-style caramel drizzle is unbeatable. I’ve made these for potlucks, for holiday gatherings, and just for myself on quiet Sundays. Every single time, people ask for the recipe. Every single time, they say it’s better than anything they’ve bought at a store. Let’s get baking.
Why You’ll Love This Recipe
There are a lot of dessert recipes out there, but these bars have earned a permanent spot in my rotation for a few specific reasons. They solve the biggest problem with traditional apple pie: the mess. Plus, they deliver on flavor in a way that feels luxurious without requiring a degree in pastry arts.
- No Rolling Pin Required — Seriously, if you hate rolling out dough, this is your salvation. The crust is a simple press-in shortbread. You just mix it, press it into the pan, and bake it. No sticking, no shrinking, no tears. It’s foolproof.
- Perfectly Portioned — Cutting a whole pie is intimidating if you only want one slice. These bars are already sliced. You grab a square, put it on a plate, and go. No server wars, no uneven slices where one person gets the crust-heavy corner and another gets the center.
- Flavor Explosion — Most store-bought apple desserts lack depth. Here, we use real cinnamon, nutmeg, and a pinch of cloves. Then we add the salted caramel. The salt cuts through the sweetness of the apples and the caramel, creating this addictive balance. It’s sweet, salty, tart, and spiced all in one bite.
- Make-Ahead Friendly — These taste even better the next day. The flavors meld together overnight, and the caramel sets into this perfect fudgy layer. I love making a batch on Sunday so I have ready-to-eat dessert all week long. They keep well in the fridge, too.
- Impressive but Easy — When I bring these to a dinner party, people assume I bought them from a high-end patisserie. They don’t realize it’s just me, a few simple ingredients, and 45 minutes of active time. It’s the perfect “I made this” flex.
Real talk: once you try these, you’ll never go back to dry, cold pie slices from the fridge. These are warm, gooey, and deeply satisfying. They’re the kind of dessert that makes you happy just by smelling them while they bake.
Ingredients You’ll Need
Here’s the thing about baking: the quality of your ingredients matters. You don’t need fancy, hard-to-find items, but you do need to pay attention to a few key components. I’m going to walk you through exactly what you need and why it matters.
For the Shortbread Crust
Unsalted butter (½ cup / 115g, softened) — This is the foundation. Softened butter mixes easier and creates a tender crust. If you use melted butter, the crust will be greasy. If you use cold butter, it won’t bind properly. Room temperature is the sweet spot.
Granulated sugar (¼ cup / 50g) — Just enough sweetness to complement the tart apples. You don’t want the crust to be too sweet, or it’ll compete with the caramel.
All-purpose flour (1 cup / 120g) — Standard flour works perfectly. Don’t try to swap this for almond flour unless you want a completely different texture. We want that classic, crumbly shortbread feel.
Salt (¼ teaspoon) — Even though the butter is unsalted, a pinch of salt in the crust enhances the overall flavor profile. Don’t skip it.
For the Apple Filling
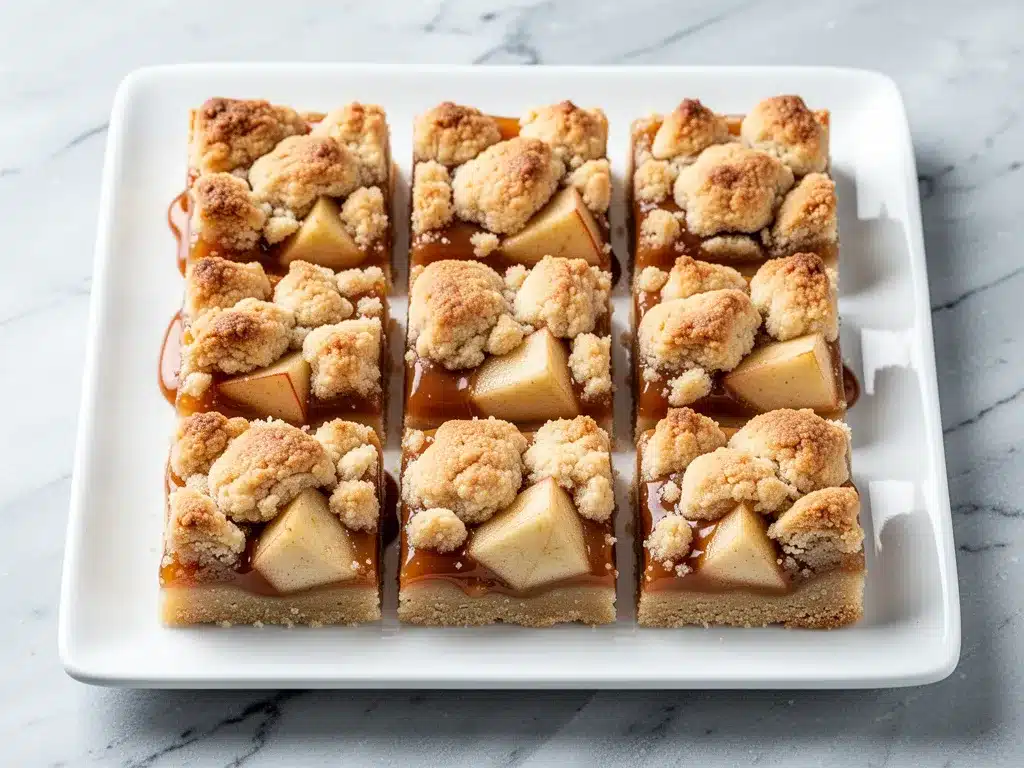
Granny Smith apples (3 large / about 450g) — This is non-negotiable. Granny Smiths hold their shape when baked and provide that necessary tartness. If you use Red Delicious or Gala, they’ll turn into mush and the bars will be too sweet. You want firm, tart apples.
Lemon juice (1 tablespoon) — Prevents the apples from browning and adds a bright note that balances the sugar.
Granulated sugar (½ cup / 100g) — Adjust based on how tart your apples are. If they’re super sour, maybe add a tablespoon more.
Ground cinnamon (1 teaspoon) — The classic apple flavor. Make sure it’s fresh; old cinnamon tastes dusty.
Ground nutmeg (¼ teaspoon) — Adds warmth. Just a little goes a long way.
Butter (1 tablespoon / 15g, melted) — Helps the apples caramelize slightly in the oven.
Cornstarch (1 teaspoon) — This thickens the juices released by the apples. Without it, you’ll have a soupy bottom layer. Trust me on this.
For the Salted Caramel Drizzle
Heavy cream (½ cup / 120ml) — Full fat only. Low-fat cream will split and look grainy.
Brown sugar (½ cup / 100g, packed) — Dark brown sugar has more molasses and gives a deeper, richer caramel flavor. Light brown works in a pinch, but dark is better.
Unsalted butter (2 tablespoons / 30g) — Adds richness and helps the caramel set slightly as it cools.
Salt (½ teaspoon flaky sea salt) — This is the “salted” part. Flaky salt adds nice crunch and bursts of salinity. If you only have kosher salt, use ¼ teaspoon.
Vanilla extract (1 teaspoon) — Pure vanilla, not imitation. It rounds out the sharp edges of the caramel.
Optional: Vanilla Bean Paste — If you want those pretty black specks for presentation, use vanilla bean paste instead of extract. It looks fancy and tastes amazing.
Equipment Needed
You don’t need a fancy kitchen for this. Here’s what I actually use:
8×8 inch baking pan — Line it with parchment paper, leaving an overhang on the sides. This is crucial for lifting the bars out later. I use Reynolds Wrap because it’s sturdy and non-stick.
Mixing bowls — Two medium bowls. One for the crust, one for the apples.
Small saucepan — For making the caramel. A small one prevents burning because the heat is more even. I use a 1-quart saucepan.
Microplane or grater — For grating the apples. You want thin, even slices so they cook uniformly. A box grater works too, but a microplane is faster.
Whisk — For mixing the caramel smoothly.
Spatula — For pressing the crust and stirring the apples.
How to Make It: Step-by-Step
Alright, let’s make these best salted caramel apple pie bars! I’m walking you through exactly how I do it, including the little tricks I’ve picked up over time.
Step 1: Prep Your Pan and Oven (5 minutes)
Preheat your oven to 350°F (175°C). Line your 8×8 inch baking pan with parchment paper. Leave a little overhang on the long sides—you’ll need this to lift the bars out later. Grease the parchment lightly with butter or cooking spray. This ensures nothing sticks.
Step 2: Make the Crust (5 minutes)
In a medium bowl, mix the softened butter and granulated sugar until creamy. It should look like wet sand. Add the flour and salt, and mix until a dough forms. It will be crumbly at first, but keep mixing until it comes together. Press this mixture firmly and evenly into the bottom of your prepared pan. Use the bottom of a measuring cup to pack it down tight. A tight crust prevents the filling from seeping through. Bake for 15 minutes until lightly golden. Remove from the oven and let it cool while you make the filling.
Step 3: Prepare the Apples (5 minutes)
Peel and core the Granny Smith apples. Grate them using the large holes of a box grater or a microplane. You want fine shreds, not chunks. Place the grated apples in a bowl. Add the lemon juice, sugar, cinnamon, nutmeg, melted butter, and cornstarch. Toss everything together until the apples are evenly coated. The cornstarch is key here—it’ll thicken the juices as they cook.
Step 4: Assemble and Bake (30-35 minutes)
Spread the apple mixture evenly over the pre-baked crust. It should be a flat, even layer. Bake for 30-35 minutes. You’ll know it’s done when the apples are tender (test with a knife) and the edges are bubbling slightly. The top should be golden brown. Remove from the oven and let it cool completely on a wire rack. This step takes patience, but it’s important so the caramel doesn’t melt into a mess when you pour it on.
Step 5: Make the Salted Caramel (10 minutes)
While the bars cool, make the caramel. In a small saucepan over medium heat, combine the heavy cream, brown sugar, and butter. Whisk constantly. The mixture will bubble up—don’t panic. Keep whisking until the sugar dissolves and the mixture is smooth and glossy. This takes about 3-4 minutes. Remove from heat and stir in the vanilla and salt. The caramel will thicken slightly as it cools.
Step 6: Drizzle and Chill (30+ minutes)
Once the bars are completely cool, pour the warm caramel over the top. Use a spatula to spread it evenly to the edges. Let it set at room temperature for 20 minutes, or pop them in the fridge for 15 minutes to speed things up. The caramel should be set but still slightly soft.
Step 7: Slice and Serve
Lift the bars out of the pan using the parchment overhang. Slice into 12 squares. Use a sharp knife for clean cuts. If the caramel is too soft, chill the knife under cold water before each cut. Serve with a dollop of whipped cream if you’re feeling fancy, or enjoy them plain.
Expert Tips & Tricks
Here’s everything I’ve learned from making these dozens of times. These tips will save you from my mistakes.
- Grate, Don’t Chop — Chopped apples take longer to cook and can remain crunchy in the center. Grating them ensures they cook through quickly and blend nicely with the crust.
- Don’t Skip the Pre-Bake — Baking the crust first prevents a soggy bottom. If you skip this, the crust will be raw and doughy in the middle. Trust the process.
- Watch the Caramel — Brown sugar burns easily. Keep the heat at medium, not high. Stir constantly. If it starts to smell burnt, toss it and start over. It’s better to be safe than sorry.
- Cool Completely — I know it’s tempting to cut into them warm, but the caramel will slide off. Let them cool completely for the best texture and cleanest slices.
- Sharp Knife is Key — For clean cuts, use a sharp chef’s knife. Wipe the blade between cuts if the caramel gets sticky. This keeps the presentation looking professional.
Variations & Substitutions
Once you’ve mastered the basic version, here’s how you can mix it up. I’ve tried all of these.
- Pumpkin Spice Version — Swap the cinnamon and nutmeg for pumpkin pie spice. Add ½ cup of pumpkin puree to the apple mixture (reduce sugar slightly). Perfect for fall.
- Maple Caramel Drizzle — Replace the brown sugar in the caramel with maple syrup. Adds a wonderful woody flavor that pairs beautifully with apples.
- Cheddar Cheese Crust — Add ¼ cup of grated sharp cheddar to the crust dough. This is a classic Southern twist that adds a savory contrast to the sweet filling.
- Gluten-Free — Use a 1:1 gluten-free flour blend in the crust. The texture might be slightly crumblier, but it still works. The rest of the recipe is naturally gluten-free.
- Vegetarian — This recipe is already vegetarian. Just ensure your vanilla extract and caramel are vegan-friendly if you need it to be vegan.
Serving & Storage
How to Serve: These bars are great on their own, but I love serving them with a scoop of vanilla ice cream or a dollop of whipped cream. The warm, gooey caramel contrasts nicely with the cold cream. They’re also perfect for potlucks because they’re easy to grab and eat.
Storage: Store leftovers in an airtight container in the refrigerator for up to 5 days. They actually taste better after a day or two as the flavors meld. You can also freeze them for up to 2 months. Wrap individual bars in plastic wrap and then foil. Thaw in the fridge overnight before serving.
Reheating: If you want them warm, microwave a bar for 15-20 seconds. The caramel will get gooey and the apples will soften further. Be careful not to overheat, or the caramel might melt too much.
Nutrition Information
I’m not a nutritionist, but here’s the breakdown if you’re tracking. This is a rich dessert, so portion control is key.
| Nutrient | Per Bar (1 of 12) |
|---|---|
| Calories | 280 |
| Carbs | 42g |
| Sugar | 28g |
| Fat | 12g |
| Saturated Fat | 7g |
| Protein | 2g |
| Fiber | 1g |
| Sodium | 150mg |
Look, this is a dessert with caramel and butter. It’s not a health food. But it’s way better than store-bought bars, and you control the sugar. If you want to lighten it up, use half the caramel drizzle or swap half the butter in the crust for coconut oil.
Final Thoughts
So that’s my go-to best salted caramel apple pie bars recipe! I’ve probably talked your ear off at this point, but when you make a recipe this often, you have a lot to say about it. These bars have saved my dessert game more times than I can count. They’re my answer to “what do I bring to the party?” or “what do I make for a quick treat?”
Make them yours! Try different apples, swap the caramel for a chocolate drizzle, or add some chopped nuts on top. The best recipes are the ones you adapt to your family’s tastes. If you make these, drop a comment and let me know what you think! I love hearing how recipes turn out in your kitchen. And if something doesn’t work, tell me that too—I’m here to help troubleshoot.
Happy baking! And I hope your kitchen smells half as good as mine does right now.
Frequently Asked Questions
Can I use a different type of apple?
You can, but I strongly recommend sticking with tart apples like Granny Smith, Honeycrisp, or Braeburn. Sweet apples like Red Delicious or Fuji will turn mushy and lack the necessary tartness to balance the sweet caramel. If you must use a sweet apple, add an extra tablespoon of lemon juice to compensate.
Can I make the caramel ahead of time?
Yes! You can make the caramel up to 3 days ahead and store it in a jar in the fridge. Reheat it gently in the microwave or on the stove before drizzling. It will thicken in the fridge, so add a splash of cream if it’s too stiff.
Why did my caramel seize up?
This usually happens if the cream is too cold when added to the hot sugar, or if water gets into the pan. Make sure your cream is warm or room temperature. Also, don’t stir the sugar once it starts melting, as this can cause crystallization. If it seizes, add a little more warm cream and whisk vigorously to bring it back together.
Can I freeze these bars?
Absolutely. Wrap individual bars tightly in plastic wrap and then foil. They’ll last in the freezer for up to 2 months. Thaw in the fridge overnight. The texture might change slightly, but they’ll still be delicious.
Is there a substitute for heavy cream in the caramel?
You can use half-and-half, but the caramel will be thinner and less rich. Coconut cream is a good dairy-free option, though it will add a coconut flavor. For the best texture and flavor, stick with heavy cream.
Can I use pre-grated apples?
Pre-grated apples are often treated with anti-browning agents and can have a different texture. It’s better to grate them fresh. If you’re short on time, you can use a food processor with the grating blade, but be careful not to over-process them into applesauce.
Pin This Recipe!
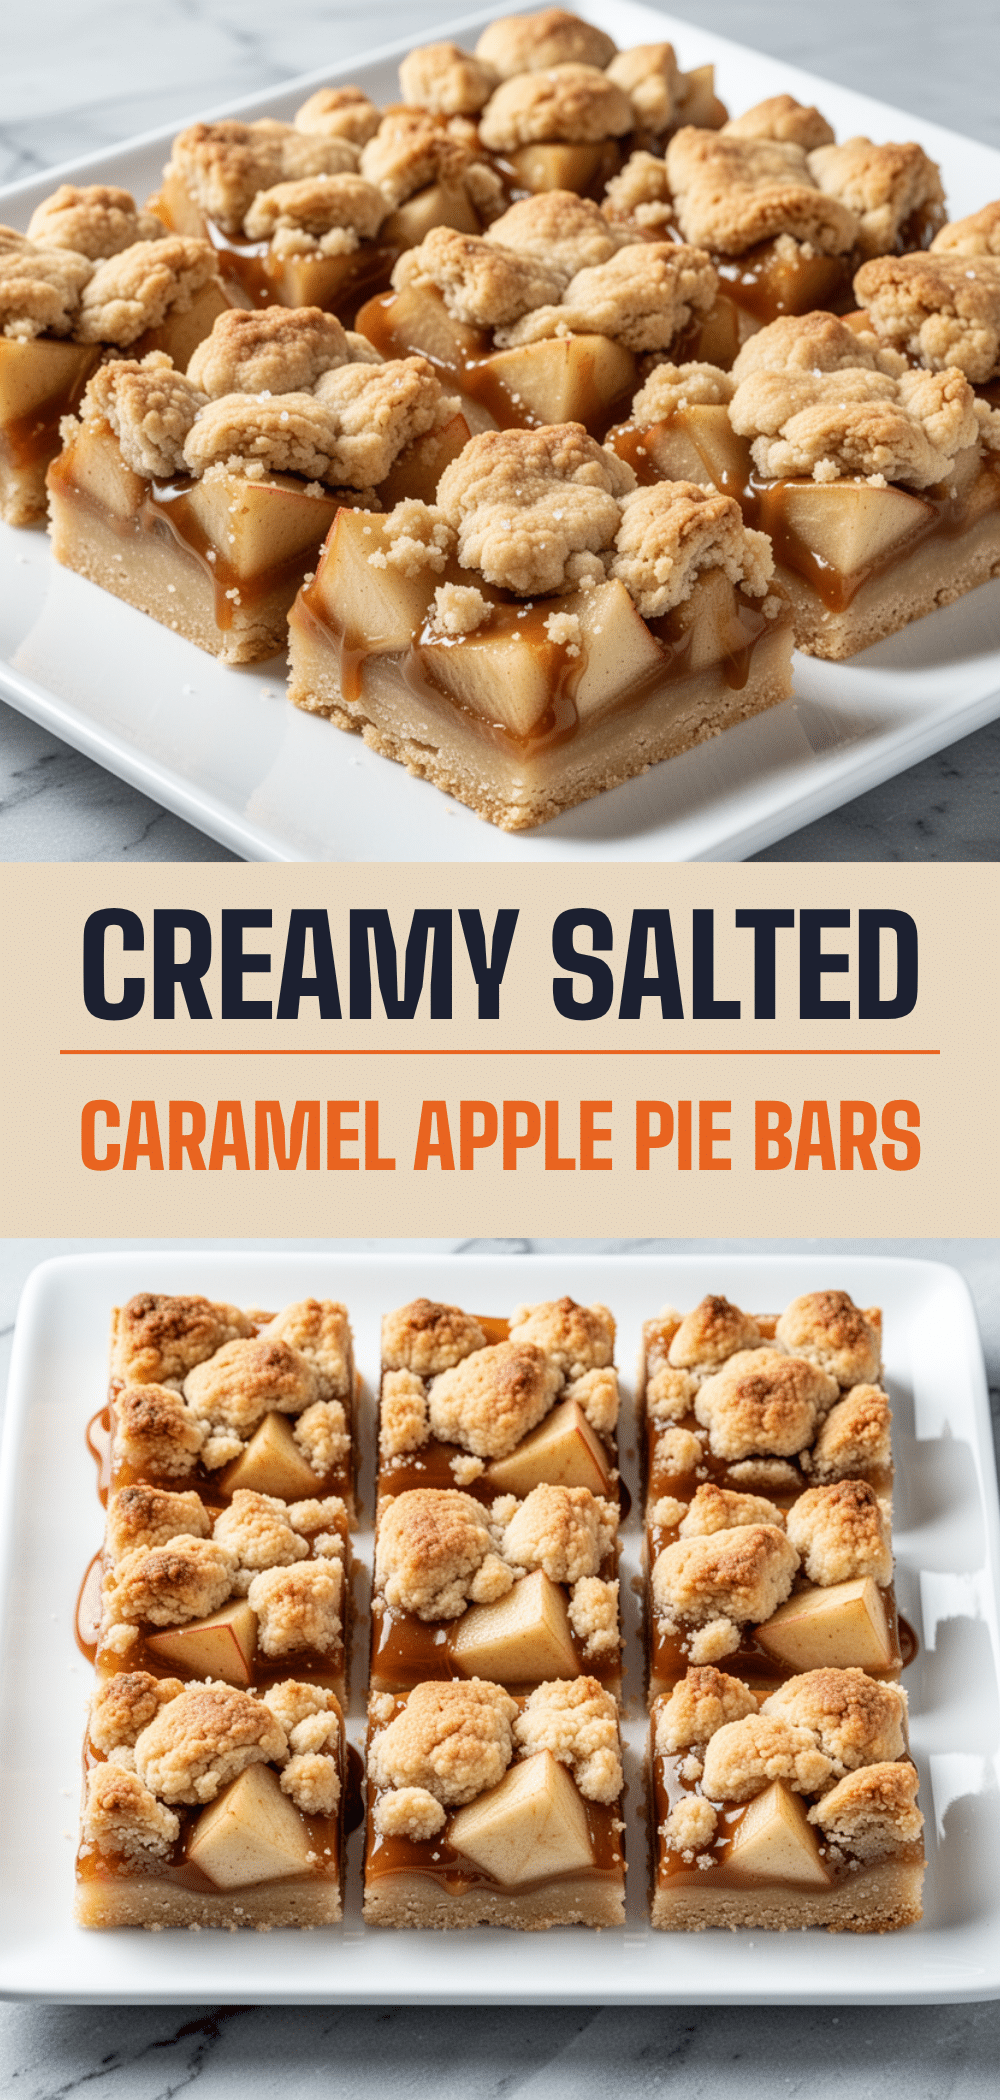
Salted Caramel Apple Pie Bars: Easy Best Dessert
- Total Time: 60 minutes
- Yield: 12 servings
Description
These easy-to-make salted caramel apple pie bars feature a buttery shortbread crust, spiced grated apple filling, and a rich homemade salted caramel drizzle. They are easier than traditional pie and deliver a perfect balance of sweet, salty, and tart flavors.
Ingredients
- For the Shortbread Crust: ½ cup (115g) unsalted butter, softened
- For the Shortbread Crust: ¼ cup (50g) granulated sugar
- For the Shortbread Crust: 1 cup (120g) all-purpose flour
- For the Shortbread Crust: ¼ teaspoon salt
- For the Apple Filling: 3 large Granny Smith apples (about 450g), peeled and grated
- For the Apple Filling: 1 tablespoon lemon juice
- For the Apple Filling: ½ cup (100g) granulated sugar
- For the Apple Filling: 1 teaspoon ground cinnamon
- For the Apple Filling: ¼ teaspoon ground nutmeg
- For the Apple Filling: 1 tablespoon (15g) butter, melted
- For the Apple Filling: 1 teaspoon cornstarch
- For the Salted Caramel Drizzle: ½ cup (120ml) heavy cream
- For the Salted Caramel Drizzle: ½ cup (100g) packed brown sugar
- For the Salted Caramel Drizzle: 2 tablespoons (30g) unsalted butter
- For the Salted Caramel Drizzle: ½ teaspoon flaky sea salt
- For the Salted Caramel Drizzle: 1 teaspoon vanilla extract
Instructions
- Preheat oven to 350°F (175°C). Line an 8×8 inch baking pan with parchment paper, leaving an overhang on the sides, and grease lightly.
- In a medium bowl, mix softened butter and granulated sugar until creamy. Add flour and salt, mixing until a dough forms. Press firmly into the bottom of the prepared pan.
- Bake the crust for 15 minutes until lightly golden. Remove and let cool while preparing the filling.
- Grate the peeled apples. In a bowl, toss grated apples with lemon juice, sugar, cinnamon, nutmeg, melted butter, and cornstarch until evenly coated.
- Spread the apple mixture evenly over the pre-baked crust.
- Bake for 30-35 minutes until apples are tender and edges are bubbling. Remove and let cool completely on a wire rack.
- While bars cool, make the caramel: In a small saucepan over medium heat, combine heavy cream, brown sugar, and butter. Whisk constantly until smooth and glossy (3-4 minutes).
- Remove caramel from heat and stir in vanilla and salt.
- Pour warm caramel over the completely cooled bars and spread evenly.
- Let caramel set at room temperature for 20 minutes or in the fridge for 15 minutes.
- Lift bars out of the pan using parchment overhang. Slice into 12 squares with a sharp knife.
Notes
Grate the apples rather than chopping them to ensure they cook through quickly and blend well with the crust. Do not skip pre-baking the crust to prevent a soggy bottom. Ensure the bars are completely cool before adding the caramel to prevent it from sliding off. For clean cuts, use a sharp knife and wipe the blade between cuts.
- Prep Time: 15 minutes
- Cook Time: 45 minutes
- Category: Dessert
- Cuisine: American
Nutrition
- Serving Size: 1 bar
- Calories: 280
- Sugar: 28
- Sodium: 150
- Fat: 12
- Saturated Fat: 7
- Carbohydrates: 42
- Fiber: 1
- Protein: 2
Keywords: salted caramel apple pie bars, apple dessert, easy baking, shortbread crust, homemade caramel, fall recipes, make-ahead dessert


