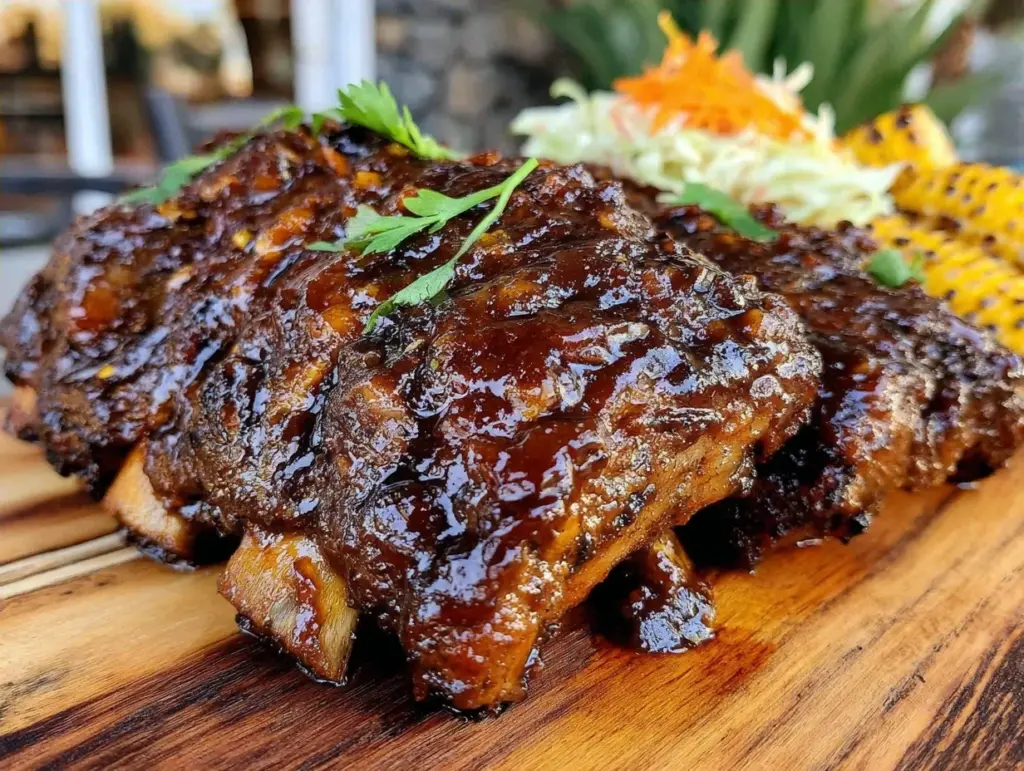
I still remember the first time I realized I’d been doing it wrong. It was a humid July evening, and my neighbor, a guy named Earl who had that permanent tan and a smoker that looked like it was built in 1974, had invited us over. I showed up with store-bought ribs, hoping to impress. Earl didn’t say much. He just handed me a plate of his own ribs, dark and glossy, with a bark so crispy it cracked when he pulled it apart.
I took one bite. And I stopped breathing for a second. It wasn’t just meat; it was smoky, sweet, tender, and complex all at once. When I asked him for the recipe, he laughed and said, “Son, you’re overcomplicating it. You don’t need a PhD in chemistry. You need patience, the right rub, and low heat.”
That night changed everything for me. I spent the next six months experimenting with dry rubs, wood chips, and temperature gauges, failing more times than I care to admit (burnt edges, dry meat, sad-looking racks). But eventually, I cracked the code. I found a method that delivers that restaurant-quality, fall-off-the-bone tenderness without requiring a degree in barbecue science or a backyard the size of a tennis court.
These smoky BBQ ribs are the result. They’re simpler than you think, requiring just five key ingredients to build a flavor profile that’s deeper and richer than anything you’ll get at a takeout joint. The secret isn’t in the complexity; it’s in the technique. And once you taste these, you’ll never look at a rib rack the same way again.
Why You’ll Love This Recipe
There’s something primal about eating ribs. It’s messy, it’s satisfying, and it feels like a celebration even if it’s just a Tuesday night. I’ve made this smoky BBQ ribs recipe for everything from casual backyard hangouts to dinner parties where I’m trying to look like I have my life together. Here’s why it keeps showing up in my rotation:
- Restaurant Quality at Home — Seriously, the bark on these ribs is incredible. The combination of the dry rub and the slow cooking creates a crust that’s spicy, sweet, and slightly charred. It’s the kind of texture that makes people stop mid-chew and ask, “How did you do that?”
- Stupidly Simple Ingredients — I’m not talking about a pantry full of obscure spices. You probably have everything you need right now. Brown sugar, paprika, garlic powder, salt, and your favorite BBQ sauce. That’s it. No fancy rubs from specialty stores.
- Tender Enough to Melt — The biggest fear people have with ribs is dry, chewy meat. This method ensures the collagen breaks down completely. These ribs are so tender they practically slide off the bone. My kids eat them with a fork and knife, and I don’t blame them.
- Smoky Flavor Without a Smoker — I know, I know. You don’t have a $2,000 smoker. But we’re using a trick that adds that deep, wood-fired flavor using just your oven or a basic grill. It’s the closest you’ll get to Earl’s ribs without moving to Tennessee.
- Perfect for Sharing — Ribs are inherently communal. This recipe yields a full rack that’s perfect for pulling apart at the table. It’s the ultimate crowd-pleaser. I’ve served these alongside BBQ chicken skewers for summer cookouts, and they’re always the first thing to disappear.
This is my go-to when I want to impress guests without spending hours in the kitchen stressing over temperatures. It’s reliable, delicious, and makes your house smell like a high-end BBQ joint.
Ingredients You’ll Need
Here’s the best part about this smoky BBQ ribs recipe: the ingredient list is short, but every single item plays a huge role. I’m not going to skimp on quality here, because with only five ingredients, each one needs to earn its place.
For the Ribs
Pork Baby Back Ribs (3-4 pounds) — I prefer baby backs because they’re leaner and more tender than spare ribs. Look for a rack that’s meaty and has a good layer of fat, but not a thick, waxy cap. You want it to look pink and fresh, not gray or slimy. If you can’t find baby backs, spare ribs work too, but they’ll need a bit more cooking time to get tender.
Brown Sugar (½ cup, packed) — This is the base of your dry rub. It caramelizes beautifully in the oven, creating that sticky, sweet bark. Dark brown sugar is better here because it has more molasses, which adds depth. Don’t use light brown sugar unless you have no other choice; the flavor just isn’t as rich.
Smoked Paprika (2 tablespoons) — This is the secret weapon for that “smoky” flavor without a smoker. Regular paprika is sweet and mild, but smoked paprika is made from peppers dried over open fires. It adds a deep, woodsy aroma that transforms the dish. If you can’t find smoked paprika, you can use regular paprika plus a teaspoon of liquid smoke, but the smoked version is superior.
Garlic Powder (1 tablespoon) — Fresh garlic can burn at high heat, so powder is safer and distributes more evenly. It adds a savory backbone to the sweetness. I use a good quality garlic powder, not the stuff in the shaker that’s been sitting in your cabinet for three years. If it smells faint, toss it and buy fresh.
Salt (1 tablespoon) — I use kosher salt because it’s easier to control. Table salt is too fine and can make the ribs overly salty if you’re not careful. The salt helps draw out moisture and tenderizes the meat over the long cooking time.
For the Glaze
Your Favorite BBQ Sauce (1 cup) — This is where you can get personal. I like a sauce that’s a balance of sweet and tangy. Sweet Baby Ray’s is a classic, but I also love a Carolina-style vinegar sauce for a sharper kick. Avoid sauces that are too thin; you want something with body so it sticks to the ribs. If you have time, try my BBQ pulled chicken sliders recipe for a side that pairs perfectly with this glaze.
Butter (2 tablespoons) — Optional, but I highly recommend it. Adding a little butter to the sauce right before brushing it on adds richness and helps the sauce shine. It’s a chef’s trick that makes a big difference.
Equipment Needed
You don’t need fancy equipment for this. Here’s what I actually use:
- Large Baking Sheets — I use two large rimmed baking sheets. One for the ribs and one underneath to catch any drips. Don’t skip the drip pan; BBQ sauce burns easily, and you don’t want to scrub a dirty oven later.
- Heavy-Duty Aluminum Foil — You’ll be wrapping the ribs tightly. Get the heavy-duty kind; regular foil tears too easily when you’re sealing in the steam.
- Pastry Brush — For applying the sauce. Silicone brushes are easier to clean, but a natural bristle brush works fine too. Just make sure it’s clean.
- Sharp Knife or Kitchen Shears — To trim the membrane and cut the rack into individual ribs. Sharp tools make this step much safer and easier.
- Measuring Cups and Spoons — For the rub. Consistency matters, so measure carefully.
Pro Tip: If you have a meat thermometer, use it. The internal temperature of the ribs should reach around 190°F (88°C) for fall-off-the-bone tenderness. But if you don’t have one, the “bend test” works too: pick up the rack with tongs, and if it bends easily and the surface cracks, it’s done.
How to Make It: Step-by-Step
Alright, let’s make these smoky BBQ ribs! I’m walking you through exactly how I do it, including the little tricks I’ve picked up over the years.
Step 1: Prep the Ribs (10 minutes)
Start by removing the ribs from the fridge and letting them sit out for 30 minutes while you preheat your oven. This helps them cook more evenly. Next, flip the rack over. You’ll see a thin, shiny membrane on the bone side. This is the silverskin, and you need to remove it. Slide your knife under one end of the membrane, lift it up, and grab it with a paper towel for grip. Pull it off in one piece. It might take a few tries, but it’s worth it. If you leave it on, the ribs won’t get tender, and the rub won’t penetrate.
Step 2: Make the Dry Rub (2 minutes)
In a small bowl, mix together the brown sugar, smoked paprika, garlic powder, and salt. Stir until well combined. The mixture should look like wet sand. If it’s too dry, add a teaspoon of water. If it’s too wet, add a bit more paprika.
Step 3: Season the Ribs (5 minutes)
Pat the ribs dry with paper towels. This is crucial—any moisture will prevent the rub from sticking. Generously apply the rub to both sides of the ribs, pressing it into the meat. Don’t be shy; you want a thick, even coat. Rub the sides too. Once coated, wrap the ribs tightly in plastic wrap and let them rest in the fridge for at least 1 hour, or up to 24 hours. This marinating step allows the flavors to penetrate the meat. If you’re short on time, you can cook them immediately, but the flavor will be much better if you let them rest.
Step 4: The Slow Cook (2 hours)
Preheat your oven to 300°F (150°C). Remove the ribs from the fridge and unwrap them. Place the rack on a large baking sheet lined with foil. Wrap the ribs tightly in another layer of foil, creating a sealed packet. This steams the ribs in their own juices, making them incredibly tender. Place the packet in the oven and cook for 2 hours. Do not open the oven during this time. The low and slow heat breaks down the connective tissues.
Step 5: The Sauce and Char (15 minutes)
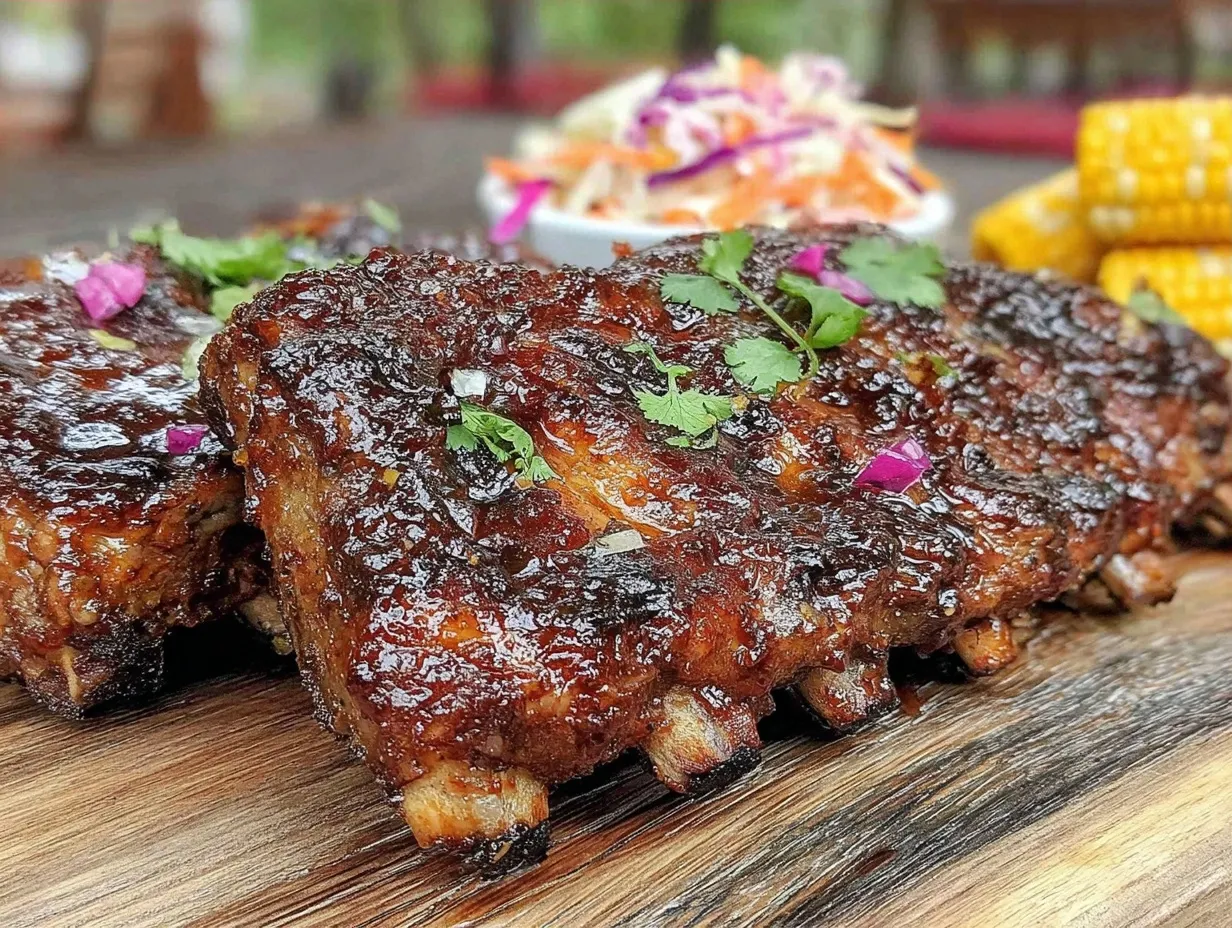
Remove the ribs from the oven and carefully open the foil. Be careful of the steam! Pour off any excess liquid from the packet. Brush the ribs generously with your BBQ sauce on both sides. Place the ribs back on the baking sheet, uncovered, and increase the oven temperature to 400°F (200°C). Return them to the oven for 10-15 minutes. You’re looking for the sauce to bubble and caramelize. Keep an eye on them; you want the edges to get slightly charred, but not burnt.
Step 6: Rest and Serve (10 minutes)
Remove the ribs from the oven and let them rest for 10 minutes before cutting. This allows the juices to redistribute. If you cut them immediately, all the flavor will run out onto the plate. Slice between the bones and serve immediately with extra sauce on the side. These ribs are best served hot, maybe with a side of grilled chicken salad to balance out the richness.
Expert Tips & Tricks
Here’s everything I’ve learned from making this dozens of times. These tips will save you from my mistakes.
The Membrane is the Enemy
I can’t stress this enough. If you don’t remove the silverskin, the ribs will be tough. It’s a non-negotiable step. If you struggle to get it off, use a butter knife to loosen the edge, then grab it with a paper towel. The paper towel gives you the grip you need.
Don’t Skimp on the Rest Time
After the final bake, let the ribs rest. I know it’s tempting to dig in, but waiting 10 minutes makes a huge difference in texture. The meat firms up slightly, making it easier to handle and eat.
Sauce Late, Not Early
BBQ sauce is full of sugar, which burns easily. If you put it on too early, you’ll get charred, bitter sauce. Always apply the sauce in the last 15 minutes of cooking. This gives you that sticky, glossy finish without the bitterness.
Use a Drip Pan
Place a baking sheet on the rack below the ribs to catch drips. BBQ sauce is sticky and sweet, and it will burn on the bottom of your oven. Cleaning a burnt oven is a nightmare. Do yourself a favor and use a drip pan.
The Bend Test
Not sure if they’re done? Pick up the rack with tongs. If it bends easily and the surface cracks, they’re ready. If they’re stiff, give them more time.
Variations & Substitutions
Once you’ve nailed the basic version, here’s how you can mix it up. I’ve tried all of these.
Spicy BBQ Ribs
Add 1 teaspoon of cayenne pepper or chipotle powder to the dry rub. This adds a nice kick that balances the sweetness. My husband likes it spicy, so I always make a batch with extra heat.
Honey Mustard Glaze
Swap the BBQ sauce for a mixture of honey, Dijon mustard, and apple cider vinegar. It’s tangier and less sweet. This is a great option if you want something different.
Beer-Brined Ribs
Soak the ribs in a mixture of beer, apple juice, and salt for 4 hours before seasoning. This adds moisture and a subtle malt flavor. It’s a bit more work, but the result is juicy and flavorful.
Gluten-Free
Most BBQ sauces contain gluten (usually from soy sauce). Check your label and use a certified gluten-free sauce. The dry rub is naturally gluten-free, so you’re good to go.
Dairy-Free
Skip the butter in the sauce. The ribs are naturally dairy-free, so this is an easy swap.
Serving & Storage
How to Serve:
I usually serve these straight from the cutting board, piled high on a platter. It looks rustic and inviting. Pair them with grilled BBQ chicken thighs for a protein-packed feast. Add some corn on the cob, coleslaw, and crusty bread. It’s a complete meal that feels like a vacation.
Toppings Bar:
When I have guests, I put out extra sauce, chopped parsley, and lemon wedges. Let everyone customize their ribs. It’s a fun way to engage your guests.
Storage:
Refrigerator: Store leftovers in an airtight container for up to 3 days. The flavors actually get better after a day or two as they meld together.
Reheating: The best way to reheat ribs is in the oven. Preheat to 350°F, wrap the ribs in foil with a splash of water or BBQ sauce, and heat for 15-20 minutes. This keeps them moist. Avoid the microwave; it tends to make the meat rubbery.
Freezing: You can freeze cooked ribs for up to 3 months. Wrap them tightly in plastic and then foil. Thaw in the fridge overnight and reheat as above. Note that the texture might be slightly softer after freezing, but the flavor remains great.
Nutrition Information
I’m not a nutritionist, but here’s the breakdown if you’re tracking. Keep in mind that nutrition can vary based on the specific ribs and sauce you use.
Per Serving (based on 6 servings, 2 ribs per serving):
- Calories: 450
- Protein: 28g
- Carbs: 22g
- Fiber: 1g
- Sugar: 18g
- Fat: 28g
- Saturated Fat: 10g
- Cholesterol: 95mg
- Sodium: 650mg
What’s Good: High in protein, which is great for muscle repair. The pork is a good source of B vitamins.
What to Know: Higher in calories and fat due to the pork and sauce. The sugar content comes from the brown sugar and BBQ sauce. If you’re watching your sugar, consider using a sugar-free BBQ sauce or reducing the amount of brown sugar in the rub.
My Take: Look, this is comfort food. It’s not a diet meal. But it’s made with real ingredients, and you control what goes in it. When I want to make it lighter, I trim the visible fat before cooking and use a lighter sauce. But usually? I just enjoy it. Life’s too short to stress over every calorie.
Final Thoughts
So that’s my recipe for smoky BBQ ribs better than takeout. I’ve probably talked your ear off at this point, but when you make a recipe this often, you have a lot to say about it. These ribs have saved my dinner parties more times than I can count. They’re my answer to “what’s for dinner” when I want to impress but don’t want to spend hours in the kitchen.
Make it yours! Try different rubs, swap the sauce, or add some heat. The best recipes are the ones you adapt to your family’s tastes. If you make this, drop a comment and let me know what you think! I love hearing how recipes turn out in your kitchen. And if something doesn’t work, tell me that too—I’m here to help troubleshoot.
Happy cooking! And I hope your kitchen smells half as good as mine does right now.
Frequently Asked Questions
Can I use spare ribs instead of baby backs?
Yes, you can. Spare ribs are meatier and have more connective tissue, so they’ll need a bit more cooking time. I’d recommend adding 30 minutes to the initial slow-cook step. The result will be chewier and more robust, which some people prefer.
Why did my ribs turn out dry?
This usually happens if you cook them at too high a temperature or don’t wrap them tightly enough. The foil packet is crucial for steaming the meat. If the foil leaks, the moisture escapes, and the ribs dry out. Also, make sure you’re not overcooking them. Once they pass 190°F, they can start to dry out.
Can I make this ahead for a party?
Absolutely. You can cook the ribs through the slow-cook step, let them cool, and refrigerate them for up to 2 days. When you’re ready to serve, unwrap them, apply the sauce, and finish them in the oven at 400°F. They’ll come out just as tender and delicious.
What wood chips should I use?
If you’re using a grill or smoker, hickory and applewood are classic choices for pork. Hickory is strong and smoky, while applewood is sweeter and milder. For this oven method, the smoked paprika does the heavy lifting, but if you want to add a smoky element, you can soak wood chips and place them in a foil pouch in the oven.
How do I know when the ribs are done?
Use the bend test or a meat thermometer. The internal temperature should be around 190°F-203°F. At this temperature, the collagen has broken down, and the meat is tender. If you’re unsure, give them a few more minutes. They’re hard to overcook, but easy to undercook.
Can I freeze the dry rub?
Yes, the dry rub keeps well in an airtight container for up to 6 months. I often make a big batch and keep it in the pantry for quick weeknight dinners. Just shake it up before using to redistribute any clumps.
What sides go well with BBQ ribs?
Classic sides include coleslaw, baked beans, corn on the cob, and mac and cheese. For a lighter option, try a simple green salad with a vinaigrette. I also love serving them with BBQ chicken skewers for a mixed grill feast.
Pin This Recipe!
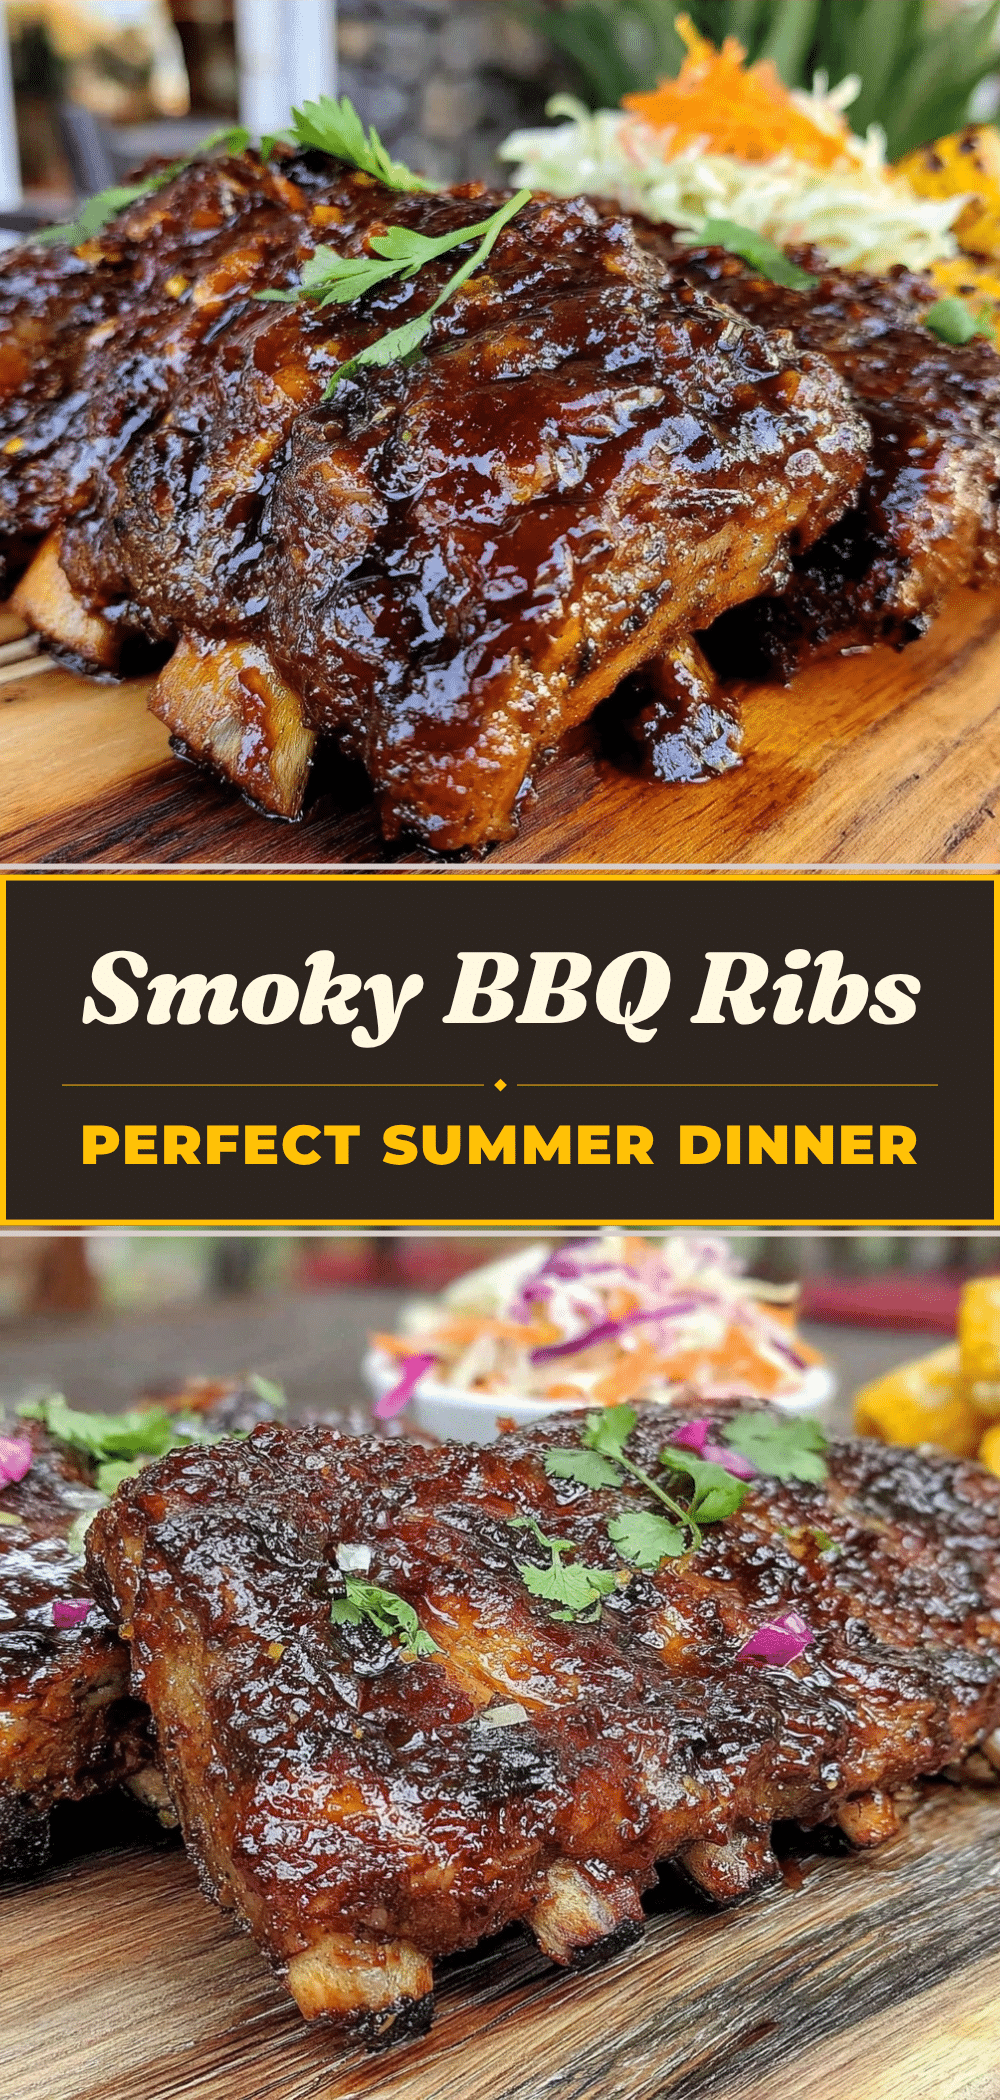
Smoky BBQ Ribs: 5-Ingredient Easy Recipe
- Total Time: 2 hours 25 minutes
- Yield: 6 servings 1x
Description
These smoky BBQ ribs deliver restaurant-quality, fall-off-the-bone tenderness using just five key ingredients. The secret lies in a simple dry rub, a low-and-slow oven bake, and a caramelized glaze, requiring no expensive smoker.
Ingredients
- 3–4 pounds Pork Baby Back Ribs
- ½ cup packed Brown Sugar
- 2 tablespoons Smoked Paprika
- 1 tablespoon Garlic Powder
- 1 tablespoon Kosher Salt
- 1 cup Your Favorite BBQ Sauce
- 2 tablespoons Butter (optional)
Instructions
- Preheat oven to 300°F (150°C). Remove ribs from fridge and let sit for 30 minutes.
- Flip the rack over and remove the silverskin membrane from the bone side using a knife and paper towel for grip.
- Pat ribs dry with paper towels. In a small bowl, mix brown sugar, smoked paprika, garlic powder, and salt to create the dry rub.
- Generously apply the rub to both sides of the ribs, pressing it into the meat. Wrap tightly in plastic wrap and refrigerate for at least 1 hour (or up to 24 hours).
- Line a large baking sheet with heavy-duty aluminum foil. Place ribs on the foil and wrap tightly to create a sealed packet.
- Place the packet in the oven and cook for 2 hours without opening.
- Remove ribs from oven and carefully open the foil. Pour off excess liquid.
- Brush ribs generously with BBQ sauce (mixed with butter if using) on both sides.
- Increase oven temperature to 400°F (200°C). Return ribs to the oven, uncovered, for 10-15 minutes until sauce bubbles and caramelizes.
- Remove from oven and let rest for 10 minutes before slicing between the bones and serving.
Notes
Ensure the silverskin membrane is removed for tender ribs. Do not apply BBQ sauce too early as the sugar burns easily. Use a drip pan to catch sauce drips and prevent oven mess. Ribs are done when internal temperature reaches 190°F or when they bend easily.
- Prep Time: 10 minutes
- Cook Time: 2 hours 15 minutes
- Category: Main Course
- Cuisine: American
Nutrition
- Serving Size: 2 ribs per serving
- Calories: 450
- Sugar: 18
- Sodium: 650
- Fat: 28
- Saturated Fat: 10
- Carbohydrates: 22
- Fiber: 1
- Protein: 28
Keywords: BBQ ribs, smoky ribs, oven baked ribs, easy BBQ recipe, pork ribs, fall off the bone ribs, dry rub ribs