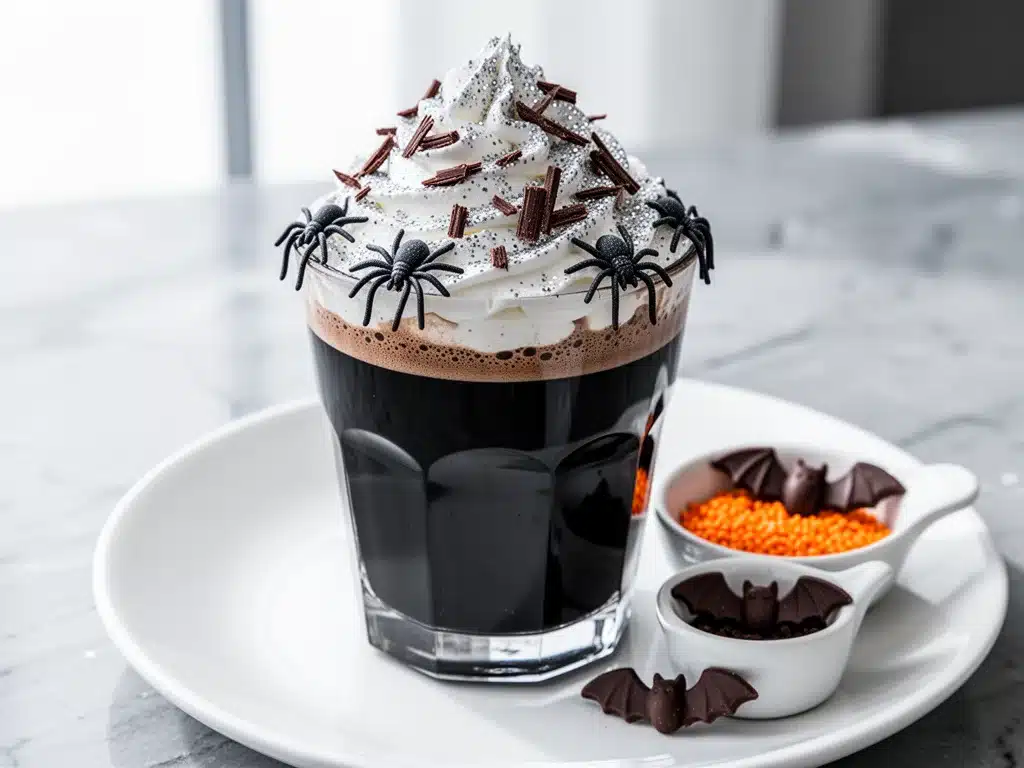
Last October, I was stressed. Not just “forgot to buy toilet paper” stressed, but “Halloween is in two days and I have zero decorations, a toddler who is terrified of the dark, and a guest list of twenty people” stressed. My husband, bless his heart, had promised to help me set up a “spooky coffee bar” for our neighborhood Halloween gathering, but he’s more of a “microwave burrito” kind of guy. He looked at me, shrugged, and said, “Just make something black. It’s Halloween. Black is good.”
Black coffee? Please. I’m not running a haunted house, I’m running a coffee bar.
I went to the pantry, staring at the usual suspects, when my eyes landed on a bag of black cocoa powder I’d bought for a brownie experiment that went horribly wrong. It was darker than dirt. It was intense. And it was perfect. I threw it into my espresso machine, added some vanilla, frothed up some oat milk, and watched in awe as the liquid turned a deep, ominous purple-black. It looked like a potion. It tasted like a dessert. And my guests? They lost their minds.
That was the birth of the Spooky Black Cocoa Latte. It’s not just a drink; it’s the centerpiece of any Halloween gathering. It’s dramatic, it’s easy, and it tastes like a liquid brownie with a caffeine kick. I’ve made this for three Halloweens now, and it’s become the first thing people ask for when they walk through my door. If you’re looking to add some magic (and maybe a little mystery) to your coffee bar, this is the recipe you need.
Why You’ll Love This Halloween Coffee Bar Star
There are a million latte recipes out there. Why this one? Why black cocoa? Here’s the real talk: regular cocoa powder is fine. But black cocoa? It’s the superhero of chocolate. It’s alkalized to the extreme, which means it’s darker, less acidic, and has a flavor profile that’s closer to a brownie than a cup of hot chocolate.
Here’s why this Spooky Black Cocoa Latte is about to become your Halloween obsession:
- It’s Instantly Instagrammable — Seriously. The color is so dark it looks almost purple in certain lights. When you drizzle caramel or add a dusting of powdered sugar, it looks like something from a fantasy movie. My Pinterest boards have never looked better.
- Three Steps. That’s It. — You don’t need a barista degree. You need milk, espresso, black cocoa, and sugar. If you can pour and froth, you can make this. I’ve made it while holding a baby. It’s that simple.
- It’s Naturally Gluten-Free — Coffee is naturally gluten-free, and with the right milk choice, this drink is safe for everyone. No cross-contamination worries, no hidden flours. Just pure, spooky goodness.
- It’s Sweet, But Not Cloying — Black cocoa is naturally less sweet than regular cocoa. This means you control the sugar. You can go light and let the chocolate flavor shine, or go heavy and make it a dessert drink. I like it somewhere in the middle.
- It Pairs Perfectly with Sweet Treats — I always serve this alongside churro cheesecake bars. The bitter, dark chocolate notes cut through the sweet, creamy cheesecake perfectly. It’s a match made in Halloween heaven.
This latte isn’t just a drink. It’s the vibe of your entire party. It’s the thing that makes people stop and say, “Wait, you made that?” And yes. Yes, I did. And it took five minutes.
Ingredients You’ll Need for the Perfect Spooky Brew
Before we get into the magic, let’s talk about what you need. The beauty of this recipe is that the ingredient list is short, but the quality matters. You’re not hiding behind heavy syrups here; you’re letting the black cocoa do the talking.
The Core Four
Black Cocoa Powder (2 tablespoons / 10g) — This is the star. You can find this at most baking stores or online. If you can’t find it, you can try mixing regular unsweetened cocoa powder with a tiny bit of activated charcoal (food grade), but honestly, just buy the black cocoa. It’s worth the extra dollar. It’s what gives the latte its eerie, midnight color.
Espresso or Strong Coffee (2 shots / 60ml) — You need a strong base. If you don’t have an espresso machine, use a Moka pot or very strong drip coffee. Regular drip coffee might get lost in the milk. I use a single-origin dark roast because it adds a fruity, bitter note that balances the sweetness.
Milk of Choice (1 cup / 240ml) — I love oat milk for this because it froths up nicely and has a natural sweetness that complements the dark cocoa. But whole dairy milk works too, and so does almond milk if you’re watching calories. Just know that oat milk gives you that creamy, barista-style texture.
Sweetener (1-2 tablespoons) — I use brown sugar because it has a molasses note that pairs beautifully with the dark cocoa. Maple syrup works too if you want it vegan. White sugar is fine, but it’s a bit flat. Honey is also good, but it has a strong flavor that might overpower the cocoa.
The Fun Stuff (Garnishes)
Vanilla Extract (½ teaspoon) — Just a little bit to round out the flavors. Don’t skip it. It makes the chocolate taste more “chocolatey.”
Caramel Drizzle — For that spooky, dripping effect. Store-bought is fine, or make your own.
Whipped Cream — Optional, but recommended if you want it to feel like a dessert.
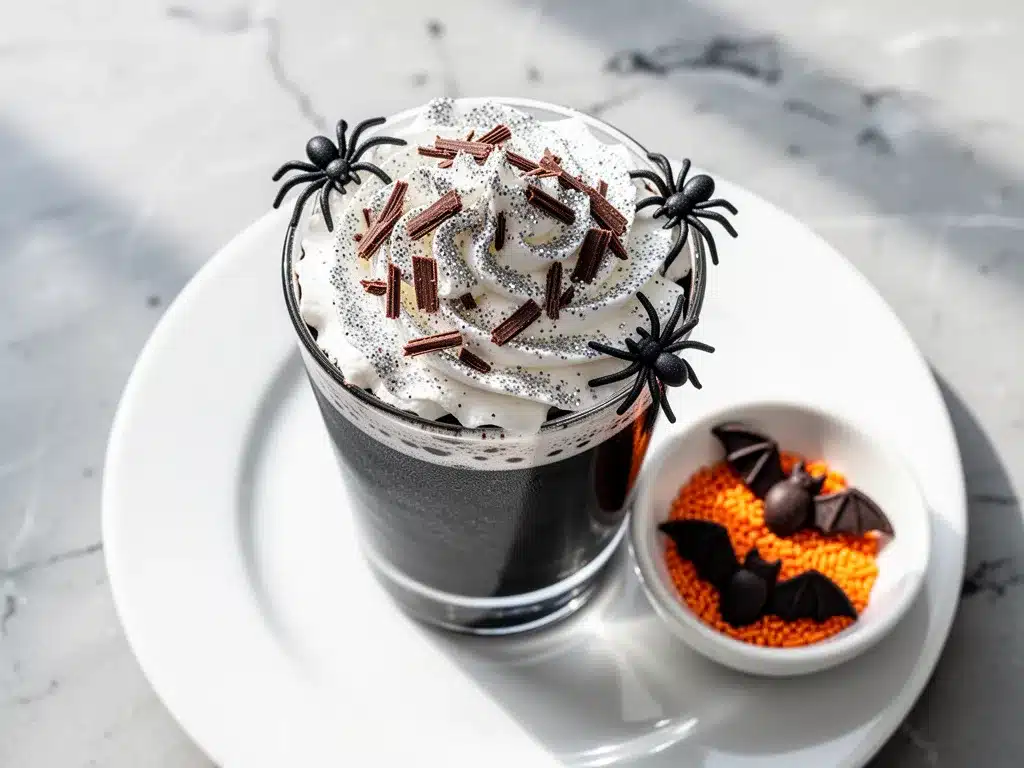
Powdered Sugar — For dusting. It looks like frost or cobwebs on the dark surface.
Edible Glitter or Dust — I use purple or black edible dust for that extra magical touch. It’s not necessary, but it’s fun.
Equipment You’ll Need
You don’t need a fancy coffee shop setup, but having the right tools helps. Here’s what I actually use:
Espresso Machine or Moka Pot — I use a Breville Bambino for quick shots. If you don’t have one, a stovetop Moka pot is great. It makes strong, concentrated coffee that stands up to the milk.
Milk Frother — A handheld frother is cheap and works well. I use the one from Amazon that’s like $15. It froths oat milk surprisingly well. If you have a steam wand on your espresso machine, use that for the creamiest texture.
Small Saucepan or Microwave-Safe Jug — To heat the milk. I usually heat it in the microwave for 60-90 seconds until it’s hot but not boiling. Boiling milk can scorch it and change the flavor.
Mugs — I use clear glass mugs for this. You want to see the layers and the color. White mugs work too, but they hide the spooky aesthetic. Clear glass makes it look like a potion.
Spatula or Spoon — To mix the cocoa powder with the espresso. It’s easier to mix it into the hot coffee first to avoid lumps.
How to Make It: Step-by-Step
Alright, let’s make this! I’m walking you through exactly how I do it, including the little tricks I’ve picked up over three Halloweens.
Step 1: Prep the Cocoa Base (2 minutes)
In your mug, add the black cocoa powder and your sweetener (brown sugar, maple syrup, etc.). Add a splash of your hot espresso or strong coffee to the mug. You don’t need all the coffee yet, just enough to make a paste. Whisk or stir vigorously until it’s smooth and lump-free. This is crucial. If you add milk to lumpy cocoa, you’ll have cocoa clumps in your drink. A small whisk or a fork works best here. The mixture should look like a thick, dark chocolate syrup.
Step 2: Heat and Froth the Milk (3 minutes)
While the cocoa base is ready, heat your milk. I heat it in the microwave for 60-90 seconds. It should be hot to the touch but not boiling. Then, use your handheld frother to froth the milk. If you’re using oat milk, it froths up really nicely. If you’re using dairy, you can use the steam wand on your espresso machine. You want the milk to be creamy and airy, not just hot. If you don’t have a frother, you can shake the milk in a jar with a lid, but it won’t be as creamy.
Step 3: Assemble the Spooky Latte (2 minutes)
Pour the remaining hot espresso over the cocoa base in the mug and stir to combine. Now, the fun part. Pour the frothed milk over the coffee mixture. If you want layers, pour it slowly over the back of a spoon. But for the spooky look, just pour it in and let it mix. The black cocoa will swirl with the white milk, creating a marbled, eerie effect. Top with whipped cream if you’re using it.
Step 4: The Spooky Garnish (1 minute)
Drizzle caramel sauce over the top. I like to do a zigzag pattern or just let it drip down the sides. Dust with powdered sugar for a “frosty” look, or add edible glitter for magic. Serve immediately. It looks best when the contrast between the dark coffee and the white milk is fresh.
Expert Tips & Tricks for the Best Latte
Here’s everything I’ve learned from making this dozens of times. These tips will save you from my mistakes.
- Don’t Skimp on the Cocoa — Black cocoa is intense, but you need enough to make the color dark. If you use too little, it’ll just look like a regular latte. Two tablespoons is the sweet spot for a standard mug.
- Use Dark Roast Coffee — Light roast coffee will taste acidic and weak against the dark cocoa. You want a coffee that’s bold and bitter. It’s like a partnership. Both need to be strong.
- Froth Cold Milk — If you’re using a handheld frother, start with cold milk. It froths better and creates more stable foam. Heat it after frothing if you need it hotter.
- Layer for Drama — If you want to show off, pour the coffee first, then slowly pour the milk. The density difference will create a gradient effect. It’s pretty and fun to watch.
- Make a Batch for Parties — I make the espresso shots in a large pitcher, mix the cocoa and sugar into a paste, and then add the milk right before serving. It’s faster and keeps the milk fresh.
Common Mistake: The Lumpy Latte
If your latte has lumps, you didn’t mix the cocoa with the coffee enough. Always make a paste first. It’s the easiest way to avoid this. Trust me.
Common Mistake: Too Sweet
Black cocoa is less sweet than regular cocoa. If you’re used to sweet lattes, you might need to add more sugar. Taste as you go. I like mine with two tablespoons of brown sugar, but you can adjust.
Variations & Substitutions
Once you’ve nailed the basic version, here’s how you can mix it up. I’ve tried all of these.
The “Haunted House” Version
Add a drop of purple food coloring to the milk before frothing. It turns the foam a ghostly purple. It’s not necessary, but it’s fun for kids. Or add a drop of blue food coloring for a “witch’s brew” look.
The “Zombie” Version
Use matcha powder instead of cocoa. Mix it with the coffee and milk. It’s green and eerie. It’s a different flavor profile, but it’s still a latte. I like it with vanilla sweetener.
The “Vampire” Version
Add a splash of cherry syrup or bitters. It adds a fruity, tart note that pairs well with the dark chocolate. It’s sophisticated and spooky.
Dietary Modifications
Vegan — Use oat milk or almond milk and maple syrup instead of brown sugar. Use dairy-free whipped cream if you want it.
Low-Sugar — Use stevia or monk fruit sweetener. Black cocoa is naturally low in sugar, so this works well.
Caffeine-Free — Use decaf espresso or strong black tea. The black cocoa will still give you the dark color and chocolate flavor.
Serving & Storage
How to Serve:
I serve this in clear glass mugs with a spooky straw. I also put out a “toppings bar” with caramel, whipped cream, and edible glitter. It’s fun for guests to customize their drinks.
Side Dishes:
I serve this with fudgy sea salt caramel brownies. The brownies are rich and chocolatey, and the latte cuts through the richness. It’s a perfect combo. Also, iced brown sugar oat milk lattes are a great non-spooky option for people who don’t want the dark color.
Storage:
You can’t store this latte. It’s best made fresh. If you have leftover espresso, you can store it in the fridge for 24 hours. Reheat it gently and mix with fresh frothed milk. The cocoa paste can be stored in the fridge for 3 days, but it will harden. Just microwave it to soften it before using.
Nutrition Information
I’m not a nutritionist, but here’s the breakdown if you’re tracking. This is per serving (one mug).
| Nutrient | Amount |
|---|---|
| Calories | 180 |
| Protein | 3g |
| Carbs | 22g |
| Fiber | 2g |
| Sugar | 18g |
| Fat | 8g |
| Caffeine | 95mg |
What’s Good:
It’s a treat, but it’s not as bad as a candy bar. The black cocoa has antioxidants. And it’s just one mug. Moderation is key.
What to Know:
It’s higher in sugar if you add a lot of sweetener. Use less sugar or a zero-calorie sweetener to reduce the sugar content. It’s also higher in calories if you use whole milk or heavy cream.
Final Thoughts
So that’s my Spooky Black Cocoa Latte! I’ve probably talked your ear off at this point, but when you make a recipe this often, you have a lot to say about it. This latte has saved my Halloween parties more times than I can count. It’s my answer to “what’s for the coffee bar?” when I’m tired, don’t want to make a big fuss, and still want something that looks amazing.
My guests are always impressed. My kids love the color. And I love that it’s so easy to make. It’s the perfect balance of spooky and delicious.
Make it yours! Try different garnishes, swap in your favorite milk, adjust the sweetness. The best recipes are the ones you adapt to your own tastes. And if you have leftovers (which there won’t be), store the espresso and cocoa paste separately.
If you make this, drop a comment and let me know what you think! I love hearing how recipes turn out in your kitchen. And if something doesn’t work, tell me that too—I’m here to help troubleshoot.
Happy brewing! And I hope your kitchen smells half as good as mine does right now.
Frequently Asked Questions
Q: Can I use regular cocoa powder instead of black cocoa?
A: You can, but the color won’t be as dark. Black cocoa is alkalized, which makes it darker and less acidic. If you use regular cocoa, your latte will look more like a regular chocolate latte. But it will still taste good. I’d recommend using a bit more cocoa powder to try to get the dark color.
Q: Why did my latte turn out watery?
A: This usually happens if you use too much milk or if you don’t froth it enough. The milk should be creamy and airy, not thin. Also, make sure you’re using strong espresso or coffee. If the coffee is weak, the milk will overpower it.
Q: Can I make this ahead for a party?
A: You can prep the espresso and cocoa paste ahead of time. Store them separately in the fridge. Just froth the milk and assemble the lattes right before serving. This ensures the foam is fresh and the drink is hot.
Q: Is black cocoa powder healthy?
A: Black cocoa is a type of dark cocoa, which is high in antioxidants. It’s less processed than regular cocoa, but it’s still a treat. It’s not a health food, but it’s better than a candy bar. Enjoy it in moderation.
Q: Can I use almond milk instead of oat milk?
A: Yes, almond milk works well. It’s thinner than oat milk, so it might not froth as thickly. But it still tastes good. I like oat milk because it’s creamier and sweeter, but almond milk is a great low-calorie option.
Q: How do I store leftover cocoa paste?
A: Store it in an airtight container in the fridge for up to 3 days. It will harden, so just microwave it for 15-20 seconds to soften it before using. Stir well to combine.
Q: Can I make this iced?
A: Absolutely! Instead of frothed hot milk, use cold milk and ice. Pour the cold milk over the cocoa and espresso mixture. It’s a great option for warm Halloween nights. I also love smoothies on warm nights, but an iced latte is a perfect alternative.
Pin This Recipe!
Spooky Black Cocoa Latte: 3-Step Halloween Coffee
- Total Time: 5 minutes
- Yield: 1 serving 1x
Description
A dramatic, easy-to-make Halloween coffee featuring intense black cocoa powder, espresso, and frothed milk. This latte looks like a spooky potion and tastes like a liquid brownie, perfect for any festive gathering.
Ingredients
- 2 tablespoons (10g) Black Cocoa Powder
- 2 shots (60ml) Espresso or Strong Coffee
- 1 cup (240ml) Milk of Choice (Oat milk recommended)
- 1–2 tablespoons Sweetener (Brown sugar, maple syrup, or white sugar)
- 1/2 teaspoon Vanilla Extract
- Caramel Drizzle (for garnish)
- Whipped Cream (optional, for garnish)
- Powdered Sugar (for dusting)
- Edible Glitter or Dust (optional, for garnish)
Instructions
- In your mug, add the black cocoa powder and sweetener. Add a splash of hot espresso or strong coffee to the mug to create a paste. Whisk or stir vigorously until smooth and lump-free.
- Heat the milk in the microwave for 60-90 seconds until hot but not boiling. Use a handheld frother or steam wand to froth the milk until creamy and airy.
- Pour the remaining hot espresso over the cocoa base in the mug and stir to combine.
- Pour the frothed milk over the coffee mixture. For layers, pour slowly over the back of a spoon; for a marbled look, pour directly in.
- Top with whipped cream if desired. Drizzle with caramel sauce, dust with powdered sugar, and add edible glitter for a spooky effect. Serve immediately.
Notes
Black cocoa is alkalized, providing a darker color and less acidic, brownie-like flavor. If you cannot find black cocoa, you can mix regular unsweetened cocoa with a tiny amount of food-grade activated charcoal, though buying black cocoa is recommended. For the best foam, froth cold milk before heating if using a handheld frother. Do not boil the milk as it can scorch. The cocoa paste can be stored in the fridge for 3 days.
- Prep Time: 5 minutes
- Cook Time: 0 minutes
- Category: Beverage
- Cuisine: American
Nutrition
- Serving Size: 1 mug
- Calories: 180
- Sugar: 18
- Fat: 8
- Carbohydrates: 22
- Fiber: 2
- Protein: 3
Keywords: Halloween coffee, black cocoa latte, spooky drink, easy latte recipe, gluten-free coffee, Halloween party drinks


