It was 7:30 PM on a Tuesday, and I was standing in my kitchen in my pajamas, staring at the delivery app on my phone like it was going to magically solve my hunger. My husband had mentioned pizza earlier that morning, so I figured, why not? But then I looked at the price—$28 for two large pizzas that would arrive cold and soggy in thirty minutes—and I just… stopped. I didn’t want soggy. I didn’t want to wait. I wanted something that felt like a treat but tasted like it came from my own hands.
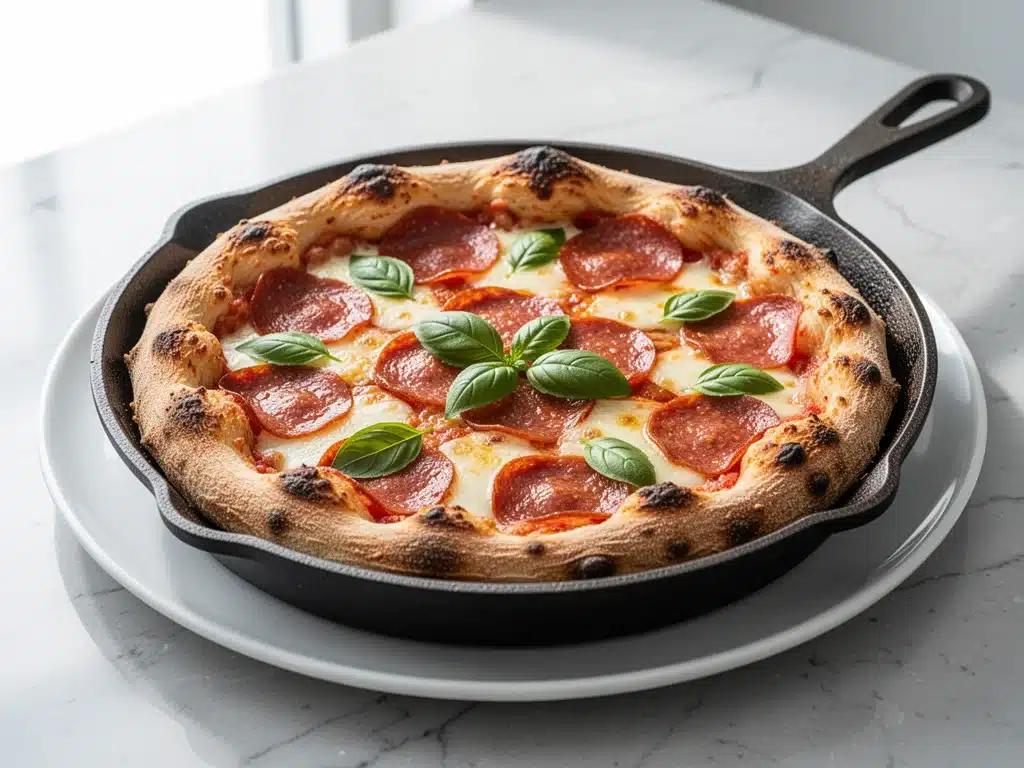
So I did something I hadn’t done in months. I opened the freezer, pulled out a bag of store-bought pizza dough (the good kind, not the sad refrigerated tubes), and grabbed a cast iron skillet. I’ve made pizza at home before, but it always ended up in a sad, flat pile on a baking sheet. Not this time. I decided to try the cast iron method again, specifically for that extra-crispy crust I’d been craving. Twenty minutes later, I was pulling a bubbling, golden, pepperoni-loaded masterpiece out of the oven. The smell alone made my husband come running from the living room.
That night changed my weeknight routine forever. This cast iron skillet pepperoni pizza isn’t just dinner; it’s a mood lifter. It’s the answer to “I don’t want to cook, but I want good food.” It’s faster than delivery, cheaper than takeout, and honestly? It tastes better. I’ve tested this method dozens of times, tweaking the heat and the dough handling, and I’ve finally nailed the version that gives you that professional pizzeria crunch without the hassle. If you’re tired of ordering in, this is the recipe that’s going to save your weeknights.
Why You’ll Love This Cast Iron Skillet Pepperoni Pizza
There are a lot of pizza recipes out there, but this specific method has completely won me over. It’s not about being a professional chef; it’s about using the right tool for the job. Here’s why this cast iron skillet pepperoni pizza has earned a permanent spot in our weekly rotation:
- That Crispy Crust Magic — Seriously, the cast iron does the heavy lifting. The skillet retains heat like a beast, creating a crust that’s crispy on the outside and chewy on the inside. I’ve tried baking sheet methods, but nothing compares to this texture. It’s the closest you’ll get to a brick-oven pizza at home.
- Stupid Simple Prep — I use store-bought dough for a reason. It saves 45 minutes of rising time. You roll it out, add toppings, and throw it in the pan. If you can spread sauce, you can make this. My teenage son made it solo last week while I was folding laundry.
- Lightning Fast — From dough to dinner is about 20 minutes. That’s it. I start the dough in the pan while I’m chopping pepperoni. By the time the oven timer goes off, dinner is ready. This is perfect for those chaotic weeknights when you get home at 6:30 PM.
- Customizable for Everyone — My kids want pepperoni and mozzarella. I want extra garlic and red pepper flakes. My husband likes mushrooms. Because it’s one big skillet, we all build our own slices. No more fighting over toppings.
- Budget-Friendly — A bag of dough is $3-4. Sauce, cheese, and pepperoni run about $5-6 total. That’s roughly $10 for a whole pizza that feeds 3-4 people. Compare that to the $28 delivery bill, and you’re saving money while eating better.
This is my go-to when I need dinner to just work. No complicated techniques, no weird ingredients, just reliable, delicious food that makes everyone happy. And honestly? The cleanup is easier than you think.
Ingredients You’ll Need
Here’s the best part: you probably have most of this already in your pantry or fridge. This cast iron skillet pepperoni pizza relies on high-quality basics rather than a long list of obscure items. I’m particular about three ingredients here, and I’ll tell you exactly why.
For the Dough Base
Pizza dough (1 pound / 450g) — I always buy the refrigerated dough balls from the bakery section of the grocery store. It’s fresh, it’s soft, and it saves time. Look for brands that don’t have too many preservatives. You can also make your own if you have time, but for weeknights, store-bought is a lifesaver. If you’re feeling ambitious on a weekend, this garlic herb focaccia recipe uses a similar dough base and is worth the extra effort.
Olive oil (2 tablespoons) — Use a decent quality extra virgin olive oil for brushing the pan. It adds flavor and helps the crust brown. Don’t skimp here—it’s part of that crispy exterior.
For the Sauce and Toppings
Marinara sauce (½ cup / 120g) — I prefer a simple, no-sugar-added jarred sauce like Rao’s or a local brand. You want something with good tomato flavor, not too sweet. If you have homemade sauce, use it! But jarred is totally fine and saves time.
Shredded mozzarella cheese (2 cups / 200g) — Buy the block and shred it yourself. Pre-shredded cheese has cellulose (anti-caking agent) that prevents it from melting smoothly. I want gooey, stringy cheese, not powdery clumps. It takes 2 minutes to shred and makes a huge difference.
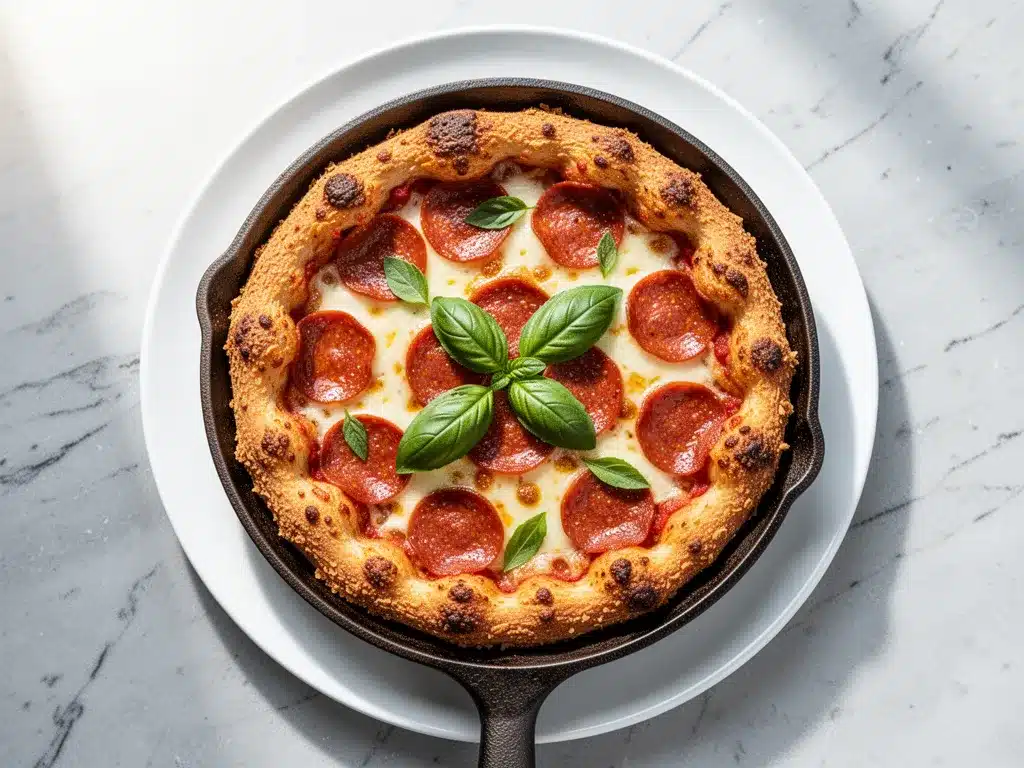
Pepperoni slices (1 package / 8oz) — The star of the show. Look for thin-sliced, dry-cured pepperoni. It crisps up beautifully in the oven. Thick slices stay chewy; thin slices get those delicious curly, crispy edges.
Garlic powder (1 teaspoon) — A quick dusting on the sauce adds depth. Fresh garlic can burn in the high heat, so powder is safer for the crust.
Red pepper flakes (½ teaspoon) — Optional, but I always add a pinch. It adds a little kick that balances the rich cheese.
Fresh basil (a handful, chopped) — Added after baking. It keeps the bright, fresh flavor that gets lost if cooked too long.
Optional Add-ins
- Prosciutto — Add thin slices after baking for a fancy touch.
- Mushrooms — Sautéed thinly sliced mushrooms add earthiness.
- Bacon bits — For extra smokiness.
Equipment Needed
You don’t need fancy equipment for this. Here’s what I actually use. The star of the show is obviously the cast iron, but everything else is standard kitchen gear.
10-inch Cast Iron Skillet — This is non-negotiable for this recipe. I use a Lodge skillet that’s been seasoned for years. It needs to be oven-safe and large enough to hold the dough with a little room for the crust. If you don’t have cast iron, a heavy stainless steel skillet works, but you won’t get the same crust.
Oven — Obviously. But make sure it preheats properly. I set mine to 450°F (230°C). If your oven runs hot or cold, you might need to adjust by 25 degrees.
Rolling Pin — Or your hands. I use a rolling pin to get even thickness, but if you’re feeling artisanal, you can stretch the dough with your hands.
Pastry Brush — For brushing the olive oil on the crust. A silicone brush works great.
Sharp Knife — For slicing the pepperoni if it’s in large rounds, and for chopping basil.
Pizza Cutter or Sharp Chef’s Knife — To slice the finished pizza. A wheel cutter is fun, but a sharp knife gives cleaner slices.
Measuring Cups and Spoons — For the sauce and seasonings. Dollar store versions work fine.
Aluminum Foil — Not strictly necessary, but I keep it handy to catch any cheese drips if the pizza overflows the pan.
How to Make It: Step-by-Step
Alright, let’s make this! I’m walking you through exactly how I do it, including the little tricks I’ve picked up to ensure that extra-crispy crust. This cast iron skillet pepperoni pizza comes together fast, so have your ingredients ready.
Step 1: Prep Your Dough and Pan (5 minutes)
Take your store-bought dough out of the package and let it sit at room temperature for about 10-15 minutes while your oven preheats. Cold dough is stiff and hard to stretch. Meanwhile, place your empty cast iron skillet in the oven and preheat it to 450°F (230°C). Yes, heating the pan empty helps create that initial sear on the bottom. Trust me on this.
Step 2: Shape the Dough (3 minutes)
Once the dough is relaxed, place it on a lightly floured surface. Roll or stretch it out into a 10-inch circle. It doesn’t have to be perfect—handmade looks rustic and delicious. If the dough shrinks back, let it rest for a minute and try again. Gently transfer the dough into your hot skillet. It will sizzle! That’s a good sign. Use your hands to press it into the edges of the pan. Don’t worry if it tears; just patch it with your fingers.
Step 3: Add the Sauce and Cheese (2 minutes)
Remove the skillet from the oven (carefully, it’s hot!). Brush the edges of the dough with olive oil. Spoon the marinara sauce onto the center of the dough and spread it out, leaving a ½-inch border for the crust. Sprinkle garlic powder and red pepper flakes over the sauce. Then, add the shredded mozzarella cheese. Don’t be shy with the cheese—it’s the best part. I usually go for a generous layer.
Step 4: Bake the Pizza (12-15 minutes)
Place the skillet back in the oven on the middle rack. Bake for 12-15 minutes. You’re looking for a golden-brown crust and bubbly, slightly browned cheese. Check it at 12 minutes. If the crust looks done but the cheese isn’t bubbly, give it another 2-3 minutes. The cast iron will continue to cook the bottom even after you take it out, so don’t overcook it.
Step 5: Add the Pepperoni (Last 2 minutes)
Here’s the trick for crispy pepperoni: add the slices in the last 2 minutes of baking. If you put them on at the beginning, they can burn or release too much oil. Once you add the pepperoni, let it bake for those final 2 minutes. The edges of the pepperoni should curl up and crisp slightly.
Step 6: Rest and Serve (5 minutes)
Remove the skillet from the oven and let it rest on a cooling rack for 5 minutes. This is crucial. If you cut it immediately, the cheese will slide off. Resting allows the cheese to set slightly and the crust to firm up. Sprinkle with fresh basil. Slice into wedges and serve immediately. Pair this with a simple fresh strawberry basil lemonade for a complete weeknight meal.
Expert Tips & Tricks
Here’s everything I’ve learned from making this dozens of times. These tips will save you from my mistakes.
Preheat the Skillet
This is the #1 tip. Heating the empty cast iron skillet before adding the dough creates an instant sear. It prevents the bottom from being soggy. I learned this the hard way with a pale, soft crust. Now, I always preheat the pan.
Don’t Over-Sauce
A heavy hand with the sauce leads to a soggy center. Use a thin layer. The sauce should coat the dough, not pool on it. If you like more sauce, serve it on the side for dipping.
Use Block Cheese
Pre-shredded cheese contains potato starch or cellulose to prevent clumping. This stops it from melting properly. Shred your own mozzarella for that stretchy, gooey texture. It takes 2 minutes and is worth it.
High Heat is Key
Keep your oven at 450°F or even 475°F if your skillet can handle it. High heat creates steam quickly, which helps the crust rise and crisp up. Low heat just dries out the dough.
Let It Rest
I know it’s tempting to dig in immediately, but let the pizza rest for 5 minutes. This lets the cheese set so your slices hold together. It also makes the pizza easier to cut without sliding toppings everywhere.
Variations & Substitutions
Once you’ve nailed the basic version, here’s how you can mix it up. I’ve tried all of these, and they’re all winners.
White Pizza Version
Skip the tomato sauce. Use a base of ricotta cheese mixed with a little garlic and olive oil. Top with mozzarella, spinach, and roasted garlic. It’s creamy and rich.
BBQ Chicken Pizza
Swap the marinara for BBQ sauce. Add shredded rotisserie chicken, red onion, and cilantro after baking. It’s a crowd-pleaser, especially with kids.
Veggie Loaded
Add sliced bell peppers, mushrooms, and onions before baking. For delicate veggies like spinach, add it after baking so it doesn’t wilt too much. This is how I get my kids to eat vegetables without complaining.
Spicy Italian
Add Italian sausage crumbles (cooked) along with the pepperoni. Use hot marinara sauce. It’s bold and flavorful.
Dairy-Free Option
Use dairy-free mozzarella and a vegan pepperoni. It’s not exactly the same, but there are good plant-based cheeses that melt well now. I’ve used Follow Your Heart and it works okay.
Gluten-Free Crust
Use a gluten-free pizza dough base. Be careful—GF dough is more fragile. Press it gently into the pan and don’t over-handle it. It still tastes great, just slightly different in texture.
Serving & Storage
How to Serve:
I usually serve this straight from the skillet at the dinner table—it looks rustic and stays warm. But here are other ways I’ve enjoyed it:
Side Dishes:
- A simple arugula salad with lemon vinaigrette cuts through the richness.
- Garlic bread is obvious, but why eat two carbs? Skip it.
- Roasted broccoli with parmesan adds a healthy crunch.
Toppings Bar:
When I have guests, I put out: extra red pepper flakes, fresh basil, hot honey, and shaved parmesan. Everyone customizes their slice.
Storage Instructions:
Refrigerator: Store leftovers in an airtight container for up to 3 days. The crust will soften in the fridge, which is normal.
Reheating: Best method: Reheat in a cast iron skillet over medium-low heat for 3-4 minutes. This restores the crispiness. Microwave method: It works in a pinch, but the crust will get chewy, not crispy. I avoid the microwave if I can.
Freezing: You can freeze uncooked pizza dough for up to 3 months. Cooked pizza doesn’t freeze well because the cheese gets grainy and the crust gets soggy when thawed. Better to eat fresh or refrigerate.
Nutrition Information
I’m not a nutritionist, but here’s the breakdown if you’re tracking. Keep in mind that values vary based on the specific dough and cheese brands you use.
Per Slice (based on 8 slices):
- Calories: 320
- Protein: 14g
- Carbs: 35g
- Fat: 14g
- Sodium: 650mg
What’s Good:
- Decent protein from the cheese and dough.
- Calcium from the mozzarella.
- Faster and often healthier than delivery pizza.
What to Know:
- Higher in sodium from the pepperoni and sauce.
- Contains gluten and dairy.
- Can reduce calories by using less cheese or a thinner crust.
Look, this is comfort food. It’s not a diet recipe. But it’s way better than takeout, costs less, and I know exactly what’s in it. When I want to make it lighter, I load up on veggies and use part-skim cheese. But usually? I just enjoy a couple of slices and call it a night.
Final Thoughts
So that’s my go-to cast iron skillet pepperoni pizza! I’ve probably talked your ear off at this point, but when you make a recipe this often, you have a lot to say about it. This has saved weeknight dinners more times than I can count. It’s my answer to “what’s for dinner” when I’m tired, don’t want takeout, and still want something that tastes really good. My kids are happy, my husband’s happy, and I’m happy because I’m not stressed about cooking.
Make it yours! Try different add-ins, swap in your favorite vegetables, or experiment with different cheeses. The best recipes are the ones you adapt to your family’s tastes. If you make this, drop a comment and let me know what you think! I love hearing how recipes turn out in your kitchen. And if something doesn’t work, tell me that too—I’m here to help troubleshoot.
Happy cooking! And I hope your kitchen smells half as good as mine does right now.
Frequently Asked Questions
Can I use frozen pizza dough?
Yes, but it needs to be thawed completely. Let it sit in the fridge overnight and then bring it to room temperature for 30 minutes before rolling. Thawed dough can be a bit wetter, so you might need to dust it with more flour. It works fine, just slightly less convenient than refrigerated dough.
Why is my crust soggy?
This usually happens if the pan wasn’t hot enough when you added the dough, or if you used too much sauce. Make sure you preheat the empty skillet. Also, keep the sauce layer thin. If you’re using homemade sauce, make sure it’s not too watery—reduce it on the stove first if needed.
Can I make this ahead for a party?
You can prep the dough and toppings ahead, but assemble and bake right before serving. Pizza is best fresh. If you need to make it ahead, you can bake it, let it cool, and reheat it in the oven or skillet. It won’t be quite as crispy, but it’s still delicious. I do this for small gatherings.
How do I get the pepperoni to curl up?
Thin-sliced, dry-cured pepperoni curls best. Make sure you add it in the last 2 minutes of baking so it crisps up without burning. If your pepperoni is thick, slice it in half or quarter it. The high heat of the cast iron helps with the curling.
Can I use a different type of pan?
Cast iron is ideal because it retains heat. If you don’t have one, a heavy stainless steel skillet or a well-seasoned carbon steel pan works. Avoid non-stick pans if you want a crispy crust, as they don’t get hot enough. A baking sheet will work, but you’ll need to bake it longer and the bottom won’t be as crispy.
Is this recipe kid-friendly?
Absolutely. Kids love pizza, and this is no exception. You can keep it simple with just cheese and pepperoni. My kids actually prefer this to delivery pizza because the crust is crispier and they helped make it. It’s a great way to get them involved in the kitchen.
Can I freeze leftovers?
I wouldn’t recommend freezing cooked pizza. The cheese separates and the crust gets soggy when thawed. It’s best eaten fresh or stored in the fridge for up to 3 days. Reheat in a skillet to restore crispiness.
Pin This Recipe!

Cast Iron Skillet Pepperoni Pizza: 10-Min Crispy Dinner
- Total Time: 25 minutes
- Yield: 8 servings 1x
Description
A quick and easy weeknight dinner featuring a crispy, golden crust made in a cast iron skillet with store-bought dough, marinara, mozzarella, and pepperoni. Ready in about 20 minutes.
Ingredients
- 1 pound pizza dough (store-bought refrigerated balls)
- 2 tablespoons extra virgin olive oil
- ½ cup marinara sauce (no-sugar-added)
- 2 cups shredded mozzarella cheese (from a block)
- 8 oz thin-sliced dry-cured pepperoni
- 1 teaspoon garlic powder
- ½ teaspoon red pepper flakes (optional)
- Fresh basil, chopped (for garnish)
Instructions
- Preheat oven to 450°F (230°C) with an empty 10-inch cast iron skillet inside for 10-15 minutes.
- Let pizza dough sit at room temperature for 10-15 minutes to relax.
- Roll or stretch dough into a 10-inch circle on a floured surface.
- Carefully transfer dough into the hot skillet; it should sizzle. Press into edges.
- Remove skillet from oven. Brush crust edges with olive oil.
- Spread marinara sauce over dough, leaving a ½-inch border. Sprinkle with garlic powder and red pepper flakes.
- Add shredded mozzarella cheese generously.
- Return skillet to oven and bake for 12-15 minutes until crust is golden and cheese is bubbly.
- Add pepperoni slices in the last 2 minutes of baking to crisp up.
- Remove from oven and let rest for 5 minutes before slicing.
- Garnish with fresh basil and serve immediately.
Notes
Preheating the empty skillet is crucial for a crispy bottom crust. Use block cheese and shred it yourself for better melting. Add pepperoni in the last 2 minutes to prevent burning. Let the pizza rest for 5 minutes to allow cheese to set.
- Prep Time: 10 minutes
- Cook Time: 15 minutes
- Category: Main Course
- Cuisine: Italian
Nutrition
- Serving Size: 1 slice (1/8 of pizz
- Calories: 320
- Sugar: 4
- Sodium: 650
- Fat: 14
- Saturated Fat: 6
- Carbohydrates: 35
- Fiber: 2
- Protein: 14
Keywords: cast iron pizza, pepperoni pizza, weeknight dinner, crispy crust, easy pizza, homemade pizza, quick dinner


