
There is a specific kind of chaos that happens when you let a six-year-old help you cook. It involves spilled flour, enthusiastic stirring that doesn’t quite match the recipe, and a lot of giggles. But it also involves the best part of parenting: teaching them something they can do on their own later, and creating a memory that lasts longer than the meal itself.
I’ve been looking for a dessert that fits that chaotic, beautiful window for months. Something that isn’t just “feed the kid,” but “make the kid.” Most rice pudding recipes rely heavily on heavy cream and butter, which are great for flavor but not so great if you’re trying to keep things dairy-free or if you want a lighter, fresher treat. And honestly? Traditional rice pudding can feel a bit like eating a brick if it’s not done right.
That’s why I fell in love with this dairy-free coconut lime rice pudding. It’s creamy without the dairy, bright with citrus, and sweetened just enough to satisfy a sweet tooth without sending us into a sugar crash. But more importantly, it’s forgiving. You don’t need fancy equipment. You don’t need precision. You just need a pot, some patience, and a little helper.
This is the recipe my kids will help make. Not because it’s hard, but because it’s fun. They get to rinse the rice (the water running clear is a game they love playing). They get to pour the coconut milk. They get to squeeze the lime. By the time it’s done cooking, they’re not just eating dessert; they’re eating something they made. It’s become our go-to weekend activity, right alongside our homemade pumpkin bagels, which is also a messy, wonderful process.
If you’re looking for a way to spend quality time in the kitchen that ends with a delicious, allergen-friendly treat, this is it. It’s simple, it’s safe, and it tastes like a tropical vacation in a bowl.
Why You’ll Love Making This With Your Kids
I’ve tested this dairy-free coconut lime rice pudding through every phase of my kids’ cooking abilities—from the “helpful” phase (where they touch everything) to the “independent” phase (where they actually read the instructions). Here’s why this recipe wins every time:
- It’s a Sensory Lesson — Kids learn through their hands. Rinsing rice teaches them about texture. Zesting a lime teaches them about scent and zest. Stirring a thick pudding teaches them about patience. It’s cooking class disguised as playtime.
- Safe Steps for Little Hands — You don’t need to worry about sharp knives or hot stoves for the majority of this recipe. The heavy lifting (simmering) happens while you supervise. The prep work is all safe, cool, and hands-on.
- Dairy-Free Doesn’t Mean Boring — I know what you’re thinking. “Coconut milk? Really?” Trust me. When you add lime zest and a touch of maple syrup, the coconut flavor doesn’t overpower. It just makes the pudding incredibly rich and creamy. It’s a flavor profile that feels fancy but is actually very simple.
- It’s Naturally Gluten-Free — For families dealing with allergies or just trying to reduce gluten, this is a huge win. Rice is naturally gluten-free, and coconut milk is safe. It’s a dessert everyone at the table can enjoy, no modifications needed. If you have kids with nut allergies, just swap the coconut milk for oat milk or soy milk, and it still works beautifully.
- Leftovers Are Better — Like my pumpkin spice Rice Krispie treats, this pudding actually tastes better the next day. The rice absorbs all that coconut lime flavor overnight. It’s perfect for packing in lunchboxes or enjoying as a mid-afternoon snack.
This isn’t just a dessert recipe. It’s a way to slow down on a Saturday morning, make a mess together, and end up with something delicious. It’s the kind of cooking that doesn’t require speed—it requires presence.
Ingredients You’ll Need (and Why They Work)
One of the best things about this dairy-free coconut lime rice pudding is that you probably have most of these ingredients already. It’s not a complex list with obscure spices. It’s simple, clean, and effective.
For the Pudding Base
Short-Grain Rice (1 cup / 200g) — This is crucial. Don’t use long-grain basmati or jasmine. You want Arborio or any short-grain white rice. Short-grain rice is starchier, which is what gives you that creamy, pudding-like texture without needing heavy cream. If you can’t find short-grain, sushi rice works too.
Full-Fat Coconut Milk (2 cans / 400ml each) — Do not buy the light version. Do not buy the carton of coconut beverage. You need the thick, canned coconut milk found in the Asian aisle or near the dairy alternatives. This is what provides the fat and creaminess. Shake the can before opening—it should be solidified.
Water (1 cup / 240ml) — Just plain old tap water. It helps the rice cook evenly without the coconut milk burning too quickly.
Maple Syrup (¼ cup / 60ml) — I prefer maple syrup over white sugar because it adds a subtle depth of flavor that pairs well with lime. Honey works too, but if you’re keeping it vegan, stick to maple. Agave nectar is another option, though it’s sweeter.
Vanilla Extract (1 teaspoon) — Pure vanilla. Not the imitation stuff. It rounds out the citrus flavor and makes it taste like a proper dessert.
Salt (½ teaspoon) — I know, salt in dessert? Yes. Salt enhances sweetness and balances the richness of the coconut. Don’t skip it.
For the Lime Zest and Juice
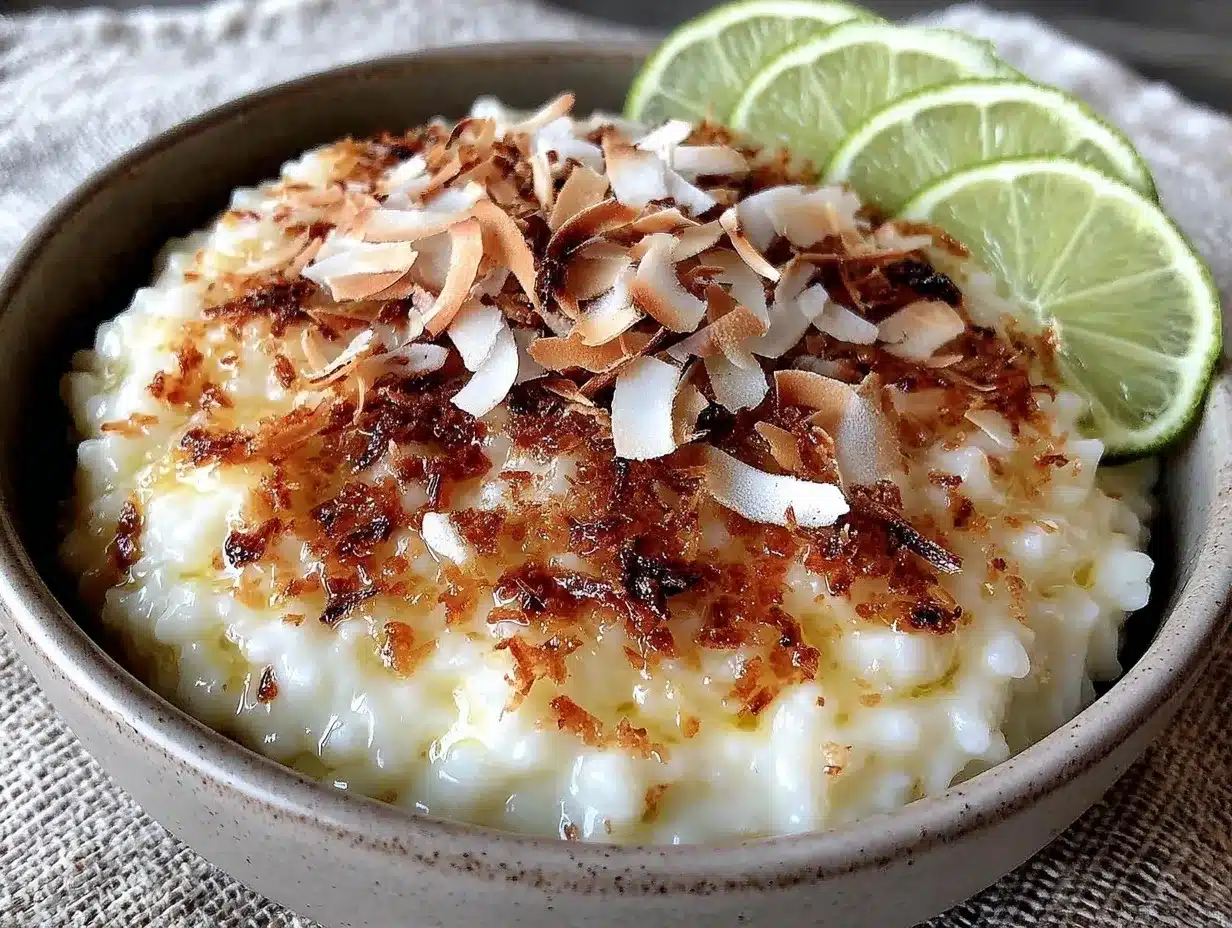
Fresh Limes (2 medium) — You need the zest and the juice. Do not use bottled lime juice. It tastes artificial and will ruin the delicate balance. Fresh limes are non-negotiable. If you’re in winter and limes are expensive, you can use lemon, but lime is the classic pairing.
Lime Zest — From one of the limes. Just the green part, not the white pith. The pith is bitter.
Lime Juice — From both limes. You’ll need about 3-4 tablespoons.
For Garnish (Optional but Recommended)
Extra Lime Zest — For sprinkling on top. It looks pretty and adds a burst of aroma.
Coconut Chips — Toasted coconut adds a nice crunch. Kids love the texture contrast.
Edible Flowers — If you’re feeling fancy, a few nasturtiums or violets make it look restaurant-worthy. My kids find this hilarious.
Equipment Needed
You don’t need anything fancy. Here’s what you actually need:
Medium Saucepan — A 3-4 quart pot works best. It needs to be heavy-bottomed if possible to prevent scorching, but a regular pot works fine if you stir often.
Wooden Spoon or Silicone Spatula — For stirring. You’ll be stirring a lot, so use something sturdy.
Microplane or Zester — For the lime zest. A regular grater works, but a microplane is easier and gets fine zest without the bitter pith. This is a great tool for kids to use under supervision—they can feel the zest coming off.
Measuring Cups and Spoons — Standard stuff.
Colander — For rinsing the rice.
Serving Bowls — Small bowls look cute and portion control is easier.
Optional: Citrus Juicer — If you have a handheld juicer, it helps. Otherwise, just squeeze with your hands. Let the kids squeeze—it’s fun for them.
How to Make It: Step-by-Step
Alright, let’s make this! I’m walking you through exactly how I do it, including the little tricks I’ve picked up to keep the kids engaged and the pudding perfect.
Step 1: Rinse the Rice (Kids’ Job #1)
Put the rice in a colander and rinse it under cold water. Have your child stir the rice with their fingers while you hold the colander. They’ll see the water turn cloudy, then clear. This removes excess starch and helps the rice cook evenly. Tell them it’s like washing the rice so it’s clean for the pot. It takes about 2 minutes. They’ll love the tactile sensation.
Step 2: Combine Ingredients in the Pot
Add the rinsed rice, coconut milk, water, maple syrup, vanilla, and salt to the saucepan. Stir everything together. This is a good time to let your child stir. It’s a thick, white mixture that looks a bit like paint. Let them mix it up until the syrup is dissolved.
Step 3: The Simmer (Adult Job, Kid Supervision)
Place the pot over medium-low heat. Bring it to a gentle simmer. You should see small bubbles breaking the surface, not a rolling boil. Once it simmers, reduce the heat to low and cover the pot partially. Let it cook for 25-30 minutes.
Here’s the key: Stir every 5 minutes. If you don’t stir, the rice will stick to the bottom and burn. This is where you can teach your child about patience. Set a timer. While it cooks, you can chat, sing, or let them play nearby. But remind them that the pot needs attention every few minutes.
Step 4: Zest and Juice the Limes (Kids’ Job #2)
While the rice is cooking, wash the limes thoroughly. This removes any wax or residue. Now, it’s time for the zest. Show your child how to use the microplane. Gently scrape the green part of the lime. Avoid the white pith. It’s a delicate motion. Once you have about 1 tablespoon of zest, cut the limes in half and squeeze out the juice. Let them squeeze—use a juicer or just your hands over a bowl. It’s satisfying to see the juice come out.
Step 5: Check the Rice
After 25 minutes, check the rice. It should be tender and creamy. If it’s still hard, add a splash of water and cook for another 5-10 minutes. If it’s too thick, add a little more water. The consistency should be like thick oatmeal, not soup. Remember, it will thicken more as it cools.
Step 6: Add the Lime
Remove the pot from the heat. Stir in the lime zest and lime juice. The mixture will change color slightly and smell incredible. The heat of the rice will release the oils from the zest. Taste it. Does it need more lime? More sweetness? Adjust now. This is a great moment for your child to taste and give their opinion. “More lime!” or “More maple!”
Step 7: Cool and Serve
Let the pudding cool for 10-15 minutes. It will thicken up. Spoon into bowls. Sprinkle with extra lime zest and toasted coconut chips if you’re using them. Serve warm or chilled. I like it warm because the lime flavor is more vibrant, but my kids often prefer it cold from the fridge.
Expert Tips for Success
Here’s everything I’ve learned from making this dozens of times. These tips will save you from my mistakes.
- Stir, Stir, Stir — The biggest mistake is not stirring enough. Rice pudding sticks. If you see brown bits at the bottom, you’ve scorched it. It will taste bitter. Keep stirring.
- Use Full-Fat Coconut Milk — I’ve tried the light version, and it’s watery and bland. You need the fat for creaminess. If you can’t find full-fat, mix coconut cream with a little water.
- Don’t Over-Zest — Only use the green part. The white pith is bitter and will ruin the pudding. If you accidentally get some white, just scrape it off with a knife.
- Adjust Sweetness — Limes can be tart. Taste the lime before you juice it. If it’s sour, you might need a bit more maple syrup. If it’s sweet, less syrup. Let your child taste the lime and decide.
- Thickening — Rice pudding continues to thicken as it cools. If it’s too thick after cooling, stir in a splash of milk or water to loosen it up.
Variations & Substitutions
Once you’ve nailed the basic version, here’s how you can mix it up. I’ve tried all of these.
Flavor Twists
Tropical Mango — Swap the lime for mango puree. Add ½ cup of pureed mango at the end. It’s sweet, bright, and kids love the yellow color.
Matcha Green Tea — Whisk 1 teaspoon of matcha powder into the coconut milk before cooking. It’s earthy and green. Great for a sophisticated twist.
Chocolate Chip — Stir in ½ cup of dairy-free chocolate chips at the end. Let them melt slightly. It’s like a coconut chocolate chip cookie in pudding form.
Dietary Modifications
Nut-Free — If you have nut allergies, use oat milk or soy milk instead of coconut milk. It won’t be as rich, but it’s still delicious. Add a tablespoon of coconut oil for fat.
Sugar-Free — Use stevia or monk fruit sweetener instead of maple syrup. Adjust to taste. It’s less sweet, so you might need more lime juice to balance it.
High-Protein — Stir in a scoop of vanilla protein powder at the end. It will thicken the pudding significantly, so add extra liquid. It’s a great post-workout snack.
Serving & Storage
How to Serve
I usually serve this straight from the pot into small bowls. It looks rustic and homemade. Add a sprig of mint or a lime wedge on the side. If you want to make it feel special, add a dollop of coconut whipped cream on top. My kids love to decorate their own bowls with toppings.
Storage Instructions
Refrigerator: Store in an airtight container for up to 4 days. The pudding will thicken in the fridge. To serve, stir in a splash of milk or water to loosen it up.
Freezing: This doesn’t freeze well. The coconut milk can separate when thawed, and the rice texture becomes mushy. It’s best eaten fresh or within a few days.
Reheating: Reheat gently on the stove over low heat, stirring frequently. Add a splash of liquid to prevent sticking. Microwave works too, but stir every 30 seconds to avoid hot spots.
Nutrition Information
I’m not a nutritionist, but here’s the breakdown if you’re tracking. Note that this is an estimate.
Per Serving (based on 6 servings):
- Calories: 280
- Protein: 4g
- Carbs: 45g
- Fiber: 2g
- Sugar: 18g
- Fat: 10g
- Saturated Fat: 8g
- Cholesterol: 0mg
- Sodium: 150mg
What’s Good: It’s naturally dairy-free and gluten-free. It has some fiber from the rice. It’s a good source of manganese from the coconut milk.
What to Know: It’s higher in carbs from the rice and maple syrup. If you’re watching sugar, reduce the maple syrup or use a sugar-free alternative. It’s a treat, not a health food, but it’s made with whole food ingredients.
Final Thoughts
So that’s my dairy-free coconut lime rice pudding! I’ve probably talked your ear off at this point, but when you make a recipe this often, you have a lot to say about it.
This has saved our weekend mornings more times than I can count. It’s my answer to “what are we doing today?” when we want to spend time together but don’t want to go out. My kids are happy because they get to help, my husband is happy because it’s delicious, and I’m happy because it’s dairy-free and easy to make.
Make it yours! Try different fruits, swap the sweetener, or add different spices. The best recipes are the ones you adapt to your family’s tastes. And if you’re looking for more kid-friendly recipes, check out our marshmallow ghost Rice Krispie treats for a spooky twist, or our cranberry apple galette for a more advanced baking project.
If you make this, drop a comment and let me know what you think! I love hearing how recipes turn out in your kitchen. And if something doesn’t work, tell me that too—I’m here to help troubleshoot.
Happy cooking! And I hope your kitchen smells half as good as mine does right now.
Frequently Asked Questions
Can I use long-grain rice?
You can, but the texture won’t be as creamy. Short-grain rice is starchier, which gives you that pudding-like consistency. If you only have long-grain, you’ll need to cook it longer and add more liquid. But short-grain is really the way to go for this recipe.
Why did my pudding turn out watery?
Usually, this means you didn’t cook it long enough, or you added too much water. Rice needs time to absorb the liquid. Let it simmer for the full 30 minutes, stirring often. If it’s still watery after cooling, it might be the type of rice. Try short-grain next time.
Can I make this ahead for a party?
Yes! Make the pudding up to 2 days ahead and store in the fridge. Let it come to room temperature or serve chilled. Stir in a splash of milk before serving if it’s too thick. It actually tastes better after sitting overnight because the flavors meld.
Can I use lime juice concentrate?
I don’t recommend it. Fresh lime juice has a brightness and complexity that concentrate doesn’t have. It can taste metallic or overly sour. Fresh limes are worth the effort. If you’re in a pinch, lemon juice can work, but it will be a different flavor profile.
Is this recipe vegan?
Yes! As long as you use maple syrup (not honey) and coconut milk, it’s completely vegan. It’s a great dessert for vegan families or those with dairy allergies.
How do I reheat leftovers without it getting dry?
Add a splash of milk or water to a saucepan, add your leftover pudding, and heat gently over low heat, stirring frequently. The extra liquid brings back the creamy texture. Microwave sort of works but tends to dry it out. If you do microwave, definitely add a splash of liquid first and heat in short bursts, stirring between.
Can I double this recipe?
Absolutely! Double everything and use a larger pot. The cooking times stay roughly the same, but you may need to stir more often to prevent sticking. I do this when I’m feeding a crowd or meal-prepping for the week.
Pin This Recipe!
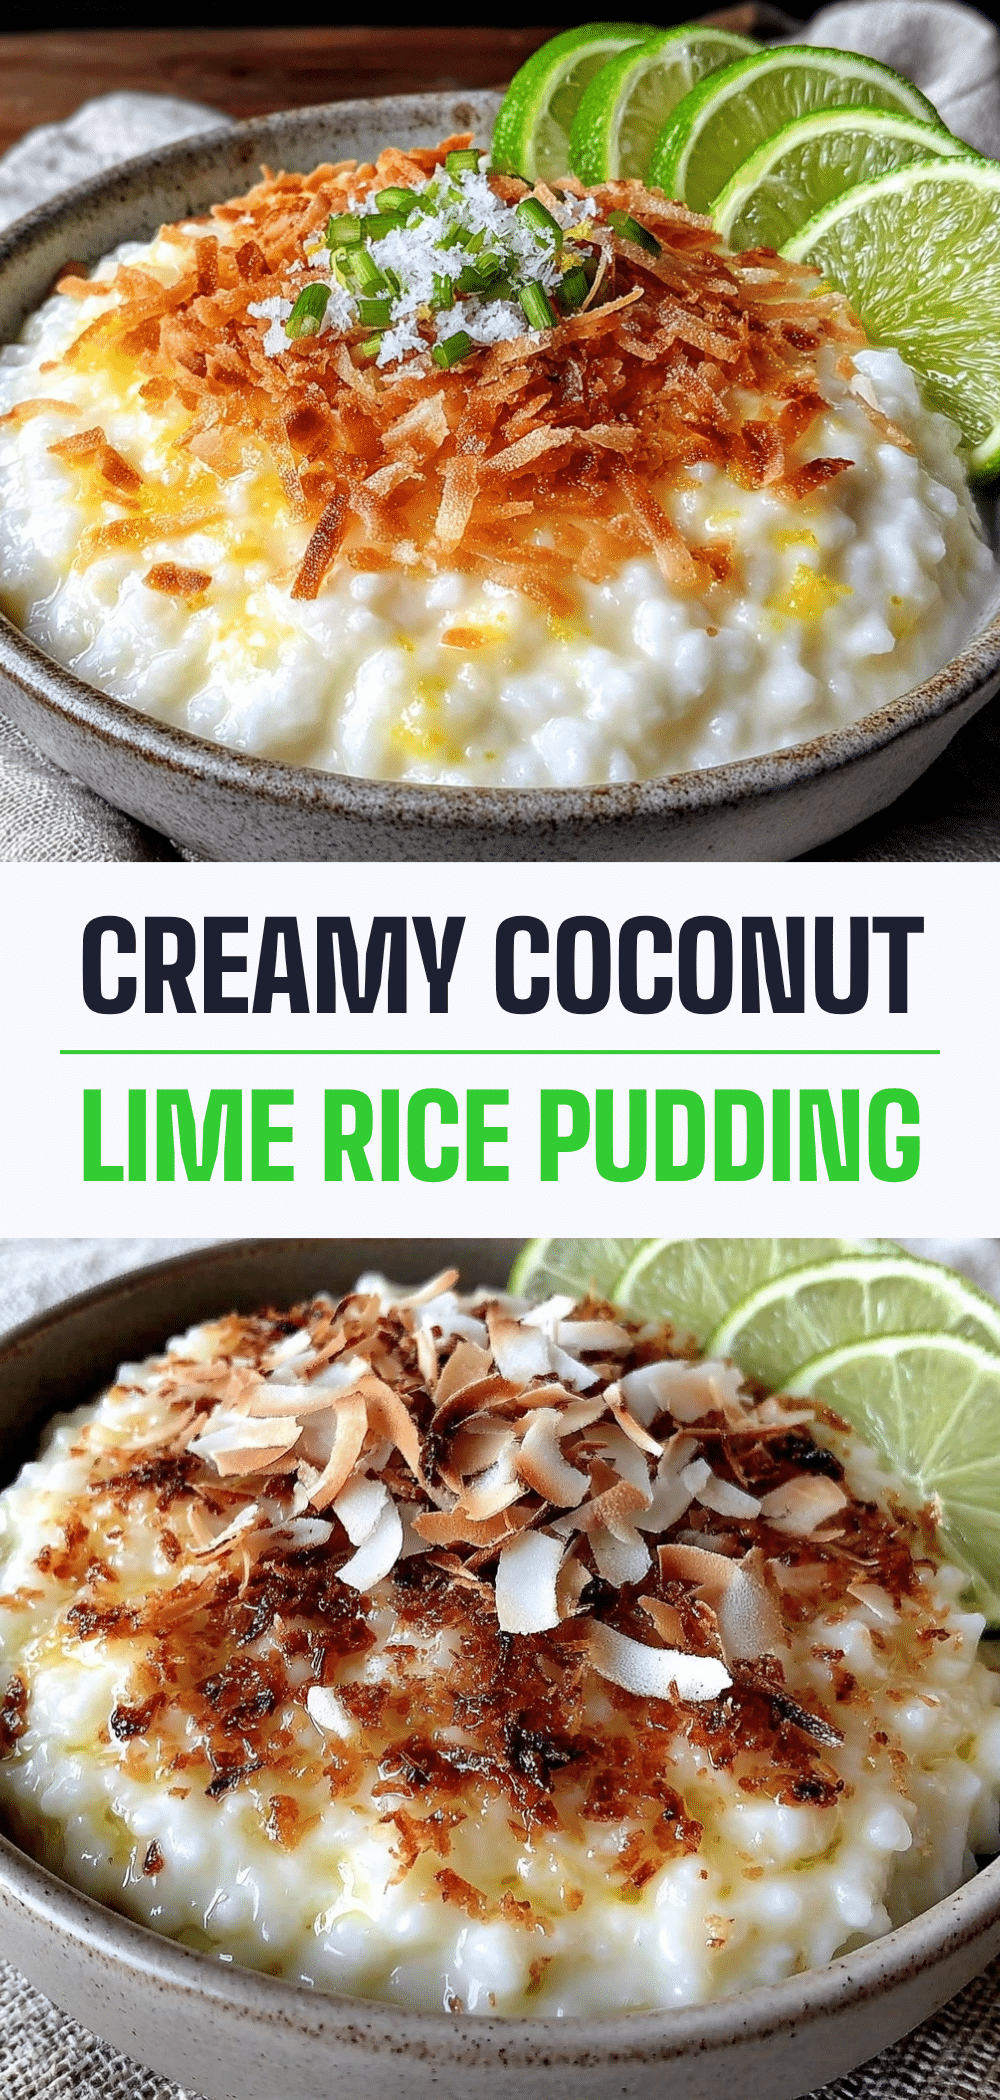

Dairy-Free Coconut Lime Rice Pudding Kids Will Help Make
- Total Time: 45 minutes
- Yield: 6 servings 1x
Description
A creamy, dairy-free coconut lime rice pudding that is perfect for making with kids. It uses simple ingredients like short-grain rice and full-fat coconut milk for a rich texture without heavy cream, finished with bright fresh lime zest and juice.
Ingredients
- 1 cup (200g) short-grain white rice (Arborio or sushi rice)
- 2 cans (400ml each) full-fat coconut milk
- 1 cup (240ml) water
- ¼ cup (60ml) maple syrup
- 1 teaspoon vanilla extract
- ½ teaspoon salt
- 2 medium fresh limes
- Lime zest from 1 lime
- Lime juice from 2 limes (approx. 3-4 tablespoons)
- Optional garnish: Extra lime zest, toasted coconut chips, edible flowers
Instructions
- Rinse the rice in a colander under cold water until the water runs clear, stirring with fingers to remove excess starch.
- In a medium saucepan, combine the rinsed rice, coconut milk, water, maple syrup, vanilla extract, and salt. Stir to dissolve the syrup.
- Place the pot over medium-low heat and bring to a gentle simmer.
- Reduce heat to low, partially cover the pot, and simmer for 25-30 minutes, stirring every 5 minutes to prevent sticking or burning.
- While the rice cooks, wash the limes and zest one lime using a microplane or zester, avoiding the bitter white pith.
- Cut the limes in half and squeeze out the juice.
- Check the rice after 25 minutes; it should be tender and creamy. If needed, add a splash of water and cook for another 5-10 minutes.
- Remove the pot from heat and stir in the lime zest and lime juice.
- Taste and adjust sweetness or tartness if desired.
- Let the pudding cool for 10-15 minutes until it thickens to a consistency like thick oatmeal.
- Serve warm or chilled, topped with extra lime zest or toasted coconut chips if desired.
Notes
Stir frequently to prevent scorching. Use full-fat canned coconut milk for creaminess; do not use light versions or carton beverages. The pudding will thicken as it cools. If it becomes too thick, stir in a splash of milk or water before serving. This recipe is naturally gluten-free and can be made nut-free by substituting oat or soy milk if needed.
- Prep Time: 15 minutes
- Cook Time: 30 minutes
- Category: Dessert
- Cuisine: American
Nutrition
- Serving Size: 1 bowl
- Calories: 280
- Sugar: 18
- Sodium: 150
- Fat: 10
- Saturated Fat: 8
- Carbohydrates: 45
- Fiber: 2
- Protein: 4
Keywords: dairy-free, coconut lime rice pudding, kid-friendly recipes, gluten-free dessert, vegan pudding, easy cooking with kids, healthy dessert


